Panther G at the Eastern Front 1945
Panther G on the Eastern Front 1945
All parts have now received their base coat of olive green. Only vertical plates receive the camouflage pattern, so I can now begin to finish the road wheels, suspension arms, sprockets and idlers. First they get a coat of glossy lacquer.
After all parts are dried, follows chipping. For that I use again the color of olive green with 10 per cent white. With a very small paintbrush I draw thin lines, my scratches on the wheels. In "deeper scratches" I draw later a thin line of red brown, the german anti-rust protection color. With a variable mix of flat black and red brown I have brushed little stains and runners. But on each part only a few scratches and stains, because less is more…
After this hard work I began to assembly the lower hull, torsion bar stays, torsion bars and suspension arms were mounted. The bottom of my lower hull is only painted in red brown, the german anti-rust color. Later barely to see; also a few suspension arms have received some little stains and runners.
Soon it will go on and it will be exciting; coating the camouflage pattern on the tank…
Greeting Hotte
IG-Panzerjäger Berlin
HL Tiger I late (ElMod)
Torro Kingtiger (ElMod)
Tamiya Tiger I early (ElMod)
Tamiya Panther G (ElMod)
The thinking is allowed to all people, but many are spared. (Curt Goetz 1888-1960)
IG-Panzerjäger Berlin
HL Tiger I late (ElMod)
Torro Kingtiger (ElMod)
Tamiya Tiger I early (ElMod)
Tamiya Panther G (ElMod)
The thinking is allowed to all people, but many are spared. (Curt Goetz 1888-1960)
Panther G on the Eastern Front 1945
It goes on with my camouflage pattern, first the red brown patches and then the diagonal stripes in dark yellow. The edges are masked with Tamiya masking tape. I let the photos speak for themselves…
The rear plate and the upper hull is in this time mounted to the lower hull; the turret later then also. The gun barrel is still missing because it will get no camouflage.
It follows the yellow stripes…
The coarse work is done...
Greeting Hotte
IG-Panzerjäger Berlin
HL Tiger I late (ElMod)
Torro Kingtiger (ElMod)
Tamiya Tiger I early (ElMod)
Tamiya Panther G (ElMod)
The thinking is allowed to all people, but many are spared. (Curt Goetz 1888-1960)
IG-Panzerjäger Berlin
HL Tiger I late (ElMod)
Torro Kingtiger (ElMod)
Tamiya Tiger I early (ElMod)
Tamiya Panther G (ElMod)
The thinking is allowed to all people, but many are spared. (Curt Goetz 1888-1960)
Panther G on the Eastern Front 1945
After the coarse painting work, I’ve now applied a first gloss lacquer coat. Also the insides of the hatches received their color, dark yellow like the thin camouflage stripes.
Here now unhurriedly a few photos from this especially camouflage pattern.
a few photos still follow...
Greeting Hotte
IG-Panzerjäger Berlin
HL Tiger I late (ElMod)
Torro Kingtiger (ElMod)
Tamiya Tiger I early (ElMod)
Tamiya Panther G (ElMod)
The thinking is allowed to all people, but many are spared. (Curt Goetz 1888-1960)
IG-Panzerjäger Berlin
HL Tiger I late (ElMod)
Torro Kingtiger (ElMod)
Tamiya Tiger I early (ElMod)
Tamiya Panther G (ElMod)
The thinking is allowed to all people, but many are spared. (Curt Goetz 1888-1960)
Panther G on the Eastern Front 1945
the rest of the photos...
The last photo for today for an overview before aging and weathering starts…
Greeting Hotte
IG-Panzerjäger Berlin
HL Tiger I late (ElMod)
Torro Kingtiger (ElMod)
Tamiya Tiger I early (ElMod)
Tamiya Panther G (ElMod)
The thinking is allowed to all people, but many are spared. (Curt Goetz 1888-1960)
IG-Panzerjäger Berlin
HL Tiger I late (ElMod)
Torro Kingtiger (ElMod)
Tamiya Tiger I early (ElMod)
Tamiya Panther G (ElMod)
The thinking is allowed to all people, but many are spared. (Curt Goetz 1888-1960)

Re: Panther G on the Eastern Front 1945
super super. Great work With the airbrush. All those weld lines and chains are popping those thin coat's of Paint
Drammen Rock City
Panther G on the Eastern Front 1945
Thank you Stian, it will go on.
After camouflage painting and applying a glossy coat of lacquer, I've now started to make first chippings at the upper hull and turret; these are my scrapes and scratches on the camouflage at my Panther. For that is the Panther almost completely assembled; tracks and tools are still missing.
I started like at my road wheels with olive green, brightened with 10 per cent white.
Here again photos of it...
In addition came then also first use traces at the different fan grills and handles.
In the next part follows still some chippings in the red brown areas and – my turret numbers, national crosses and unit insignias. Also if thereof is not many to see on the original photos…
After camouflage painting and applying a glossy coat of lacquer, I've now started to make first chippings at the upper hull and turret; these are my scrapes and scratches on the camouflage at my Panther. For that is the Panther almost completely assembled; tracks and tools are still missing.
I started like at my road wheels with olive green, brightened with 10 per cent white.
Here again photos of it...
Greeting Hotte
IG-Panzerjäger Berlin
HL Tiger I late (ElMod)
Torro Kingtiger (ElMod)
Tamiya Tiger I early (ElMod)
Tamiya Panther G (ElMod)
The thinking is allowed to all people, but many are spared. (Curt Goetz 1888-1960)
IG-Panzerjäger Berlin
HL Tiger I late (ElMod)
Torro Kingtiger (ElMod)
Tamiya Tiger I early (ElMod)
Tamiya Panther G (ElMod)
The thinking is allowed to all people, but many are spared. (Curt Goetz 1888-1960)
Panther G on the Eastern Front 1945
As I’ve already mentioned, on photos from Panther tanks from 25th PzGrDiv in WW II (that I know) are nothing to recognize like turret numbers, national signs or signs of the unit; but I don't wanted also a "naked" Panther.
After I had bought me for the national and tactical markings at the Panther a stencil, I decided me they not to use. Because, if I use the number 333, I'm very sure, that many others will have they also.
Ultimately I have only used the unit sign and this also only once.
I must also say, for self-adhesive stencils they don’t have well stuck, maybe the surface of the rear turret hatch were too rough.
To my vehicle number 323 I came then spontaneously and my consideration was as follows.
If the 5th tank battalion has had a third company with a third platoon, then surely also a second platoon (with Panther's of course). And if in the 3rd platoon exists three tanks (No. 331, 332, 333), then certainly also in the 2nd platoon (No. 321, 322, 323).
Luckily I have at work access on a cutter for adhesive foils, which can cut even relatively small representations. I had to feed him with a CAD file, which for me is not really a problem.
Normally, the writing remains on the base film, here now I have done the reverse. I have received excellent adhesive stencils; on the one hand they have good stuck and on the other hand, I could they also remove without any damage.
In the manual for the original stencils were at the tail of the panther two national crosses affixed, once on the left storage box and centrally between the mufflers. However, that doesn’t make much sense in the middle for me (under the jack?). So I left it out and have brushed only the one on the left side.
Here now the right turret side…
…and the left side
At the left and the right side at the bug were also national crosses, however the smaller version, here first again the right side…
…and here the left side.
Finally a side view from the right...
…and not from the left side, but rather the end for today. 
After I had bought me for the national and tactical markings at the Panther a stencil, I decided me they not to use. Because, if I use the number 333, I'm very sure, that many others will have they also.
- pic366.jpg (44.1 KiB) Viewed 4145 times
To my vehicle number 323 I came then spontaneously and my consideration was as follows.
If the 5th tank battalion has had a third company with a third platoon, then surely also a second platoon (with Panther's of course). And if in the 3rd platoon exists three tanks (No. 331, 332, 333), then certainly also in the 2nd platoon (No. 321, 322, 323).
Luckily I have at work access on a cutter for adhesive foils, which can cut even relatively small representations. I had to feed him with a CAD file, which for me is not really a problem.
Normally, the writing remains on the base film, here now I have done the reverse. I have received excellent adhesive stencils; on the one hand they have good stuck and on the other hand, I could they also remove without any damage.
Greeting Hotte
IG-Panzerjäger Berlin
HL Tiger I late (ElMod)
Torro Kingtiger (ElMod)
Tamiya Tiger I early (ElMod)
Tamiya Panther G (ElMod)
The thinking is allowed to all people, but many are spared. (Curt Goetz 1888-1960)
IG-Panzerjäger Berlin
HL Tiger I late (ElMod)
Torro Kingtiger (ElMod)
Tamiya Tiger I early (ElMod)
Tamiya Panther G (ElMod)
The thinking is allowed to all people, but many are spared. (Curt Goetz 1888-1960)
Re: Panther G on the Eastern Front 1945
Super. Not much more to add at the moment, just super 
Drammen Rock City
Re: Panther G on the Eastern Front 1945
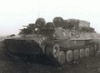
Here is a picture I discovered on the web. It is a panther rear stowage box they have found with the original camouflage paint still visible. As you can see it is very similar to your camouflage scheme.

Re: Panther G on the Eastern Front 1945
Thank you Stian and Jeff; I knew this picture and have it also used to find my own camouflage scheme.
Here again a little step to the objective...
My next little building site was the exhaust. Here still a view before I started. Because the original Panther was delivered to the unit not until February 1945, I decided me to aging only the lower part of exhaust system.
For the finish of exhaust systems at armored vehicles has each one his own ideas and methods. Started with masking the rear plate, here are again pictures of my implementation.
The exhaust was coated with Tamiya's Flat Black and Red Brown wet-in-wet.
...and finished. Finally I used a mix of different pastel chalks to give the exhaust system a slightly used impression.
until the next report...
Here again a little step to the objective...
My next little building site was the exhaust. Here still a view before I started. Because the original Panther was delivered to the unit not until February 1945, I decided me to aging only the lower part of exhaust system.
Greeting Hotte
IG-Panzerjäger Berlin
HL Tiger I late (ElMod)
Torro Kingtiger (ElMod)
Tamiya Tiger I early (ElMod)
Tamiya Panther G (ElMod)
The thinking is allowed to all people, but many are spared. (Curt Goetz 1888-1960)
IG-Panzerjäger Berlin
HL Tiger I late (ElMod)
Torro Kingtiger (ElMod)
Tamiya Tiger I early (ElMod)
Tamiya Panther G (ElMod)
The thinking is allowed to all people, but many are spared. (Curt Goetz 1888-1960)
