This time i am going to correct the two front hatches.

As you can see the two hatches are of equal size. On the real thing this isn't the case. The driver's hatch is approximately the right size but not quite in the right place and the machine gunners hatch is too big. Referring to the scale drawings in the 'Photosniper Panzer III J/L/M' book i set about marking out the correct position of the hatches. By my calculations the Heng Long model is 6mm wider across the hull than it should be. Consequently i adjusted my measurements outward from the center line.
The next problem was how to remove the hinges without damaging them. I did attempt to remove them using "thread", as demonstrated on the 'hints and tips' page, but couldn't get it to work. I don't think i bought the right type of thread!

The solution i came up with is a little extreme but it "got the job done"! Using a pair of tin snips i cut away a 2" section from a razor saw. Cutting a piece from the saw like this enables the cutting edge to be held flat against the model. As you will know the spine of the saw ordinarily prevents this.

This was quite a time consuming job but i managed to remove all four hinges without any problems. Once cut away i added some 0.4mm 'plasticard' to the bottom of each hinge to make up for what had been cut away. This was then sanded to the required thickness.

The next job was to transfer all the measurements for the new hatches onto a piece of 'plasticard' and cut out the two openings. Once you have done this its a good time to use this as a template for the hatches in order to get a good fit.

Once i was happy with the gap around the hatches i glued the parts into position.

At this point i realized i had left the front edge short and could have saved myself some work.

Some filler fixed it!

I figured that adding the weld bead at this point would be a lot easier without the hinges in place! When the 'milliput' was dry i added them.


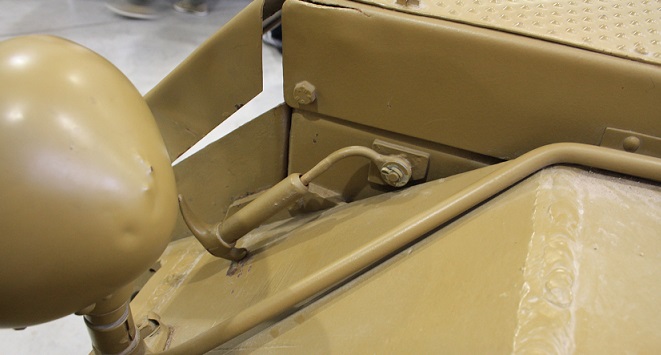
Moving on! Next up i have made some front mudguard clamps using photos from-(
http://jtrowbridges5.BovingtonsLightand ... walkaround) They are made from plastic rod thats drilled out at one end with brass rod glued in. I then drilled a hole into the edge of some 2mm 'plasticard' and attached that to the plastic rod. Over two nights these are the results.

They could have done with being a little smaller but then so could my fingers!


Some additional detailing.

I haven't been able to get them to look right attached to the mudguard so they may just have to stay like this.


- PZMG.jpg (74.18 KiB) Viewed 4777 times
Thanks for looking!


