Good Afternoon!
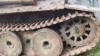
First Post of Part Two of the once 'Winter' Dual Build. The Prototype Production Turret King Tiger has had the Battery taken out and is posing in the Spot where the new King Tiger was sitting in the Tank Room. I put a charged 7.4 L-ion battery in the new Tank and tested it again after a year + wait. Everything worked perfectly, Sound, Recoil, BB Fire, Smoker, it all worked. Here are a few pics of both Tanks side by side to start out the new Build Thread.
regards,
Painless
1944 King Tiger Dual Build Part 2 Henschel Tank
- PainlessWolf
- Colonel
- Posts: 7849
- Joined: Sun Feb 26, 2012 9:09 pm
- Location: Southern Colorado Rocky Mountains
1944 King Tiger Dual Build Part 2 Henschel Tank
...Money!? What's that!?...
- Stormbringer
- Sergeant
- Posts: 713
- Joined: Wed Aug 06, 2025 8:24 am
- Location: Near Edinburgh Scotland
Re: 1944 King Tiger Dual Build Part 2 Henschel Tank
If your keeping the tank in the out the box colours here is what i found matches it
Humbrol M102 Army green
Tamiya XF92 Yellow brown
Tamiya XF62 Olive drab
Humbrol M102 Army green
Tamiya XF92 Yellow brown
Tamiya XF62 Olive drab
Cheers
Alan
Let slip the cats of war!!!!
Taigen Panther G
Taigen T34/85
Heng Long King Tiger
Heng Long Tiger 1
Heng Long Jagdpanther
Coolbank Crusader III
Alan
Let slip the cats of war!!!!
Taigen Panther G
Taigen T34/85
Heng Long King Tiger
Heng Long Tiger 1
Heng Long Jagdpanther
Coolbank Crusader III
- Herr Dr. Professor
- Major
- Posts: 5975
- Joined: Mon Apr 22, 2019 10:48 pm
- Location: Southern Wisconsin USA
Re: 1944 King Tiger Dual Build Part 2 Henschel Tank
If anyone needs it, here is the link to PainlessWolf's original "Winter" build: viewtopic.php?t=34867&hilit=Winter. It's full of good ideas.
Re: 1944 King Tiger Dual Build Part 2 Henschel Tank
My KöTi‘s are all in the out of the box camo.
Just added the Hinterhalt Tarnung, a slight weathering and in the end a wash with AK300.
For me, they‘re good enough this way!
BTW, the Tamiya Nato Green came very close to the HL green on these Tigers.
Rob.
Just added the Hinterhalt Tarnung, a slight weathering and in the end a wash with AK300.
For me, they‘re good enough this way!
BTW, the Tamiya Nato Green came very close to the HL green on these Tigers.
Rob.
-
Meter rat
- Warrant Officer 1st Class
- Posts: 1882
- Joined: Wed Aug 05, 2020 7:33 pm
- Location: By the sea in Argyle and Bute
Re: 1944 King Tiger Dual Build Part 2 Henschel Tank
Another to sit down and watch another incredible build develop.
You don’t get wiser as you get older. You just run out of stupid things to do.
- PainlessWolf
- Colonel
- Posts: 7849
- Joined: Sun Feb 26, 2012 9:09 pm
- Location: Southern Colorado Rocky Mountains
Re: 1944 King Tiger Dual Build Part 2 Henschel Tank
Good Morning,
Alan, Thank you for the Humbrol information. Herr Dr. Professor, thank you for posting the Link to the Build Thread. I had neglected to do so, my apologies all. Rob, I really enjoyed the look of your King Tigers. I also appreciate the fact that Heng Long is using a somewhat normal palette of colors this time ( No Drug Dreams ) and using a good pattern for their Camo. I saw a Build using the Ambush Scheme a few years back that tweaked my attention as it made a small but significant change to the scheme. I will need to do a little research on that. More brass details to apply and blend in and I see that Heng Long has not yet applied all the hatch handles in realistic mode. No matter, I figured and counted on this. This Build should be a little less stressful than the early KT ( all fingers and toes crossed ) so lets have some fun. ;0)
regards,
Painless
P.S. Mr. Rat! I will try to make it interesting just no near disasters during the Show Off Video
...Money!? What's that!?...
- PainlessWolf
- Colonel
- Posts: 7849
- Joined: Sun Feb 26, 2012 9:09 pm
- Location: Southern Colorado Rocky Mountains
Re: 1944 King Tiger Dual Build Part 2 Henschel Tank
Good Afternoon!
Tank taken apart and the electronics neatened up for use. I began work on the Rear Engine Deck and removed the Aerial Stub ( interesting that they no long tap those for a screw ). I filled the hole that this left with Putty and let it dry overnight. Coming back to it today, I removed the lift hooks via Tamiya plastic Saw and reattached them in the right orientation. After this, I added the small lift hooks from Tank Modelbau. Eight of them spaced around two Engine Fan Covers. I added the Brass Covers from Forgebear then drilled out the handle for the big Engine Deck Hatch. ( always 'Fun' ). I took a Hex Key and warmed it using a lighter and made the hex indentation/hole in the right cover. I had painted the cover where the Aerial Stub was and now tried the same trick there with the heated Hex Key. *Laughs* The putty slid right down the Stub shaft. I filled the shaft back up with Gel Superglue which should dry hard and allow me to make the lock aperture on that hatch. I will come back to it tomorrow or the next day and repaint the cover again.
regards,
Painless
Last edited by PainlessWolf on Wed Dec 03, 2025 12:28 am, edited 1 time in total.
...Money!? What's that!?...
- Stormbringer
- Sergeant
- Posts: 713
- Joined: Wed Aug 06, 2025 8:24 am
- Location: Near Edinburgh Scotland
Re: 1944 King Tiger Dual Build Part 2 Henschel Tank
Cool mate and as you say following along 
Cheers
Alan
Let slip the cats of war!!!!
Taigen Panther G
Taigen T34/85
Heng Long King Tiger
Heng Long Tiger 1
Heng Long Jagdpanther
Coolbank Crusader III
Alan
Let slip the cats of war!!!!
Taigen Panther G
Taigen T34/85
Heng Long King Tiger
Heng Long Tiger 1
Heng Long Jagdpanther
Coolbank Crusader III
Re: 1944 King Tiger Dual Build Part 2 Henschel Tank
Another fun build is brewing up here
Speaking of the HL KT stock paint job, It ain't half bad. The colors aren't too far off. Well the brown is more chocolate but the yellow is decent and the green isn't too bad for olive green. I could even see just spraying a coat of matte clear to blend the camo better and doing something like Robs camo work or I just did some early weathering on mine forever ago and left it.
But last winter I found it was the perfect base for some weathered and worn winter whitewash camouflage. It was just a quick and absolutely fun job. No pressure just to paint and weather and it was just in time for the snowy season to play in
viewtopic.php?t=36927
"Charlie don't surf"- Lt. Col. Bill Kilgore