Hi everyone,
It's been a while since a posted something. I took a few months off from modelling and spent a few winter weeks in Portugal as well. With the nice weather arriving in Quebec, i can work outside again on the deck and decided to paint and finish the Bradley that was standing on its own on the workbench for the past 4 months.
This is a quick update on the ongoing painting phase. Painting this complicated model is quite something.
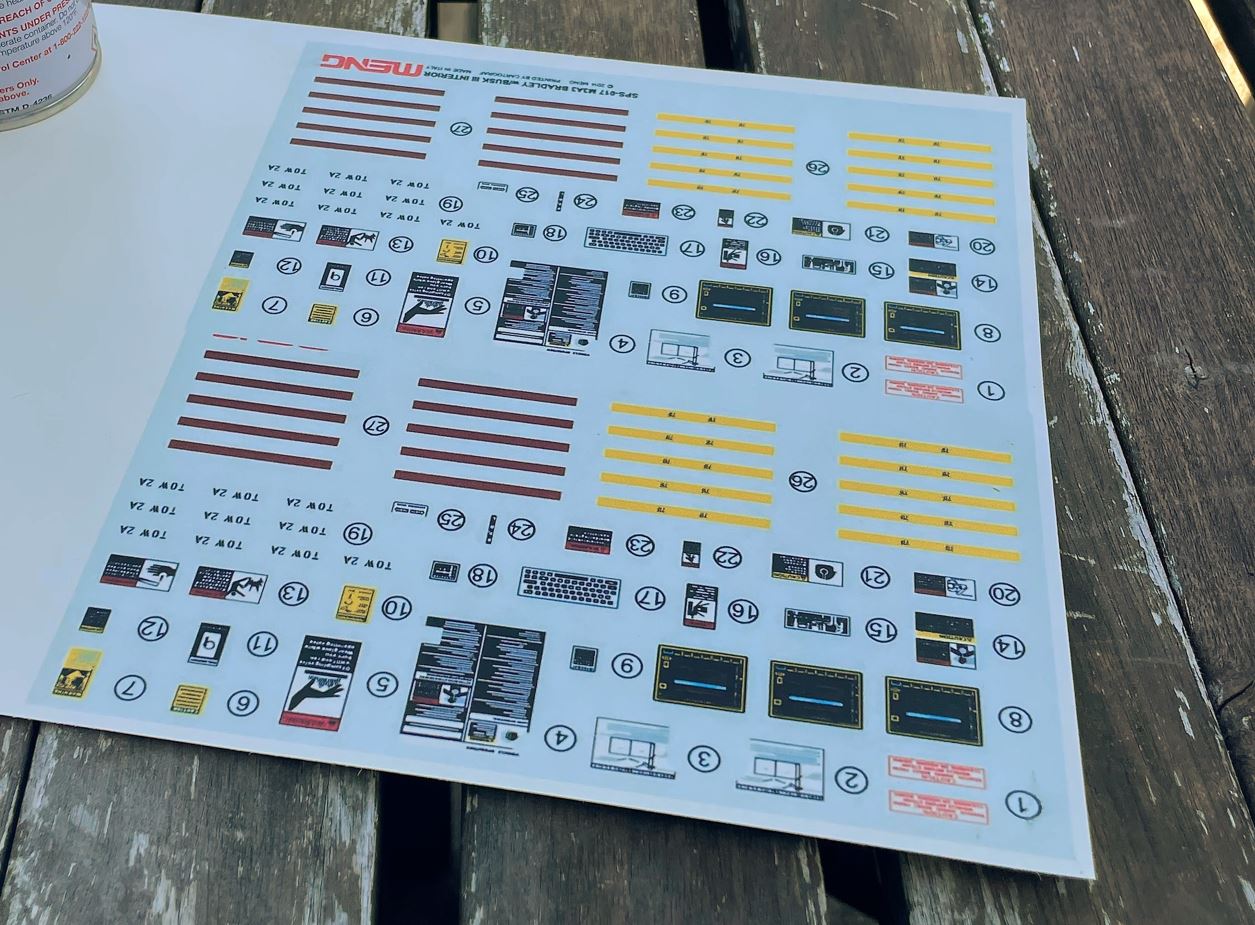
A scan of the MENG 1/35 interior decals was previously expanded to 1/16, done in double in order to offer some spares. I did a fresh inkjet printout on virgin white decal sheet and after a coat of semi gloss varnish, they are ready to be cut and used.
- M3A3 Bradley US Cavalry Fighting Vehicle - RC 1/16 Build
- Capture.JPG (216.79 KiB) Viewed 4596 times
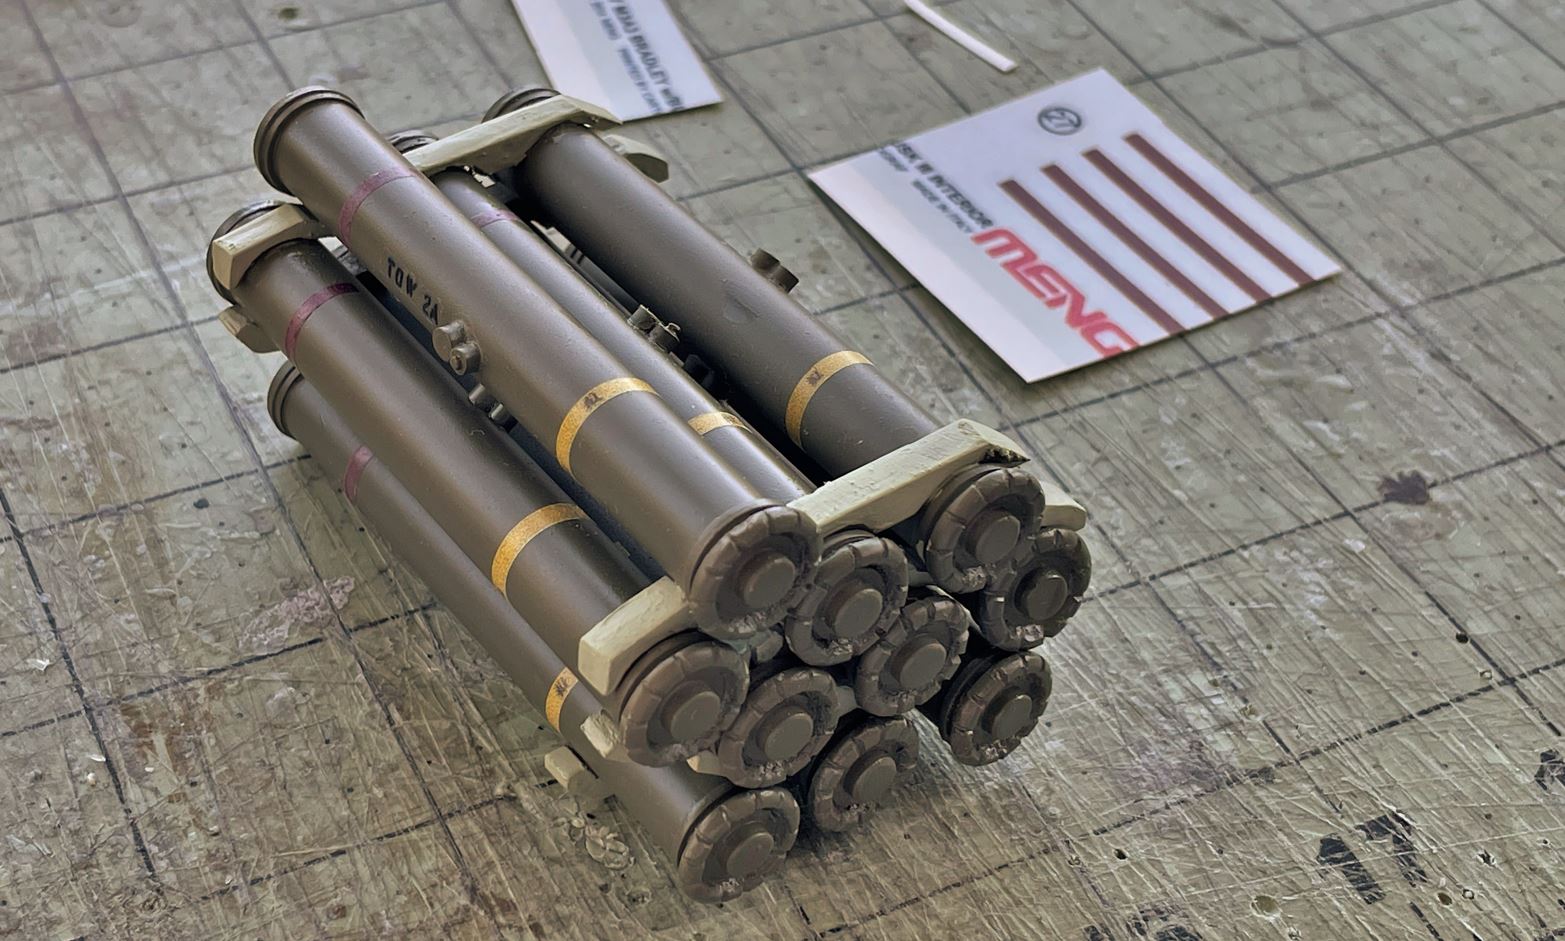
The first item to finish were the TOW missiles.
- M3A3 Bradley US Cavalry Fighting Vehicle - RC 1/16 Build
- Capture2.JPG (252.11 KiB) Viewed 4596 times
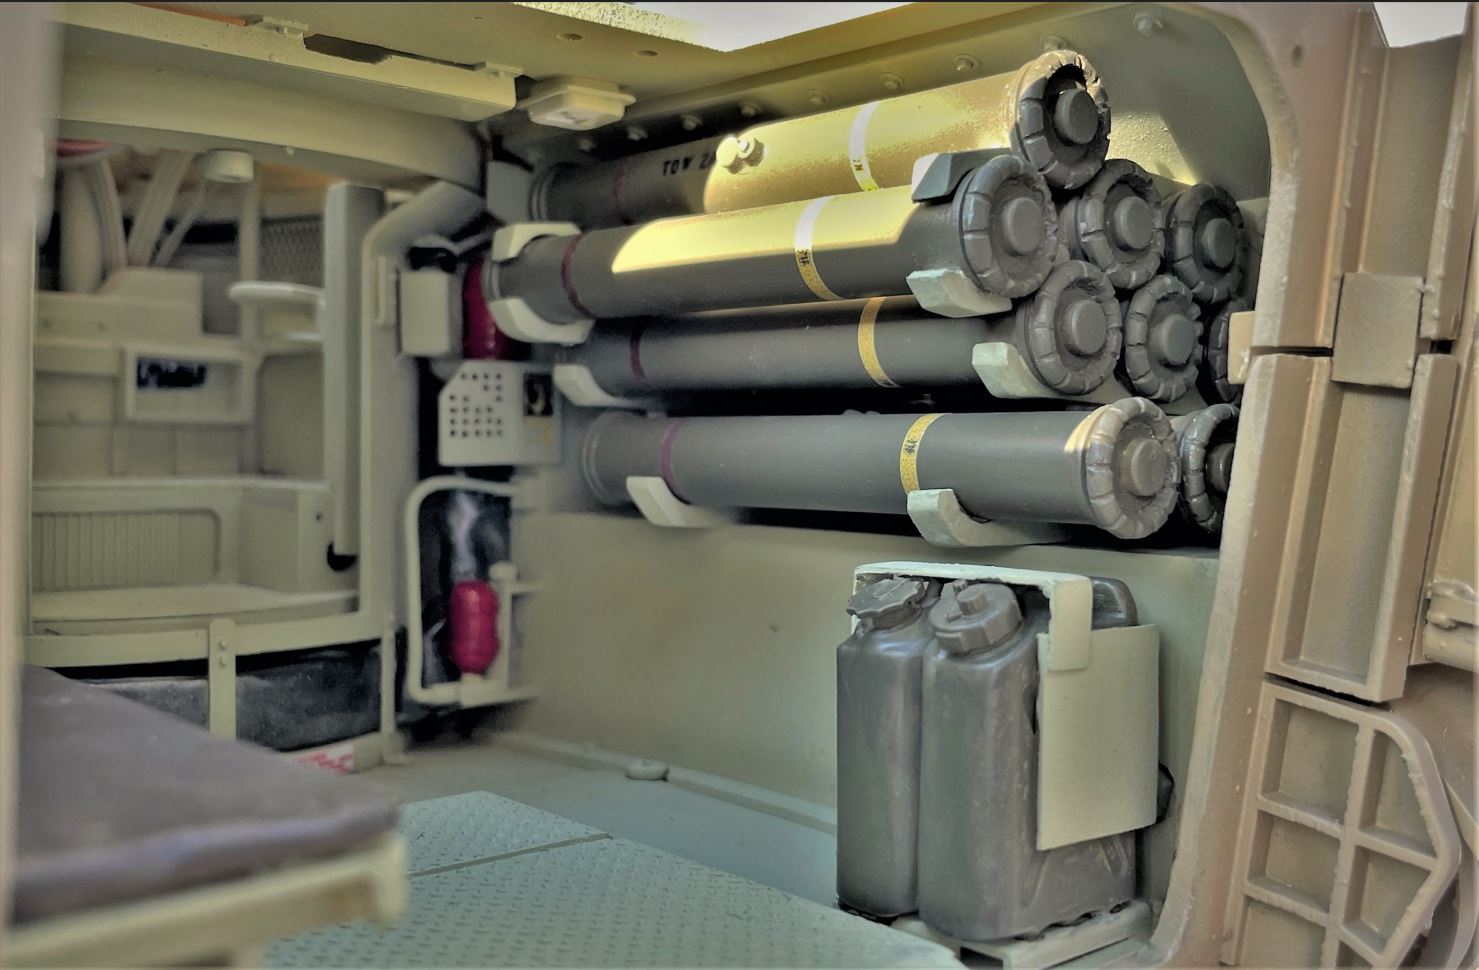
Then the interior was painted with AK 4012; APC Interior light green. The weathering and small corrections are not done yet.
- M3A3 Bradley US Cavalry Fighting Vehicle - RC 1/16 Build
- Capture3.JPG (154.91 KiB) Viewed 4596 times
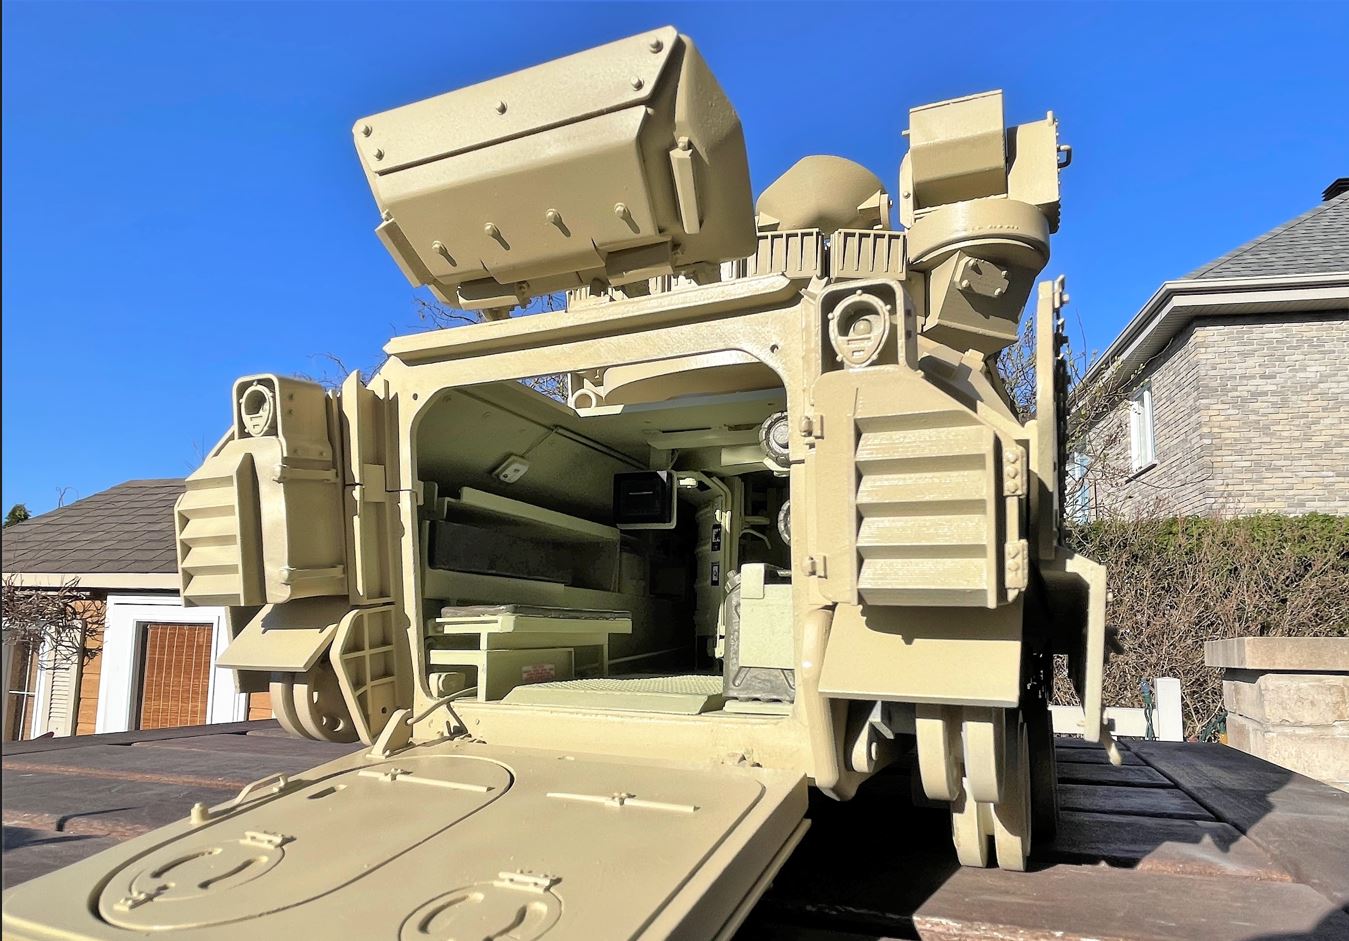
The exterior shell was given 2 coats of Tamiya enamel grey primer, then given a coat of acrylic MIG RAL7028 Dunkelgelb aus 44DGI. Forget about using readily available Dark Yellow or Desert Yellow, they do not match pictures as either too yellow, too dark or too orange. I found that RAL7028 was the closest color i had available on inventory. After seeing the model in white for months, it is nice to see some color.

- M3A3 Bradley US Cavalry Fighting Vehicle - RC 1/16 Build
- Capture4.JPG (202.96 KiB) Viewed 4596 times
- M3A3 Bradley US Cavalry Fighting Vehicle - RC 1/16 Build
- Capture5.JPG (221.03 KiB) Viewed 4596 times
The next step is to paint the black stuff (barrel, rubber), install the interior fake roof wiring, and do some weathering.
Regards, Louis


