Harry Serpent wrote:My M551 has seen action at Southwest model show at Bovy, And was run for about 4 hrs a day and preformed flawless,my assessment of the New Tamiya Radio, gearboxesand electronics, is Tamiya are back on top and are well a head of the competition.
Thank you Harry Serpent for the feedback. When I look at what could make the $500 price difference between the full option and the static version, it is pretty clear that the fabulous DMD T-11 control unit is the main factor. The rest of the equipment is pretty much standard stuff.
BarryC wrote:Here's how I handled the "gap" between the upper and the front of the lower allowing me to keep the fit at the back tight.
That's great, thank you Barry. I am thinking about a metal strip to make the plastic frontal armor side tips stronger. Mine always want to bend towards the outside.
Continuing with the build.
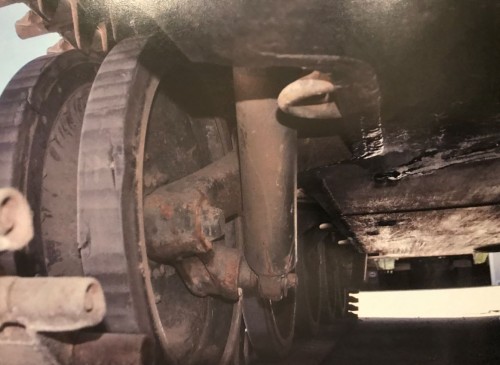
My model is rear heavy. Not sure if it is because the Mato gearbox is heavier than the Tamiya gearbox or the springs on the static version are lighter. The springs do seem to be the same when I look at the specs of the full option so something is wrong somewhere. In any cases, I do not like to see my tank rear heavy, nor I am I fan of the fake dampers. So I decided to do something about it. The real tank has dampers, its not for nothing.
- 1/16 RC M551 M-551 Sheridan Vietnam build
I figured that whatever the results I could achieve, losing the look and feel of this part would not be a great loss to the model.
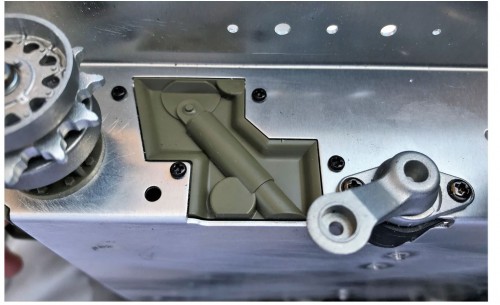
- 1/16 RC M551 M-551 Sheridan Vietnam build
I eliminated the fake molded-in rear dampers, sanding them with the Dremel with a angle towards the outside so that the new damper tip would meet the center of the roadwheel attachment point. Its not possible to remove more material to make it like the real Sheridan damper because the gearbox wall is just behind.
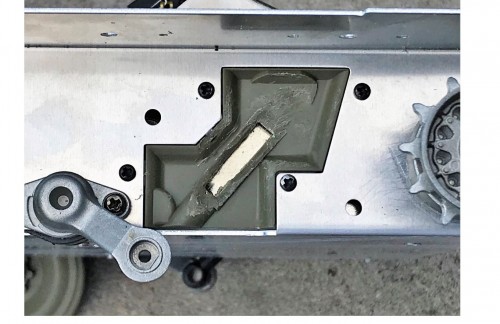
- 1/16 RC M551 M-551 Sheridan Vietnam build
I earlier cannibalized a WPL pickup in my junkyard for various parts for build. A junkyard is very important to a builder. It is now the donor for two of its dampers.
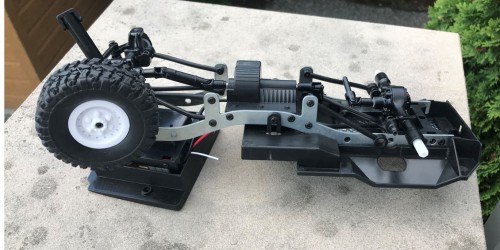
- 1/16 RC M551 M-551 Sheridan Vietnam build
The original at the top is reduced in size to fit the allocated space on the Sheridan, providing about 10mm of compression. It's not a lot but enough. It is sanded flat on the other side so that it can be glued to its new base, keeping enough material so that the spring is not exposed, other than at the very top. The top part needs to be thin so that it does not touch the tracks.
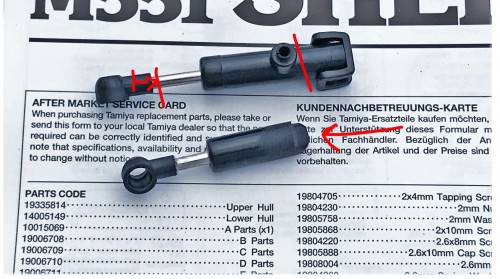
- 1/16 RC M551 M-551 Sheridan Vietnam build
To keep things simple and solid, the new damper is glued where the old one was, aligned with the center of the roadwheel and the angle of the suspension arm swing.
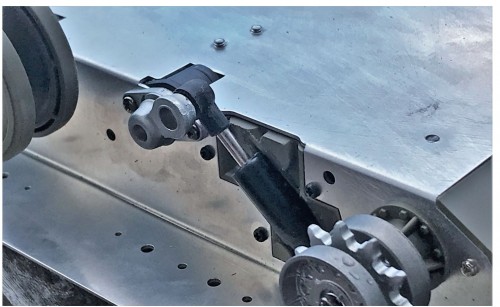
- 1/16 RC M551 M-551 Sheridan Vietnam build
An connector is made, replacing the shorter bolt that was keeping the roadwheel in place on the suspension arm. It is important that the nut be solidly placed against the suspension arm, so that the damper attachment is kept loose for good flexibility.
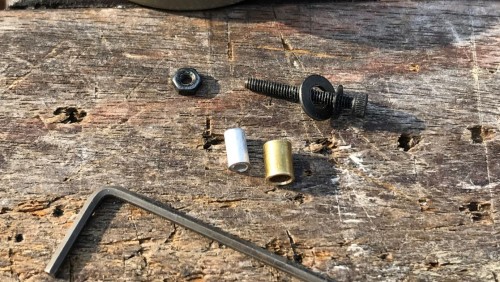
- 1/16 RC M551 M-551 Sheridan Vietnam build
View of the connection between the damper and the suspension arm. The nut is under the WPL damper cap and is not visible here.
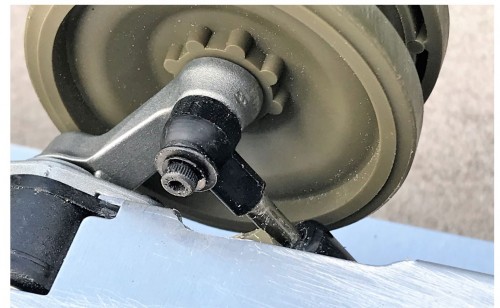
- 1/16 RC M551 M-551 Sheridan Vietnam build
It is not obvious that the fake damper was replaced by a working one. The idea for a working damper is not for the look but for its utility.
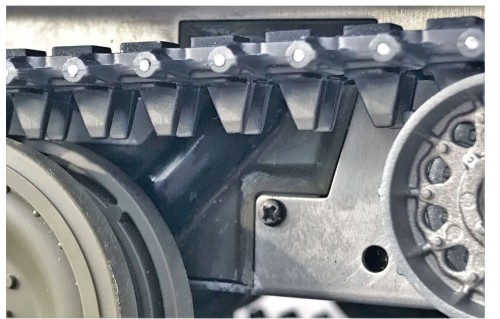
- 1/16 RC M551 M-551 Sheridan Vietnam build
The reworked WPL damper provides just enough pressure to give the suspension a boost and position the rear suspension arm where it should rest, keeping the model strait. I am happy with the results. No need to make front dampers.
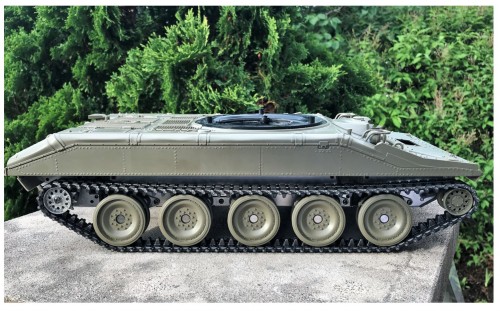
- 1/16 RC M551 M-551 Sheridan Vietnam build


