Converting HL Panther "G" to a Late "A"
Re: Converting HL Panther "G" to a Late "A"
looking great! where does one find voyager stuff?
Re: Converting HL Panther "G" to a Late "A"
For a moment there....thought this sign was a miniature
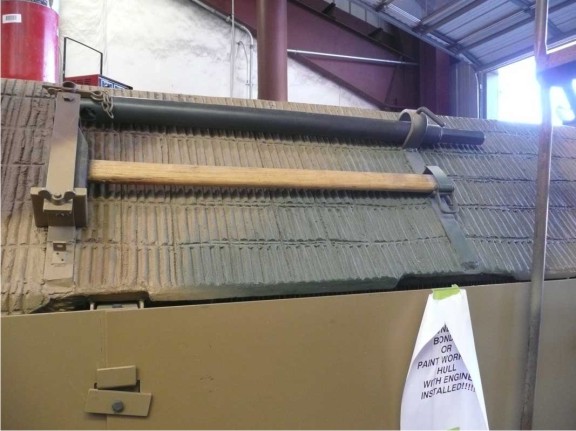
STOP!!!...Before we can't tell the difference between yours and the real thing!!!!!!!!!!!!!!!!!!!!
ALPHA
STOP!!!...Before we can't tell the difference between yours and the real thing!!!!!!!!!!!!!!!!!!!!
ALPHA
-
HERMAN BIX

- Major-General
- Posts: 11705
- Joined: Sun Jan 12, 2014 12:15 am
- Location: Gold Coast,Australia
Re: Converting HL Panther "G" to a Late "A"
Ive seen the Littlefield 'A' myself & this model could have been used as the template to restore it.
Holy Expletive !
Holy Expletive !
HL JAGDPANTHER,HL TIGER 1,HL PzIII MUNITIONSCHLEPPER, HL KT OCTOPUS,HL PANTHER ZU-FUSS,HL STuG III,HL T34/85 BEDSPRING,
HL PZIV MALTA,MATORRO JAGDTIGER,HL F05 TIGER,TAMIYA KT,HL PANTHERDOZER,HL EARLY PANTHER G,TAIGEN/RAMINATOR T34/76,
HL AN-BRI-RAM SU-85
HL PZIV MALTA,MATORRO JAGDTIGER,HL F05 TIGER,TAMIYA KT,HL PANTHERDOZER,HL EARLY PANTHER G,TAIGEN/RAMINATOR T34/76,
HL AN-BRI-RAM SU-85
-
dgsselkirk

- Warrant Officer 1st Class
- Posts: 1510
- Joined: Tue Oct 16, 2012 1:57 am
- Location: Kitchener, Ontario, Canada
- Contact:
Re: Converting HL Panther "G" to a Late "A"
Sorry for the delay in getting back to you Philipat. I got mine from BNA World but they are sold out at the moment.philipat wrote:looking great! where does one find voyager stuff?
Thanks for the comments guys, I really appreciate all the kind words...
"There are things in Russia which are not as they seem..."
Georgy Konstantinovich Zhukov
Georgy Konstantinovich Zhukov
-
dgsselkirk
- Warrant Officer 1st Class
- Posts: 1510
- Joined: Tue Oct 16, 2012 1:57 am
- Location: Kitchener, Ontario, Canada
- Contact:
Re: Converting HL Panther "G" to a Late "A"
So one of the things I have sort of puzzled over almost from the beginning was how to install the early idler. I purchased the idlers and early sprockets but of course they are set up for Asiatam/Taigen. So then I picked up a Henntec idler system. Well it is a great piece of kit I am trying to make this build at least cosmetically accurate as much as possible and there are plates and screws which would be very visible if I used it so had to come up with plan B...
Here is the early idler in case some where wondering what it lookes like compared to the regular Panther "G" idler
So here is what I decided to do. First, I found some brass pipe that would fit fairly tight on the idler shaft.
Next I drilled out the existing idler hole just large enough to slide the brass pipe into.
Next adjusted the brass pipe so that the idler was inline with the center of the first boogie. Well, actually not perfectly centered. On my blueprints it is just slightly out further.
Next I found some small dia. ( 1.5mm I think) threaded steel rod. Steel is important as I will show later. So I drilled through the plastic and though the wall of the brass tube but not all the way through.
I then threaded the hole using the steel rod. The steel is hard enough to thread the brass rod.
I then flattened one side of the idler shaft with my dremel
I then put the idler in the tube and used one of my drafting fine point marked the shaft
Into the vice and drilled it out with a bit just a hair smaller than the steel threaded rod.
Here is the early idler in case some where wondering what it lookes like compared to the regular Panther "G" idler
- Panther A 293.JPG (56.72 KiB) Viewed 5230 times
- Panther A 294.JPG (67.12 KiB) Viewed 5230 times
- Panther A 295.JPG (71.38 KiB) Viewed 5230 times
- Panther A 296.JPG (47.13 KiB) Viewed 5230 times
- Panther A 297.JPG (50.47 KiB) Viewed 5230 times
- Panther A 298.JPG (50.28 KiB) Viewed 5230 times
- Panther A 299.JPG (57.71 KiB) Viewed 5230 times
- Panther A 300.JPG (42 KiB) Viewed 5230 times
- Panther A 301.JPG (61.25 KiB) Viewed 5230 times
- Panther A 302.JPG (43.96 KiB) Viewed 5230 times
"There are things in Russia which are not as they seem..."
Georgy Konstantinovich Zhukov
Georgy Konstantinovich Zhukov
-
dgsselkirk
- Warrant Officer 1st Class
- Posts: 1510
- Joined: Tue Oct 16, 2012 1:57 am
- Location: Kitchener, Ontario, Canada
- Contact:
Re: Converting HL Panther "G" to a Late "A"
And here are the last 2 shots for tonight. Threaded the idler shaft and installed them...
- Panther A 303.JPG (76.07 KiB) Viewed 5342 times
- Panther A 304.JPG (60.2 KiB) Viewed 5342 times
"There are things in Russia which are not as they seem..."
Georgy Konstantinovich Zhukov
Georgy Konstantinovich Zhukov
-
dgsselkirk
- Warrant Officer 1st Class
- Posts: 1510
- Joined: Tue Oct 16, 2012 1:57 am
- Location: Kitchener, Ontario, Canada
- Contact:
Re: Converting HL Panther "G" to a Late "A"
Now the the front sprockets. I wanted to put the early ones on and again issues with Mato to HL.
As you can see here the later sprocket center that comes with the "G" is raised up
So I had to grind this down. Easy to tell when you have it flush the holes appear on the inner hub. I then primed it.
Here is the early cover
On the back side I made the inner ring flush with the outer by grinding it down too. Then 2 part epoxied a wafer magnet into the center
As you can see the hex bolts are magnetic and 2 of these wafer magnets measure out perfectly for a tight fit! 
so screwed the assembly into the hull then popped the magnet in on the hex bolt head.
Brought the cover close to it and snap! It went right to it. Viola! You have the early sprocket and no issues getting into it when you need to... 
As you can see here the later sprocket center that comes with the "G" is raised up
- Panther A 305.JPG (42.22 KiB) Viewed 5246 times
- Panther A 306.JPG (43.86 KiB) Viewed 5246 times
- Panther A 307.JPG (42.12 KiB) Viewed 5246 times
- Panther A 308.JPG (47.48 KiB) Viewed 5246 times
- Panther A 309.JPG (35.68 KiB) Viewed 5246 times
- Panther A 310.JPG (48.47 KiB) Viewed 5246 times
- Panther A 311.JPG (45.75 KiB) Viewed 5246 times
"There are things in Russia which are not as they seem..."
Georgy Konstantinovich Zhukov
Georgy Konstantinovich Zhukov
Re: Converting HL Panther "G" to a Late "A"
Isn't it great when you can celebrate small victories ...Nice work as always Dgsselkirk 
ALPHA
ALPHA
Re: Converting HL Panther "G" to a Late "A"
nice work.
-
Estnische

- Warrant Officer 2nd Class
- Posts: 1123
- Joined: Tue Jun 07, 2016 11:52 pm
- Location: Wollongong, Australia
Re: Converting HL Panther "G" to a Late "A"
This has been an awesome build Dean.
Thanks for pointing me in the right direction a great blueprint for any 'A' build.
Am I correct in thinking that Heng Long made the front of the hull too steep?
Thanks for pointing me in the right direction a great blueprint for any 'A' build.
Am I correct in thinking that Heng Long made the front of the hull too steep?
