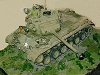
Some full view of tank pics with clevis's on front, tow bar on front ( the clevis's are used to hold the tow bar ), and with the tow bar in the rear.
I'm leaning heavily to the rear location so the clevis's can be seen on the front.
HL Abrams detailing build
-
greengiant
- Warrant Officer 2nd Class
- Posts: 1138
- Joined: Tue Jun 26, 2012 12:15 am
Re: HL Abrams detailing build
- Attachments
-
-
-
-
greengiant
- Warrant Officer 2nd Class
- Posts: 1138
- Joined: Tue Jun 26, 2012 12:15 am
Re: HL Abrams detailing build
Last of details that I'll put on it for now.
Just had to show some kind of damage so I made the left rear upper hull skirt looked like it was ripped off. Something that from what I've read happened many times.
Just had to show some kind of damage so I made the left rear upper hull skirt looked like it was ripped off. Something that from what I've read happened many times.
- Attachments
-
- some spent 50 cal brass and cartridge links to make it loo like the 50 was fired. And gun mounting pins and chains
-
- canvas 50 cal cover thrown on turret top
-
- rear skirt panel locking pin chains
-
-
greengiant
- Warrant Officer 2nd Class
- Posts: 1138
- Joined: Tue Jun 26, 2012 12:15 am
Re: HL Abrams detailing build
some more pics of completed model
The line on the picture that shows how I made the pivot lift for the hatch should read that; there are no lift handles on the real hatch.
The line on the picture that shows how I made the pivot lift for the hatch should read that; there are no lift handles on the real hatch.
- Attachments
-
- top view ( tanks hooked up to battery charger )
-
-
-
Last edited by greengiant on Sat May 02, 2015 6:29 pm, edited 2 times in total.
-
greengiant
- Warrant Officer 2nd Class
- Posts: 1138
- Joined: Tue Jun 26, 2012 12:15 am
Re: HL Abrams detailing build
Decided that the drivers hatch should open and be modified to the SEP version of the hatch.
This could also help anyone thinking of moving the controls from the tank bottom to a hatch opening.
This could also help anyone thinking of moving the controls from the tank bottom to a hatch opening.
- Attachments
-
- Abrams SEP drivers hatch 017.JPG (78.22 KiB) Viewed 4995 times
-
-
-
-
-
-
-
- Abrams SEP drivers hatch 004.JPG (96.6 KiB) Viewed 4995 times
-
-
-
greengiant
- Warrant Officer 2nd Class
- Posts: 1138
- Joined: Tue Jun 26, 2012 12:15 am
Re: HL Abrams detailing build
Some more.
- Attachments
-
-
- when you get the figure in the correct position he just clears the bottom of the turret when rotated
-
- Abrams SEP drivers hatch 025.JPG (96.31 KiB) Viewed 4995 times
-
- Abrams SEP drivers hatch 019.JPG (85.03 KiB) Viewed 4995 times
-
-
-
greengiant
- Warrant Officer 2nd Class
- Posts: 1138
- Joined: Tue Jun 26, 2012 12:15 am
Re: HL Abrams detailing build
Decided to replace the molded plastic front fender mud flaps with rubber ones after I found an old car tire inner tube.
- Attachments
-
- 007.JPG (83.43 KiB) Viewed 4979 times
-
- 006.JPG (85.87 KiB) Viewed 4979 times
-
-
-
- 003.JPG (94.46 KiB) Viewed 4979 times
-
Re: HL Abrams detailing build
Hey Green...thanks for doing this detailing thread...will probably take some of your tips and use them...I just got one of these beasts...and really like whats there
Just wondering...did you do the engine vent grills...not sure about doing those...as they might allow nature to harm some of the internals
ALPHA
Just wondering...did you do the engine vent grills...not sure about doing those...as they might allow nature to harm some of the internals
ALPHA
-
greengiant
- Warrant Officer 2nd Class
- Posts: 1138
- Joined: Tue Jun 26, 2012 12:15 am
Re: HL Abrams detailing build
Glad to be of some help to you.
The rear grills are not molded through to the inside of the hull. Only the very top center is open to allow the smoke to come out. If you read through my build you will see a part where I made a deflector to direct the exhaust smoke downward so it appears to be coming more out of the molded in grill section rather then just straight back out of that top open slot part of the grill. If you do this leave just enough room for the thin smoker refill tube to be pushed in to refill the smoker.
The main place gunk can get into the hull is through the road wheel arm guide slots which HL allowed to go through the hull side. There are pictures and a description of how I covered them. Just remember that the arms on the right side have guides that are bit longer ( or the hull wall is a bit thinner ) then those on the left and the tips that extend into the hull a fraction of a millimeter must be sanded or filled enough that when you glue the covers for the slots on they do not rub on the covers which will cause the suspension to bind up.
Good luck with your build. HL did a pretty good job of getting a mostly accurate model of the old M1A2 out for us just wish they would have included spare road wheels to mount on the storage rack, positioned the smoke grenade launchers correctly and had molded in the nonslip surface that all Abrams have had except for the M1 Abrams that mounted the rifled main gun as used in the M60 tank.
Re: HL Abrams detailing build
Yes...I saw the mods you mention...I must have read over this thread a hundred times since I got my Abrams...did you take a look at my thread...there is a new "PRO" version out...all the metal upgrades have been included...even the road wheels and solid metal tracksgreengiant wrote:Glad to be of some help to you.
The rear grills are not molded through to the inside of the hull. Only the very top center is open to allow the smoke to come out. If you read through my build you will see a part where I made a deflector to direct the exhaust smoke downward so it appears to be coming more out of the molded in grill section rather then just straight back out of that top open slot part of the grill. If you do this leave just enough room for the thin smoker refill tube to be pushed in to refill the smoker.
The main place gunk can get into the hull is through the road wheel arm guide slots which HL allowed to go through the hull side. There are pictures and a description of how I covered them. Just remember that the arms on the right side have guides that are bit longer ( or the hull wall is a bit thinner ) then those on the left and the tips that extend into the hull a fraction of a millimeter must be sanded or filled enough that when you glue the covers for the slots on they do not rub on the covers which will cause the suspension to bind up.
Good luck with your build. HL did a pretty good job of getting a mostly accurate model of the old M1A2 out for us just wish they would have included spare road wheels to mount on the storage rack, positioned the smoke grenade launchers correctly and had molded in the nonslip surface that all Abrams have had except for the M1 Abrams that mounted the rifled main gun as used in the M60 tank.
I may not do all the mods you have done...but I still find this thread very useful as there are many that I will
The major problem I face is how to keep it Girls Und Panzer
ALPHA
-
greengiant
- Warrant Officer 2nd Class
- Posts: 1138
- Joined: Tue Jun 26, 2012 12:15 am
Re: HL Abrams detailing build
I can't find your Abrams thread , tell me where to look.
The problem with the metal tracks is that the don't have rubber pads which would be helpful with some grip on smooth surfaces. I'd look for the after market ones that have the metal sprocket and tracks with rubber pads. The metal road wheels will be heavier than the plastic ones and the real Abrams has aluminum road wheels to keep the sprung weight down so the wheel can react more quickly and keep engaged with the track at speed over rough terrain as there is no provision for a track tensioner in the Abrams design. Don't think that will matter in the model as the road wheel arm springs are quite stiff.
The problem with the metal tracks is that the don't have rubber pads which would be helpful with some grip on smooth surfaces. I'd look for the after market ones that have the metal sprocket and tracks with rubber pads. The metal road wheels will be heavier than the plastic ones and the real Abrams has aluminum road wheels to keep the sprung weight down so the wheel can react more quickly and keep engaged with the track at speed over rough terrain as there is no provision for a track tensioner in the Abrams design. Don't think that will matter in the model as the road wheel arm springs are quite stiff.
