DAK Pz IV Ausf G Build

User avatar
jarndice
Colonel
Posts: 8318
Joined: Mon Sep 03, 2012 11:27 am
Location: the mountains of hertfordshire

Re: DAK Pz IV Ausf G Build

Post by jarndice »

Hi, I dislike that Axle, I know what I would do with it, I would push it through the Rollers, then through the Axle Holder and through the Hull and Mark the Axle at the point it is visible on the inside of the Hull. I would place that Axle in a Vice and using a grindstone in my DREMEL I would grind a slot at that Mark so that it could take an "R" clip,
I get the Impression that you intend using the "C" clips, so I would put the Axle in a vice and gripping a "C" clip in a pair of pliars fit it to the Axle using the Ribbed area to hold the clip, ensuring that the clip was as far into the axle ribbing as possible with the ends of the clip firmly located in the ribs which I imagine is what is intended, Having done the dry run and all being well I would refit the Roller assembly into the Hull.
The trouble with this arrangement is there is nothing to stop the axle from "Floating" in and out of the Hull and at the same time moving the "C" clip along the length of the ribbed section of the axle inviting the track to "THROW",
If you can find a cheap Axle set with Slots rather than Ribs I would use them, because these things look like trouble.
Sorry for being so negative. :wave: shaun
I think I am about to upset someone :haha:
philipat
Sergeant
Posts: 530
Joined: Wed Dec 24, 2008 3:26 am

Re: DAK Pz IV Ausf G Build

Post by philipat »

Yea...I thought I had trouble. I was thinking about using the C-clips just because that is what it came with. Right now I'm thinking about threading the end with a dye and putting a lock nut on it. I can use washers to eliminate most of the sliding back and forth that you mention.

The shaft is 3-mm in diameter. Would that be a M3 or M4 dye? Not sure how those measurements work.

If I grind a slot for an R-pin, would it need to go all the way around the shaft? Or, just one spot for the clip to attach to? Seems like I could just grind one or two small slots and it would fit into that.
User avatar
jarndice
Colonel
Posts: 8318
Joined: Mon Sep 03, 2012 11:27 am
Location: the mountains of hertfordshire

Re: DAK Pz IV Ausf G Build

Post by jarndice »

Hallo again, some good ideas, Putting a thread on the shaft is a good idea, after all if there is an excess of axle projecting through the inside of the Hull you can simply cut it off leaving enough to put a nuts depth of thread on the Axle,I wouldn't bother with a lock nut instead just use a decent smear of "THREADLOCK" The "R" clip is curved through 75% with a 25% straight length, so what would happen is that you would grind a flat or slot in the Axle long enough to seat the straight length of the "R" clip which is what keeps the "R" clip in place on the Axle, with the curved section wrapped around the curve of the unslotted part of the Axle. :thumbup: shaun
By the way an M3 DIE will put a thread on a 3mm rod or axle.
I think I am about to upset someone :haha:
philipat
Sergeant
Posts: 530
Joined: Wed Dec 24, 2008 3:26 am

Re: DAK Pz IV Ausf G Build

Post by philipat »

Awesome! Good info...thanks. I'll post how it all turns out. Right now, I'm working on strengthening the hull and preparing the return roller mounts. Might take a little bit, pin vise is getting a work-out...causing blisters. LOL
philipat
Sergeant
Posts: 530
Joined: Wed Dec 24, 2008 3:26 am

Re: DAK Pz IV Ausf G Build

Post by philipat »

With the new holes drilled, it was time to prepare the new metal support mounts that I got from Asiatam. I’m not confident that gluing them will work. So, I decided that the best thing to do would be to bolt them into place using 00-90 hex bolts.

The best way to do that is to use the existing posts to align them correctly and provide a pass-through. Start drilling from the post using a #55 drill bit. That helps to center the hole and is the correct size for a 00-90 pass-through. It also gives a pointed crater. You can use a #60 drill bit to drill the rest of the way through and then open it with a #55. Using the smaller drill bit first allowed me to pass through the post without cracking or damaging. I tried to go all the way with a #55 and it left the post walls too thin, which caused them to crack.

Once the holes are drilled, file off the molded bolt heads. Now, the 00-90 bolts will give that appearance and be functional.

Pictures show some of them being test-fitted with the 00-90 bolts next to roller mounts that haven’t been finished yet.
Attachments
IMG_0042.jpg
IMG_0041-1.jpg
philipat
Sergeant
Posts: 530
Joined: Wed Dec 24, 2008 3:26 am

Re: DAK Pz IV Ausf G Build

Post by philipat »

After finishing the return roller supports, I realized that I really needed to work on the interior of the lower hull. That would mean chopping out the battery box and the rear upright supports used to attach the lower and upper hulls. While I was doing this, it became very clear that the back hull was warped. So, the reinforcements would need to be glued down well to straighten it.

I chopped out the battery box and the other posts using a Dremel.

The idea is to have the inner reinforcement go a few millimeters above the lower hull and overlap with the upper hull. The idea is to block sand and grit from entering the hull. But, there will also need to be cutouts to allow for magnets holding the hulls together and wires from the head and convoy lights. The aft end will be a bit taller to support a shelf for switches and a charging port.

With interior cleared, I started working on the reinforcement in several stages. The first stage required creating templates using cardboard. This included test fitting the upper hull with the turret rotation motor. To get the switch shelf high enough, I have to work around the rotation motor. But this will allow access to the switches from the engine hatches. After the templates had been created, I cut the reinforcements from styrene using 3-mm styrene for the sides and 2-mm styrene for the rear. The rear also needed to have ½" holes cut for the exhaust. The holes need to be big so that they have room for the tubing to fit over the exhaust stubs. With the reinforcements cut, I test fitted them using rubber cement.

Then, I moved on to the front to work on reinforcing the front and installing the new gearboxes. The side reinforcements were also templated first using cardboard. I’m using 3-mm styrene to mount the gearboxes and raise them (sprocket needs to be raised by about 3-mm). I tried to template the mounting points by using cut nails in the screw holes. Sticking up, they could be pressed into the styrene sheet. Then, I drilled the holes and tried to line them up. It was close, but no cigar! The second attempt involved drilling the holes all the way through the hull. Then, I glued the sheet in place and drilled from the bottom of the hull into the styrene sheet.

Two notes on the gearboxes:
- To use the flat brass gearboxes, you’ll have to remove the two posts at the front used to secure the upper and lower hulls. Looks like another spot for magnets.
- The PzIV hull appears to be a few millimeters narrower than the PzIII hull. As a result, you can’t fit Speed400s into the PzIV on the flat, brass gearboxes.

The reinforcements in the rear have been epoxied in place using JB Weld. The shelf brackets are made from 5-mm triangle styrene and 3-mm styrene angle. I used plastic weld to make those permanent. The switch shelf is 2-mm styrene.

The front reinforcements are still only rubber-cemented in place. But, they took some checking and refitting to ensure that the return roller supports and the drive shaft bearings were installed well. Everything revolves around the gear boxes. So, once they are installed, test fit and install the bearings. Then, the return roller supports. From there I determined that I needed to create cutouts in the reinforcements for the bearings’ bolts and nuts. The 00-90 bolts had to be cut down and a cutout made in the reinforcement for the motor’s shaft. I’ll have to cut down the support roller shafts and make sure everything is right with test driving before gluing in the front reinforcements. So far, though, it looks good.

Note to self: next time, do all of the hull reinforcements before detailing the lower hull. Drill the guide holes and mark everything. But, don’t install it until after the reinforcements are done. That would have made it a lot easier to clamp everything down, especially in the back.

Pictures show:

Cardboard mock-ups:
IMG_0045 (2).jpg

IMG_0046 (2).jpg
Attempts to mark the styrene plate with nails: Looked good at first...
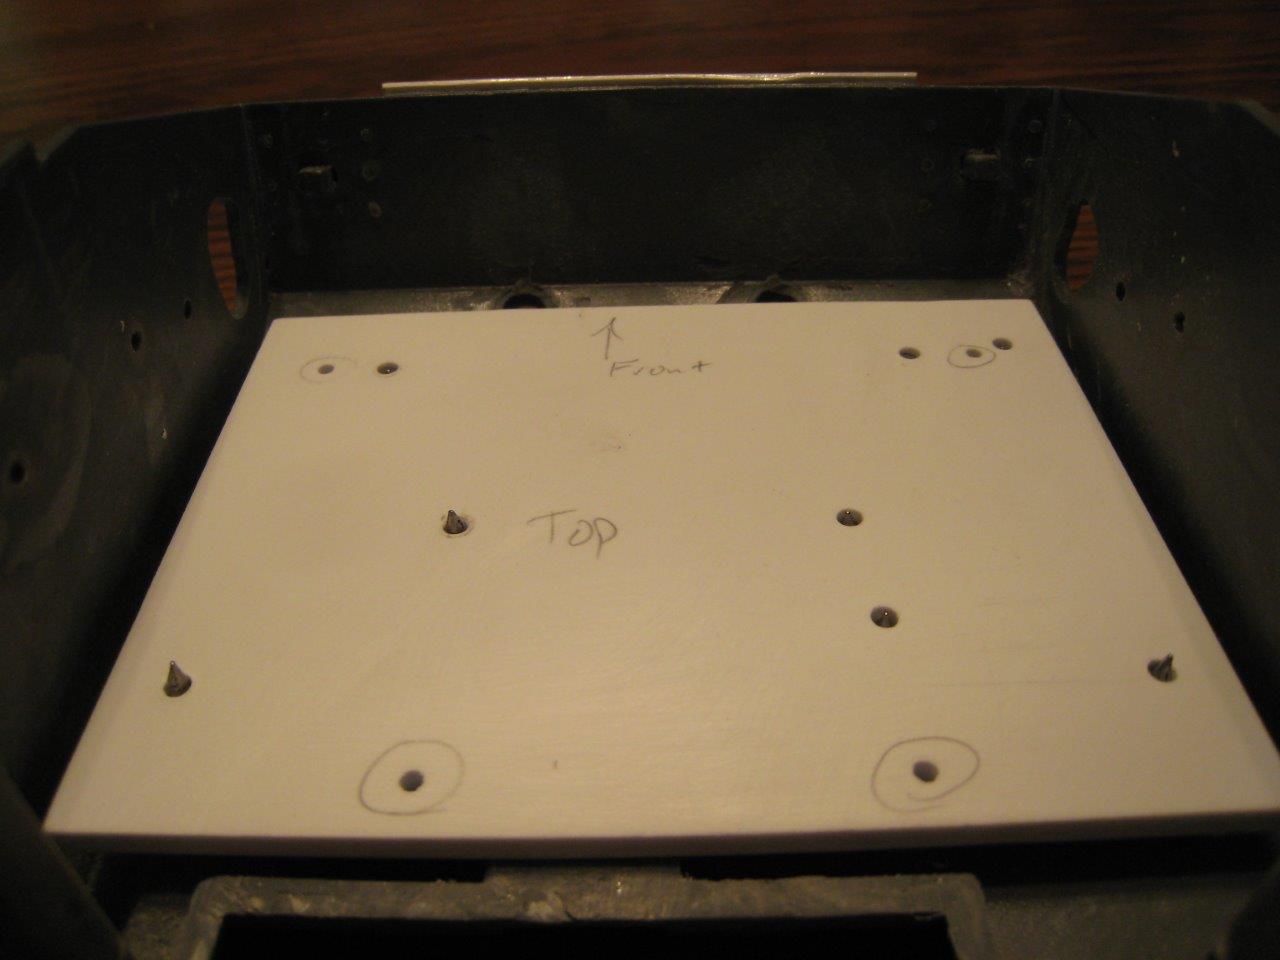
IMG_0047 (2).jpg
IMG_0048 (2).jpg
IMG_0048 (2).jpg (75.23 KiB) Viewed 4851 times
Test fitting everything. Reinforcements and switch shelf supports are held in place with rubber cement. You can see how tight it will be to get the gearboxes and the motors in and out, particularly around the return roller supports.
IMG_0045.jpg
IMG_0047.jpg
IMG_0048.jpg
philipat
Sergeant
Posts: 530
Joined: Wed Dec 24, 2008 3:26 am

Re: DAK Pz IV Ausf G Build

Post by philipat »

Continued from last post...I guess there is a limit to the number of photos you can upload.

Side and rear reinforcements epoxied in place. Gearbox plate is glued down. Forward side reinforcements are held by the return roller supports’ bolts.
IMG_0009-1.jpg
IMG_0010-1.jpg
IMG_0010-1.jpg (80.67 KiB) Viewed 4851 times
IMG_0011.jpg
IMG_0011.jpg (77.83 KiB) Viewed 4851 times
IMG_0013.jpg
IMG_0012.jpg
IMG_0018-1.jpg
Used milliput to fill in all of the holes on the underside. I’ll put the battery cover in place once I’m done with everything else.
IMG_0015-1.jpg
Edit: added PDF with the dimensions for the rear and side braces.
Attachments

[The extension pdf has been deactivated and can no longer be displayed.]

Last edited by philipat on Tue Apr 07, 2015 2:44 pm, edited 2 times in total.
User avatar
KTRob
Lance Corporal
Posts: 197
Joined: Sat Jan 26, 2013 5:56 pm

Re: DAK Pz IV Ausf G Build

Post by KTRob »

Nice work Philipat, I left the battery box in mine, will probably regret it!

Looking forward to next update :thumbup:
You can never have too many tanks...... :D
philipat
Sergeant
Posts: 530
Joined: Wed Dec 24, 2008 3:26 am

Re: DAK Pz IV Ausf G Build

Post by philipat »

Thanks. I've been watching your thread...as you know. :thumbup:

I'm watching with interest to see how you organize the interior.
User avatar
HERMAN BIX
Major-General
Posts: 11179
Joined: Sun Jan 12, 2014 12:15 am
Location: Gold Coast,Australia

Re: DAK Pz IV Ausf G Build

Post by HERMAN BIX »

A load of add ons mate, be good to see a pair of IV's rolling at the same time ;)
Keep it coming :thumbup:
HL JAGDPANTHER,HL TIGER 1,HL PzIII MUNITIONSCHLEPPER, HL KT OCTOPUS,HL PANTHER ZU-FUSS,HL STuG III,HL T34/85 BEDSPRING,
HL PZIV MALTA,MATORRO JAGDTIGER,HL F05 TIGER,TAMIYA KT,HL PANTHERDOZER,HL EARLY PANTHER G,TAIGEN/RAMINATOR T34/76,
HL AN-BRI-RAM SU-85
Post Reply

Return to “Panzer IV”