WOW....that was some main surgery, but all the work paid off!! Great job....your girlfriend must be proud she gave you this beast.
Grtz, John.
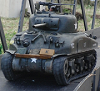
The one that started it all!
-
DRAGONWAGON

- Lance Corporal
- Posts: 169
- Joined: Tue May 29, 2012 8:24 am
- Location: Gemert, The Netherlands.
Re: The one that started it all!
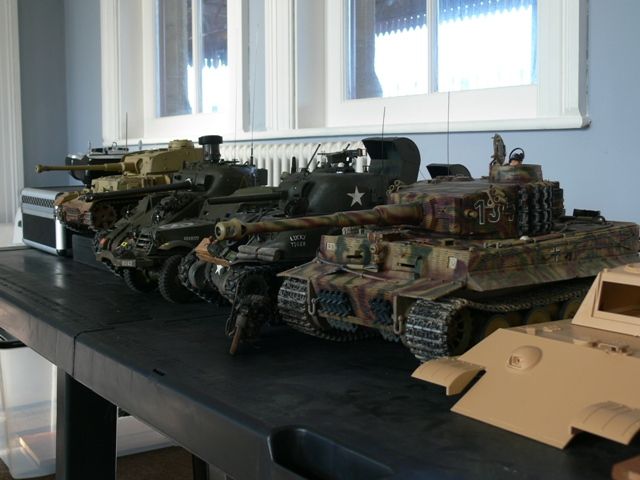
Tamiya M4 (105) HVSS Sherman
Tamiya Tiger I early version
Tamiya Pz.Kpfw.182 Tiger II "Königs Tiger"
Tamiya Tiger I early version
Tamiya Pz.Kpfw.182 Tiger II "Königs Tiger"

Re: The one that started it all!
Nicely Done!
Tamiya Tiger 1, Tamiya M4 (105) HVSS, Tamiya Jagdpanther G1, ElMod Jagdpanther G2, ElMod KV-1E, ElMod StuG 40 G
-
MarkofZollo
- Corporal
- Posts: 328
- Joined: Mon Jul 05, 2010 6:16 pm
- Location: Honiton, East Devon
Re: The one that started it all!
Cheers for the comments guys.
Been a bit of a ball ache to get this sorted but pretty well done. From the last post I sorted some electronics, decided to make the upper hull and turret easily separate-able. The two places I had solder joints was the elevation and recoil motors, and the co-ax mg. I simply soldered in excess plugs (from the Mato Sherman board), so now its just three screws and pulling plugs out to get the turret off;
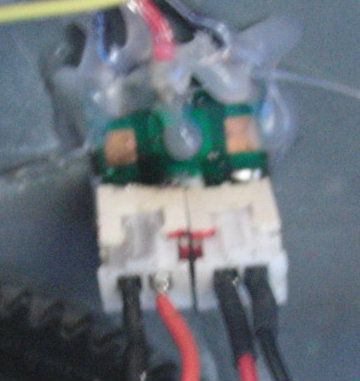
Above is the small board for the turret wiring, I just moved it out the way and soldered these two plugs, the inner legs of each plug connects to the shared positive.
This plug piggy-backs off the ball mg wires.
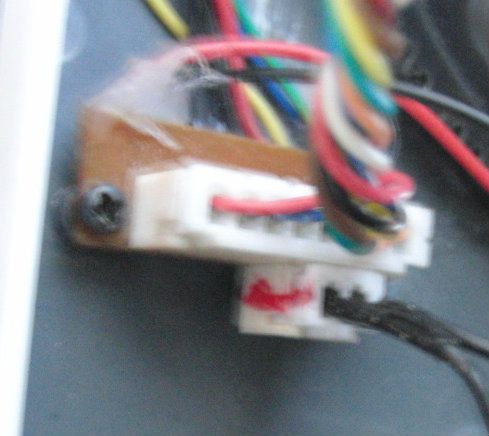
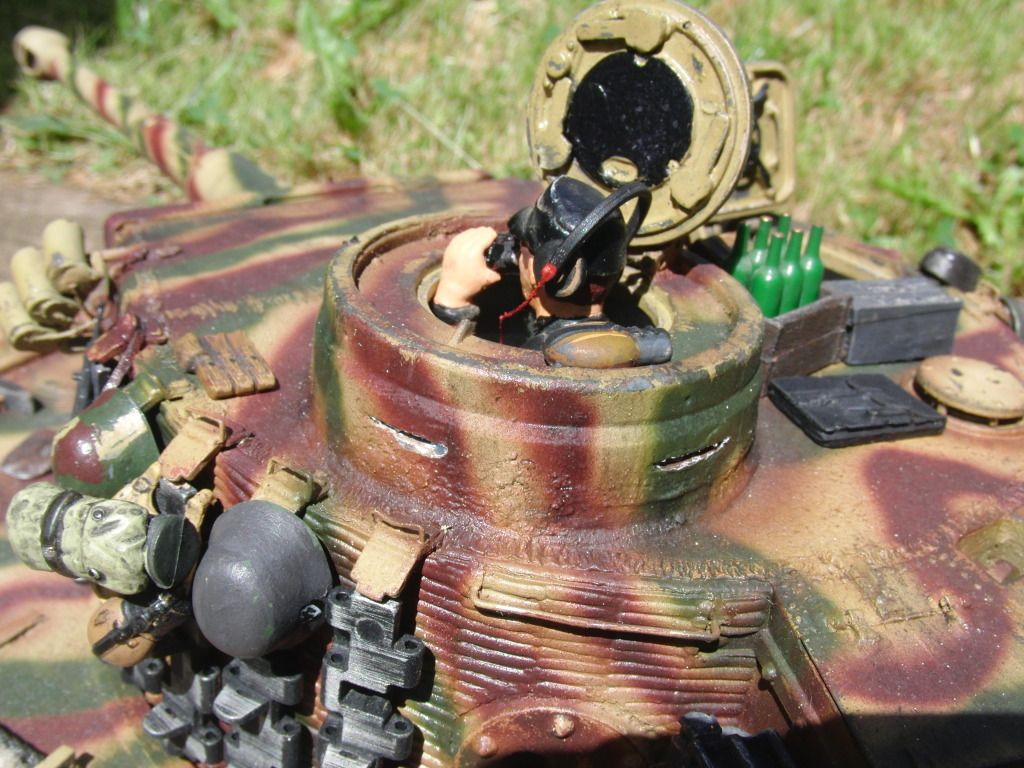
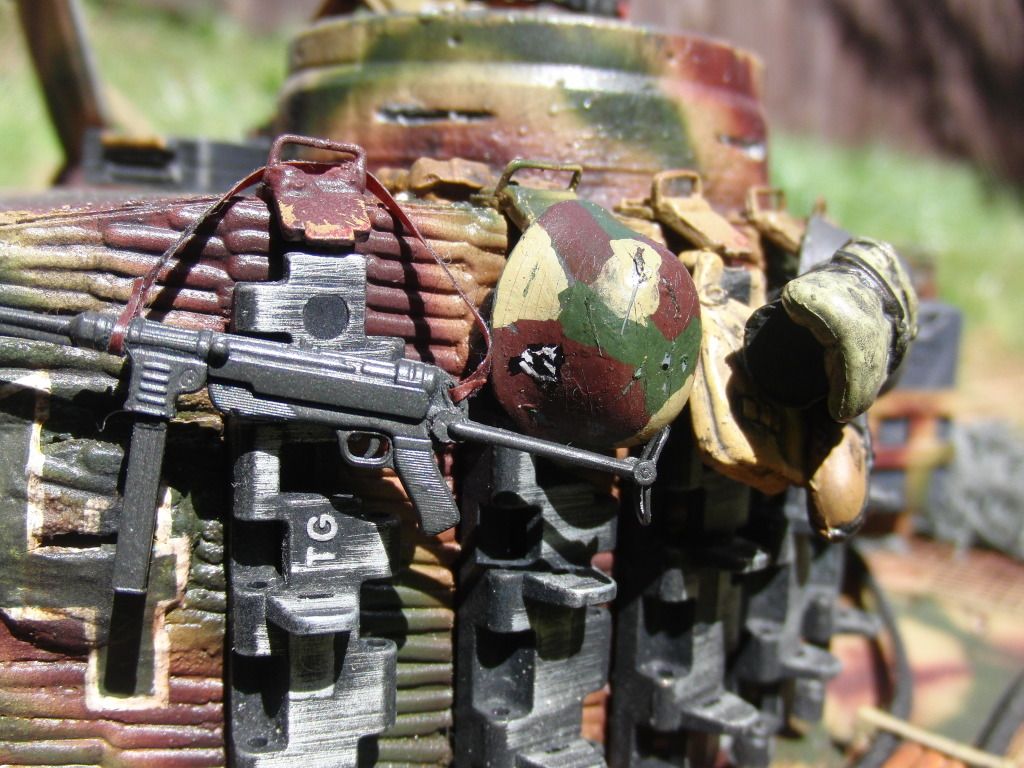
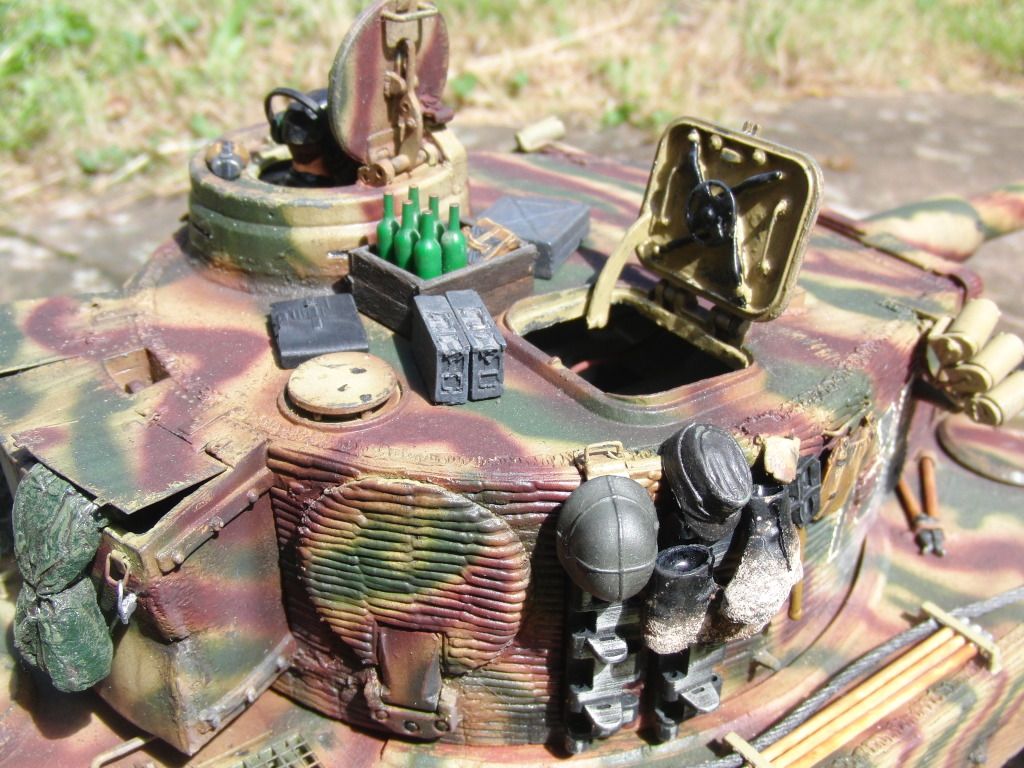
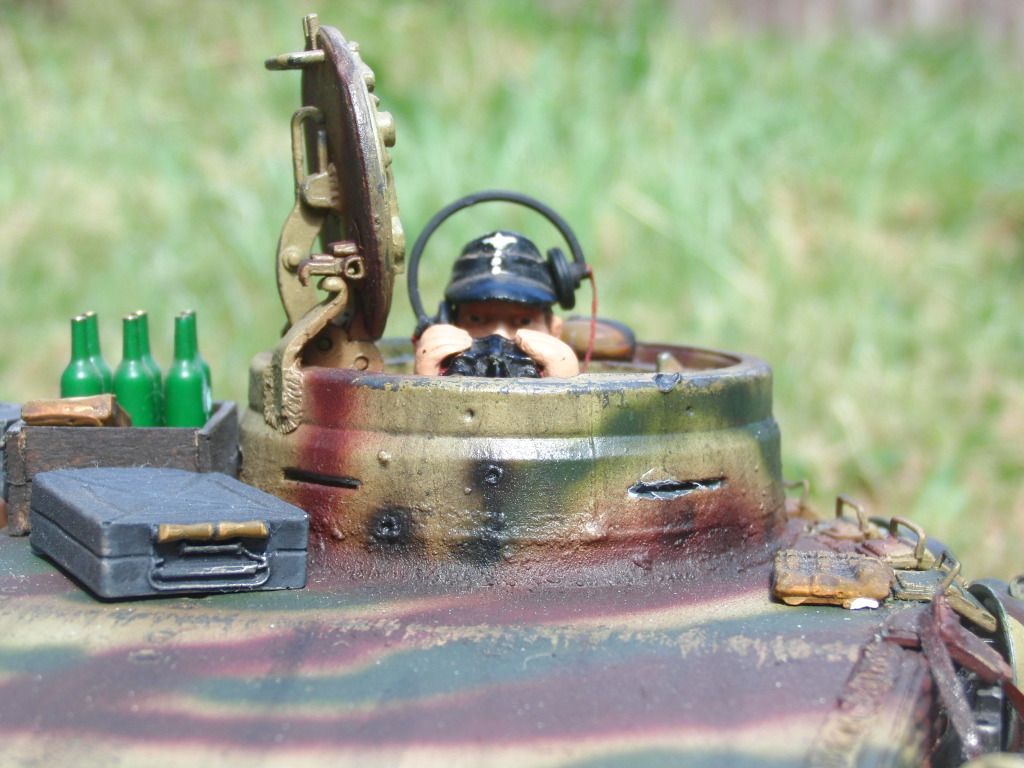
I spent a little time making a commander figure who can stay in in battles, with his head just poking over the cupola edge, quite liked this idea I saw on a 1/6th Tiger. I chopped a spare HL German commander figure down and repositioned arms to hold binoculars to his face;
I also removed his hat, made up the missing bit of head and repositioned the hat so it didn't look as stupid as it normally does;
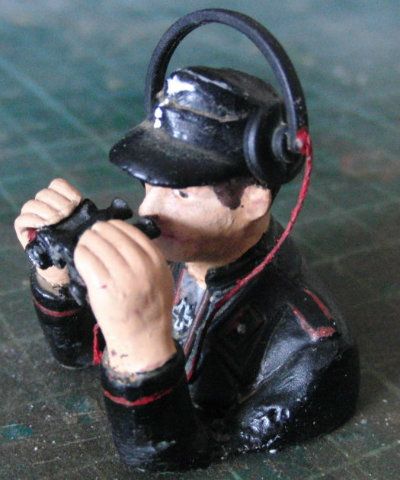
The headphones were altered too to stay in place properly, revealing the ear I added
I followed this ridiculously awesome face painting tutorial: http://www.scale-models.co.uk/figure-tu ... g-ray.html
But it didn't work as well for me (poor quality model with little detail...honest)
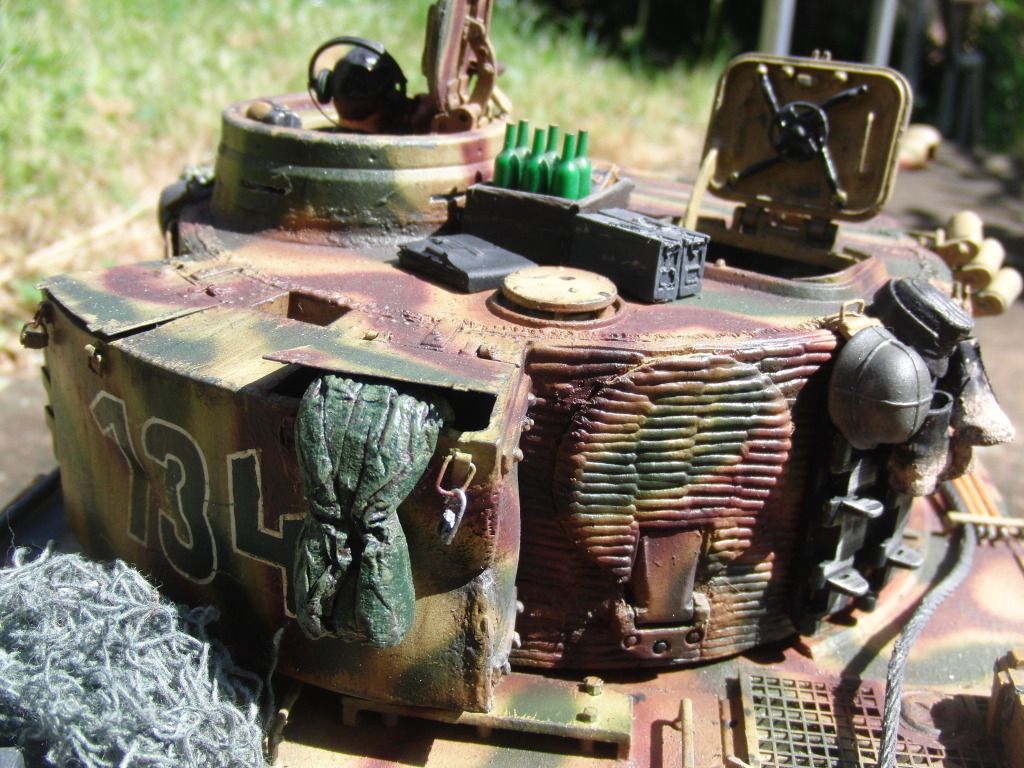
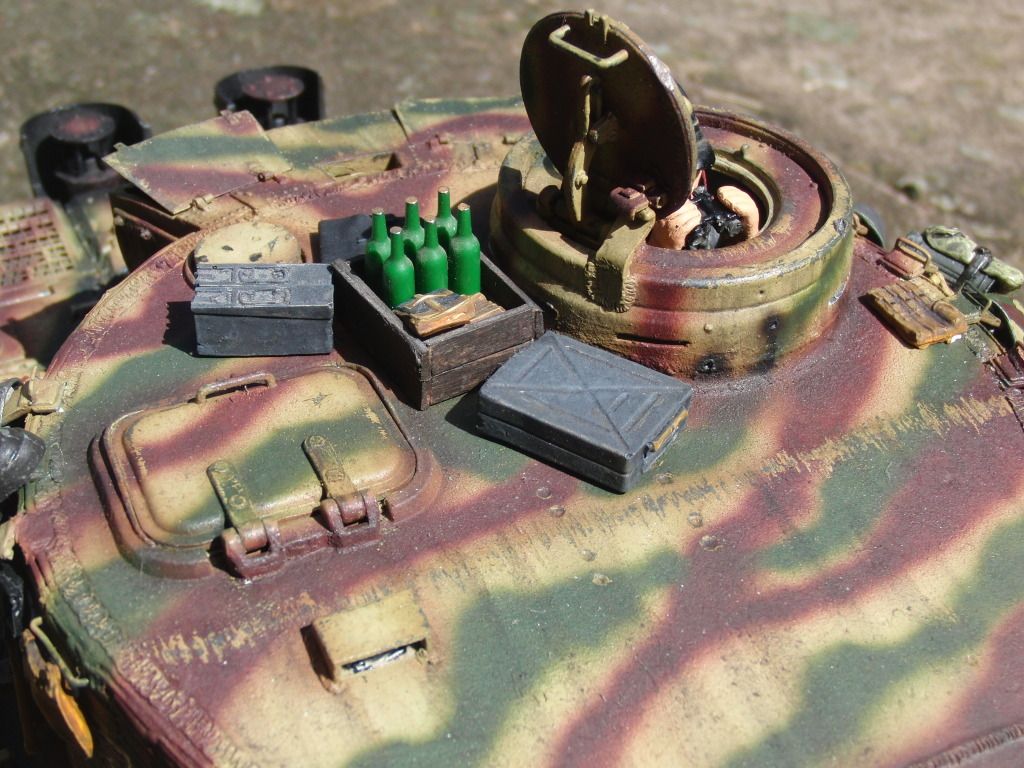
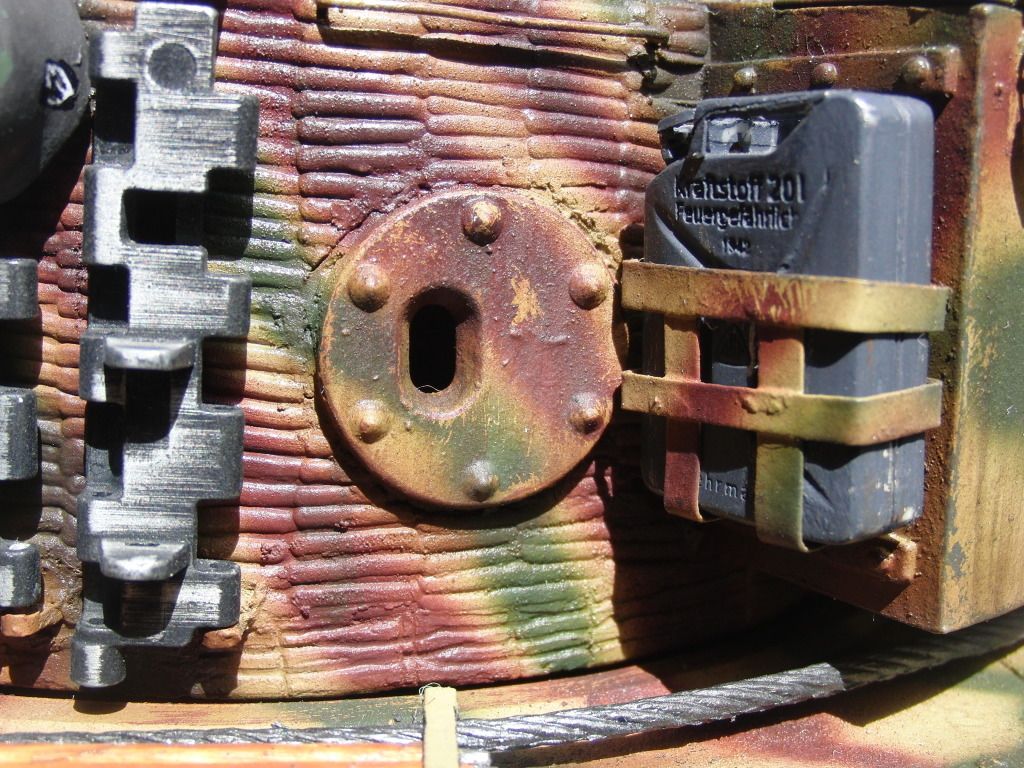
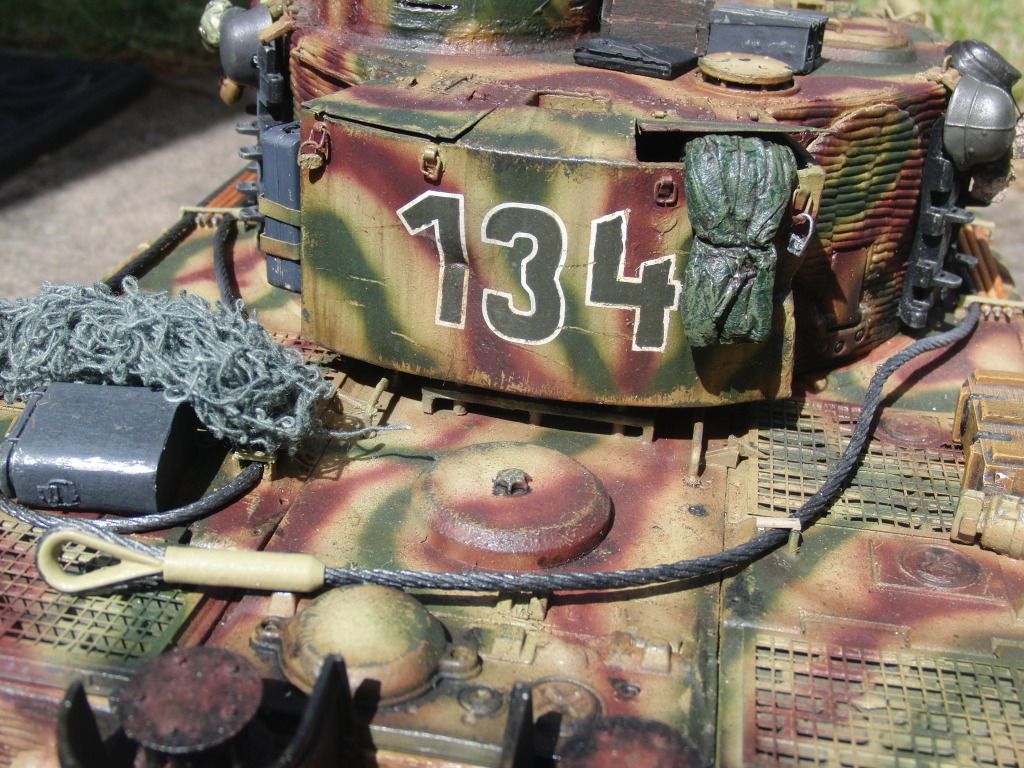
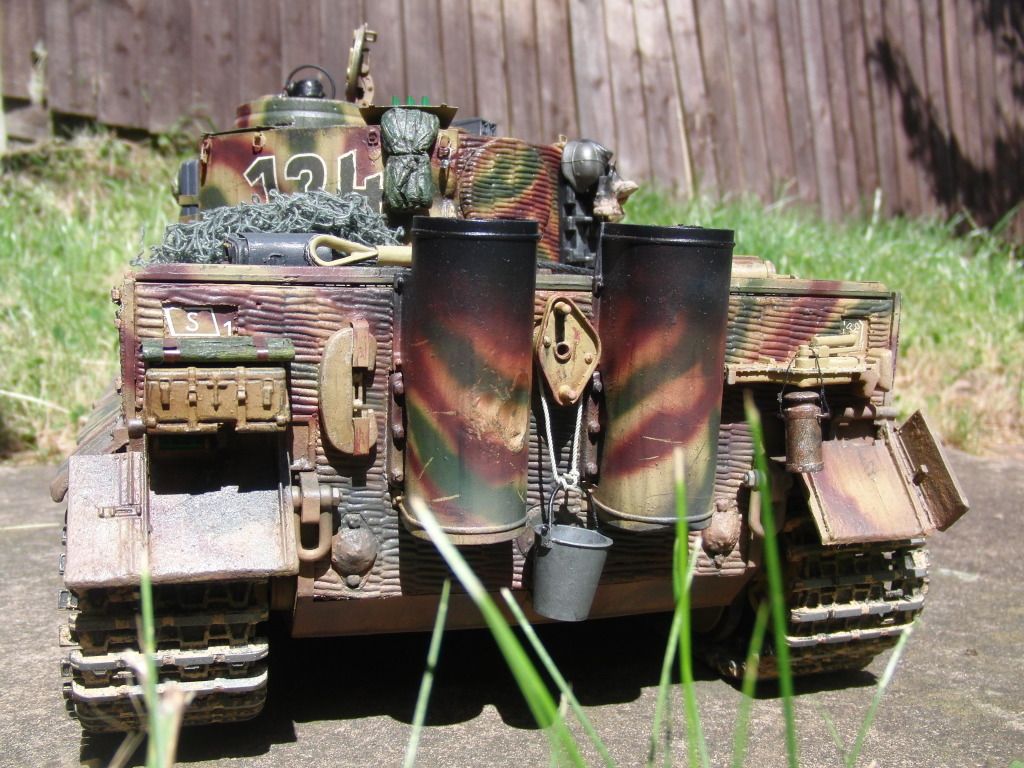
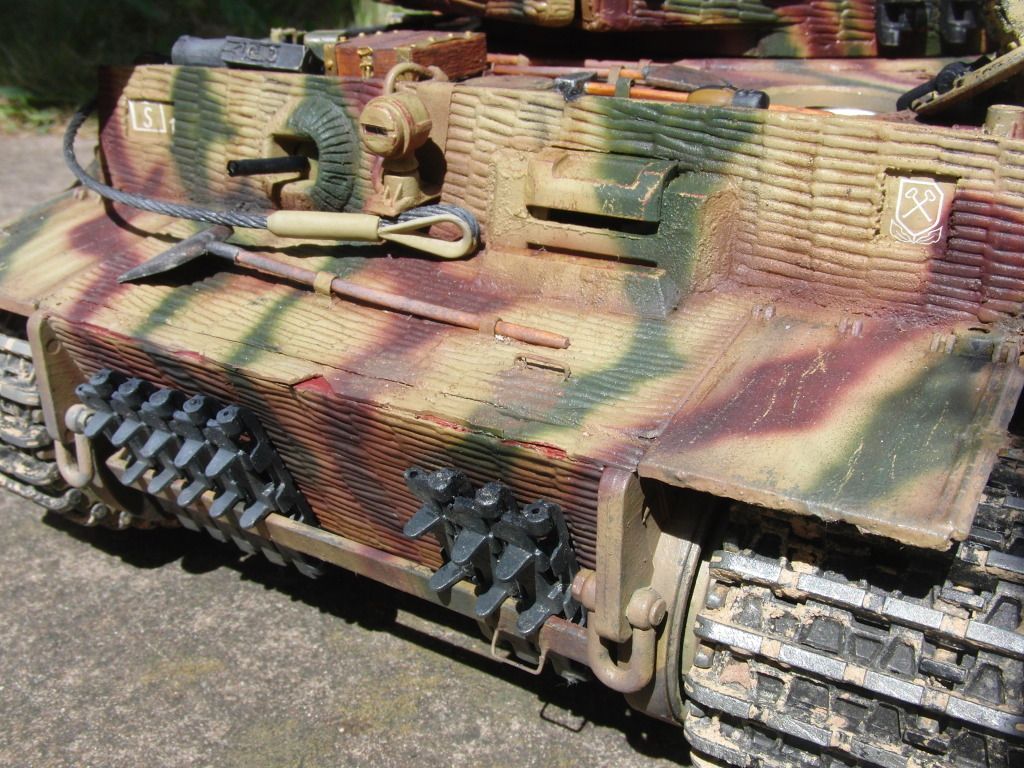
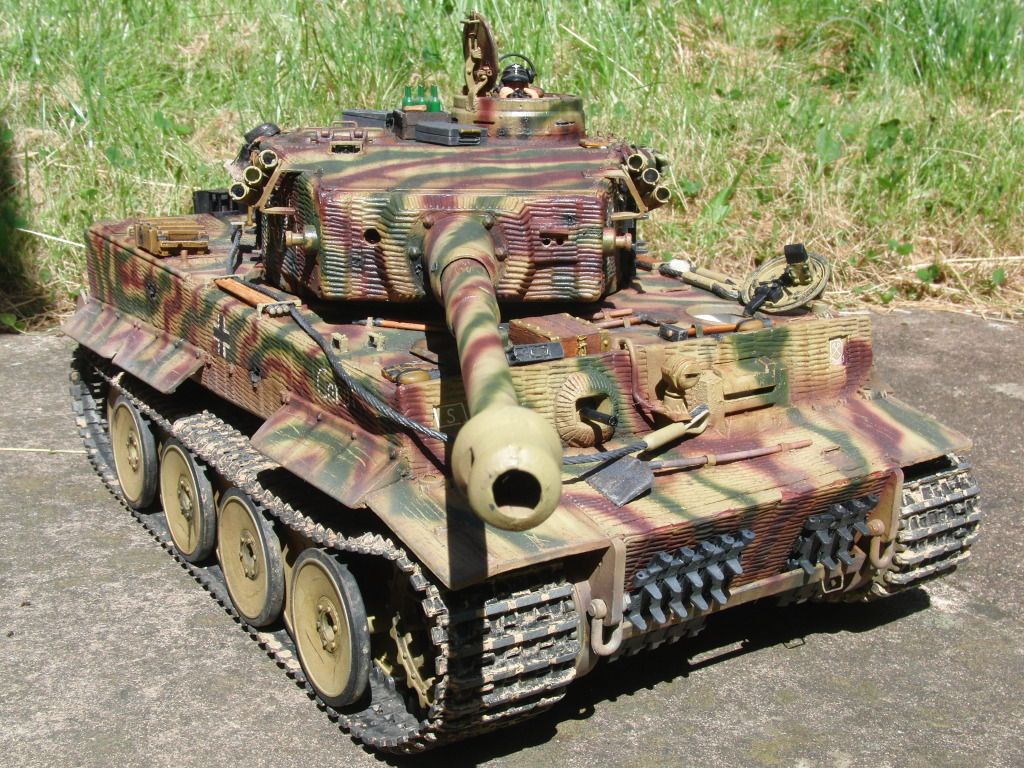
So weathering wise, it had slight pre-shading and sun lightened bits, all the while using the hairspray chipping technique (first go ) on all layers and colours separately. Then when happy with camo it was given a light dust coat (Buff), then shadowing followed by a dark brown oil paint wash and some other oil stains etc. Then came rain streaks with oil paints before a final dusting coat (Buff again) with some variation in Flat earth. Was sealed after with Pledge floorwax (Klear), then Plasti-kote Krystal matt varnish on (supposed to be) metal parts as it is more of a semi-gloss, and matt varnish on all other parts
Now normally I don't post pics over 640x480 so anyone can view on any monitor, but I have put quite a bit of effort in this bugger so pics are a bit bigger
Hope you guys like;

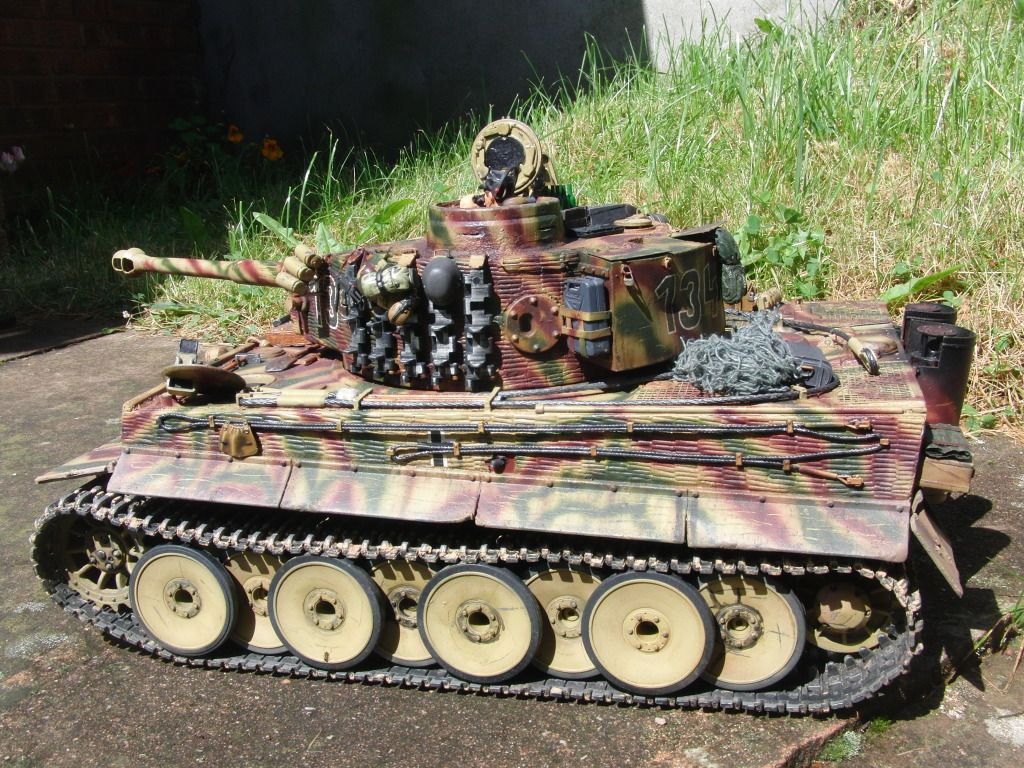
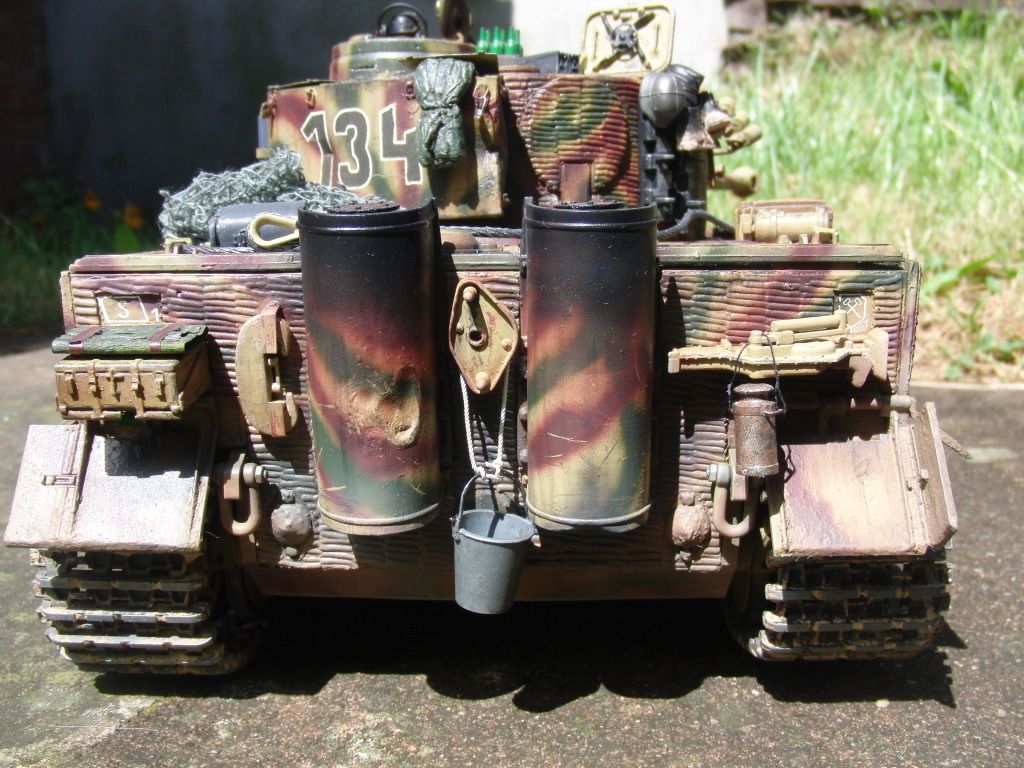
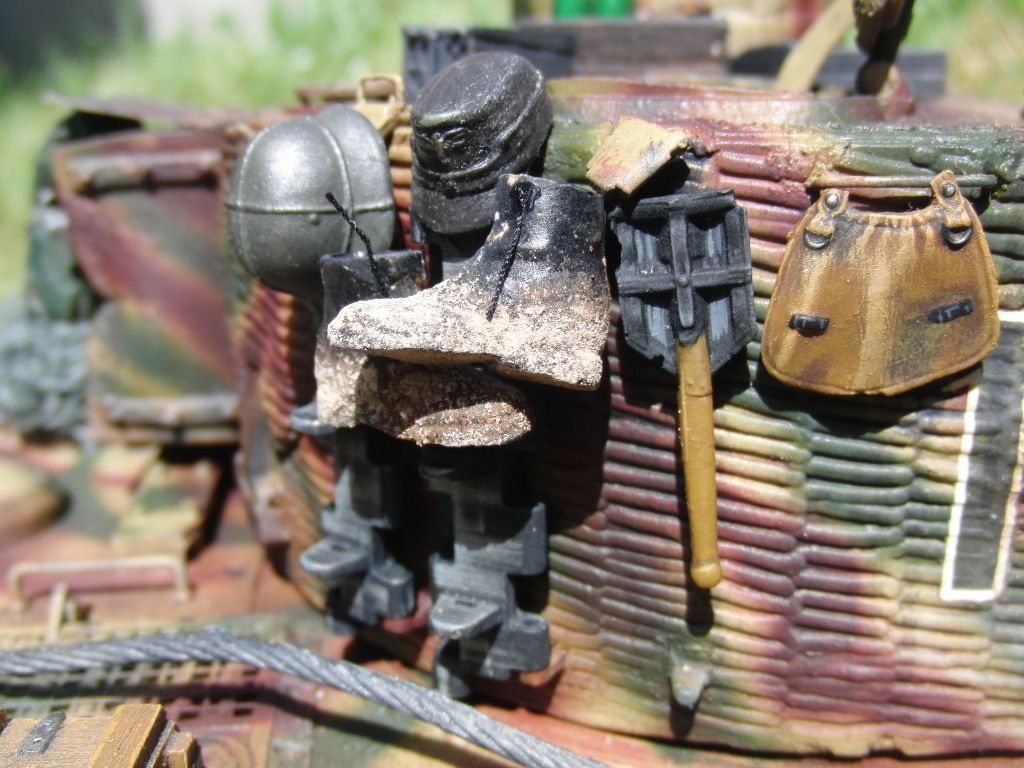
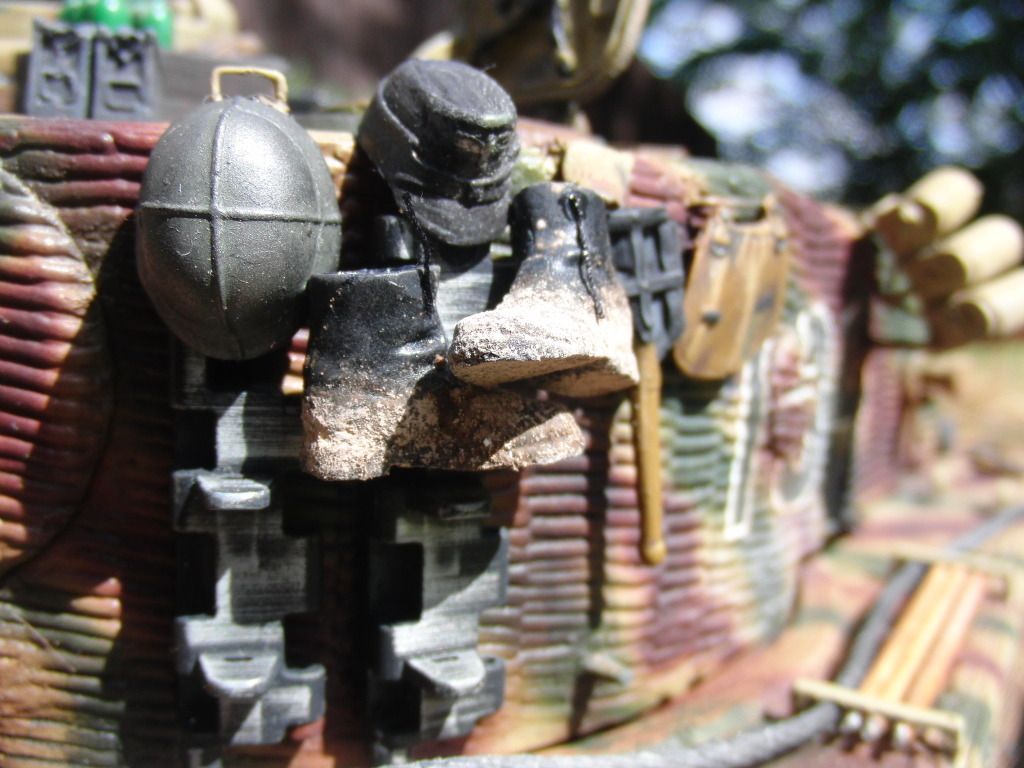
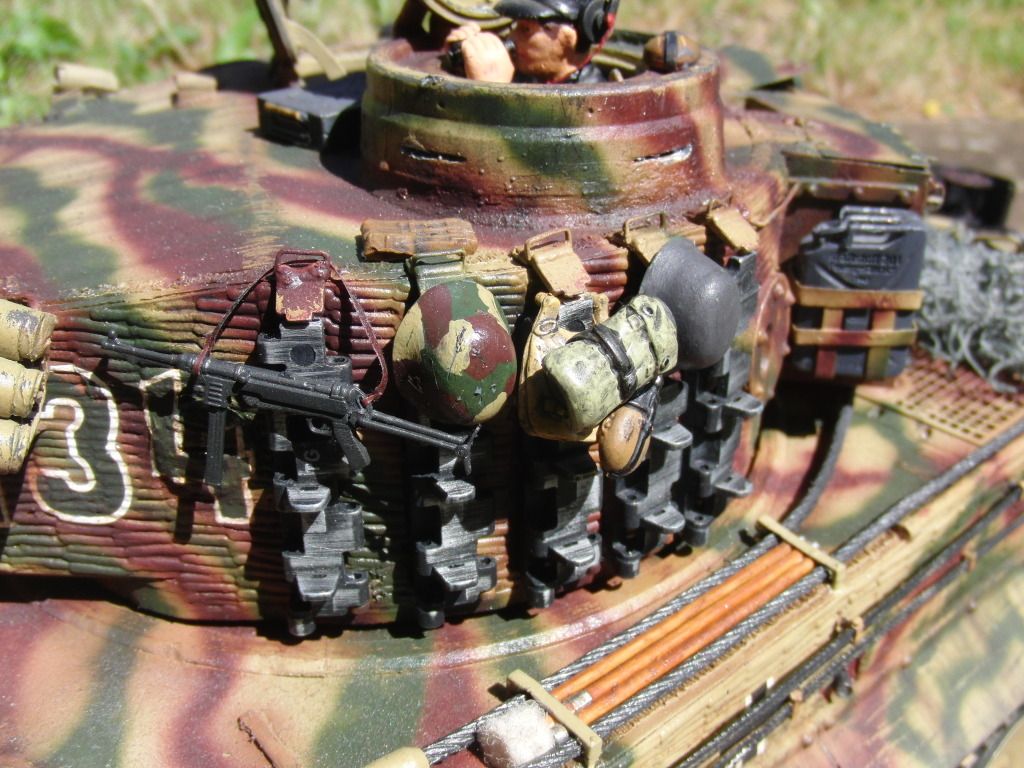
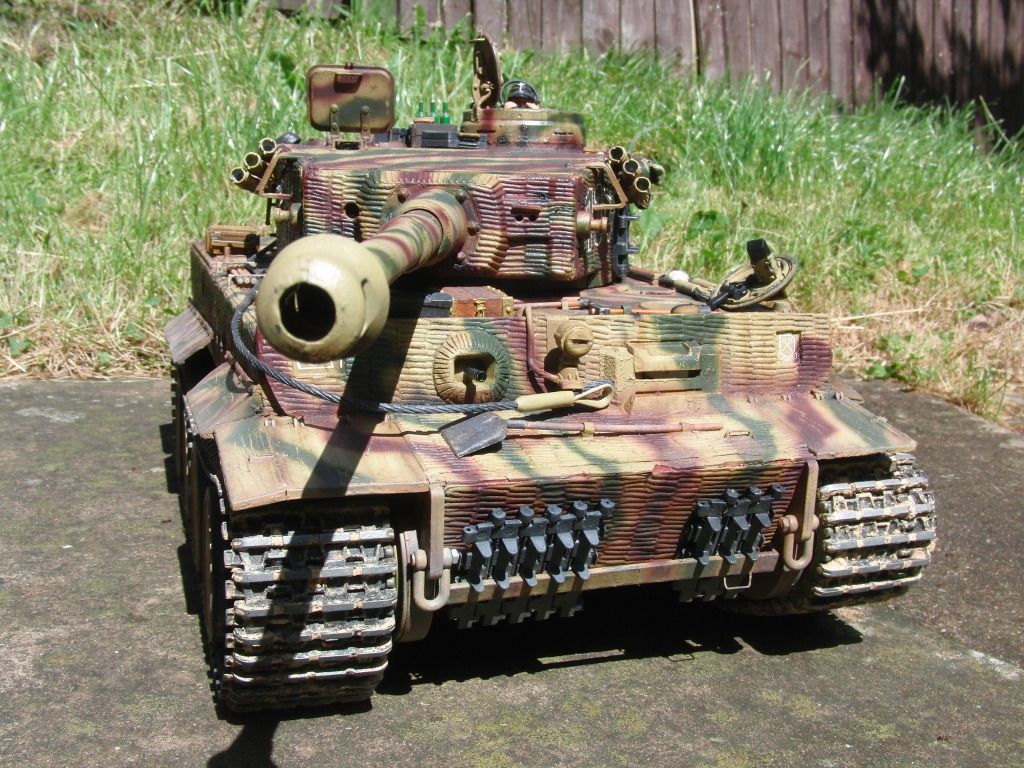
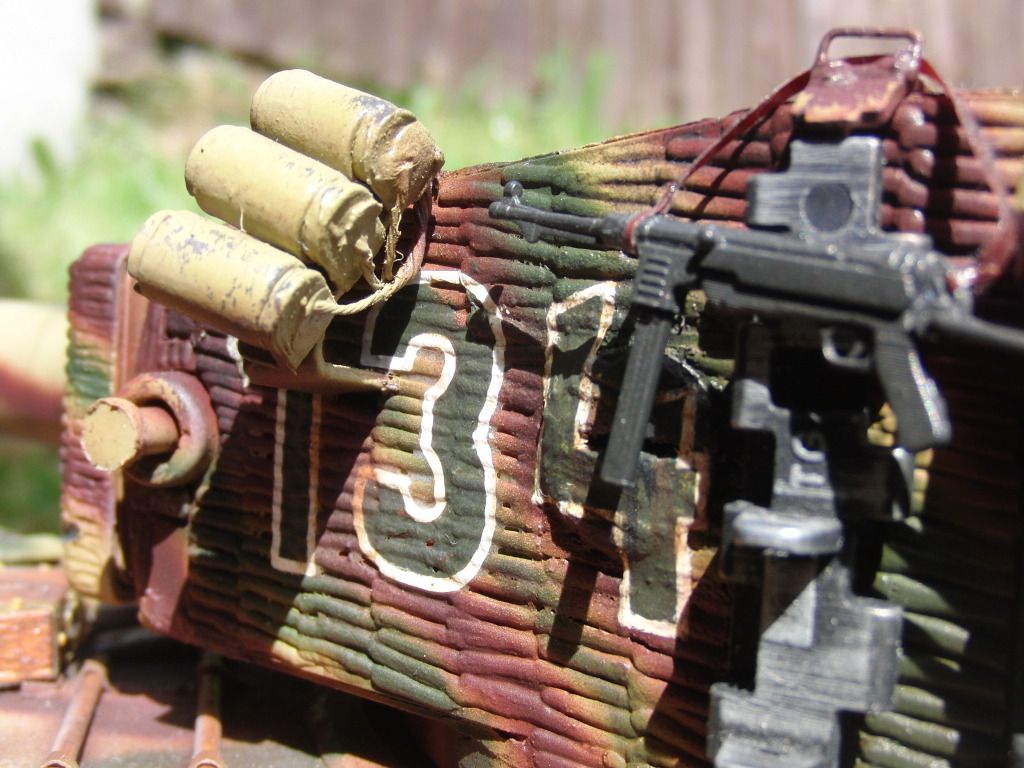
Wanted to try a wedged dud round, I like how it looks but it would have been removed asap I guess in reality;
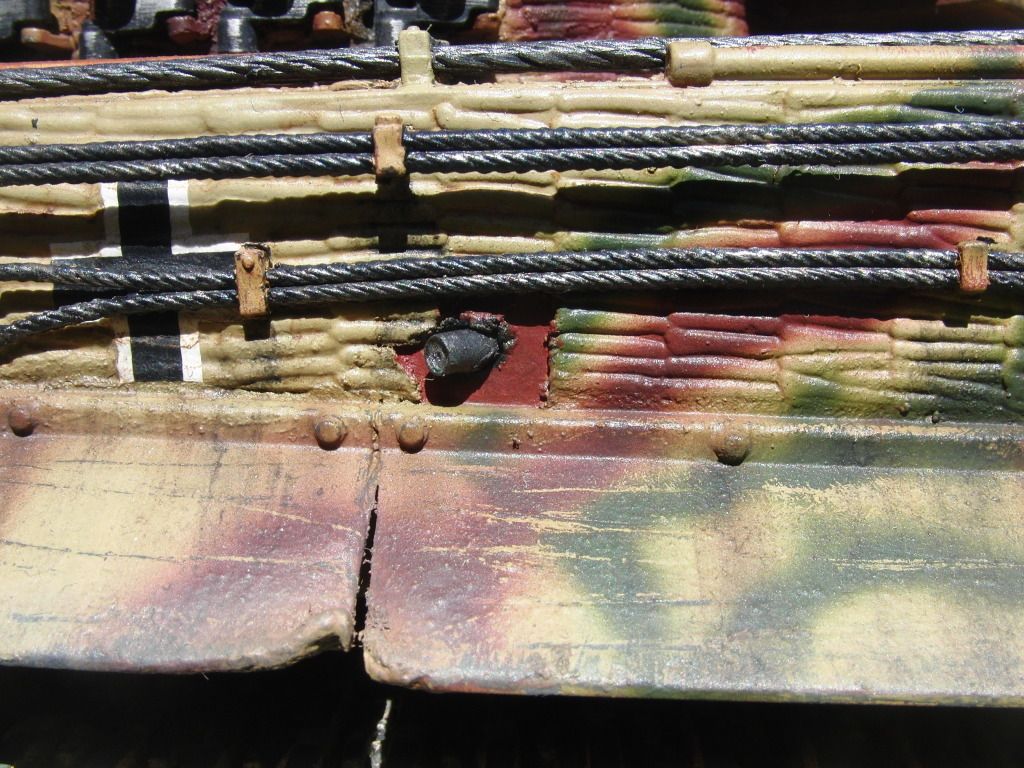
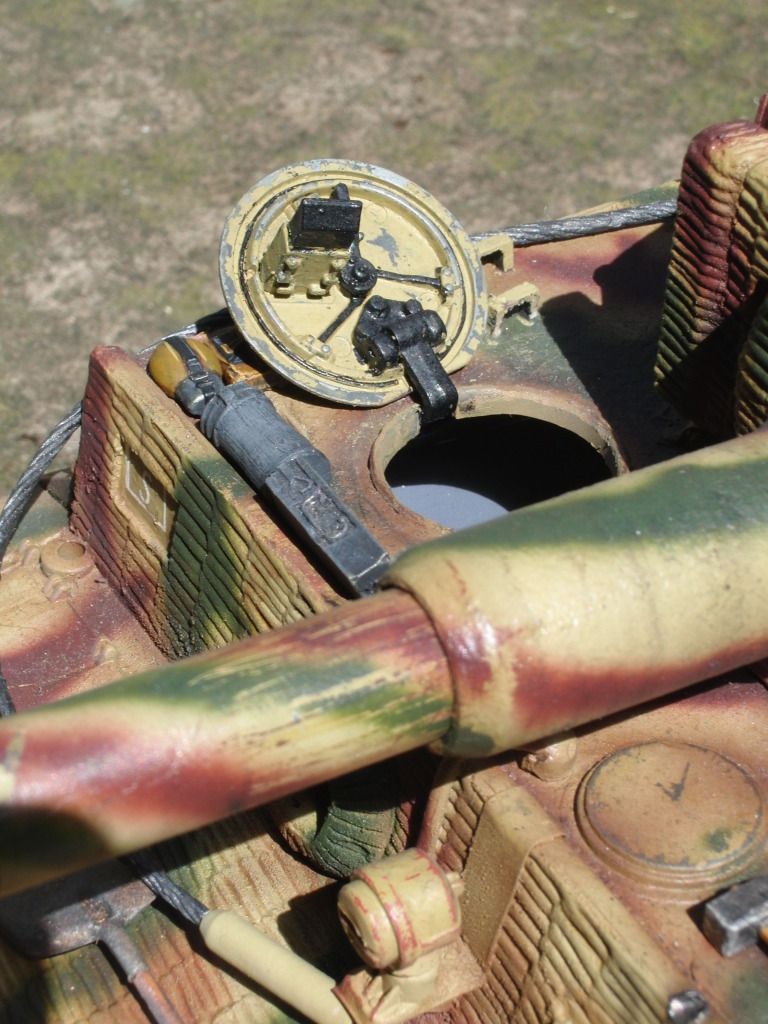
Just noticed I messed up the SS symbol here, will correct;
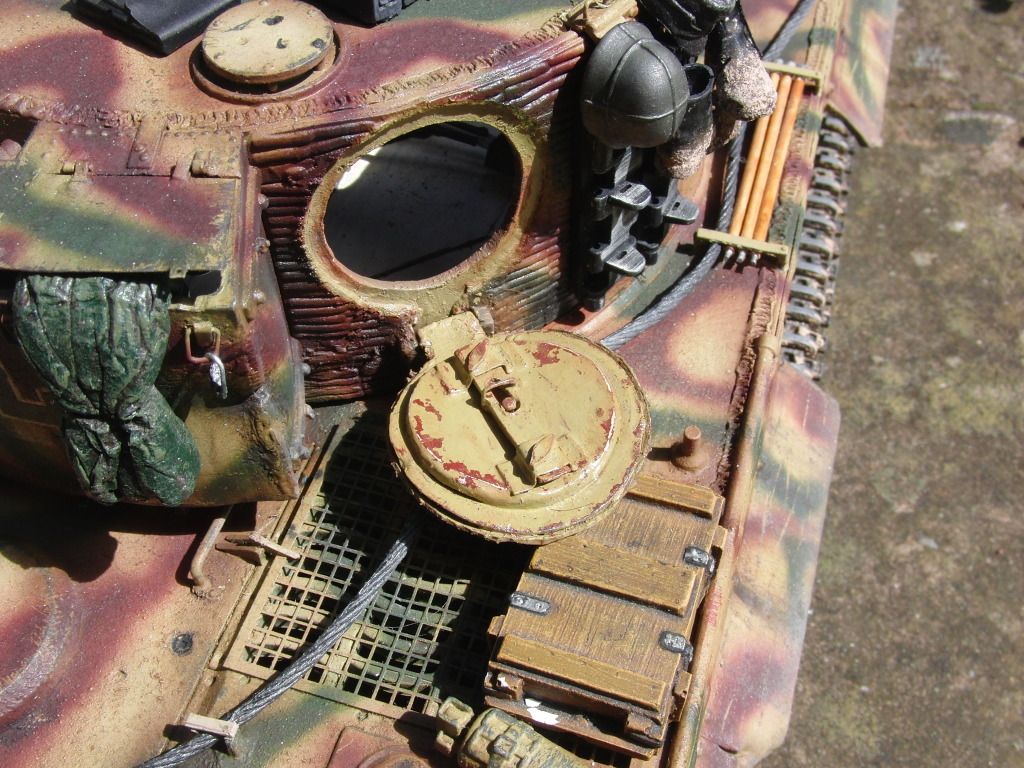
The reason this skirt section was removed, a damaging shot;
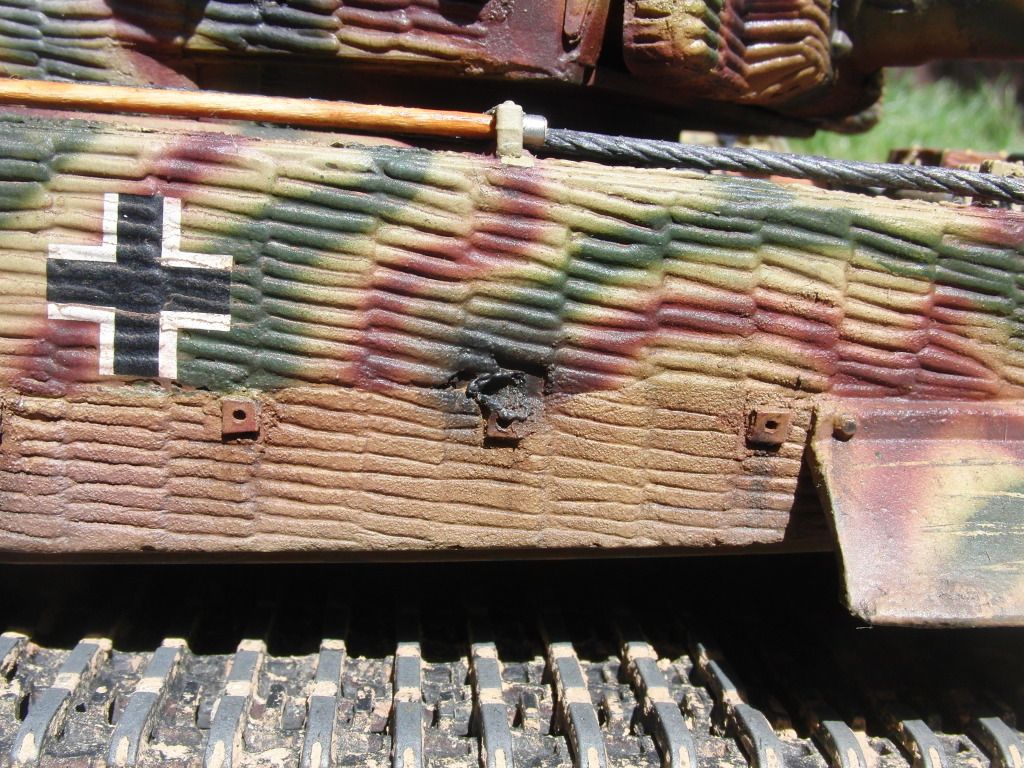
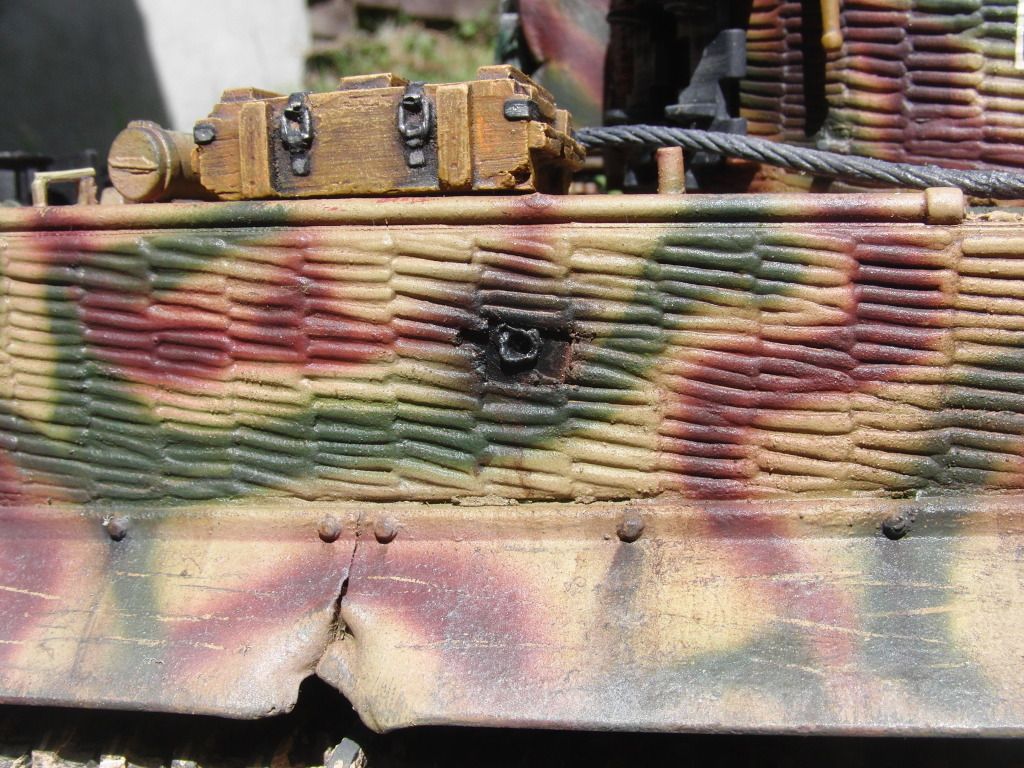

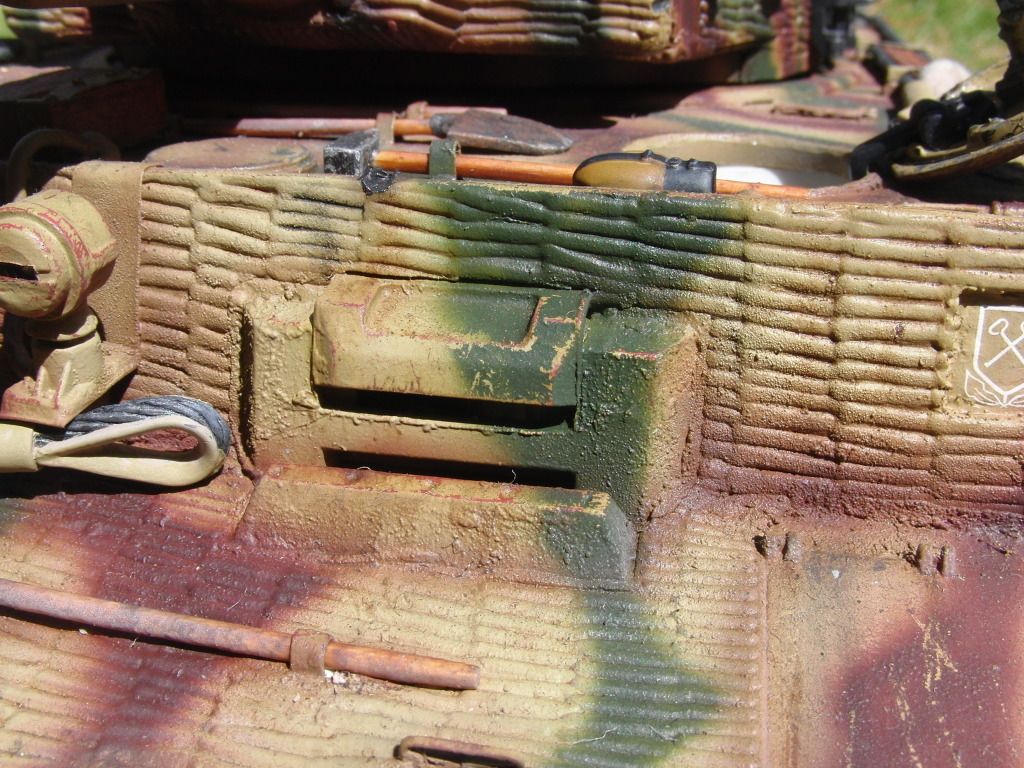
The flaking on the three was going to be corrected but I like how it looks
Cheers guys
Been a bit of a ball ache to get this sorted but pretty well done. From the last post I sorted some electronics, decided to make the upper hull and turret easily separate-able. The two places I had solder joints was the elevation and recoil motors, and the co-ax mg. I simply soldered in excess plugs (from the Mato Sherman board), so now its just three screws and pulling plugs out to get the turret off;
Above is the small board for the turret wiring, I just moved it out the way and soldered these two plugs, the inner legs of each plug connects to the shared positive.
This plug piggy-backs off the ball mg wires.
I spent a little time making a commander figure who can stay in in battles, with his head just poking over the cupola edge, quite liked this idea I saw on a 1/6th Tiger. I chopped a spare HL German commander figure down and repositioned arms to hold binoculars to his face;
I also removed his hat, made up the missing bit of head and repositioned the hat so it didn't look as stupid as it normally does;
The headphones were altered too to stay in place properly, revealing the ear I added
I followed this ridiculously awesome face painting tutorial: http://www.scale-models.co.uk/figure-tu ... g-ray.html
But it didn't work as well for me (poor quality model with little detail...honest)
So weathering wise, it had slight pre-shading and sun lightened bits, all the while using the hairspray chipping technique (first go
Now normally I don't post pics over 640x480 so anyone can view on any monitor, but I have put quite a bit of effort in this bugger so pics are a bit bigger
Hope you guys like;
Wanted to try a wedged dud round, I like how it looks but it would have been removed asap I guess in reality;
Just noticed I messed up the SS symbol here, will correct;
The reason this skirt section was removed, a damaging shot;
The flaking on the three was going to be corrected but I like how it looks
Cheers guys
There is always a fifth Sherman
Re: The one that started it all!
really nice work...I like it al lot, very cool mods
-
MarkofZollo
- Corporal
- Posts: 328
- Joined: Mon Jul 05, 2010 6:16 pm
- Location: Honiton, East Devon
Re: The one that started it all!
Cheers mustclime. It's been a while! I made some alterations after a meet at Laycock, mainly IR emitter and tube, previously had a 3 mm one in a 10 mm long tube and found it hard to hit anything.
Changed out for the better LD271 emitter (5 mm) in a short 6 mm tube, found to be a lot better at a Barry meet but could do with a little adjustment.
I had a bit of fun on 'the day of snow' (18th Jan), vid of driving round the garden;
http://www.youtube.com/watch?v=VSd01KOjDD0
Was having trouble with grip (and keeping the camera on target ) probably due to slack tracks. Turned out something had been getting worse until it broke;
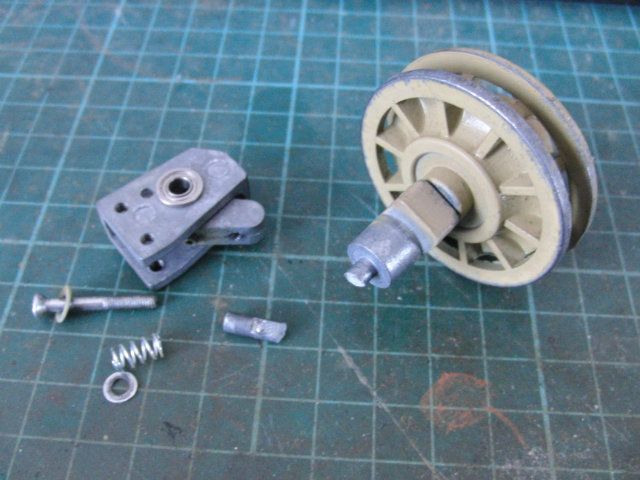
Stupid white metal parts! So was thinking about buying replacements but a few people suggested fabricating an alternative. I talked to a chap at work about threading a bit of 4 mm rod and drilling and tapping a hole for it, and he came back to me with this ;
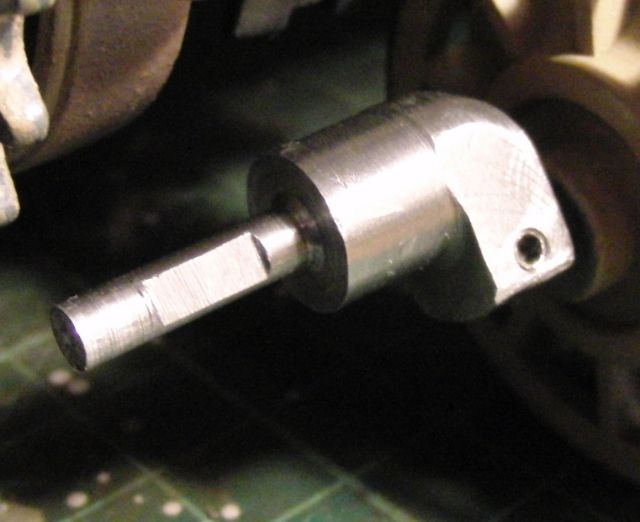
A perfect replica including a tapped hole for the grub screw, I wasn't expecting that so Jerry, cheers mate
Changed out for the better LD271 emitter (5 mm) in a short 6 mm tube, found to be a lot better at a Barry meet but could do with a little adjustment.
I had a bit of fun on 'the day of snow' (18th Jan), vid of driving round the garden;
http://www.youtube.com/watch?v=VSd01KOjDD0
Was having trouble with grip (and keeping the camera on target
Stupid white metal parts!
A perfect replica including a tapped hole for the grub screw, I wasn't expecting that so Jerry, cheers mate
Last edited by MarkofZollo on Sun Feb 03, 2013 5:55 pm, edited 1 time in total.
There is always a fifth Sherman
Re: The one that started it all!
Looks great. I know of several broken Asiatam idler arms. Thats not a bad idea to fix it! I did fint it a bit hard to adjust so I simply replaced the whole unit with Henntec track tensioners.

Re: The one that started it all!
smooth tiger you got there.
My idler broke to. Looked like a stratos inside so no wonder it snaped.
My idler broke to. Looked like a stratos inside so no wonder it snaped.
- Attachments
-
- Stratos_rull_Gjennomsiktig.png (102.99 KiB) Viewed 4801 times
Drammen Rock City
-
wibblywobbly

- Major
- Posts: 6396
- Joined: Fri Oct 17, 2008 9:30 am
- Location: South Wales Valley
- Contact:
Re: The one that started it all!
You know what I like about this build? It just demonstrates what can be achieved from a basic tank, spending the minimum, and getting excellent results through being inventive. It kind of makes me think about grass roots modelling, and that feeling you get when you have finally achieved that special something.
Excellent pics, and hope to see more of them.
RobG
Excellent pics, and hope to see more of them.
RobG
Tiger 1 Late
Panther G
King Tiger
M36 B1
Panther G
King Tiger
M36 B1
-
Steelhammer
- Corporal
- Posts: 251
- Joined: Sun Feb 12, 2012 8:04 pm
- Location: Birchington, Kent, UK
Re: The one that started it all!
I really like that - love the camo scheme and the detail. Those muddy boots are great.
Tamiya King Tiger (no options)
Taigen Full Metal T34 (winter)
Heng Long Challenger II (European camo')
Tamiya Tiger I full options (still in the box)
Taigen Full Metal T34 (winter)
Heng Long Challenger II (European camo')
Tamiya Tiger I full options (still in the box)
