The one that started it all!

User avatar
MarkofZollo
Corporal
Posts: 328
Joined: Mon Jul 05, 2010 6:16 pm
Location: Honiton, East Devon

The one that started it all!

Post by MarkofZollo »

It's about time I got my Tiger build/alteration up! :/
So I started with a HL Tiger with metal tracks, gears and sprockets that my girlfriend bought me for Chrsitmas '09.
It has been through a few mods over the years, here is a link to where it's earlier guises are already on-line;

http://www.rctankwarfare.co.uk/forums/v ... 188#p67602

I can safely say my modelling skills have come a long way since I started moding this tank, and as the Tiger improves so does my maturity.

Before these last mods and toward the end of my posts on it here it had the Asiatam lower hull put in with some pretty good 3-1 gearboxes.

Image

Anywho after finishing Uni I was trying improve the Tiger for a club meet but even weeks after I have more to do! :O
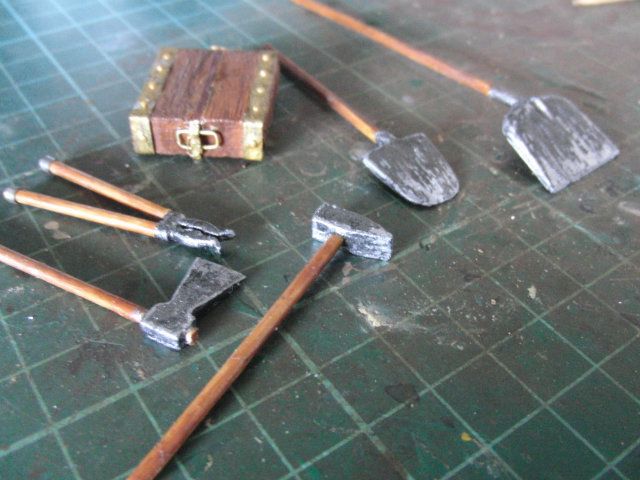
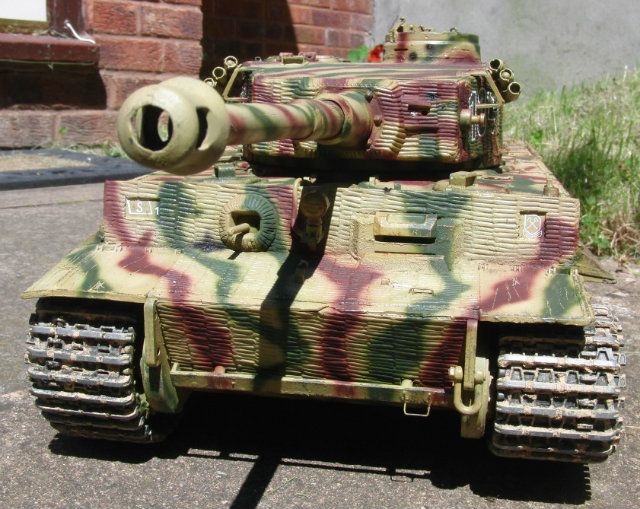
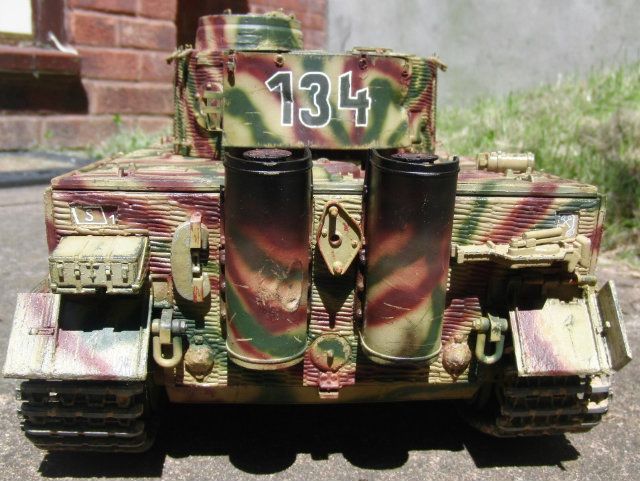
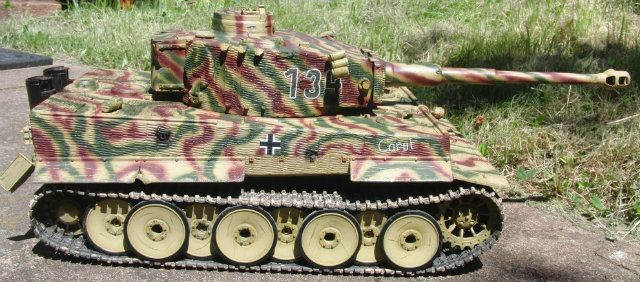
I wanted to depict a real or at least more likely Tiger in Normandy, so I got the latex zimmerit kit (on sale, thought would be cheaper than a few tubes of putty). Also I wanted to improve some mods I had done for cheap so got metal front hatches, wheels and idler, also brass engine grills.
With the DBC3 and DBU installed I decided to make a recoil unit, I was going to make another recoiling BB unit like my Sherman but in the end I accepted it might be a bit silly. And at that point I thought to get a scale barrel would remove any possibility of BB function.
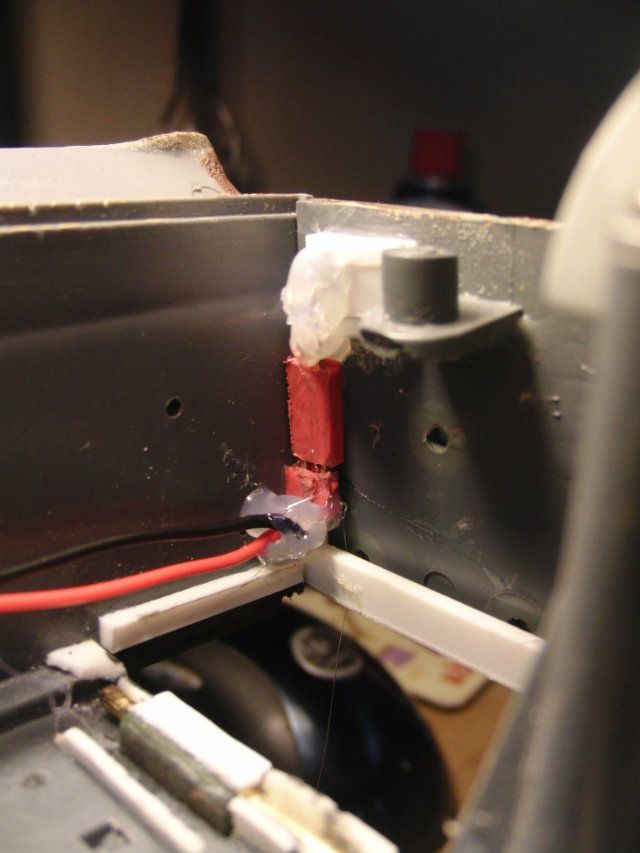
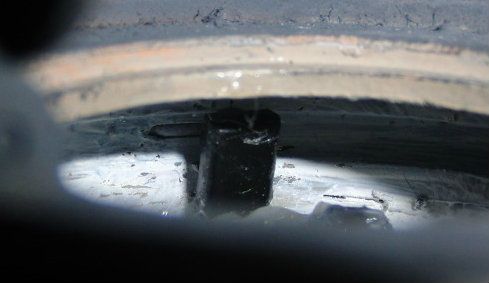
So with Dan's assistance I made this servo recoil;

Image

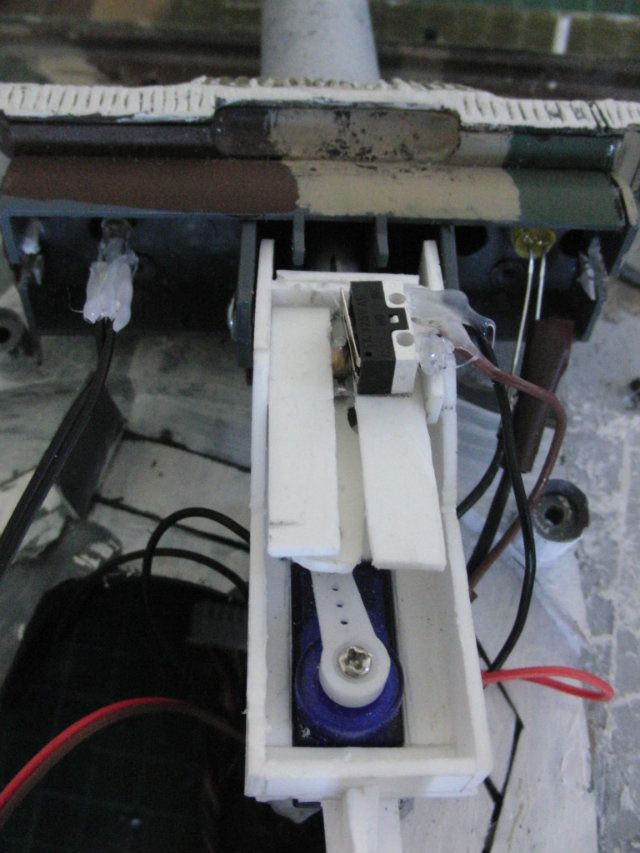
It may not be all that clear in the pic but it works great, the servo is a Turnigy 9g which I modded to remove the mechanical stop and potentiometer, though I have an idea now to put the pot back in with a resistor on one side to slow the cannon moving back (but not sure what resistor I would need on smoke outputs?).
An 8mm OD ali tube was CAd into the outer plastic barrel, this was the standard barrel with the lengthening bit on which made it too long but that is what recoils within the largest section of the barrel.

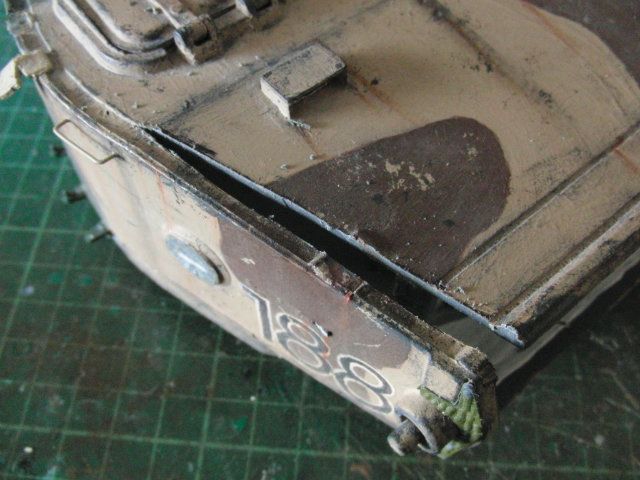
I also cut the mantel to closer to real dimensions;

Image

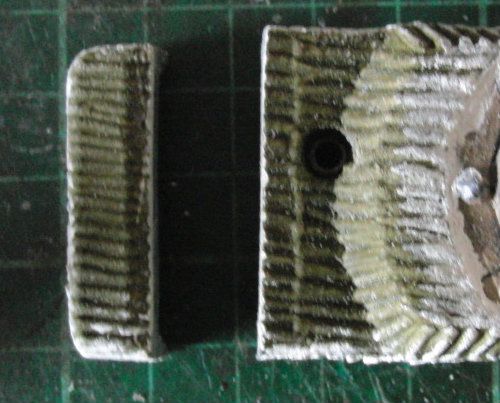
which allowed me to cut a chunk out of the turret to correct;

Image

I then moved the gun/mantel pivot point to the right place by drilling out the lifting lugs, then inserting a rod;

Image

(full length to make sure they lined up) after which I cut the rods and made a clip function on the back of the mantel.
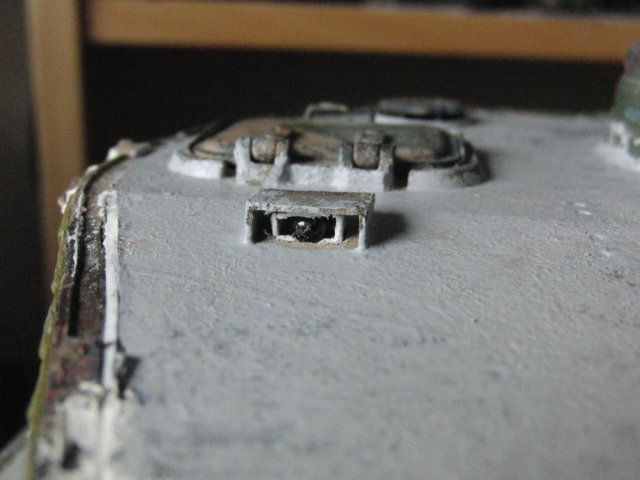
In the back I trimmed down to put the IR emitter, I basically attached a tube to the back of the right sight which has a bit of tube sticking out here;

Image

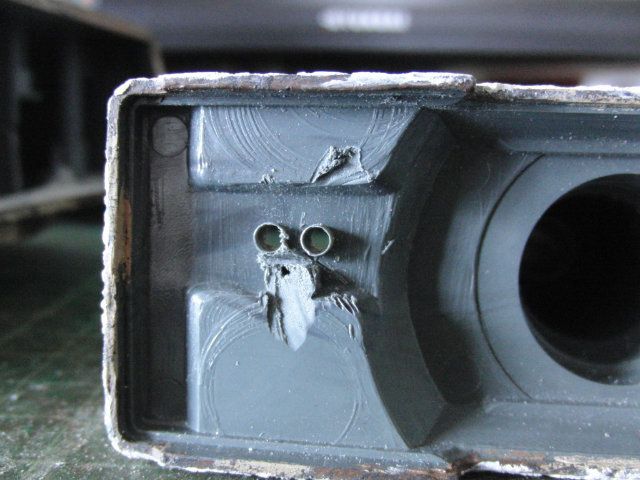
which happens to be 3mm OD, perfect fit for a 3mm ID tube, in tern perfect for the 3mm IR LED.
Looking at tanks_for_the_memory's build on RCTW;
http://www.rctankwarfare.co.uk/forums/v ... =22&t=8350

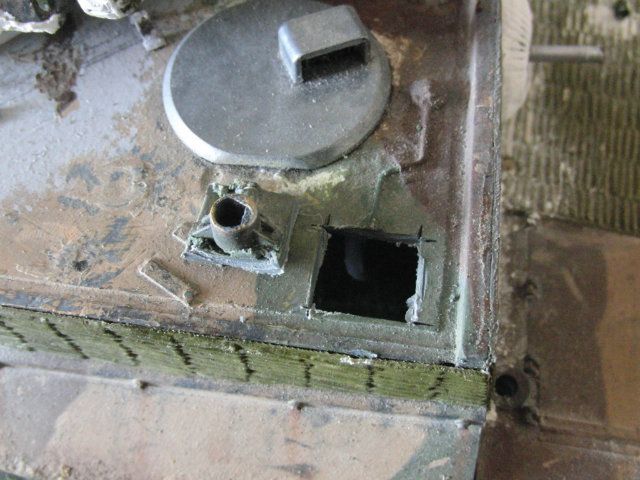
I asked about the hairband ball he used for the mg ball. He kindly sent me one and I adapted it to fit with a cradle to both allow its movement and keep it in place;

Image

The barrel is some 2mm brass rod that I turned to get the right shape, quite pleased how it came out :D
Sorry for going on lol :D more in a sec. Cheers, Dave
There is always a fifth Sherman
User avatar
MarkofZollo
Corporal
Posts: 328
Joined: Mon Jul 05, 2010 6:16 pm
Location: Honiton, East Devon

Re: The one that started it all!

Post by MarkofZollo »

Here it is on the prowl at the MVT meet with 'Dave's Battle Unit' on top.

Image

Image

I was very pleased with how it worked and battled but also learnt a lot about improvements.
The micro switch in the recoil system stopped working, was quite funny as the barrel was just going in and out...... as I commented to The Tank Man "Have you seen Idiocracy?" He nods, I say "look, my tanks the Dildozer" :haha: :haha:
So I replaced that, also improved the elevation, currently just inverted version of original, barrel weight is enough to keep it working.

Anywho annoyingly I didn't get a picture, but I have built an internal battle unit after talking with Nigel. I had wanted to do this after seeing his Tiger at Swindon last year but just wasn't sure about ambient IR light etc.
After Nige explained (that pic is the caption comp one of us :haha: :/ ) I set about making it.

Image

The left and rear IR receivers are in the cupola along with two hit LEDs. The forward receiver is in the loader periscope;

Image

The right one is in the pistol port.
There is always a fifth Sherman
User avatar
MarkofZollo
Corporal
Posts: 328
Joined: Mon Jul 05, 2010 6:16 pm
Location: Honiton, East Devon

Re: The one that started it all!

Post by MarkofZollo »

In trying to get the Tiger closer to mid spec (though I won't change the cupola! B| ) I decided to alter to the one central light.
I removed the lights and cut apart, at the very least I wanted to make them more to scale;

Image

I found the 5mm LEDs are so long they won't fit in a smaller housing, so I replaced with a 3mm one.
The LED was white, I painted it with some thinned yellow acrylic and rubbed the end a bit :O which gives a dull glow when on. The inside of the housing was all painted silver ;)
I cut the mount straight off the upper hull;

Image

I left the wiring for the old mount and the other side 'cos I like it, prob not accurate though!
Anywho made a new stand for the bracket, attached the bracket and wired it up;

Image

Image

Now the rear convoy light, I had attempted this before but couldn't get it working (a red LED in parallel to two white ones... :/ ) but now only one front light freed up some juice.
This time I did a white LED with colourised lens. Seeing the recent finding of green rear lights, I coloured accordingly (plus I think it looks nicer), drilled four holes for the light rather than one big one;

Image

The cover was made from the protective tube on the end of a 5/0 paintbrush, just halved it and added some cut up half rod that was a mount for something.
I made a little light box to spread the beam;

Image

This I attached the inside of the rear panel, and near it a jack so the upper hull and rear panel remain seperate.
This is when open;

Image

(sorry hull is upside down on desk) and closed;

Image

:D Light on;

Image

You can actually see four holes but camera won't pick them up, quite chuffed with that though, no tiny circuit board or complicated wiring, just Engineering :haha:

That's all for now until I can do more, maybe paint soon.......
There is always a fifth Sherman
User avatar
MarkofZollo
Corporal
Posts: 328
Joined: Mon Jul 05, 2010 6:16 pm
Location: Honiton, East Devon

Re: The one that started it all!

Post by MarkofZollo »

Clarifying the pic of my internal BU, no where near as neat as Nigels

Image

I have loads of floppy drive cable lying around so its getting a use. I probably use the hot glue gun a bit too much but I find it so easy to make a quick strong joint addition to stop any soldering coming loose.

There are two receivers in the cupola, the rear and left and they all cross over quite nicely. Here is the rear one just facing out the slit which is blu-tacked at the moment for painting;

Image

I pre-soldered all the joints before mounting so I know its all the right way but can only really tell if it works right at the next meet lol.
Anywho have been fitting HL high intensity flash which has been a pain with the servo recoil and lack of instructions but I got it to work using the 'full firing' mod, a diode across a couple points on the RX-18;
http://www.rccommand.com/guides/RX18FireMod.php
Problem now is its a bit temperamental on the flash and cannon fire (IR LED fire too then) on the DBC, the servo runs no worries. Also the track recoil goes too despite it being blocked, hmm.......

Oh yes and the RX-18 has gone nuts, when I flick the switch to 'on', with DBC connected or not, with receiver connected or not, the tracks randomly start moving at full speed. Sometimes both one way, or opposite directions or just one on its own. Sometimes not at all and no longer responds to input. Switches between these so not like a bridge in the wiring somewhere, acts like it has major interference but even with no receiver connected?

Anyway a final note, painting has started;

Image

an odd looking scheme I know but the idea is this tank perhaps has had parts in Panzer grey in the past, been resprayed in hull red in the areas that have had attention (zimm etc) before the final scheme applied and synchronised with the existing colours. There are some bits I need to redo and some that need red..ing before sealed, hair sprayed and then dark yellow applied.
I am curious though what colours others have used for the red base coat, seems mine is a bit brown??
There is always a fifth Sherman
User avatar
MarkofZollo
Corporal
Posts: 328
Joined: Mon Jul 05, 2010 6:16 pm
Location: Honiton, East Devon

Re: The one that started it all!

Post by MarkofZollo »

So yeah stuck with electronics, I cant get the recoil or flash to trigger, but the flash goes off when the tank is switched off?

Pics today starts with the exhausts, using a method in the Osprey book modelling the Tiger 1. Start with painting them pinkish (after texturing);

Image

Put spots of different browns on this (smaller spots than this are probably better);

Image

Then with pastels or pigments fade them a bit, also blends the colours;

Image

and finally add in some smoke marks, pastels were used in the book but I just airbrushed it on;

Image

I think they look really good, the pigments help give a textured layer of colour. Looking at 131 up close at tankfest this method is pretty close!

I have prepped and sorted rear panel as a test of the hairspray technique (first time :O ). First it was primed red/brown, then sealed nicely with Klear/Pledge (flows nicely through airbrush 8| ), once dry a layer of hairspray was airbrushed over.
Left for a couple mins then sprayed dark yellow on and left to settle. Then using water to wet through the dark yellow little bits were scratched away to give this;

Image

I didn't want to overdo this, but I found annoyingly It is not great on the latex zimmerit, this method just removes all paint on that including whatever the green colour is they come in >:< .
Worked nicely on the other plastic parts though.
Here it is after the camo added;

Image

loosely following this (thanks again septon!);

Image

Some nice smokey stains as per 131 reference added, then put back together.

The upper hull continued, it looked like this before hairspray stage;

Image

thankfully a bit darker after varnishing. I then loosely followed again the scheme above and came out with this;

Image

i am liking it on the side I copied but not so much the rest, I am rubbish when it comes to making up the pattern! :S :/
Just need to water down and remove the odd scuffs and scrapes and its done....well until the other weathering stages.....
Cheers folks
Last edited by MarkofZollo on Thu Jan 01, 2015 9:11 pm, edited 1 time in total.
There is always a fifth Sherman
User avatar
MarkofZollo
Corporal
Posts: 328
Joined: Mon Jul 05, 2010 6:16 pm
Location: Honiton, East Devon

Re: The one that started it all!

Post by MarkofZollo »

All I can say to express my current mood is f**k, s**t, a**e, c**k and t*ts!

Image

Realised after painting the box on the back of the Tiger separately that I may have been using 'Desert Yellow' (XF-59) instead of 'Dark Yellow' (XF-60), makes sense as the desert pot is nearly empty and both dark pots are nearly full :/ :{
So the turret is the more correct colour I intended to paint it. I quite liked the upper hull until I compared to turret.
I had just finished upper hull too....
So opinions people, do I keep upper hull slightly wrong colour and paint the rest as intended, do I paint all with 'Desert Yellow' like the upper hull or do I repaint that in 'Dark Yellow'?

On a more positive note here is my more detailed version of the box on the back with my more detailed jack block too;

Image

It is not all that obvious/clear in the pic but I made representative clasps and buckles as per pics of 131.
The rear of the jack block with the nearly finished revamped tools;

Image

Damn damn damn!!
There is always a fifth Sherman
User avatar
MarkofZollo
Corporal
Posts: 328
Joined: Mon Jul 05, 2010 6:16 pm
Location: Honiton, East Devon

Re: The one that started it all!

Post by MarkofZollo »

I like the work I did on the hull but it had to change. It was in 'Desert Yellow' which is too orange and part of the point about spending so long on this bugger is to get it correct (at least how I want it :D)

Looking a bit better now;

Image

Only problem is I realised now there was some 'Olive Drab' contamination in the hair spray I used to get the chipped paint effect. That has made the 'Dark Yellow' on the turret appear more green....so.......respray of that needed too :{

Getting there though, than back a bit, then forward, then back more, then forward again....
There is always a fifth Sherman
User avatar
MarkofZollo
Corporal
Posts: 328
Joined: Mon Jul 05, 2010 6:16 pm
Location: Honiton, East Devon

Re: The one that started it all!

Post by MarkofZollo »

So I fully resprayed the turret and hull, done the wheels now too, and this is how it looks;

Image

Image

Image

Image

I need to sort the colours on the front, too much yellow anyways. I may patch the colour lines out rather than having just thin lines, make it seem a bit more random.
Decals on way from US, hand painted looked OK but I couldn't get the symbol on front correct (below;)

Image

so I decided to get the Elite Armour set.
Once that comes and is settled I will do the washes, streaks and dusting to finalise the weathering :D
Sorted recoil and flash and due to my genius :D :crazy: have managed to get it working without needing the smoker plug, so I can use my smoke unit again, yay! 8|
There is always a fifth Sherman
User avatar
Red Devils
Staff Sergeant
Posts: 872
Joined: Sun May 06, 2012 2:38 pm
Location: Edmonton, Alberta, Canada
Contact:

Re: The one that started it all!

Post by Red Devils »

Well done,that beast is coming along nicely.
The Princess Patricia's Canadian Light Infantry
First in the Field - Since 1914.
User avatar
MarkofZollo
Corporal
Posts: 328
Joined: Mon Jul 05, 2010 6:16 pm
Location: Honiton, East Devon

Re: The one that started it all!

Post by MarkofZollo »

Lines patched out a bit, looks way better IMO, added decals and hopefully it is remotely accurate or at least acceptable;

Image

The '1' on the left side is a little low but I couldn't get it to go up any further unfortunately.

Image

The '4' was a point of discussion, mainly about shape but from the other tanks with a four in the number in the 101 this seems quite close (at least in terms of the real pictures I can find).

Image

I am hoping to name all my tanks after the ladies in my life :D . The Tiger being one of the toughest tanks on the battlefield, able to withstand a lot of punishment and still carry on (set aside the mechanical issues and progression of other designs for now :/ ) I decided to name after my Mum;

Image

After all the radiotherapy, chemotherapy, stem-cell transplant, and still with a titanium plate and pin recently put in her leg she is looking healthier than ever :D
Hope you guys like 8| Weathering to come...
Last edited by MarkofZollo on Sun Aug 12, 2012 11:47 am, edited 1 time in total.
There is always a fifth Sherman
Post Reply

Return to “Tiger I”