Sturmtiger

User avatar
Crispy
Sergeant
Posts: 566
Joined: Wed Oct 29, 2008 6:59 pm
Location: Redhill, Surrey
Contact:

Sturmtiger

Post by Crispy »

This started as a Heng Long pre smoke & sound Tiger 1 which I got from ebay over 4 years ago. All or nothing movement, no fancy digital tricks and the airsoft gun was naff at best. I wanted to keep the build as cheap as possible as I'm on a tight budget. So decided to run it on a 2 channel controller with ESC's to get that smooth digital movement control and be able to creep around slowly. I've always been intrigued by the Sturmtiger so it seemed the perfect opportunity to build one onto my old Tiger hull, just like the real thing. I'd also seen a rather nifty zimmerit effect on a 2nd hand tank Rocketman had bought and wanted to give that a go.

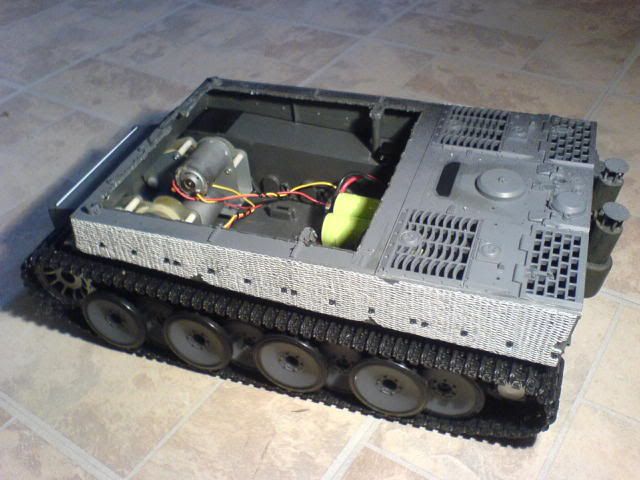
I had already stripped out the Tiger hull some years ago when I was thinking to build a Jadgpanther with it. I'd left just the motors and gearboxes inside with their + & - wiring.

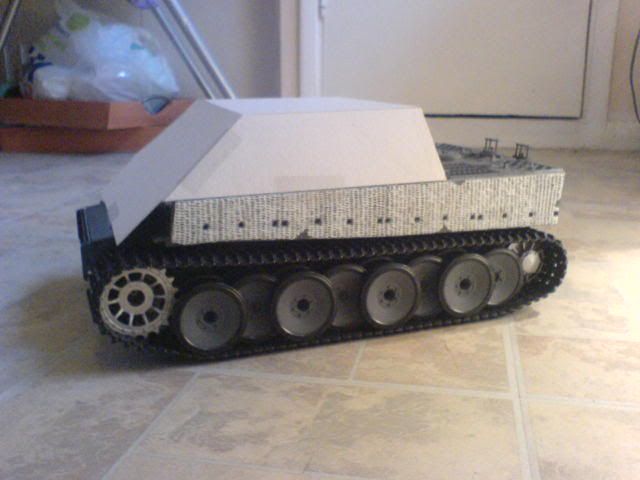
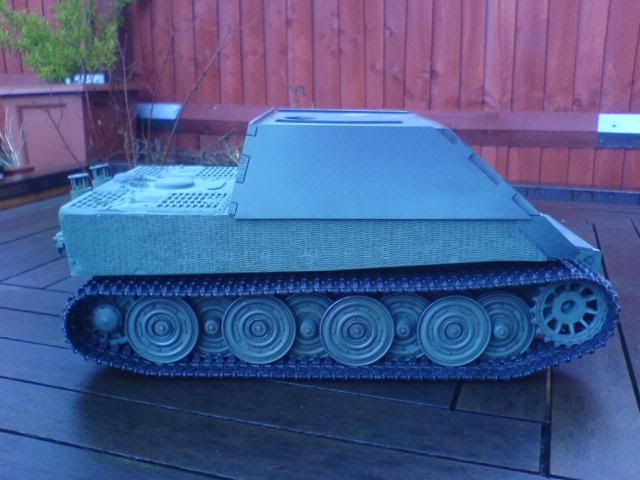
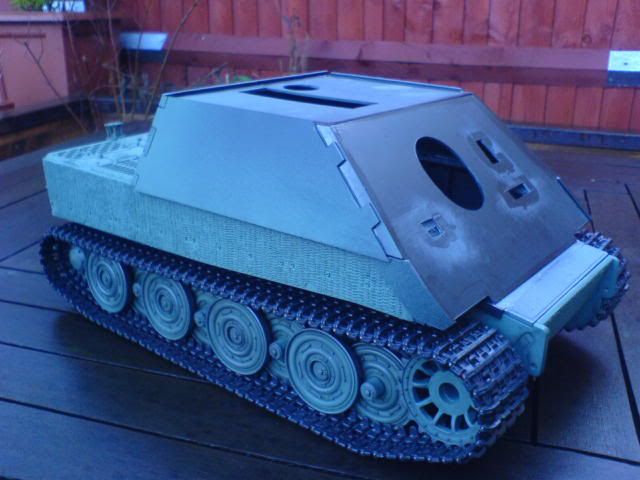
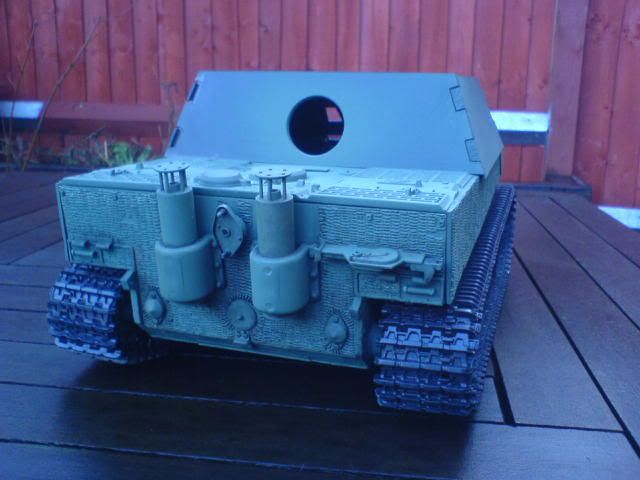
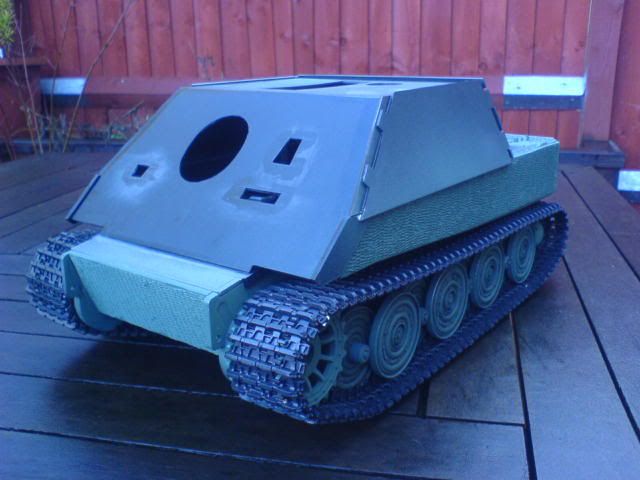
First thing to do was find some reference pics of the real thing. Then I removed the frontal armour and sections that would've been cut off the real tank. Next off came the air filters and pipework and i decided I wanted to remove all the mud guards from the tank to make it standout even more from the standard HL Tiger. I drilled through all the bolt heads holding on teh side guards so i'd have a reference to where they were on the hull. Once I'd removed those unwanted bits & pieces, this is how it would look if I kept the turret on.

Image
Image

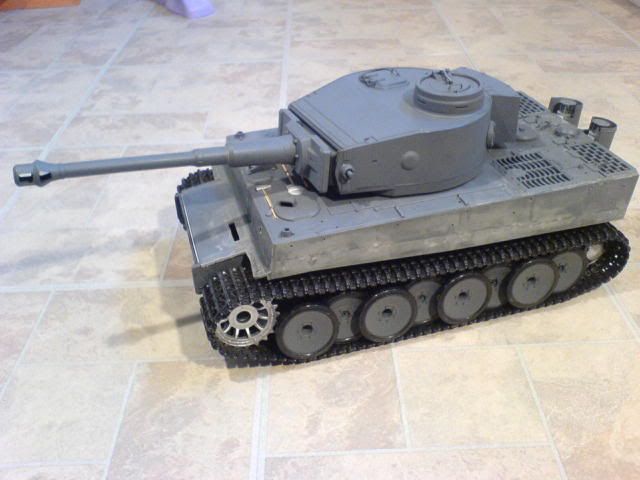
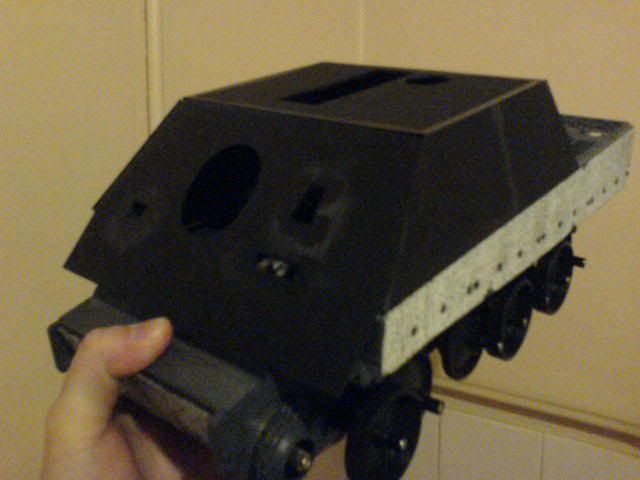
BTW that Turret will hopefully end up on a wrecked hull for the battlefield once my other projects are sorted.

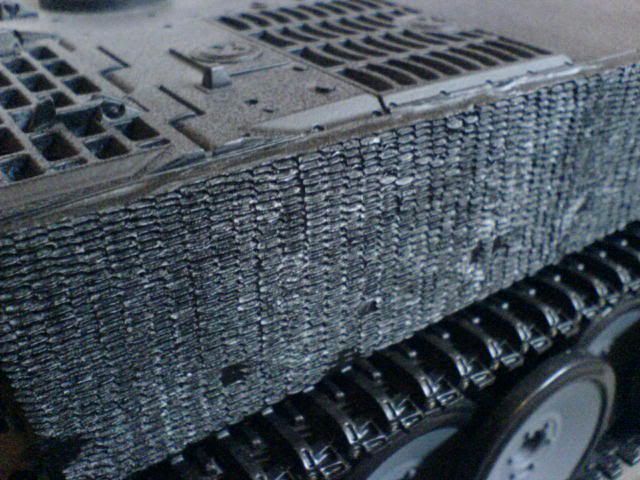
Then I tested the zimmerit effect on a few scraps from the tank. Basically it involves gluing a thin layer of plastic card to the tank hull and melting the zimmerit pattern into this with a flat head soldering iron. I wont repeat the whole process here, see this thread for a better description;(http://www.rctankwarfare.com/Forums/ind ... 684.0.html) Thanks to all those who replied to that thread, its nice to get other peoples opinions when doing something so drastic to your tank.

Image

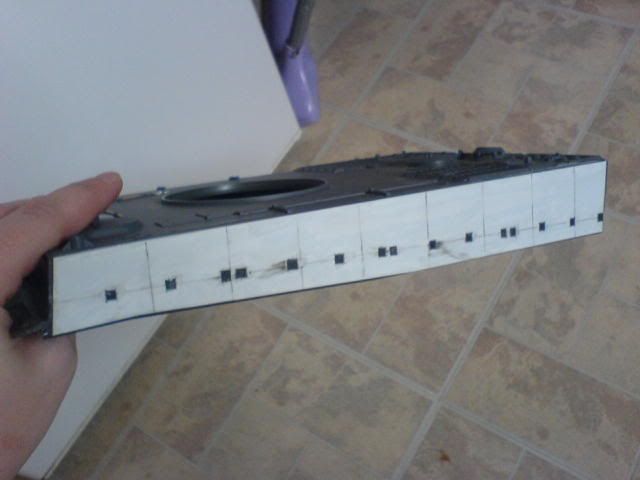
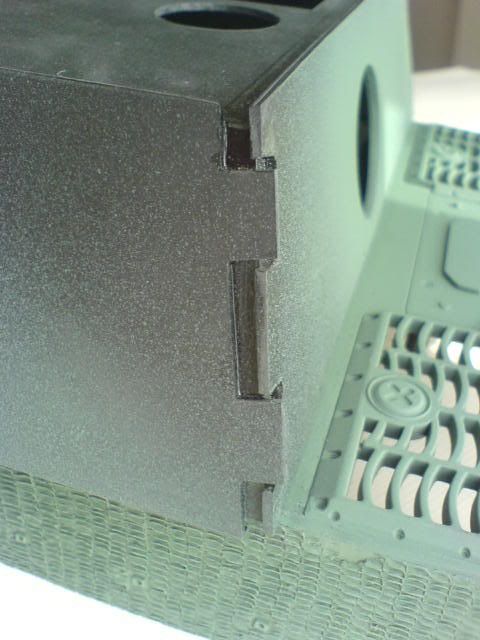
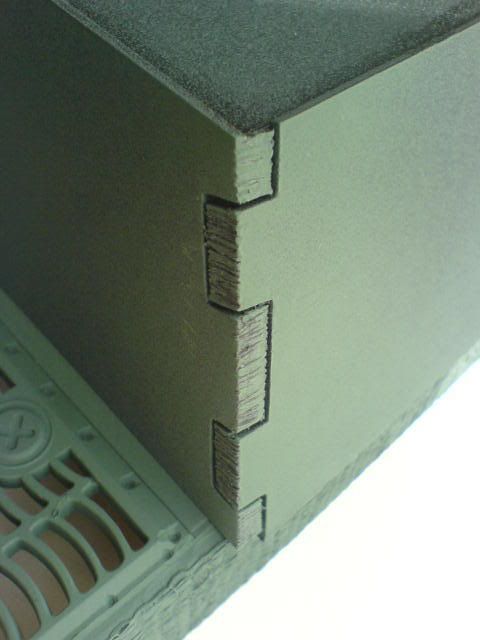
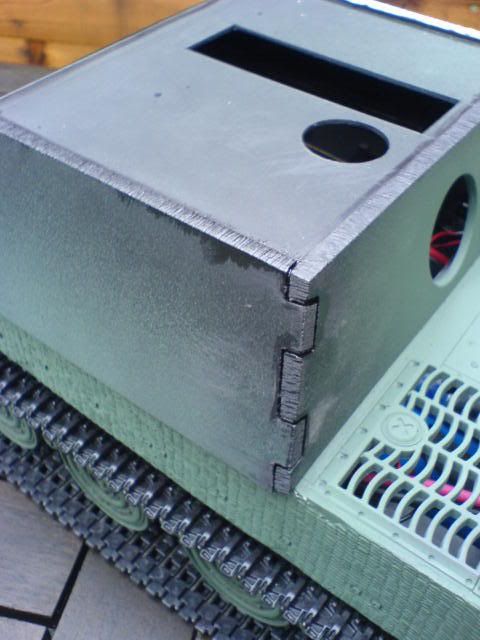
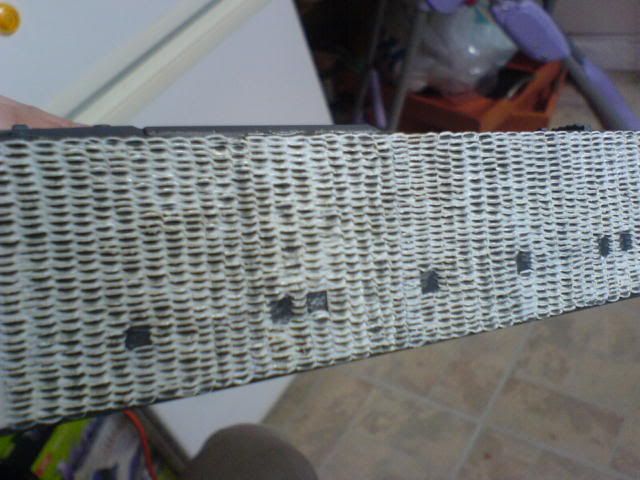
The verticle line are to help me keep the zimmerit pattern in line without being too uniform and the cut out squares are where the side guard bolt blocks will be added.

Image
Image
Image

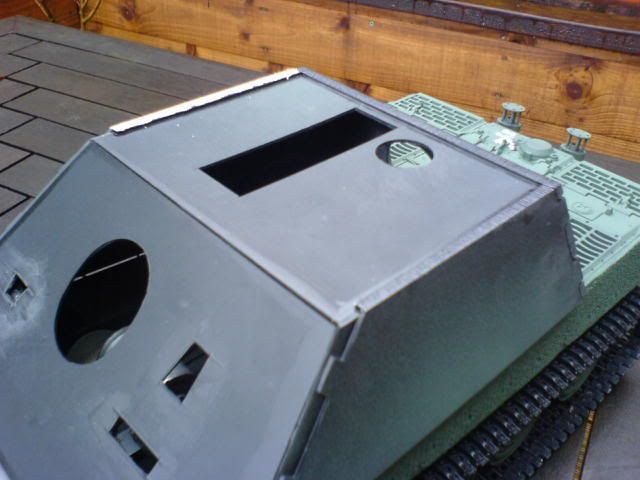
Now it was time to cut off the top deck which I'd been putting off for a while as there really was no going back from this point. Being in the middle of the deck I wouldn't be able to use my cutting disc in the dremel as normal. But having got use to the soldering iron with the zimmerit I decided to cut the section of deck off by melting around it, which worked really well and caused much less mess than the dremel would have. This is actually a very easy way to remove awkward bits from your tank quickly and easily, just remember to be careful with the hot iron and open a window as it can get a bit smelly. I also test fitted the electrics and checked the gearboxes, motors and ESC & radio gear worked fine. It a quick job to turn the right stick on the controller 90 degrees so that they both move up & down.

Image
Image
Last edited by Crispy on Thu Jan 22, 2009 11:26 am, edited 1 time in total.
You aint gettin me on no plane fool!
User avatar
Matdragon
2nd Lieutenant
Posts: 2994
Joined: Sun Jul 20, 2008 9:58 pm
Location: United Kingdom
Contact:

Re: Sturmtiger

Post by Matdragon »

great work mate :D :D  keep it up!! :D :D :D :D ;D ;D ;D
BREL
2nd Lieutenant
Posts: 2473
Joined: Tue Jul 22, 2008 9:10 pm

Re: Sturmtiger

Post by BREL »

looking good as Matt says keep it up
User avatar
Crispy
Sergeant
Posts: 566
Joined: Wed Oct 29, 2008 6:59 pm
Location: Redhill, Surrey
Contact:

Re: Sturmtiger

Post by Crispy »

Thanks chaps. Im not the fastest typer  ;D

Next up was to start on the super structure. In the past when i've made large scratchbuilt models i've sourced a 1/35 scale model and used it to get the measurments and proportions right. This time I didnt really want that outlay and had found some very good reference pics of the net, so I sat down and compared the dimensions of the photos to the exisiting parts of the HL Tiger, and worked out the size & shape of the superstructure on cereal packet cardbord first. A quick test fit and I was happy with how it looked.

Image

Note: I'd used cellotape to hold the cardboard onto the Tiger hull for this test fit. It held fine on the unmodified plastic hull but wouldnt stick to my zimmerit cotaed areas, so i must've done something right there ;)

I'd planned to build the superstructure in two layers of 2mm plasticard. Doesnt sound that thick but this is the big stuff and can be a little awkward to cut out detailed shapes. Fortunately the Sturmtiger armour plates are mostly big straight cut slabs of steel. The first layer was cut out and test fitted before glueing in place with Humbrol liquid poly glue. As this layer would eventually be covered it didnt have to look too neat and tidy, its mainly to establish the form and gives me a surface to glue the outer detailed layer too.
I also cut into it the hatchways and other openings to add a bit more details later and allow me to have working hatches, useful for hiding switches behind.  My pics of this stage are pretty poor im afraid :-[

Image

I'd also ordered the metal late Sturmtiger wheels & metal suspension arms and their strengthening supports for the HL Tiger hull. So it took a little brute force and a lot of swearing to get the old plastic HL wheels off. You need to be careful when doing this as you will reuse the inner set of plastic wheels with the metal upgarde set. Also i found the wheel axles that come with the upgrade set were way too short to properly hold into the metal suspension arms, so i reused original HL ones. If you're planning to do this modification to your tiger i'd suggest filing down the grooving on HL axles a little or test fitting them into the swing arms first before putting them on the tank as they are a very tight fit and need hamming in. Not a very delicate procedure and i stupidly didnt think to try this until i was half way through fitting them. I also took the time to add a little silicone grease to each axle and fit a washer between the wheel and the metal swing arm.

If you follow the instructions, due to the nature of the design you have to hammer them on after the arms are fitted to the tank. I was having to hit it so hard I shook loose one of the plastic exhaust pipes I had previously glue on, it loosened most of the screws in the hull too ::) I also managed to miss a few times, catching the same finger twice :-X and cracking a couple of the plastic HL roadwheels!

Most unlike me I DID think to give them & the lower hull a quick coat of Humbrol spray dark green (which isnt very dark but is usefully pretty close to Field Grey) as we cant get Tamiya spray cans in the UK anymore  >:( and gave them a wash of dark brown & black artist oils to start off the weather thay'll get later.
You aint gettin me on no plane fool!
User avatar
Crispy
Sergeant
Posts: 566
Joined: Wed Oct 29, 2008 6:59 pm
Location: Redhill, Surrey
Contact:

Re: Sturmtiger

Post by Crispy »

Finally got a chance to start on the outer skin for the armour this weekend. After a lot to working out in my head i decided on the best way to get the look i wanted. Obviously the armour thinkness isnt the same as that of the plastic card i've used. I tested in cardboard first how the inter locking armour will work, refering to reference pics and a few model kit reviews on the net. The tricky bit was taking into account the thickness of the plastic card and the gap that will be filled with milliput weld seams. Once I had the cardboard correct i used it as a template to mark and cut out the 2mm plastic card and started with glueing the rear armour plate to the superstructure. Then added both the armour plate sides and let it set. This way the front armour plate will just lay onto the superstructure and the armour thickness made up by the filling on the sides.

Here's how the rear inter locking corners looked before adding the imitation armour thickness.

Image

Once dry the armour "width" inserts were added, filed down in line with the outer edges and then i added the torch cut effect by scraping the edge and sharp end of a file over the plastic card edges and brushing with liquid poly glue.

Image

The above has had a coat of the Humbrol Dark Green and had a few more scrapes from the file to improve the torch cut effect.

Here's a few pics i took yesterday of the full tank showing the metal wheels.

Image
Image
Image
Image

And here's the torch cut effect on the side armour plates i did last night.

Image
Image

And thats as far as I've got with it. Im really happy with how its turning out.

Not much left to do now, just the frontal armour, main gun, mantlet, mechanism to hold the gun, hatches, drivers vision apeture and gun sight, crane, sort out the electrics and stiffen the hull..... ok, maybe quite a bit more ::)
You aint gettin me on no plane fool!
User avatar
Woz
Warrant Officer 2nd Class
Posts: 1320
Joined: Thu Oct 23, 2008 12:06 am
Location: UK
Contact:

Re: Sturmtiger

Post by Woz »

" I also took the time to add a little silicone grease to each axle and fit a washer between the wheel and the metal swing arm"


You'll have to put washers on the drive sprocket and idle wheels or the tracks may not line up correctly.

It's looking good so far.
User avatar
tiger205
Warrant Officer 1st Class
Posts: 1800
Joined: Thu Oct 23, 2008 11:21 pm
Location: southampton

Re: Sturmtiger

Post by tiger205 »

thats a nice build crispy, i especially like the way youve done the interlocking armour, when do you expect to have her finnished?

              Tony 8)
Image

"Er, der kämpft und Lebend davonläuft,
Lebt um einem anderen Tag zu kämpfen".
User avatar
Rocketman
Sergeant
Posts: 604
Joined: Tue Sep 30, 2008 5:17 pm
Location: Surrey Hills
Contact:

Re: Sturmtiger

Post by Rocketman »

Im sorry can I ask where my little brother has gone? He never gets this far with projects ???

Looking very cool bro
Dorking First Light Foot and Mouth (Mechanised)
BREL
2nd Lieutenant
Posts: 2473
Joined: Tue Jul 22, 2008 9:10 pm

Re: Sturmtiger

Post by BREL »

nice work so far Crispy, as an ex wielder of the Gas axe I like the flame cut effect that you have applied to the edges of the plasticard

(got out of demolition It's too effing dangerous, the company I worked for took too many short cuts and didn't allow enough time to prep buildings)
User avatar
Crispy
Sergeant
Posts: 566
Joined: Wed Oct 29, 2008 6:59 pm
Location: Redhill, Surrey
Contact:

Re: Sturmtiger

Post by Crispy »

Thanks for that Brel, I wasnt sure if I'd over done it a little so its good to get a nod from an expert  ;D

Yeah Rocketmen, well its a new year resolution isnt it - to actually finish the projects I start  ::) It'll be a first for me.
You aint gettin me on no plane fool!
Post Reply

Return to “Tiger I”