HL King Tiger Build So Far (March 23 2014)

Marc780
Corporal
Posts: 495
Joined: Wed Mar 05, 2014 1:34 pm

HL King Tiger Build So Far (March 23 2014)

Post by Marc780 »

firstly thanks to all the kind members who so patiently answered their opinions and helpfully answered my questions, often with excellent replies that they obviously went out of their way to make.

Some bit about my experience with model tanks might fit the discussion and explain my approach, which is going to be different then some peoples. I started building model tanks in the mid 1970's in high school. Based on reading history, specifically much about tanks and warfare of world war 2 also tied into that, I found the German super tanks fascinating and still do. Most of my models were monogram 1/35 scale, so many Mark IV's in all their variants, the sturmgeshutz, the shurtzen one, and so on. A Sherman or two but they're all the same after all. And there's no comparing this shockingly weak battle taxi to a German tiger or panther-not even in the same league. Also a 1/24 Panther, a Jagdpanther and a few others, none of them motorized back then...the only ones who made those were Tamiya and then as now, cost 3 to 5 times what everyone else's does. I'm sure they are great model tanks for $1000 and up but the fundamental issue THEY ARE MODEL TANKS! That is how much i paid for my first car...The day i hit the lotto they're on my list and i'll buy everything they make. Enough said about Tamiya.

I thought about the Heng longs for several months before actually getting this KT, from Hobbytron. The only other tank i seriously considered was the tiger and the panther also considered the 1.24 tiger as well....but for the price difference i decided to splurge on the king of all the panzers as there was no more powerful tank fielded by any army. For once twice as much cost does give twice the product, and a lot to work with to make a fairly impressive model.

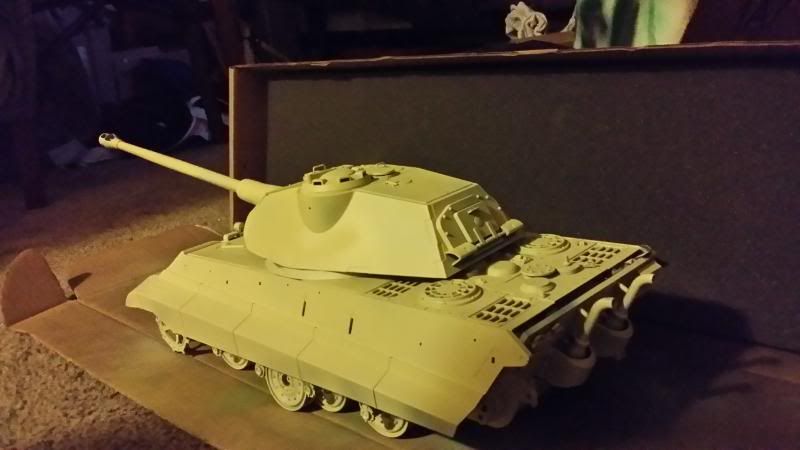
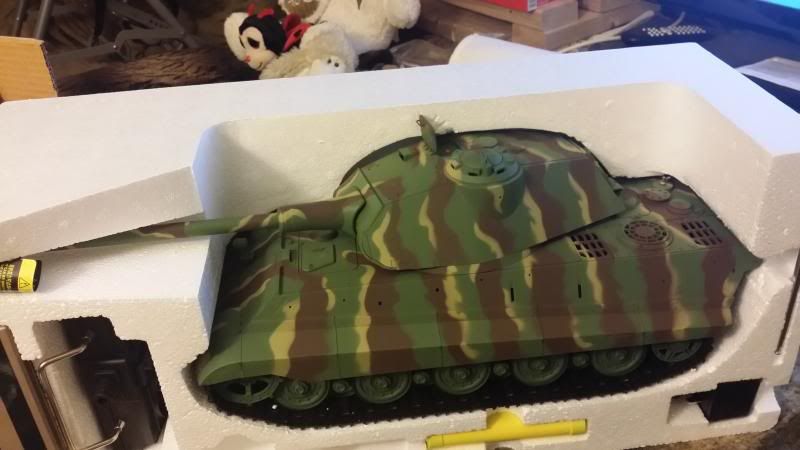
Hobbytron sells "refurbished" units on occasion for cheaper, all of them on back order, got tired of waiting and just bought it finally. It cost me $150 and turned out NOT to be the smoke and sound model. I suppose it was my fault, assumed they all came with it, but S and S were something i wouldn't use and would have just removed anyway as these features are not for me. Here's the unboxing of the jewel in the rough (or however it ultimately turns out to be)
Image

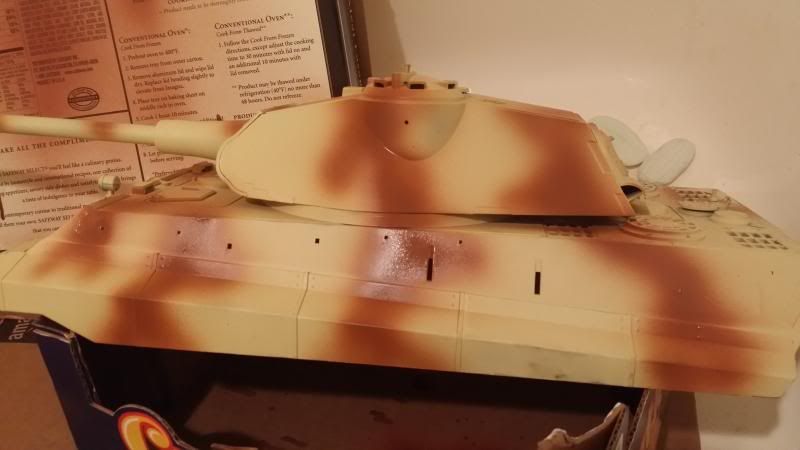
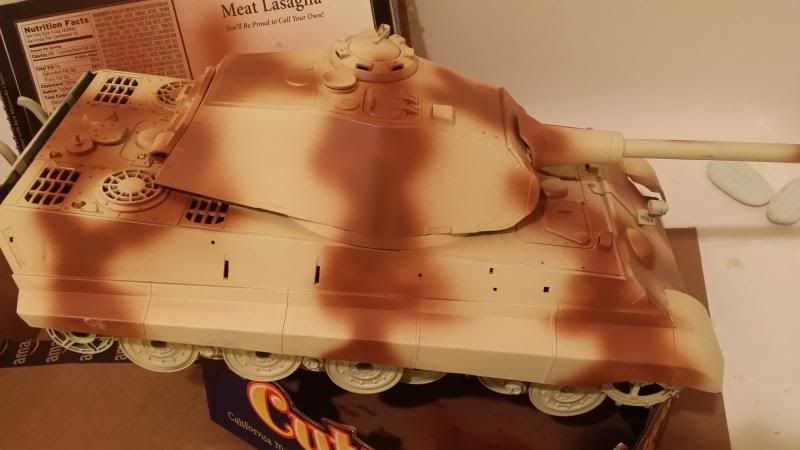
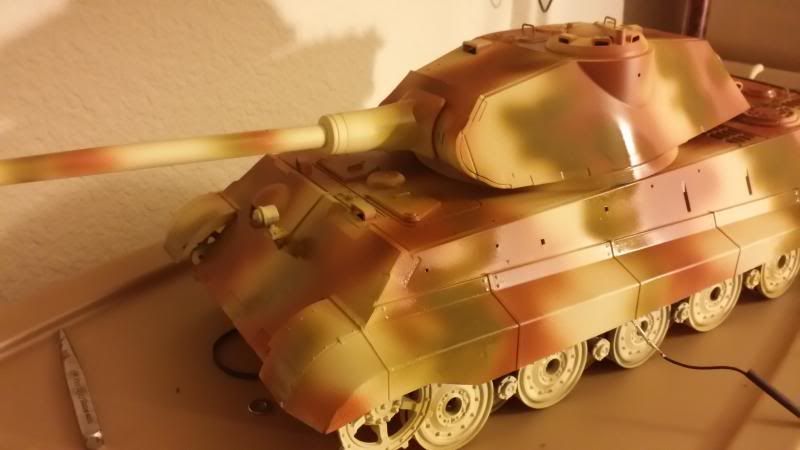
The camoflage from the factory is actually not bad and probably resembled some wartime KT painted somewhere by somebody. Even so I knew it was getting repainted and modified as that's more then half the fun-reengineering!
By the way the silly stuffed animals in the background are not mine, I'm not some kind of git, they are my wife's-she can't stop buying them, even when i tell her to quit buying them for me she keeps buying them, the uglier they are the better she likes them. But I guess she sees my tank the same way?

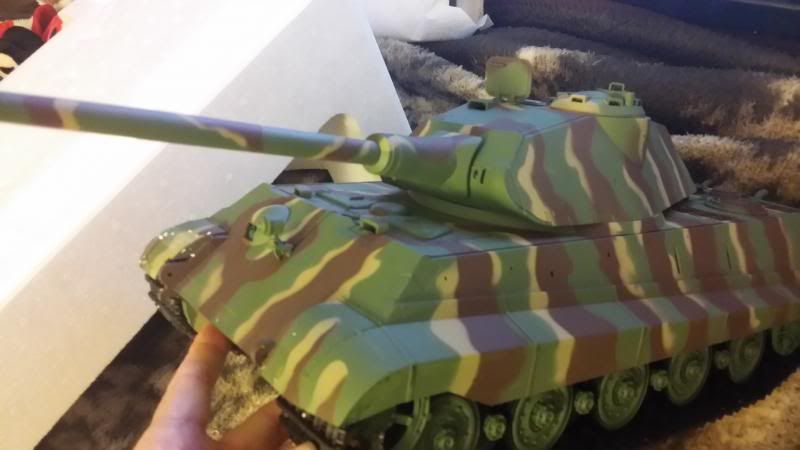
I would show this picture to people, on my phone to show them how big it is, as that's always the first question they would ask. (Hands for scale)
Image

I considered zimmerit, I had done it plenty of times in the past, using "spackle" from the hardware store, on many tanks and did like the effect. However I decided to just forego the zimmerit this time as things were getting busy enough already with this tank. I liked the idea of the glue on zimmerit film that is found online...however the price being 1/3 the model itself, maybe on the next tank! I decided to concentrate on function first. The details i see on many of the amazing tank buildss here, almost boggle the mind, and I admire the people who have the ship-in-a-bottle patience and hand/eye coordination it takes for these many small details that make the model more then just a toy. But i for one am far too ham fisted to try most of these add ons! So i'll leave those to the master modelers who are much better at such detail then I am.

The first thing i decided to do was install brass bushings in the wheels. I was tempted to just leave them be, however, almost half of them stuck and barely turned and the tank had trouble turning or doing anything except travelling in a straight line. So i put bushings in all of the road wheels i could remove. The inner road wheels turned out to have their caps glued on at the factory, i found this out after prying, almost breaking then finally cutting off the flange of one of them, to reveal the hex head axle. I decided to leave the inner road wheels be after this and perhaps they might free up with a drop of the silicone oil. Hopefully I won't be touching these wheels again unless I decide to get the steel wheels some day.

This was simple, I took an axle, and a wheel to the hobby shop and found some brass tubing that fit and seemed like the wheel could be drilled out to fit. (A dremel tool is almost essential for this step). I found the easiest way is to dremel off a 2 to 3" section of tubing and just glue that inside the wheel, leaving the excess sticking out. When dry, dremel off the unwanted tubing. My other way, of sizing and cutting the bushings FIRST to make them fit was fiddly and awkward next time i'd do the "road wheel on a stick" approach with no fooling around with burnt fingers from grinding brass, and cuts etc!

On reinstalling the wheel, using the stock axles, I have to add a washer to the axle on the inboard side/ It's almost mandatory as most of the inner and outer wheels are touching each without a washer to space the outer wheels just a little bit.

Image

The last step, grease the axles (i used silicone grease i have for my airguns, it won't attack the plastic if it should get on it). Silicone shock oil from the R/C store also works-I tested it on my test piece (for airbrushing later) and left it on overnight to see what effect this oil would have on the paint and plastic. It just dripped off, no effect on the paint. Good! Will be using it for the road wheels i can't remove easily.

Then I started priming and painting, starting with the road wheels. I got a can of "Dunkelgelb" made by the "Plastic soldier" company in England and bought from a US hobby shop online for $20. It might in fact be historically accurate, but came out too green for me since it will be the base coat. Here's what it looked like

Image

I decided to just go with the tried-and-true armor sand, i got two cans of Model master "modern desert sand" along with the brown and green combo colors, for airbrushing later.

First i lightly sanded the old finish, wiped off with a tack clothe (paper towel really) then primed. Used grey primer- not the more historically accurate red primer- due to color bleed through almost certain to happen with the sand base coat.

Image

I had to reconnect the turret power and traverse it several times, in order to paint the top of the hull completely. The large turret masks many areas on the deck from the paint when left in 12 o clock, and even at 3 o clock positions.

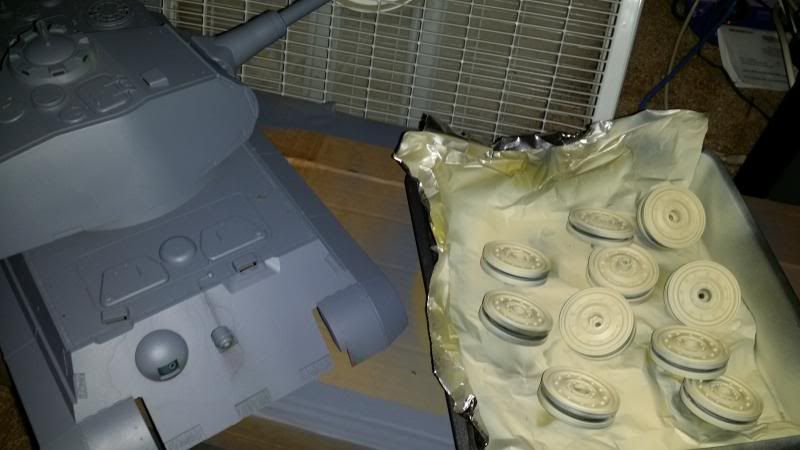
Here's upper hull primer drying along with a tin of freshly painted wheels in sand color.
Image

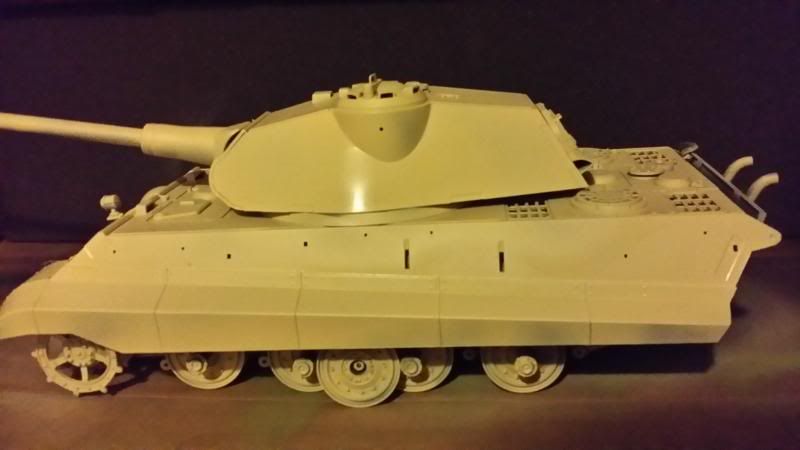
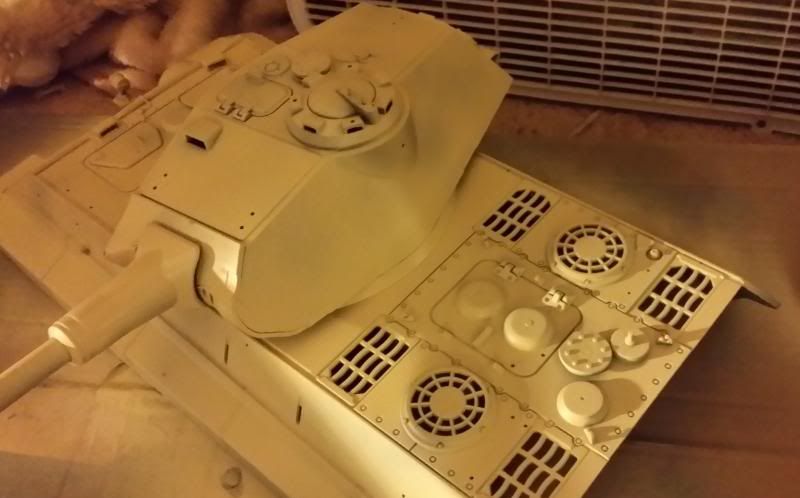
Now i've laid down the base coat of armor (desert) sand on the upper and lower hulls. Model master is enamel, did not want acrylic (a tank finish that isn't water resistant?) and i noticed the paint was still somewhat soft even after 48 hours. And naturally you dont dare put any kind of heat on it or even leave it in the sun to dry-that's asking for trouble isn't it. So I'm letting the enamel dry, the longer the better, i'd say 2-3 days at least.

I'm thinking i didn't let the primer dry long enough before applying the base. Primer is thick, and covering it with another coat of something else just hours afterwards, is not going to help it dry any faster.

Here's the base, that's what i'm up to now
Image

Despite the appearance in the photo, the paint is not glossy in the least.
Image

Image

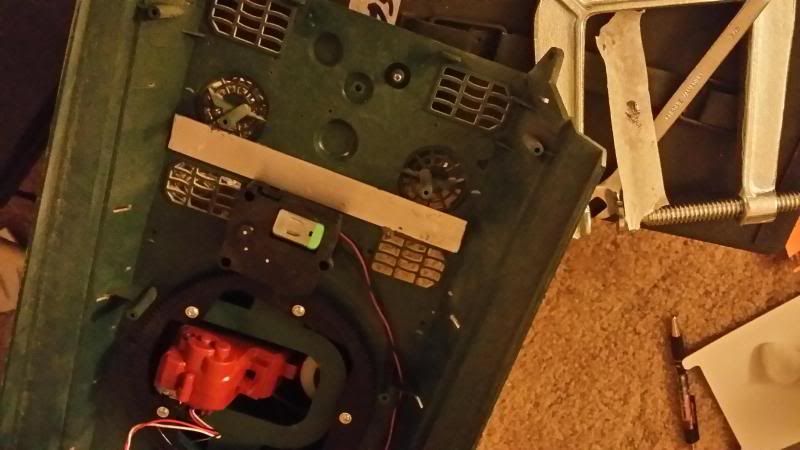
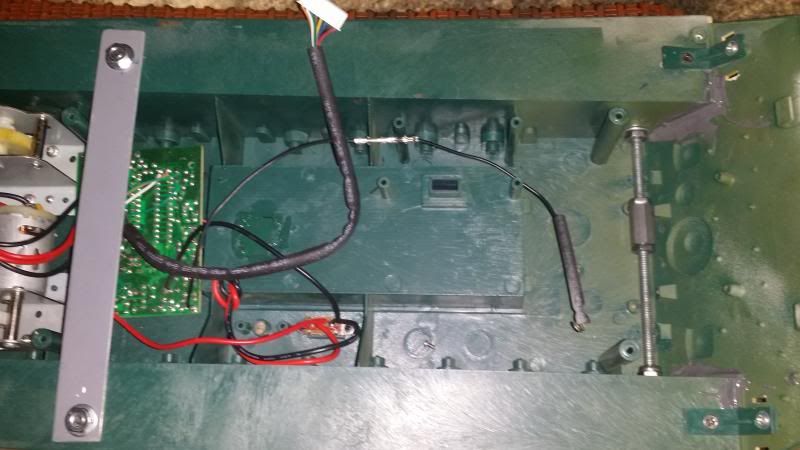
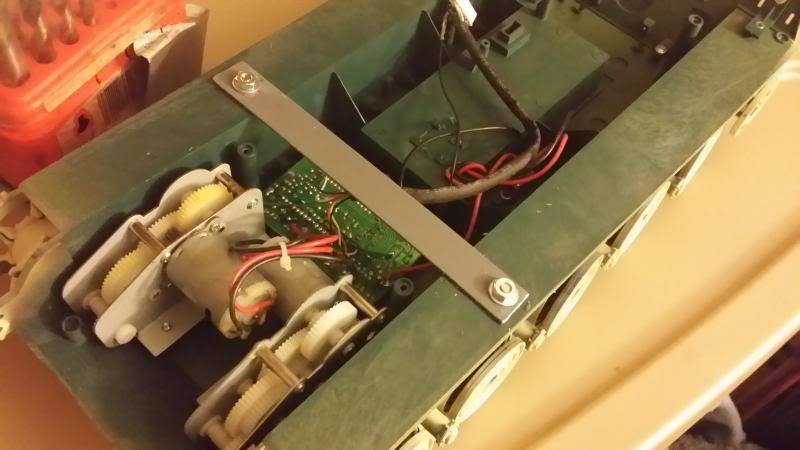
Today I added a strip of aluminum accross the front hull for bracing. I will post a picture of that soon, its held on by one screw each side. The aluminum strip has to be sized correctly, allowing a "shelf" for the upper hull to properly sit on the lower (when you look inside the upper hull, you can see the area that sits on the lower, it is set in about 1/4 inch and the strap needs to not block that, for the hull to close).

Also I epoxied another strip like this, into the inside of the upper hull-right behind the turret rotating motor and in front of the engine grates. I may need one more brace in the lower hull, but looks pretty solid for now. At least i have a handle to carry the lower hull!
User avatar
jarndice
Colonel
Posts: 8030
Joined: Mon Sep 03, 2012 11:27 am
Location: the mountains of hertfordshire

Re: HL King Tiger Build Part 1 So Far (March 23 2014)

Post by jarndice »

MARC!!"SHOCKINGLY WEAK BATTLE TAXI" have a care, the Panzer 4 was a medium Tank and was built to carry out a totally different role to its mbt relatives. it was after all built in many variants and was the only Tank to be in production throughout WW11, it was as good as a Sherman and possessed the flexibility that enabled it to be upgraded as the war advanced and the only other tank with that capability was the T34 although I freely admit there were many types of Sherman, but the only way that fine vehicle could be altered was because the USA had the industrial capacity that was the envy of every other Army in the War, almost none of its modifications could be carried out in a field workshop except for perhaps the Bocage cutter. I await with interest the insults and other rude comments pointing out just how wrong I am (yet again) but I think there is much to be gained in developing a thread on Tank variants of all types. shaun
I think I am about to upset someone :haha:
User avatar
MichaelC
2nd Lieutenant
Posts: 2448
Joined: Tue Oct 16, 2012 4:03 pm
Location: Toronto, Canada

Re: HL King Tiger Build Part 1 So Far (March 23 2014)

Post by MichaelC »

Marc,

I am surprised that the KT came without smoke and sound. It is one of the later models from HL and they are on RX-18s for a while now. So are you saying that the KT doesn't have sound effect at all ? Wow...... You learn something new everyday.

MichaelC
kapalek
Recruit
Posts: 32
Joined: Mon Sep 09, 2013 2:10 pm

Re: HL King Tiger Build Part 1 So Far (March 23 2014)

Post by kapalek »

there are both versions in sale, with or without sound and smoke.
Are you going to apply zimmerit? Its necesary when making KT with porshe turret
Marc780
Corporal
Posts: 495
Joined: Wed Mar 05, 2014 1:34 pm

Re: HL King Tiger Build Part 1 So Far (March 23 2014)

Post by Marc780 »

jarndice wrote:MARC!!"SHOCKINGLY WEAK BATTLE TAXI" have a care, the Panzer 4 was a medium Tank and was built to carry out a totally different role to its mbt relatives. it was after all built in many variants and was the only Tank to be in production throughout WW11, it was as good as a Sherman and possessed the flexibility that enabled it to be upgraded as the war advanced and the only other tank with that capability was the T34 although I freely admit there were many types of Sherman, but the only way that fine vehicle could be altered was because the USA had the industrial capacity that was the envy of every other Army in the War, almost none of its modifications could be carried out in a field workshop except for perhaps the Bocage cutter. I await with interest the insults and other rude comments pointing out just how wrong I am (yet again) but I think there is much to be gained in developing a thread on Tank variants of all types. shaun
I meant the Sherman was "shockingly weak" not the mark IV...the Sherman was picked by General George "The Twit" Patton and this choice was either based on ignorance or disdain for his men's lives. Patton himself had seen the German tiger in Tunisia, must have realized there must be more of them, yet chose to equip his army with the Shermans. It was inferior to a mark IV let alone any of the heavies. Patton was no great General-had he been a German General he'd have been average.
Marc780
Corporal
Posts: 495
Joined: Wed Mar 05, 2014 1:34 pm

Upper and Lower Hull Braces and Axle Problems!

Post by Marc780 »

I added a lower hull brace, made from aluminum bar about 1 inch wide and 1/8 inch thick. It is so soft you can bend it with your hands, with some effort if not precision! But good enough I'm thinking. And light. Considered gluing carbon fiber rods in the upper hull and i may still do that later. For now this is what i've done.

Image

The alumin bar cost about $3 at Lowe's hardware for 3 feet. I cut it with my dremel so that the ends are set in from the edge of the lower hull. This is on purpose because the upper hull needs that space for the hull to sit properly. I test fitted the bar and the hull before drilling the holes. Fortunately on the KT, the side skirts completely obscure the ugly screw head above the wheels.

Image

I glued in another length of aluminum on the upper hull. This was the only place where i could fit a long length and not interfere with the turret rotation. The clamp i used is shown next to it. I put a wrench (spanner in British English?) on top of the bar and some alumin foil on the other side to not mar the paint and let the glue (JB Weld actually) dry all night. If the glue doesn't hold and it falls off, I'll probably just glue in some carbon fiber rods. I did not want to add more ugly screws especially where they will show!

I'm considering how i will mount the upper hull-I'm considering using the rare earth magnets but not not where I'm going to glue them, and how well they will hold! I found magnets with a hole in the center, perfect for a screw, and those might work in the bottom of the hull where another screw head doesn't really matter.

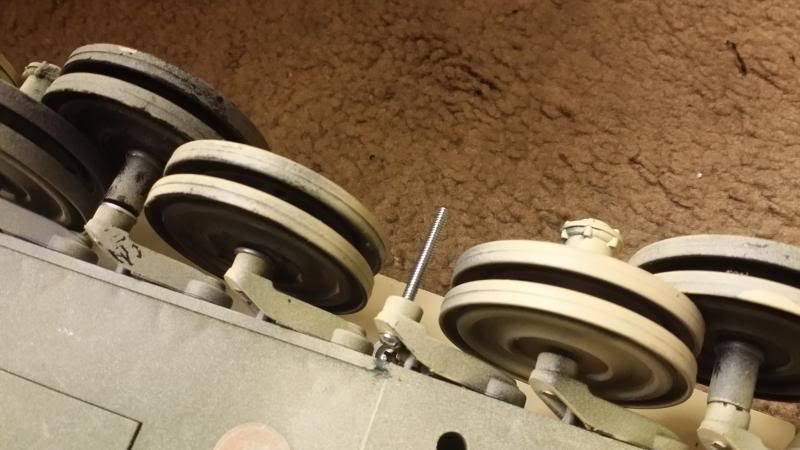
I wanted to paint the combo colors today but didn't. The paint still seems a bit soft, and even worse, i keep losing small parts! I lost an axle and i can't find the #%$@%% thing. This is my (temporary) solution, it's clear i would have to cut the wheel to make room for a nut on the other side to hold the long screw. As it is, i drilled out the suspension arm hole just a little, and these thin screws barely screwed in from the inboard side....still thinking about what to do, any ideas welcome!
Image
Marc780
Corporal
Posts: 495
Joined: Wed Mar 05, 2014 1:34 pm

HL King Tiger Build Part 2 Painting

Post by Marc780 »

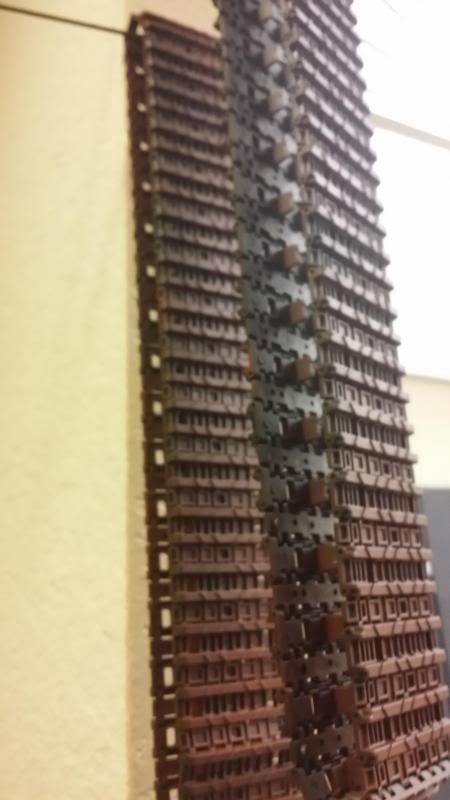
I put on the brown and green and also rusted the treads. I did the treads first in order to get a feel for the airbrush, again since i haven't used one in years. I planned to use 30 PSI so turned the dial on the little compressor, to adjust it to 35-40 psi, taking into account the air pressure drop through the hose.

I did make some mistakes, the biggest ones being not adjusting the spray pattern to be narrow enough for scale, using too much air pressure, being in a hurry, not mixing the paint properly, not test spraying each color thoroughly, not setting the pattern before spraying the real item, and not stopping to let the compressor cool when it was clearly affecting the painting.

Image

I used Testor's rust on the treads. I will go back later and put silver on the contact points as they are going to wear black, of course.

Then I did the brown part of the camo. Yes, that's my bathtub-no workshop...it had an easy to clean surface and a fan venting outside and it's that or nothing. And as they say in the French Foreign Legion, demerdez vous! ("Make do!")

Image

I used Testors' military brown, mixed with a small bit of the rust still in the bottle. This did dry flat though.

Image

Image

Now the green...used Testor's military olive drab and I don't think i thinned it enough! It wasn't coming out at all for a minute.

Image

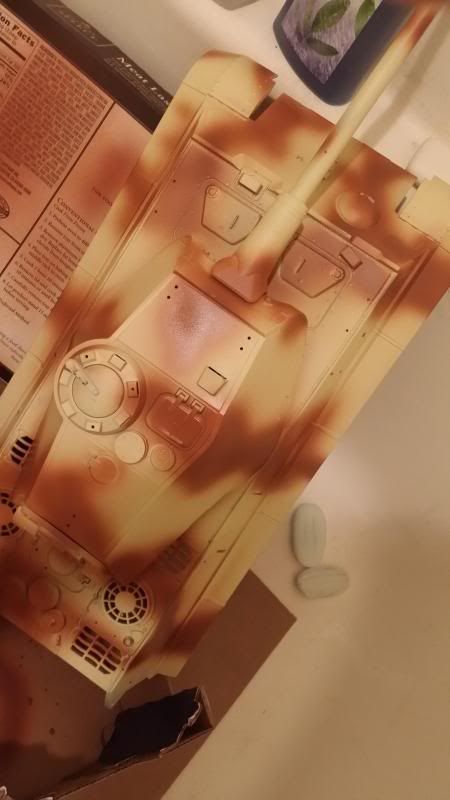
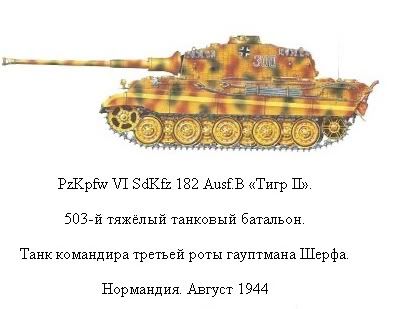
The green has stayed a bit glossy. I think it needs spot painting with sand, again. It's close to what i want but not quite! This is what i had in mind before i started.

Image

I did the base coat of primer followed by sand several days ago and it is still drying! I could still smell it before i did the combo colors. It'll need another week i think to completely dry.

I'm almost sad that it's getting closer to being done. Perhaps it just doesn't have to ever quite be "done"! I still have the wheels to square away, more hull bracing, track weathering and a bunch more.

Image

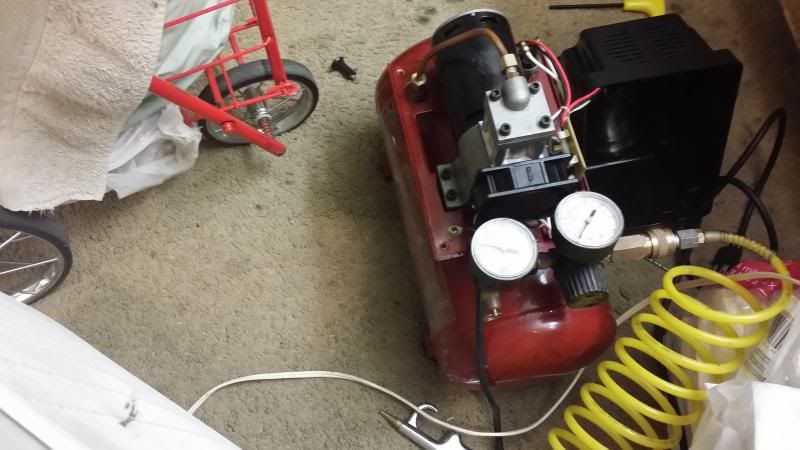
My compressor overheated and quit twice while doing this. The first time while in the middle of doing the green. I removed the carrying handle/cylinder cover and put a box fan on it for 10 minutes to cool the electric pump. That tiny fan on the front of the pump does nothing at all.

The little unit cost me $40 at Pep Boys over 10 years ago and it's still soldiering on. I remove the steel air tube that goes from the electric air pump to the tank once in a while, and put a couple drops of air tool oil into the piston chamber. I think perhaps that's the only reason the cheapo chinese thing still works, as it does get used monthly for blowing out the computers and by rights should have quit working long ago.
I think a better setup if you have the space, and want as economical setup as possible, would be to attach this compressor to another air tank and just let the compressor fill the air tank. That way you can pre fill the air tank and the compressor has plenty of time to cool before you are likely to need it to run again. The air tanks are very cheap, $10 or 20, and compare favorably to the cost of non-reusable canned air for that matter! And if you have a small compressor already and not buying another anytime soon, might be the way to go. And i used to have one but it had to get tossed-they are just too bulky and huge when you live with two people in a 400 sq ft apartment.

The broken plastic piece at 11 o clock is from the plastic cover i unbolted and put to the side-i think the heat got to it. Not sure just how big a fan you'd need to keep the compressor motor cool, but if it finally quits once and for all from overheating that's clearly just a sign i need to buy a bigger compressor next time.
Image
Marc780
Corporal
Posts: 495
Joined: Wed Mar 05, 2014 1:34 pm

Re: HL King Tiger Build Part 1 So Far (March 23 2014)

Post by Marc780 »

kapalek wrote:there are both versions in sale, with or without sound and smoke.
Are you going to apply zimmerit? Its necesary when making KT with porshe turret
Perhaps you are right, speaking historically, the zimmerit would likely have been applied since it was done to every German heavy and medium tank at the factory. That is until September 1944, when the Waffenamt simply dropped the application of the zimmerit to KT's leaving the factory after that. The Porsche Tigers were only 50 in number and among the first ones on the battlefield, if i recall so yes theyd have had the zimmerit.
I have repainted a tank more then once, sometimes years after i built it, so ill keep the zim in mind. And liked the idea of the "film" zimmerit" that you just glue on but, how dear's the price of that. Unless the parts vendors ran a super sale at give-away prices giving it away or some such tomorow though, this one will be sans the zimmerit for now.
Marc780
Corporal
Posts: 495
Joined: Wed Mar 05, 2014 1:34 pm

HL King Tiger Build Part 3-Rear axle with roller bearings

Post by Marc780 »

I got metal idler wheels from Mato. I think i got them from alibaba and they took over three weeks to arrive. If you buy these don't forget to file off the flash metal left over from the casting on the wheel, (i think it must be aluminum) because there was some flash aluminum on the wheels when i got them.

With the metal idlers I naturally had to think of a different one-piece axle arrangement then the plastic ones have because that won't work with the metal idlers. I thought about this for a while, did some research and examined what other people had done on their tanks and decided a combination axle and brace might work best, and be simplest.
To be honest for what i spent on making this axle, it was not very much less costly then buying the Henntech Idlers. The bearings alone, 3 per side, cost $15. The other hardware cost about $10. However this axle works well, stiffens the hull in the bargain, and doesn't add much weight or bulk. And the amount of mangling and cutting etc. needed to be done to the original tank model is minimal.

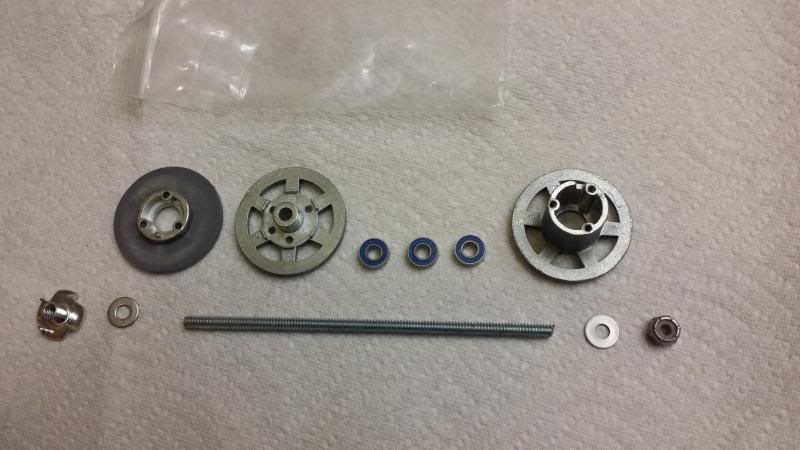
Image

The wing nut on the far left was intended to be the inboard lock nut inside the hull. But i wound up not using it because there isn't room for it. So I just used a regular nut and washer. Whatever you do, do not use loctite on the axle, at least not until you are completely certain it's going to be there semi-permanently...because the axle and wheels will have to be taken apart again at some point and loctite will make it much more difficult to do adjusments.

To install this axle, you have to do some cutting on the hull, at least if you're doing it to the HL King Tiger. There was some plastic bracing in the rear hull that was molded in to allow screws to hold it on to the lower hull, and this factory bracing was in the way of the new axle. I just used a cutting wheel and dremeled off the plastic bracing. This axle adds so much more stiffness that it more then replaces what you cut off to install it. But after I installed the axle and had it adjusted how it needed to be, I then used some JB weld to hold the rear hull on securely...I later had reason to regret gluing on the rear hull, i had issues with this new axle and they had to come out to change washers. It would have been easier if i had left the rear hull to be easily removable. With the hull glued in, I have to fiddle with the axle with the rear hull permanently in the way and it's a lot more difficult, a lot like building a ship in a bottle. I could have prevented this issue just by not attaching the rear hull permanently. So if i were to do this over, I would NOT glue on the rear hull permanently, i would just modify it so it is still removable!

The bearings i got from "Hobby people", from the store not online (I wouldn't know what size to order, I had to take the wheel with me to get the right size bearings), the bearings happened to fit loosely inside the big cavity, in the wheel part to the right of the picture. Rather then add spacers or glue the bearings, I decided to use three bearings per side. I think they pretty much function as expensive bushings here...i did not glue them in or do anything else to hold them i just left them loose to spin on the threaded rod and in the wheel. (I think four bearings might actually fit but three is what i used).

These idler wheels are made of three pieces, and held together by three long, phillips screws. The way the parts go together is like in the picture: a nylon insert nut at each end of the wheel, with washers, are all i used to hold the whole thing together. Just take apart the wheel, put the bearings on your axle (I used #10/24 for the axle, and the nylon insert nuts) and drop the bearings inside the wheel like that. And put a washer at each end facing the bearings. The end of the axle is the nylon insert nut and a washer, then another nylon insert nut, is the inboard side (outside the hull). Reassemble your wheel over that, then put the small screws that hold the wheel together. Using a washer over a second nylon insert nut, now just adjust the inboard nut until it spins freely but no looser then that.

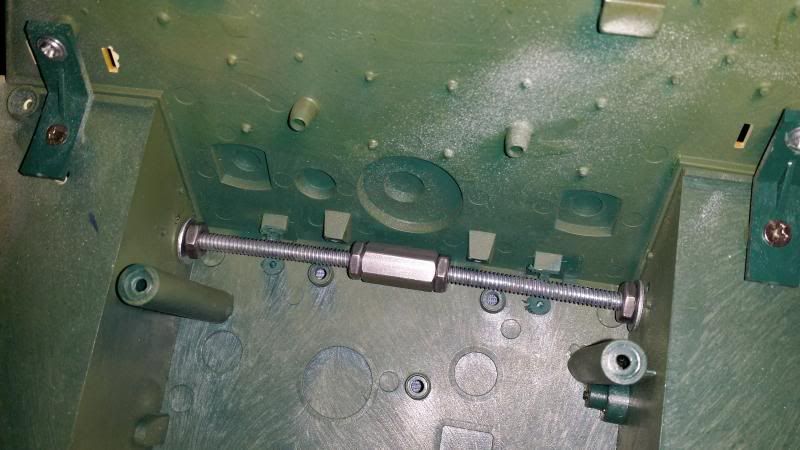
I simply drilled out the original idler hole a couple sizes up until the axle fit through. I did not drill the hole in the hull big enough to use a bushing, although that would be a good idea-I just used lock nuts and washers to hold the axle in place in the hull, like in the picture.

I used two sections of threaded rod for the axle, with the connector thing in between. Then i just cut the axles from one piece of threaded rod. But I installed the axles for a test fit, and made the two axles a little short, with about a 1/4" gap between the axles. Once assembled into the hull, I spun the long center connector piece over the axles to make it one solid axle. Then I secured the connector, and the inboard part of the axles, with lock nuts.

I used two shorter axles instead of one long one because with a two part axle, it is easier to take apart the axles and wheels again. If you use one axle you have to take the entire thing apart every time.

Here it is installed
Image

It is stiff, light, not bulky and can easily be adjusted if you need to. I was thinking of cutting a slot where the axle goes through the hull, for adjusting track tension, but i will see how the tank runs with this axle first. If it starts throwing tracks I'll have to reexamine the slot idea.

i'll repeat this because it's worth repeating, if you too decide to use this axle idea, i think it's better NOT to attach the rear hull permanently. If i did it over again,I'd glue on some steel attachments that can be held on to the bottom of the hull with a screw and nut to keep the easy remove feature of the rear hull. The important reason is that you are certainly going to need to remove the axle at some point! And probably more then once. And this is much easier to do if you can get the rear hull off easily, as HL made it.

This shows the aluminum brace i put further forward. The brace makes a nice carrying handle too. The piece of aluminum I cut it from was about 3 feet long and cost me $3.00. i also glued a short piece of this inside the upper hull for bracing it, but it's clear the upper hull needs even more bracing it still flexes quite a bit. I might just glue in some carbon fiber rod, it seems a natural choice for bracing the fairly crowded upper hull, because it is so thin.

Image

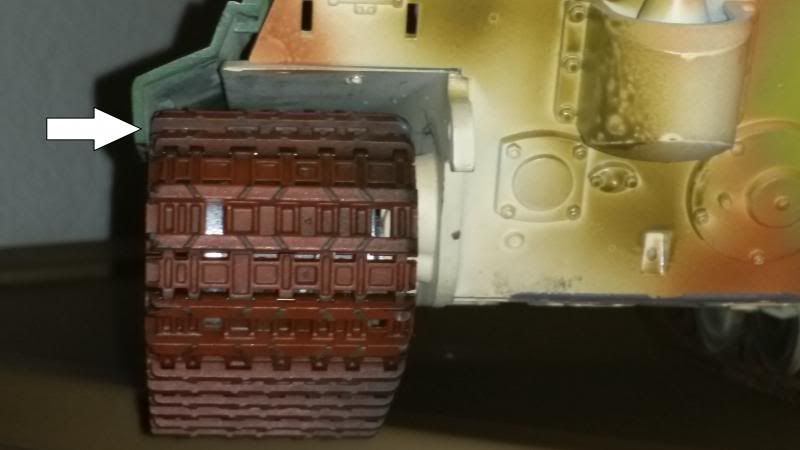
If you mod your axle or plan to, don't forget about the inboard spacing of the idler wheels. Arrow shows how the tracks barely clear the skirts. I think i am going to have to add a spacer inside the hull because they are still touching and i can't reduce the idler spacing any further. The idler wheel spacing (distance from hull) has to remain the same as stock, that or the fenders have to be moved out one or two mm. The tank will still run if you increase that idler spacing but the tracks will touch the inside of the side skirts and you don't want that. I had a nylon insert nut inboard on the idler wheels and this turned out to be too wide. To allow the idler wheels to clear the skirts, i had to replace that nut with two washers. And I just put the nylon insert nut inside the hull.

The lesson learned, measure twice and cut once or it's better to over-think the small details of a mod, then do it, then spend just as much time to fix a mistake!

Image
Marc780
Corporal
Posts: 495
Joined: Wed Mar 05, 2014 1:34 pm

HL King Tiger Build Part 4-New Gearboxes and Wiring

Post by Marc780 »

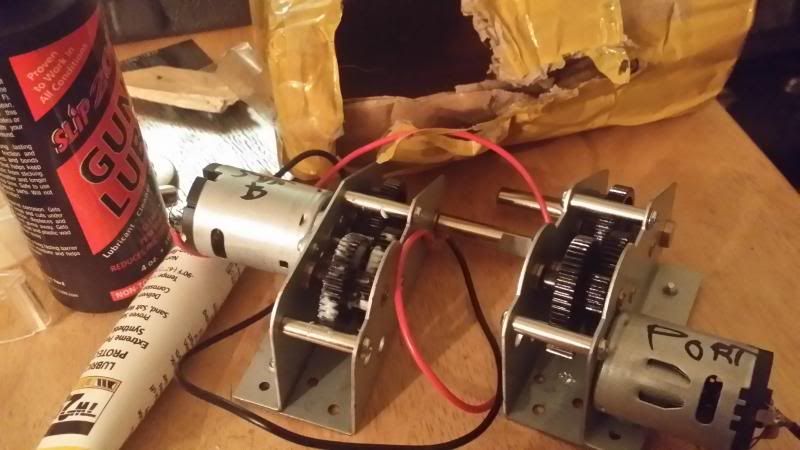
I sent away for a metal gearbox from Hobby Raw and it arrived today. It cost $50 and they took 3 weeks to arrive. I hooked up my OEM battery to run them in for half an hour, until the battery went dead...I didn't use anything on the gears i just ran them dry.

I was surprised at how cool the motors ran, even after ten minutes they were barely warm. Maybe that's because they had no load, but they were still very cool running. I had plans to put a fan on the motors but now I don't think i will bother with that.

The pins in the gearbox I lubricated with Slip 2000 because that's what I have around. It has plenty of cling for a light oil and you don't need much at all.

Image

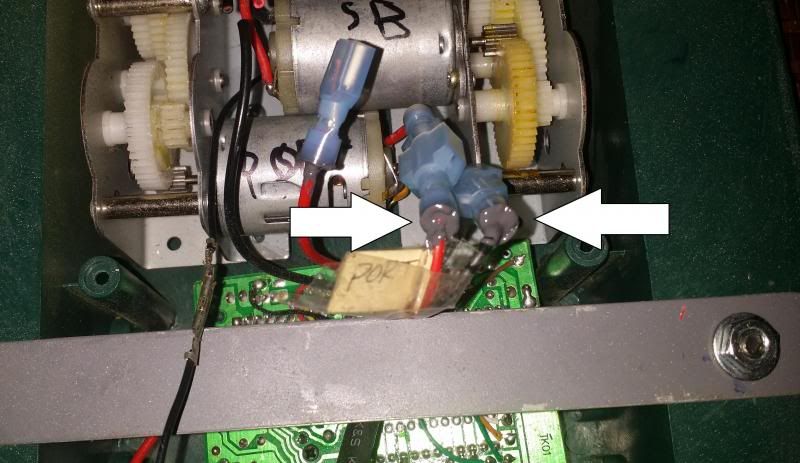
I labelled them "port" and "Starboard" since that seemed more descriptive then just writing "L and R" on them. My KT is not the S & S model, it doesn't have the RX18 board, i have a different kind i think, and everything's soldered. So I am using solderless connectors on the wires here. I filled the inside of the connectors with JB weld so hopefully, they will be less likely to pull out. The crimp isn't always reliable at least not when i do them!
Image
I tested the connectors before I glued them with the JB Weld, by running the tracks. But several of the connectors weren't crimped tightly enough and didn't hold- so now i need a bunch more.


I ordered some Mabuchi 380 motors and I will probably wait for those to arrive, before swapping out the gearbox. The motors did not come with a plate so I plan to reinforce the hull floor under the gearboxes with some styrene, before installing them.
Post Reply

Return to “King Tiger”