My first build - Tamiya Jagdpanther

User avatar
Geoffjag
Recruit
Posts: 16
Joined: Sun Nov 27, 2011 10:01 pm

My first build - Tamiya Jagdpanther

Post by Geoffjag »

Hi,

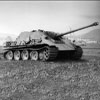
New here and new to the world of RC tanks so thought I'd put up a build thread and see what happens... Back end of 2011 managed to score a Tamiya full option Jagdpanther from evilbay (always wanted a Tamiya tank) at a decent price. Not going to be building this as a well researched specific tankbuster but will be using the Tamiya paint / decal option "A" (number 121, France Dec 1945). Going to use a Spektrum DX6i / AR6100 combo and will be doing some upgrades along the way, may even light it.

Couple of "upgrades" that I know I will be adding / doing: -
Doing something about the dodgy sticker to cover the front of the tank!
Use the schumo hex bolt kit
Building some sort of transmission brace
Ball bearings on the wheels
Probably some other stuff, maybe some etch?

So first up, instuctions part 1 tension pully
(let's see if I can attach a picture)
Tension Pulley
Tension Pulley
cool. that worked..

Don't have a picture of all the stuff in the box / bags as I have already split into components and washed the plastic...
User avatar
Geoffjag
Recruit
Posts: 16
Joined: Sun Nov 27, 2011 10:01 pm

Re: My first build - Tamiya Jagdpanther

Post by Geoffjag »

Suspension housings on with Schumo Hex head bolts.
DSCN5348.jpg
Hull wiped over with IPA and Suspension housings masked + coat of Grey Halfords Primer on the hull for drying overnight..
DSCN5353.jpg
User avatar
maintcoder
Private
Posts: 54
Joined: Sun Jan 23, 2011 8:02 pm
Location: Kent, WA

Re: My first build - Tamiya Jagdpanther

Post by maintcoder »

Great start, I'll be watching this thread to see how it progresses as I have one on deck to be built (after the Sherman). :thumbup:
User avatar
Geoffjag
Recruit
Posts: 16
Joined: Sun Nov 27, 2011 10:01 pm

Re: My first build - Tamiya Jagdpanther

Post by Geoffjag »

Undercoated the suspension arms and drive sprockets / return rollers last night as well using the same primer. Used some bent paper clips as hangers on a bit of old curtain pull string for drying, either attached to the masking tape or a bit of bluetack..
DSCN5354.jpg
DSCN5355.jpg
Also started work on the replacement for the sticker that Tamiya supply for the front lower glacis plate (a sticker! what were they thinking!). I obtained some 0.2mm aluminium sheet from my local model shop and cut it to fit the plate.
DSCN5354 (2).jpg
Will epoxy that on later. My two concerns with this method are whether it will affect the fitting of the sproket guides later (I have the metal ones) and whether fitting the transmissions will push it away from where it is glued - I may need to fettle the transmission frames. However if this works then it will be better than the sticker.
User avatar
Geoffjag
Recruit
Posts: 16
Joined: Sun Nov 27, 2011 10:01 pm

Re: My first build - Tamiya Jagdpanther

Post by Geoffjag »

The ally plate is stuck on now and looks ok so far. Measured both the aluminium and the sticker (without backing) and both are 0.21mm thick (no glue on the ally plate so add a smidge of a mm for that). The coverage looks better, ie fits across the glacsis plate vs the sticker's "not just" and although the same thickness the ally plate is less bendy, not that it matters that much in this case. Worse case I pull this off and use the sticker - that's the fun with a bit of experimentation..
User avatar
Geoffjag
Recruit
Posts: 16
Joined: Sun Nov 27, 2011 10:01 pm

Re: My first build - Tamiya Jagdpanther

Post by Geoffjag »

Metal sprocket guides on and lower hull painted (will be painting the lower glacis plate with the top on to keep the camo lined up). You will notice the extra hole in the hull below left of the driveshaft exit hole, this is for the support bearings I'll be adding..
DSCN5405.jpg
Still have a little bit of fettling / filling on this bit to smooth off the transition..
DSCN5406.jpg
Next steps are to install the swing arms and the DMD / Battery mounting plate then onto the motors / transmissions.

Test fitting the transmissions reveals that the drive shafts exit the hull out quite high in the holes in the hull (nearly interferring at the top). The transmission standoffs are a smidge over 10mm (10.2 on my gauge) but as I will be replacing these with home made mounts I should be able to bring them down 0.5mm which will be enough (have 8mm square section steel bar that comes in at 7.8mm and 2mm sheet that comes in at 1.9mm = 9.7 mm total vs. 10.2 mm of the existing mounts).
Reaper332
Corporal
Posts: 484
Joined: Wed Jan 11, 2012 8:54 pm

Re: My first build - Tamiya Jagdpanther

Post by Reaper332 »

Lookin Mate cant wait to see it finished thinking of doing one of these next.
Ken
User avatar
Geoffjag
Recruit
Posts: 16
Joined: Sun Nov 27, 2011 10:01 pm

Re: My first build - Tamiya Jagdpanther

Post by Geoffjag »

Suspension arms on, DMD / Battery tray bolted in...
DSCN5410.jpg
Transmission support / brace built and left hand transmission in place with axle shaft support baring (is that a coffee stain on the masking tape?)..
DSCN5411.jpg
DSCN5412.jpg
DSCN5413.jpg
Quick MS paint of the transmission plate design
Transmission support side view.jpg
Transmission support plan view.jpg
Just realised that the plan view shows the suspension arm coming from the left of the hull where in reality it is the right. Not going to change it but you get the gist of what I have done hopefully....

Mods, let me know if I am uploading too many pictures / you need me to restrict the picture flow - I am one of those "pictures paint a thousand words" type of guys :D
User avatar
Panther Ausf G
Corporal
Posts: 457
Joined: Tue Sep 13, 2011 1:18 pm
Location: Bournemouth, Dorset. UK.

Re: My first build - Tamiya Jagdpanther

Post by Panther Ausf G »

No such thing as too many pictures. :thumbup:
We do not stop playing because we grow old.
We grow old because we stop playing.
User avatar
Geoffjag
Recruit
Posts: 16
Joined: Sun Nov 27, 2011 10:01 pm

Re: My first build - Tamiya Jagdpanther

Post by Geoffjag »

Update for today.
Rather than use the Tamiya supplied stickers for the rear hull to hide the holes for the optional exhaust brackets, used some cut down sprue. Will sand down later.
DSCN5427.jpg
Also added the metal rear tow bracket
DSCN5428.jpg
Built the Jack.. Added two handles out of brass rod (anealed and bent to fit) and a jack handle tie strap made of a bit of painted Tamiya tape and a buckle made out of some bent wire (cut off of an LED)..
DSCN5454.jpg
DSCN5455.jpg
Post Reply

Return to “Jagdpanther”