Hello, I’m new here and since last December-ish (I think) I’ve been tinkering with installing FPV cameras in all of my tanks. If my editing is off or weird let me know so I can get better at posting.
GENERAL:
Let me a make a distinction here, the FPV I’m about to go into is what you would find on a quadcopter FPV drone, not the thing that ToucanHobby and others sell and sometimes you see pre-installed in HL tanks. While these are great because it’s relatively cheap, easy to install, and you just connect and watch on your phone, you don’t get things like the range, picture quality, and audio like you can with the sort of equipment used on FPV drones. However, all you need to do this with your tank is the same equipment you would purchase for a drone, and a battery to supply power. You could essentially put this on anything that has a 7v to 36v power supply.
So each FPV system consists of two parts, the part on the tank and the part where you are. On the tank you will have a camera, video transmitter (VTX), and a single antenna. Wherever you are you will have a viewer, a video receiver (VRX), and usually either two or four antennas.
Before we dive into the components there’s another important breakdown in FPV systems: analog and digital FPV. I’m not going to go over how each works, just know that components between the two are NOT compatible. Here are the pros and cons
ANALOG PROS: Cheaper components, the capacity for longer range, higher latency, the potential to broadcast audio as well as video.
ANALOG CONS: Picture is not as good as digital
DIGITAL PROS: Better picture
DIGITAL CONS: Range is acceptable but not as good as analog, more expensive, higher latency, restrictive component ecosystems, no capacity for broadcasting audio (yet)
I always run with analog. I want to be able to hear my beautiful tank sounds, so this is a no go for me for digital. I tried the digital ecosystem that has worst picture quality of the three, and while the picture is still better than analog, it wasn’t enough to justify the loss of audio for me. Also, if I mess up and fry a component, I’m not out $150-$300. Range was also important to me, but unless you’re rocking a RX/TX with ELRS (which is another kettle of fish), it’s probably not going to be a big deal. With the right components your VTX will out range your TX 9 times out of 10. For this post, everything I’m going to be talking about is analog, but digital systems can be assembled in a similar manner.
FPV EQUIPMENT NEEDED ON THE TANK:
Back to the tank! While you can find all-in-one (AIO) cameras that have the camera, VTX, and antenna all rolled up in one unit, like most things, it’s better if you purchase each of them separately.
CAMERA:
So let’s start with the camera. There are two common sizes, micro (around 19mmx19mm) and nano (around 14mmx14mm). Common brands are Foxeer, Caddx, and RunCam. Prices run anywhere from $15-$50. Quality usually correlates with price, but not always. If you’re going to be driving around at night, be sure to pick something with decent low light capabilities.
These cameras are good if you have a modern tank with larger optics, but are too big to hide in WWII era tanks. Of course you can just slap a camera on top and call it a day, but I like to try to preserve the aesthetics of the tank as much as I can. For these tanks and for things like auxiliary sights and periscopes I like to use the Ultra Tiny Camera from Team Black Sheep. They are 5mmx5mm and run about $15 each plus shipping from Hong Kong.
All cameras have a ground, positive, and video out cables. These will come with bare ends or with a tiny JST connector that will have to be clipped off. If I’m just doing one camera connected to one VTX, I will put a servo connector on there to connect them. Most cameras will also have two additional wires that you can plug into a controller (also comes with the camera) that you can use to change the settings on the camera. Some also have something call Smart Audio, which you can use to control your camera via your voice. I do not use Smart Audio.
One last thing before we leave cameras. Make sure, especially if you are doing something advanced where the camera power is not supplied by the VTX, that your voltage range going to the camera is correct. All VTX’s I have used put out 5V to the camera, and all micro and nano cameras I have used have a voltage range that includes 5V, except the TBS Ultra Tiny Camera. It needs a voltage range of around 3V so you will need some kind of battery eliminator circuit (BEC) or voltage step down card to make sure you don’t toast the camera. I have done this several times. Always double check the voltage before you turn it on for the first time.
VTX:
Next, VTX. This is what’s going to transmit the video signal across the park to your VRX on your viewer. Analog VTX range in price from $20-$135+. The range that they broadcast is usually proportional to their power output, measured in wattage. Most VTX have a range of different wattages at which they can broadcast. Usually, the higher the wattage, the greater the range, and the hotter the VTX gets.
We have to remember that these were built to be put on small quadcopters or planes and flown through the sky, acting as a source of cooling. We are shoving ours inside of a plastic or metal box with no air flow. So you will want to purchase a small (usually 25mmx25mm) fan that you can either mount on the VTX itself or put nearby the VTX. Even putting the VTX on the outside of the tank is not enough. While a few have overheating protections, most will just burn up and die. While I’ve never had a VTX get hot enough to burn or melt anything, they can get hot enough where it is painful to touch them for more than a second or two. So, make sure you get a fan. I usually power it off of the positive and ground going from the VTX to the camera.
VTX usually come with a small 6 pin connector with naked ends. Voltage in, ground in, Smart Audio, voltage out, ground out, and video. VTX usually have a voltage input range of around 7v-36v, so you can power it directly off of your main battery, but always always double check the voltage. If you are using LiPos you can power them off of the balance lead if soldering is scary. If you are using NiMH, as soon as your voltage drops below 7v your VTX will cease to function. It might not damage it, but it won’t work. This is one of a few reasons I switched all of my tanks to LiPo from NiMH. For your camera, the VTX will act as a BEC and step down the voltage to your camera to around 5V usually.
The VTX is also what will record and transmit your audio, if it has this function. The best brand for this I have found is Rush FPV. Most of the VTX they make either have built in microphones or a 3 pin plug or soldering pad when you can wire an external microphone. TBS Unify also has a microphone, as do some of the higher end Foxeer VTX, also the AKK Range Racer. If you don’t see built in mic somewhere in the description, it probably doesn’t have the capability to transmit audio. All FPV pilots will hear is the “bzzzzzzzz” of their rotors, so it’s not a super popular function. One thing to note here, the microphones only pick up sounds that are generated very very close to them, so make sure you put your VTX or external mic close to your sound source. If I have a VTX with a built jn mic in the turret, I will try to point the mic toward the cavity between the turret and the chassis. If I have one with an external mic I will try to run it through the slip ring and mount the mic next to the speaker. If the VTX is in the chassis I will place it next to the speaker. While theoretically you could hear what people are saying near your tank, they would have to get on their hands and knees next to the rank and scream at it be for you would hear anything.
ANTENNAS:
Moving on to antennas, in addition to the 6 pin connector most analog VTX will have what’s called a MMCX connector that will connect the VTX to the antenna. Most VTX will come with a MMCX antenna which is cheap and only good if your real antenna hasn’t come in yet, and a MMCX to SMA pigtail. Most FPV antennas have an SMA connector, but you can find other types as well. Antennas usually range from $10-$20 each.
There’s not a whole lot to say about antennas except two major things. Never ever turn your VTX on without your antenna plugged in. It will toast your VTX instantly. I have done this a few times on accident, so always double check the connection before you turn it on. Second, antennas come in handedness, left or right. Just make sure that whatever handedness you use on your VTX is the same as on your VRX. Also antennas work better if you use the same brand on both the VTX and VRX. Also, the higher and less confined the antenna is, the better the signal. Things like trees, houses, and bushes are the bane of FPV signals, so if you’re driving in an area with lots of these things, try to mount your antenna outside of the tank and use a VTX with significant wattage.
That’s pretty much it for what’s on the tank. You will want to have some connectors and matching crimpers and be familiar with them. I like to use 2 and 3 pin servo connectors for all of my FPV set ups
VIEWING THE VIDEO:
FPV VIEWERS:
Next let’s talk about the VRX side of things. To see the video you will need either a viewer or goggles. Viewers are like little 4”-7” TV screens with a built in VRX. They can be had for around $60-$100. While some of them come with little sun visors, it can be pretty hard to see the screen if you are in direct sunlight. I like to try to find a quiet shady spot to sit or stand if I am using this. Most viewers will have two antennas that should be replaced with better ones as soon as possible. The viewer I have used SMA-RP connectors so I had to buy some adaptors to make the regular SMA antenna fit. Just remember try to buy the same brand, and definitely buy antennas with the same handedness.
FPV GOGGLES:
Goggles are great, but will range from $100-$600+. While the screen of even the lowliest box goggle will be better than a viewer if nothing else other than for cutting out all sunlight, you will basically be blind (and deaf if you’re getting audio from the tank) to the world around you so only use them either at home, or with a spotter if in a public place. Most goggles support up to four antenna. Use as many antenna as there are hookups available, it will make your video reception better.
Some goggles will have a VRX built into them, and some will have expansion slots for external VRX that you buy separately. Again, usually if you can buy the pieces separately, this is better. Also, if you’re using audio, make sure your goggles (or viewer) either have built in speakers or a headphone jack.
RECORDING VIDEO:
Also the viewer and the goggles I own have a slot for a little tiny SD card, and they have a record button, so you can record what you see (and hear of using audio). Just put the card in a reader on your computer and pull off the videos just like you would with a thumb drive.
SYNOPSIS:
And that’s it. That’s everything you need to know to have a basic analog FPV setup. Here’s a synopsis of how to connect everything.
Wire the camera to the VTX voltage out, ground out, and video (servo connector is best here, also double check voltage requirements of camera), solder a lead off of the main battery to connect to the VTX voltage and ground in (or create a JST XH connection to the balance lead of your LiPo), connect the VTX to the antenna (make sure it’s always connected if powering on). Use the VRX on your goggles or viewer to search for the VTX signal, and bam, picture (and maybe audio).
This may make it seem simple (or not) but there’s a lot that can go wrong when trying to hook this stuff up. Just be patient and double check everything.
EQUIPMENT RECOMMENDATIONS:
Here’s a list of the equipment that I use that I like the most
CAMERAS:
TBS Ultra Tiny Camera: For when you need a camera in small places. Not the best picture, but not terrible either. No low light capabilities, at all.
Caddx Ant: A bare bones nano camera that’s still good and easy to fit into difficult places.
Foxeer Toothless 2 Starlight: A great all around nano camera with excellent low light capabilities.
I don’t currently use any micro cameras as I have found them to be too large to fit in most places I need to put cameras. But, if space allows, definite go for a micro over a nano
VTX:
Rush Tank Solo: This is my go to VTX. It’s super powerful, has a built in microphone, has overheat protection, and a heat sink with screw holes to mount a 25mmx25mm directly to the heat sink.
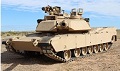
Rush Max Solo: A supposedly more powerful version of the Tank Solo with a built in fan and an external mic port, which will allow you to place the VTX and mic wherever you want. These are on the expensive side of analog VTX, and are also hard to find given VTXs are also popular for strapping to flying bombs in war zones. I recently installed one in my Abrams, but I’m waiting for a stupid LED bulb for my machine gun before I can put my tank back together and test it.
TBS Unify: I have not used this, but it’s supposedly a good VTXwith audio capabilities.
ANTENNA:
I always use Lumenier because one time I read on some website somewhere they were good. I haven’t had any problems, and I don’t think there’s a whole lot to gain by trying out different brands. I like to get the ultra long ones and mount them to the turret, if possible. I will put the VTX in the turret and run the MMCX to SMA pigtail through the roof or the side of the turret to make it look like it’s not out of place, as much as possible. The connection between the VTX and the antenna is not something you can run through a slip joint.
VIEWER:
SoloGood FPV Monitor 7”: This is the viewer I use if I’m out at a park by myself. It has a built in VRX and speaker, and is pretty user friendly. I got mine off Amazon for around $100, I think you can find them a little cheaper on AliExpress.
HDZero Goggles: These are digital based goggles that have the worst picture of the three digital goggle companies. However, they also have the ability to plug in an analog VRX, AND they have an audio Jack, AND they have some kind of interlacing software that makes the analog picture look slightly better than it would on other purely analog goggles. Then, if you want to try out digital to see what it’s like, like I did, you don’t have to buy a whole new set of goggles. Full disclaimer though, I had them for a month and a half of light use, and one of the two screens went out on me. Customer service has been great, but slow. I shipped them out mid May and they just put it back in the mail yesterday. However, customer service is based stateside, where I am, so hopefully it won’t take long to get back to me.
TBS Fusion: This is the analog VRX is use in the analog VRX expansion slot on the HDZero goggles. I like company TBS and I’ve always heard good things about this VRX.
EXAMPLES:
Let me know if you all have any questions. I can get into some more detail on specific topics if you all want, can talk about digital FPV and the three companies that make digital products, and later I will add on another post about how to do things like add more than one camera to your tank.
Here are some videos of the two tanks of mine I have installed FPV on.
HL Abrams (7 cameras)
https://youtu.be/HtFDfo77eJQ?si=TQ06eQxkGVUMR5co
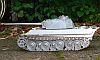
Torro Tiger II (3 cameras)
https://youtu.be/lxV3Y9VALLI?si=SMBvivchOdZffw2-
Adding Better FPV To Your Tank
Adding Better FPV To Your Tank
- Attachments
-
- TBS Ultra Tiny camera in gunners sight
- IMG_2428.jpeg (1.65 MiB) Viewed 6391 times
-
- TBS Ultra Tiny Cameras in machine gunners and drivers periscope
- IMG_2427.jpeg (2.17 MiB) Viewed 6391 times
-
- IMG_2426.jpeg (2.43 MiB) Viewed 6391 times
-
- Inside my HL Abrams turret. You can see the VTX with fan near the turret ring, and two 3 way switches on the upper part of the turret
- IMG_2229.jpeg (1.49 MiB) Viewed 6391 times
-
- TBS Ultra Tiny Cameras in the drivers periscope and the gunners auxiliary sight
- IMG_2239.jpeg (1.22 MiB) Viewed 6391 times
-
- Left to right, Foxeer Predator 5, Toothless 2 Starlight, Caddx Ant, all nano cameras
- IMG_2240.jpeg (1.57 MiB) Viewed 6391 times
-
- IMG_2238.jpeg (1.45 MiB) Viewed 6391 times
-
Herr Dr. Professor

- Major
- Posts: 6228
- Joined: Mon Apr 22, 2019 10:48 pm
- Location: Southern Wisconsin USA
Re: Adding Better FPV To Your Tank
Wow! I caught your post on my phancyphone  tonight. Tomorrow I can print it out to read through carefully. Even if I never install an FPV camera, I gobble up the kind of posts from which I can learn. Thank you.
-
Rad_Schuhart

- Warrant Officer 1st Class
- Posts: 2089
- Joined: Tue Jan 19, 2016 9:22 am
- Location: Spanish living in Graz, Austria. Heart in UK.
- Contact:
Re: Adding Better FPV To Your Tank
Nice thread. I was also writting an entry on my website about my FPV experiments. I have a tank with two cameras and a boat with three, and I enjoy it as a gadget, but I also get a horrible motion sickness.
While it does the job, I found the video quality to be pretty poor. Also the video transmitters are scarce and they indeed get very hot, no idea why.
While it does the job, I found the video quality to be pretty poor. Also the video transmitters are scarce and they indeed get very hot, no idea why.
My RC tanks website, loads of free info for everybody:
https://radindustries.wordpress.com/
https://radindustries.wordpress.com/
-
jhamm
- Warrant Officer 2nd Class
- Posts: 1122
- Joined: Fri May 19, 2017 7:21 am
- Location: Germany
- Contact:
Re: Adding Better FPV To Your Tank
It´s depend on the hardware and the provided voltage.Rad_Schuhart wrote: ↑Fri May 31, 2024 7:15 am I found the video quality to be pretty poor. Also the video transmitters are scarce and they indeed get very hot, no idea why.
My transmitter FrSky X20HD can show hdzero video stream on its display.
On the Tamiya Centurion i use HDZero equipment:
- 05112022-01.jpg (73.41 KiB) Viewed 6349 times
- 05112022-02.jpg (81.67 KiB) Viewed 6349 times
- good is the quality of digital video => 720P 60FPS
- the equipment is expensive
- a focus adjustment/autofocus function is missing and limits the image quality
Here a video:
https://www.youtube.com/watch?v=GX1WX9KjrBw
Re: Adding Better FPV To Your Tank
That’s really cool that you can get it on your radio’s display. How did you do that? I use a TX16s, didn’t know if I could replicate whatever you did on it.
-
Herr Dr. Professor
- Major
- Posts: 6228
- Joined: Mon Apr 22, 2019 10:48 pm
- Location: Southern Wisconsin USA
Re: Adding Better FPV To Your Tank
An Aside: from your initial comment in your first post above, Jib, I gather that you care about your writing. So just FYI, I copied your discourse on FPV above and popped it into WordPerfect. (Yes, I am one of those who sticks with this venerable program, finding it better for "scholarly" writing and editing than MicroSnot Void.  ) It came up perfectly formatted. Of course, I also added in the URL and your "Jib" handle.
Re: Adding Better FPV To Your Tank
Thanks!
Sometimes I can kind of jump around with my ideas so I just wanted to make sure everything was as clear as possible.
I really enjoy having FPV on my tanks, and I don’t see a lot of people doing it, so I’d like to get more people on board with it.
Sometimes I can kind of jump around with my ideas so I just wanted to make sure everything was as clear as possible.
I really enjoy having FPV on my tanks, and I don’t see a lot of people doing it, so I’d like to get more people on board with it.
-
Herr Dr. Professor
- Major
- Posts: 6228
- Joined: Mon Apr 22, 2019 10:48 pm
- Location: Southern Wisconsin USA
Re: Adding Better FPV To Your Tank
I just had time to watch the second video, and I understand that the sound quality is not the best. However, the video were in black and white, maybe with some "Newsreel" type titles and German music, it would look just like 1944.
Torro Tiger II (3 cameras)
https://youtu.be/lxV3Y9VALLI?si=SMBvivchOdZffw2-
Torro Tiger II (3 cameras)
https://youtu.be/lxV3Y9VALLI?si=SMBvivchOdZffw2-
Re: Adding Better FPV To Your Tank
If you get motion sickness you might want to sit down while using it. I get motion sickness too when i'm flying my FPV drone unless i sit down, so i always bring a simple folding chair with me whenever i go flying somewhere.Rad_Schuhart wrote: ↑Fri May 31, 2024 7:15 am Nice thread. I was also writting an entry on my website about my FPV experiments. I have a tank with two cameras and a boat with three, and I enjoy it as a gadget, but I also get a horrible motion sickness.
While it does the job, I found the video quality to be pretty poor. Also the video transmitters are scarce and they indeed get very hot, no idea why.
The video transmitter (VTX) sends out a fairly high powered signal, while 200, 400, 600 or even a 1000 miliwatts doesn't sound like a lot, but it is for such a small device as a VTX. You can even buy 10 Watt VTXes now. However, because I live in the EU i never set my VTX to anything higher then 25 mW, since that is the legal limit here if you don't have a HAM radio license.
And you're right about the scarcity of VTXes, it probably has something to do with it being a old technology with not a lot of use outside of the RC hobby, and the fact that a lot of the 'killer drones' in Ukraine use analog VTXes.
Oh, and I spotted a mistake in Jib's post:
That should be lower latencyANALOG PROS: Cheaper components, the capacity for longer range, higher latency, the potential to broadcast audio as well as video.
Although that latency is measured in milliseconds, for most people flying FPV drones it's barely noticeable, so i think it's even less noticeable for RC ground pounders
A few examples of video quality:
Analog: https://youtu.be/E9-aMfkJ3yA
HDZero: https://youtu.be/lTw6DhQPPTk
Walksnail: https://youtu.be/wnclzi12Wjw
DJI: https://youtu.be/tLIGke8v_zM
The multiple cameras in a RC tank is amazing
More information about the differences between FPV systems: https://oscarliang.com/fpv-camera/#Anal ... sideration
