Colour

If you have a tank query and you can't find the answer anywhere else, post here. (TIP - Check for answers in FAQ, use the 'search' facility or even check this board before posting here).
Forum rules
If your question is electronics related please post it in one of the relevant boards here: viewforum.php?f=31
Post Reply
User avatar
Afrikakorps
Corporal
Posts: 250
Joined: Sun Jun 14, 2015 1:40 am
Location: Australia

Colour

Post by Afrikakorps »

Hello everyone,
I have a question about German tank colour,
In early 1943 the primary German tank colour changed from RAL7021 panzer grey to a dark yellow.
I have read that initially the dark yellow was dunkelgelb nach muster but changed to RAL7028 dunkelgelb.
This had several variations/shades in the following years. The early 1943 dunkelgelb nach muster being a deeper yellowish colour than the lighter more buff colours of late 1943-44.

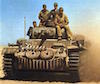
Would the german 1943 “Kursk” ferdinand’s be painted in the "darker "dunkelgelb nach muster ?
From what pictures I can find, it is very difficult to determine. Picking the difference between olive green and red brown in these photographs is hard enough. !!!

Secondly, if the tank destroyers were recalled back to Germany for refitment ie, hull machine gun and cupola etc, would the vehicle’s have been repainted in the current supply of dark yellow ?
To me this seems logical, as the vehicles would need some type of cleaning prior to maintenance, repairs and refitment . Also, the colour camouflage patterns used in Italy appear tho be painted over a fresh dark yellow. There does not seem to be any previous pattern covered up by a newer style of camouflage.

I look forward to hearing your views or any information you may have on this area.
Cheers
Steve
Panzer III G
Sherman M4A3 (105)
T-34/76 (1942)
Panzer IV Wirbelwind
Sturmtiger
KV-2
M26 Pershing
T-34/76 (1943)
KV-1
M3 Lee
Ferdinand / Elephant
M16 Half-track
Panther G
M4a1 (75mm)
M41 Walker Bulldog
JS-2
M4a3e8 (76mm)
Japanese Type94
FT-17
Tiger 1
User avatar
jarndice
Colonel
Posts: 8403
Joined: Mon Sep 03, 2012 11:27 am
Location: the mountains of hertfordshire

Re: Colour

Post by jarndice »

Steve some time ago we had a lengthy discussion over Tank Colours and it was pointed out by Tom Hugill that the size of a 1/16 scale Tank would have a marked effect on the shade needed in comparison with the real thing,
It is relatively easy to get an accurate match to the colour that was painted on the real Tank but on our models it will look wrong,
Going by eye I always favour "Humbrol's" Sea Grey not their Tank Grey as a base for my German Armour in service in eastern Europe and "Humbrol's" Desert Yellow as a base for the Africa Corp PZ4s and the Tunisian Tigers.
Notice I said "BASE" you have to work from there to get the shade you are after,
As to the colours used at the Factory I make a point of painting all my German Armour with a red oxide undercoat this being the colour that German armour was always painted and it has a definite effect on the shade of the base coat.
I think I am about to upset someone :haha:
Jay-Em
Corporal
Posts: 292
Joined: Sun Jul 17, 2011 9:11 pm
Location: The Chilly and Flat part of the Netherlands' North.

Re: Colour

Post by Jay-Em »

Another trick is to use the actual RAL colour, and dry brush the whole tank with light sand, say Revell matt 98. And if the grey value is higher on the original paint layer, add some white to the sand.

Drybrushing with sand will also make the Wehrmacht Grau look warmer, more daylight-like, and slightly dusty without looking completely-dragged-from-the-siberian-bog filthy. Depends on what You want to simulate.

Alternatively, You could add some white to the Wüstensand Gelb, and drybrush in multiple -ever lighter- stages. It takes much more time than the quick-fix Revell sand trick, especially when a campuflage pattern is used, but will look even better when done right.

The thing is, the ‘correct’ colours àlways look too dark and flat/plain on a small model. The dry brushing artificially enhances the amount of light reflected on the model, emulating the far bigger ridges and things on a real tank. Pin-washing does the same, but inverted. I usually take black as a base layer for green tanks, and dark grey for the lighter ones.

A lazy way of getting more “depth”, because the black is very hard to fully overspray in the nooks and crannies on a tank, and thusly simulates more depth than there actually is, especially in sharply defined indentations, like stowage bins, panel plating and such.

It may look odd close-up, but when taking sone distance from a model, it suddenly clicks. To make a model look ‘real’ one has to overdo everything a bit.

I got this trick from some article in a modellers magazine yèars ago in the 70’s, when they interviewed the guys that built the Star Wars models.
Post Reply

Return to “General Questions”