As Niels Jansen commented, there indeed is not much space to build in stuff in the tower. However, the bottom hole in the tower base is large enough to build in the gun recoil system (Tamiya), turret MG and the barrel motor (Tamiya) and the complete wiring: recoil cable, MG cable, barrel motor cable, gun flash cable and even a 3-5mm hose to enable smoke come out of the gun barrel after firing a shot.
Next to that I can reach these parts via the hatch openings on top of the turret. As long as the hatches are not build in, there is plenty of room (even with my thick fingers) to do adjustments. As I decided to use an IBU 3 board to control my tank I have to modify the tower somewhat. I will use a led flash instead of the high-voltage flash set from Tamiya. Other additions/changes to the tower are (and are work in progress):
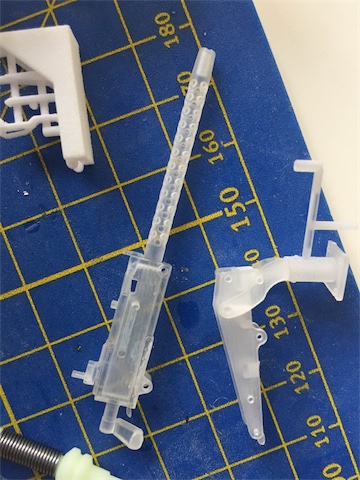
•It is not my intention to build a copy of the “furry” tank or so, but many M4A3’s were packed with extra armour or extra gunpower. It was very common to mount a Browning .30 cal. machine gun on the turret to knock out nearby enemy infantry next to the .50 cal. Browning heavy machine gun that was more in use for air defense and long distance targets. I will add a .30 cal machine gun in front of the commander’s hatch. Shapeways (
http://www.shapeways.com) provides a very detailed 1/16 scale .30 cal. Browning machine gun with a vehicle mount with ammo mounts and very detailed ammo boxes. The quality of their 3D printing is excellent.
•It is not that I do not like the gunner’s split-hatch that was provided by Nick Agular, but the Mato metal hatch from
http://www.rctank.de is much more detailed, so I will use that instead.
•From the same supplier I purchased a New spring load high detail US antenna.
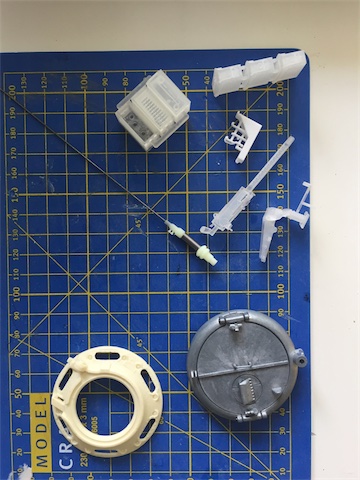
- Shapeway parts
- Stower_001.jpeg (81.91 KiB) Viewed 7553 times
- Shapeways fine detailed 3D printed parts
- Stower_002.jpeg (89.69 KiB) Viewed 7553 times
In the meantime, I already made good progress in building the lower hull. I added a few modifications (to the standard super Sherman Tamiya kit):
• To make the tank heavier I build in a steel bottom plate. This steel plate can be purchased by Axels Modellbau (Germany). According the vendor the weight of the tank increases by 460 grams which improves the driving behavior. Next to that it offers a stable and separated battery compartment and it separates the motor compartment (grease) from the electronics. The electronic compartment is big enough for an IBU3 board, a smoker unit, other electronic switches and the cabling.
- You can recognize the heavy bottom plate to improve the driving behavior
- l hull_005.jpeg (49.58 KiB) Viewed 7553 times
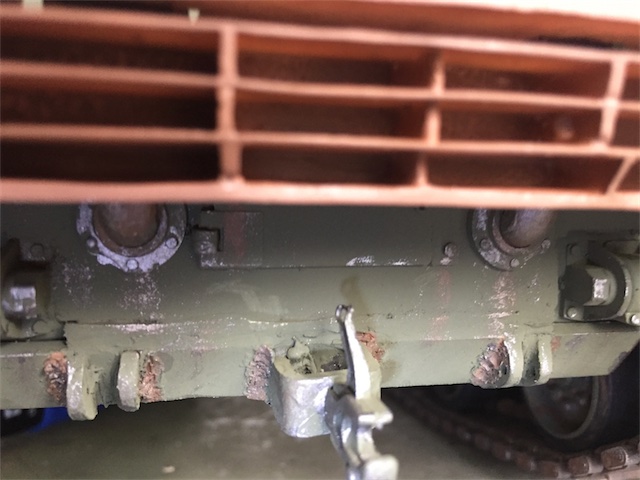
• At the front-side I enforced the sprocket axes with two aluminum plates with high quality ball bearings for additional support of the drive axles of the model. These bearings are externally mounted to the tub. The axes of the gears are better supported, in addition, the life of the transmission is significantly increased (no sand can come into the gearbox. These bearing/plates can be purchased by rc.tank.de.
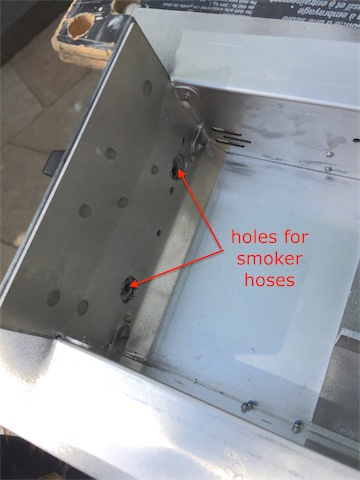
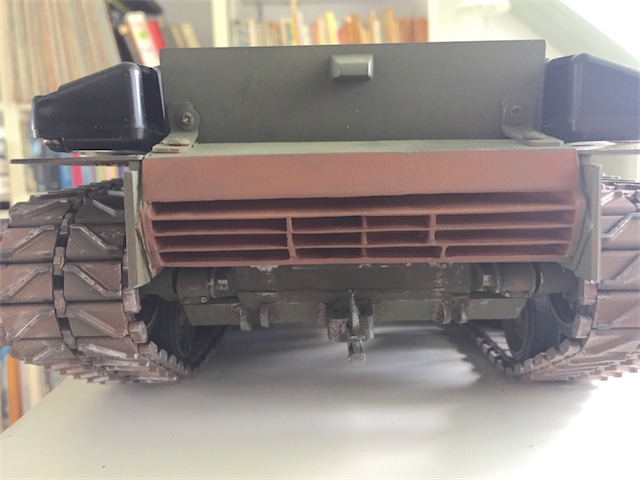
• At the back-side I changed the exhaust system. Many of the older M4 Sherman types were utilized with a single exhaust pipe (pepperpot), filter-systems at the left and the right side and a relative large back engine door, such as is standard in the Tamiya kit.
- l hull_006.jpeg (82.33 KiB) Viewed 7553 times
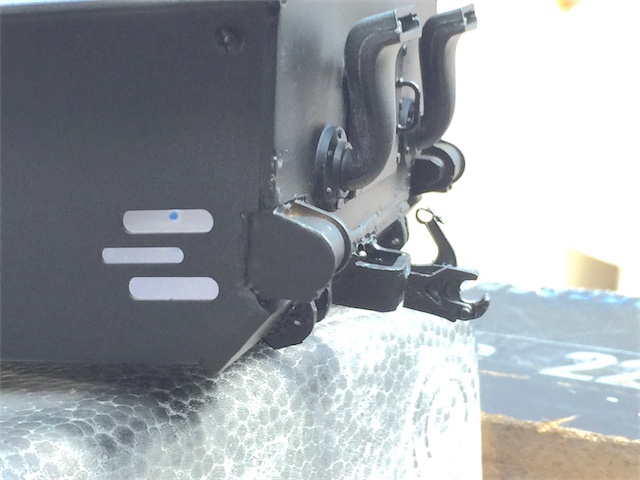
As I want to build a late, say 1944, M4A3E8 with smaller back engine doors and the specific exhausts gas deflector/diffuser I had to change these parts. The gas deflector was delivered by Nick Agular as part of the M4E3E8 resin kit. To change the doors and to add the trumpet like exhaust pipes, I used the Mato metal set (Sherman rear plate with exhaust) from
http://www.rctank.de. I had to remove the metal attachments of this set to make it fit to the original Tamiya hull. To enable smoke coming out the exhaust pipes I drilled two holes in the hull so that I can attach hoses that come from the smoke unit. I used some metal strips to attach the deflector to back-side of the tank.
- l hull_004.jpeg (60.27 KiB) Viewed 7553 times
- l hull_003.jpeg (77.49 KiB) Viewed 7553 times
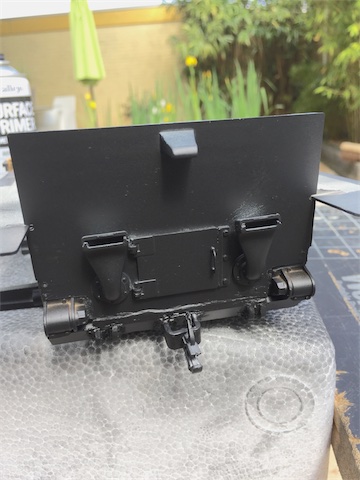
• At the bottom of the back side I added a tow hooks and a trailer hitch with holder which are not part of the Tamiya original kit
- hooks and trailer hitch
- l hull_001.jpeg (85.18 KiB) Viewed 7553 times
After spraying all the metal parts with a primer, I air-brushed the lower hull, the tracks, and all the metal parts of the idlers, sprockets wheels and suspension sets.
Hope to update you very soon.....comments are more than welcome...