Challenger 2 Build Log
Posted: Tue Apr 19, 2016 11:20 pm
I received all my tracks and gears upgrade from Carson after a long wait (made to order) and plus the UK customs took a long time to clear it. I will be doing the post Iraq war version. This is the strip down version as already done by Scalawag. Nothing special about this version. I will highlight the details that I will add as I go along this build.
First off are the wheels..... this will be the newer type in which lightening holes are noted. In the real tank this helps clear out the build up of mud/debris on the wheels that will cause damage to it and the tracks. Carson did a great job on the jig. Its made of hard aluminium and its solid and very heavy just like steel. Drilling this using a hand drill proves to be fidly. You need to be very careful as the angle of the wheels itself will cause a slight angle deflection on the drill bit despite the jig. I have to stop working on this as I ran out of 2mm drill bits (I broke 3 already despite being careful. Also note that once you drill trough the outer wheel you have to pin it down with a 2mm broken drill bit on the first hole to maintain accurate alignment just to be on the safe side as it has a small "play" when you drill.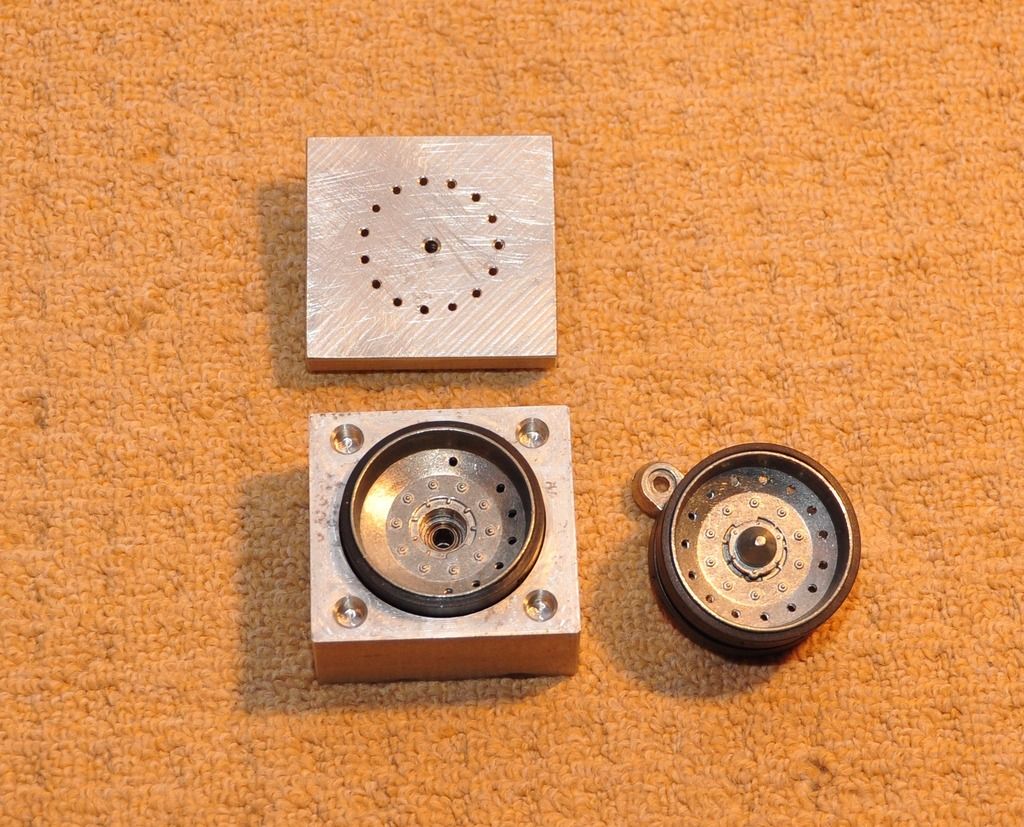
First of the 12 wheels........3 drill bits snapped so far. If you have a bench drill available it will greatly help as its more stable.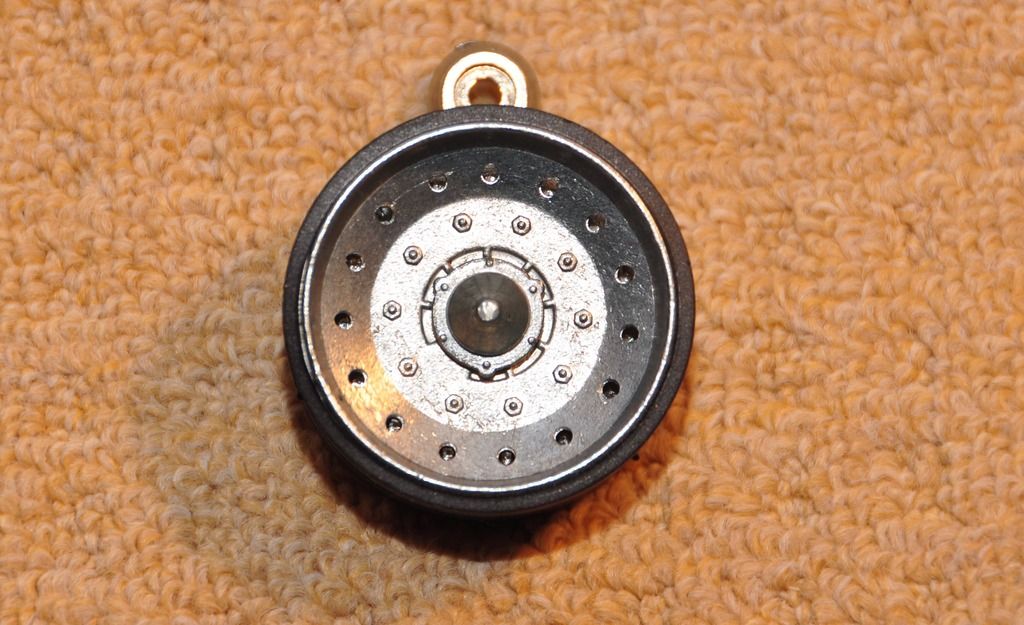
First off are the wheels..... this will be the newer type in which lightening holes are noted. In the real tank this helps clear out the build up of mud/debris on the wheels that will cause damage to it and the tracks. Carson did a great job on the jig. Its made of hard aluminium and its solid and very heavy just like steel. Drilling this using a hand drill proves to be fidly. You need to be very careful as the angle of the wheels itself will cause a slight angle deflection on the drill bit despite the jig. I have to stop working on this as I ran out of 2mm drill bits (I broke 3 already despite being careful. Also note that once you drill trough the outer wheel you have to pin it down with a 2mm broken drill bit on the first hole to maintain accurate alignment just to be on the safe side as it has a small "play" when you drill.

First of the 12 wheels........3 drill bits snapped so far. If you have a bench drill available it will greatly help as its more stable.


