Page 1 of 5
Nicks Xion Sdkfz 222
Posted: Fri Oct 16, 2015 12:01 am
by NickDonitz
Having always fancied a 222 I managed to aquire one that had been to put it bluntly been built badly, a few others had had a go to try and sort it but realistically it deserved better so a complete strip down was needed, Id seen it running at a MAD meeting and it struggled to cope with inclines though it was way to quick.
Another thing that had to be addressed was access to the internals, a friend 'Famo man' has a 222 and was infuriated by having to disassemble the whole thing to get in to make adjustments or change a battery so with this in mind I set to work stripping the whole thing down.
Once apart I soaked all the parts in Mr Muscle to soften the paint and it lifted off all the metal parts a treat but took a little more effort to get it of the resin parts.
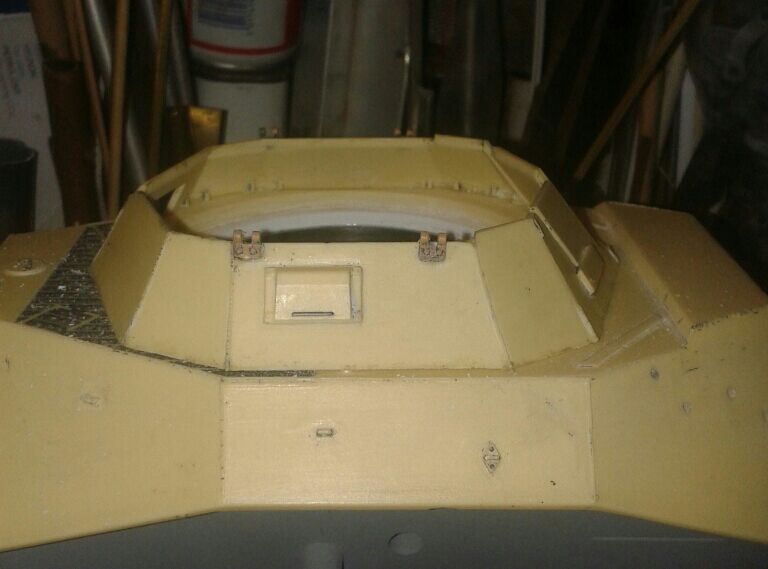
The following picture shows the basic parts after initial cleaning, you can see the turret simply sits in the upper bodywork so I decided that id open it up and ad turret rotation
Re: Nicks Xion Sdkfz 222
Posted: Fri Oct 16, 2015 12:37 am
by NickDonitz
]I cut the recess out with the dremel and also the grating at the back of the turret. I had the pe grill to replace the cast grill and it would look so much better.

- Phone download Aug 2015 827.jpg (64.6 KiB) Viewed 4258 times
It had to be recessed a little so a bit of careful scraping with a scalpel blade gave it a nice recess to sit in.

- Phone download Aug 2015 828.jpg (65.83 KiB) Viewed 4258 times
you can see in the pictures that ive mounted a rotation motor.

- 5ca0d8c3-5380-4403-b014-b39b84158bf5.jpg (62.48 KiB) Viewed 4258 times
This is a Tamiya elevation unit but its a great fit. Next thing was to make a turret ring which was made by cutting down a HL unit and heating it up with a hot air gun till it retained its shape.
- Phone download Aug 2015 819.jpg (96.96 KiB) Viewed 4258 times
The ring was glued to the base of the turret

- Phone download Aug 2015 820.jpg (56.21 KiB) Viewed 4258 times

- Phone download Aug 2015 821.jpg (51.6 KiB) Viewed 4258 times
a little adjustment and voila working turret
- Phone download Aug 2015 822.jpg (48.25 KiB) Viewed 4258 times
Re: Nicks Xion Sdkfz 222
Posted: Fri Oct 16, 2015 1:55 am
by Ad Lav
Always liked these.
Good work so far!
Re: Nicks Xion Sdkfz 222
Posted: Fri Oct 16, 2015 11:01 am
by wibblywobbly
I can't help but be impressed by your seemingly inexhaustible engineering skills. I look at the ingenious solutions that you come up with on your builds and start banging my forehead on the keyboard.

Re: Nicks Xion Sdkfz 222
Posted: Fri Oct 16, 2015 4:02 pm
by EddyK
Excellent idea and job done on the turret rotation!


Re: Nicks Xion Sdkfz 222
Posted: Sat Oct 17, 2015 12:35 am
by NickDonitz
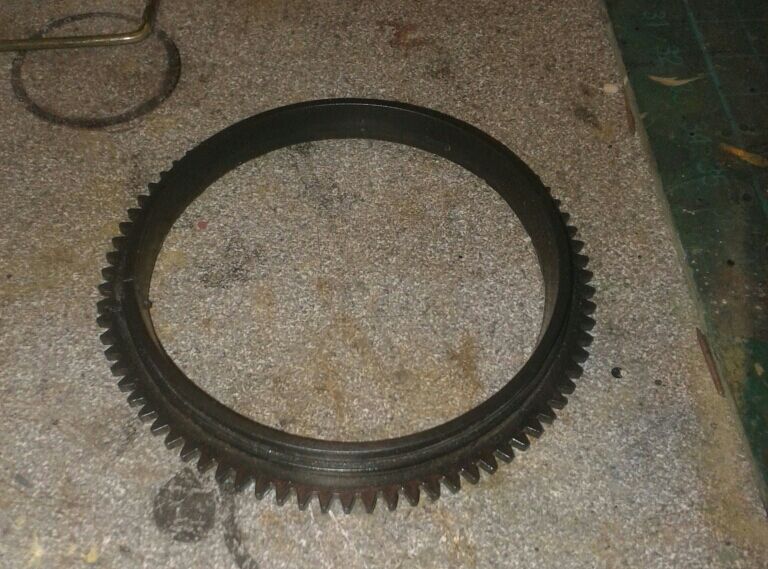
Space is at a premium inside a 222

- Phone download Aug 2015 709.jpg (34.01 KiB) Viewed 4201 times
The gearbox is designed for a 280 but it needs more torque and less speed
got to fit these bad boys in
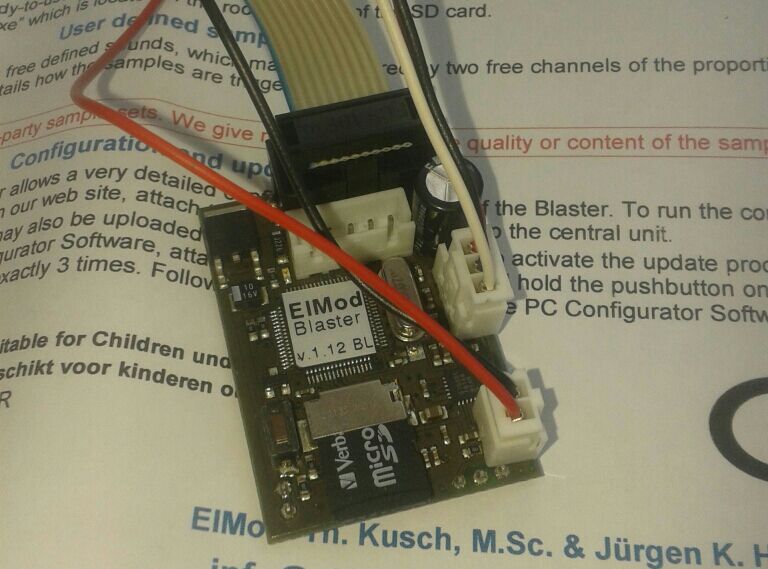
- 7bf34eae-a5ec-4c9c-9786-0ea14fe877e9.jpg (70.07 KiB) Viewed 4201 times
Re: Nicks Xion Sdkfz 222
Posted: Sun Oct 18, 2015 11:29 pm
by NickDonitz
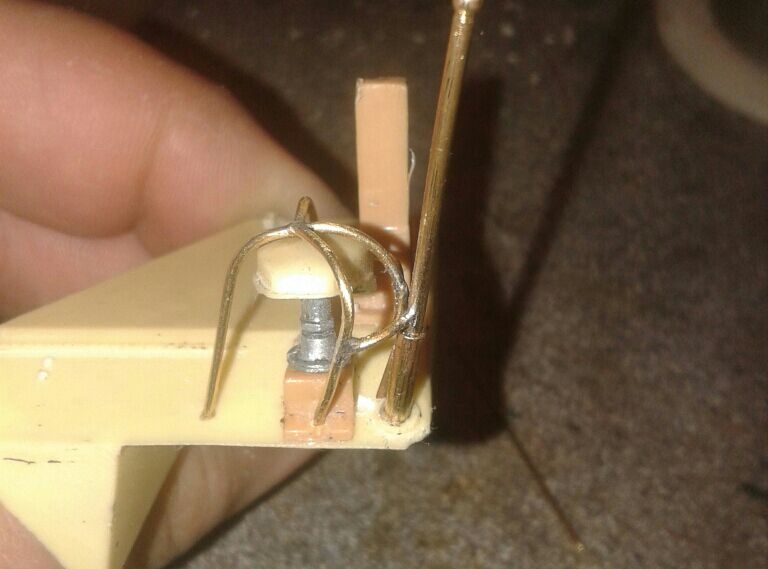
The joy of the xion kit is that its well thought out and accurate. just a few little changes to be made
The resin upper has the fuel cap cast in
- Phone download Aug 2015 832.jpg (71.93 KiB) Viewed 4174 times
The Pe replacement is 100% better and now it had a working handle
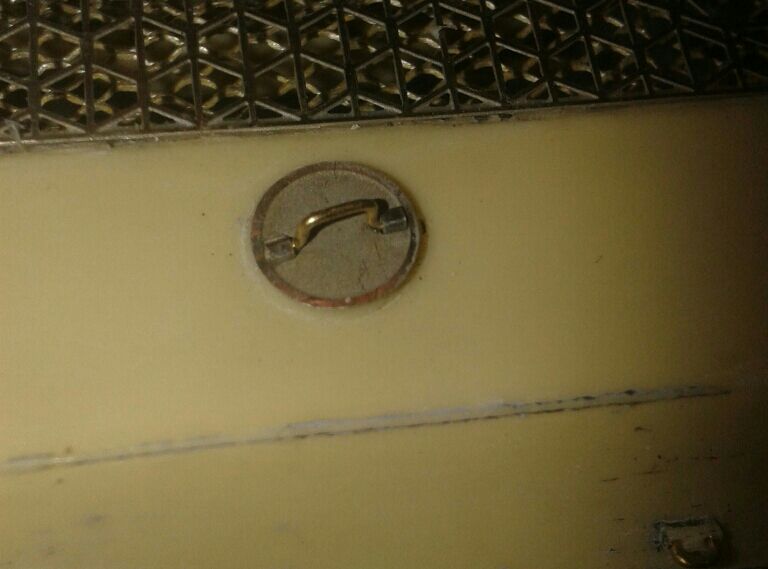
- Phone download Aug 2015 925.jpg (48.96 KiB) Viewed 4174 times
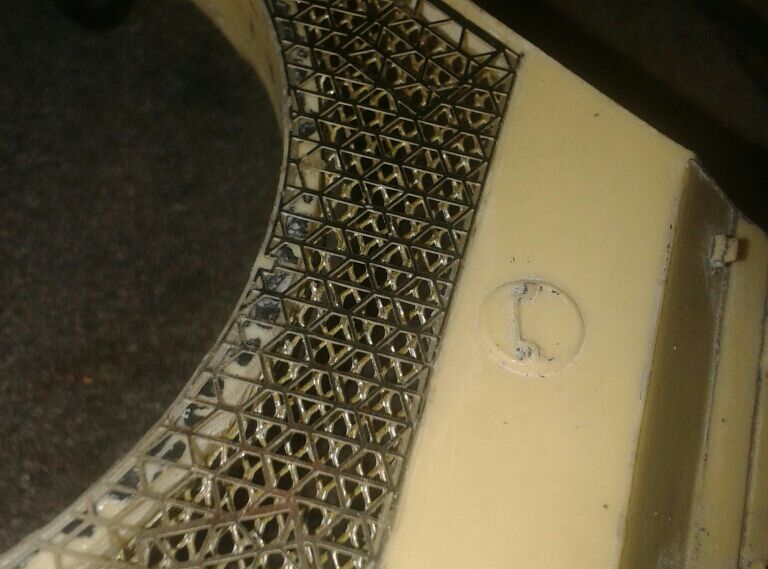
After the clean up there were a few areas that needed filling where pinoles in the resin had opened up
I fitted a led into the front Notek and made a brass cage to fit over the top and some hex rod cut to represent the bolt heads

- Phone download Aug 2015 859.jpg (50.66 KiB) Viewed 4173 times
- Phone download Aug 2015 871.jpg (50.96 KiB) Viewed 4174 times
The rear brake light was next which was made from a led that was cut and filed and a case made from milliput
- Phone download Aug 2015 858.jpg (61.41 KiB) Viewed 4174 times
Next a brass cage to fit over that

- Phone download Aug 2015 870.jpg (46.87 KiB) Viewed 4174 times
Re: Nicks Xion Sdkfz 222
Posted: Sun Oct 18, 2015 11:54 pm
by NickDonitz
The rear convoy light was next, four mini leds all wired up and mounted in milliput and the brass step.

- Phone download Aug 2015 923.jpg (47.1 KiB) Viewed 4169 times
With all the lights the brass cages are a necessity as protection from knocks and scrapes so they are all mounted solidly in the resin
The mudguards have all been hollowed out a little to better represent the sheet metal they are made from, the original resin wings are quite thick and not quite the right shape as they come out of the box the kit is a modellers joy and is easy to improve but it isn't a straight out of the box screw together kit
Re: Nicks Xion Sdkfz 222
Posted: Sun Oct 18, 2015 11:56 pm
by NickDonitz
Bit of fun scratch building the fire extinguisher and its mount
Re: Nicks Xion Sdkfz 222
Posted: Mon Oct 19, 2015 12:06 am
by NickDonitz
The extinguisher mounted on the arch and jerry can holder.

- Phone download Aug 2015 911.jpg (57.18 KiB) Viewed 4168 times
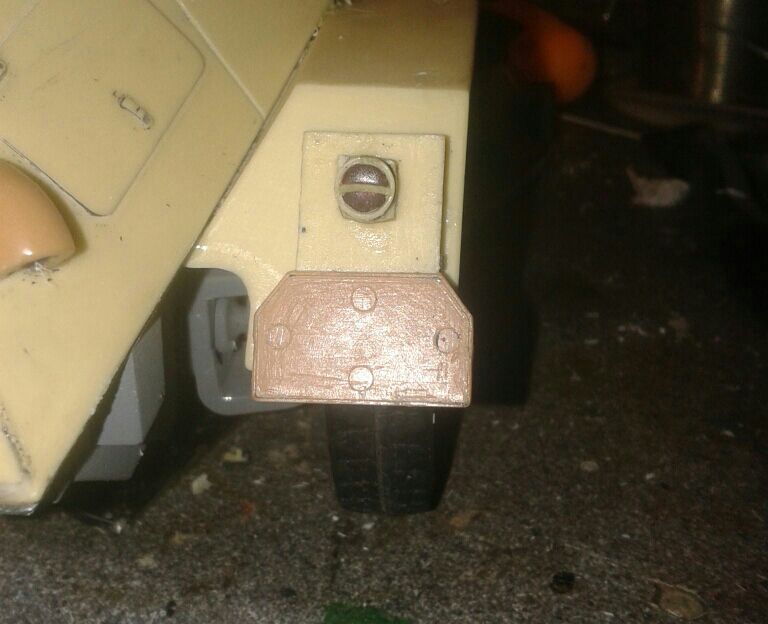
Next the jack cleaned up and a few little details added and its mounts.
The stowage loops cast in resin have been cut out drilled and brass wire inserted to make them serviceable.
other little details