HL King Tiger Zimmerit/Tiger 1 Fixingfor Metal Tracks Cheap
Posted: Sat Sep 13, 2014 4:43 am
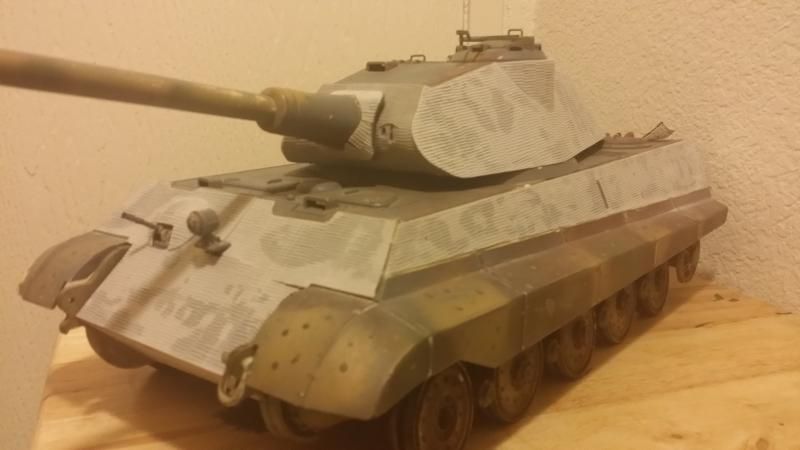
I bought the Atak zimmerit from Forgebear and came from England very fast-less then two weeks. it was about $60 US. It is very good, the extra parts they enclose-front mantlet, and rear armored door were very helpful in fixing the botched putty zimmerit job I tried!
The things I learned from this-if you are not sure of your zimmerit making skills, practice on a scrap piece first! Also if you use spackle, instead of putty, there is more working time. Even better, if you don't like how spackle zimmerit comes out-it just washes off with water. Unlike putty. I'm convinced they could use Testors putty on battleships, (can not find Milliput here and I doubt I'd do any better with that anyway) not even a naval gun could knock it loose-sanding, sanding, sanding! I saw someone had made a zimmerit tool from wire and a HL motor gear and that seems like the way to go, if i ever tried zimmerit by hand again, which i won't...
Anyway about installing the Atak zimmerit
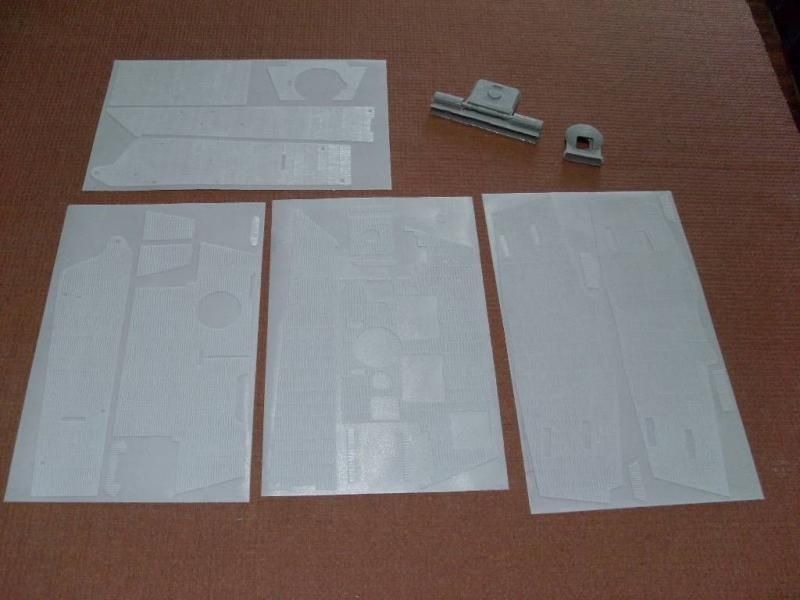
It's made in Poland, came with no instructions but you don't really need any. You do have to take the turret off the hull, then undo the screws underneath to remove the turret piece behind the mantlet. And this part gets replaced with the one from the kit. The main gun is held by two small screws then you pull the gun out, enough to get the turret piece in place. (The muzzle device just unscrewed, i was surprised to find the barrel seems to be made of steel not plastic like I thought).
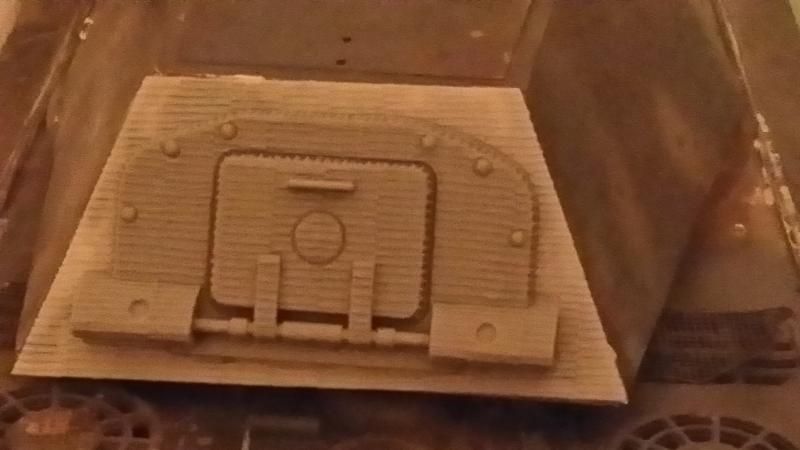
I examined the new armored door piece it comes with and saw there were protrusions that must go into slots in the turret. I assumed the turret was molded one piece but its not-the old armored door pries off. Then you glue the rear turret piece of zimmerit behind it and attach the armored door. I filled the seam with putty.
I used CA glue, medium thickness viscosity, and it did work well. Thin enough not to bulge the zimmerit and thick enough not to run.
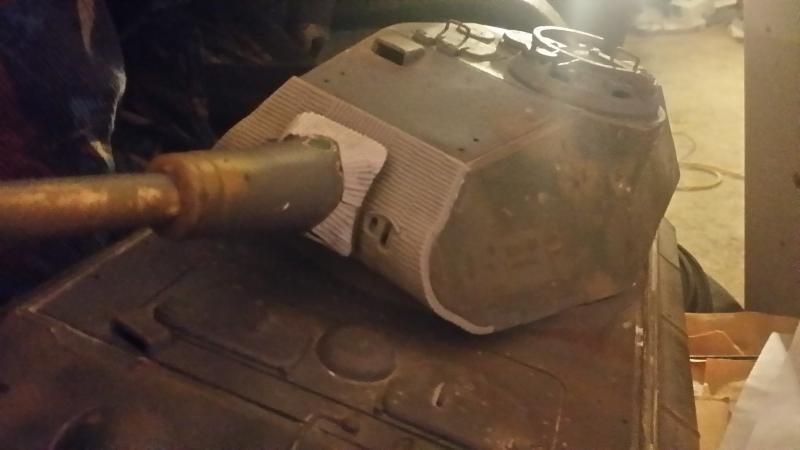
The piece behind the mantlet is simply replace all as one-replaces the old piece. The zimmerit around the gun mantlet is made in two pieces to glue on.
The hull sides are in two pieces. Separated at the point of the slot about 2/3 back. The turret side, with the cuppola bulge, has an empty space for the bulge. A separate piece of zimmerit goes over it.
The front hull has an empty circle for the machine gun bulge, that's a bit of a tricky part that you glue on and sort of mold the zimmerit over the round bulge. The rear hull zimmerit comes in 3 pieces so you don't have to remove the mufflers or anything else, it has cut-outs for every molded on part.
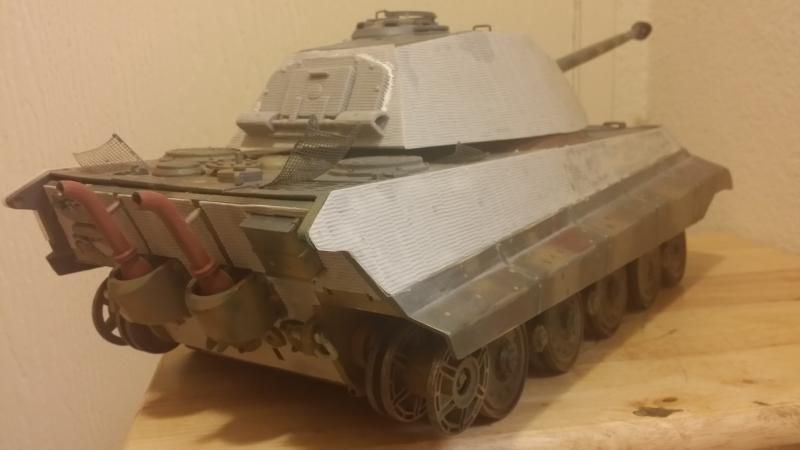
The zimmerit is thick enough to show the zimmerit, unlike the awful Tamiya zimmerit, but it can t ear easily and requires ginger handling at times (no offense to any real gingers reading this ).
).
A question for anybody that knows it please, I am installing the asiatam idler tensioners-I have two sets of metal idler wheels, one came with it, and is way smaller diameter then the other.
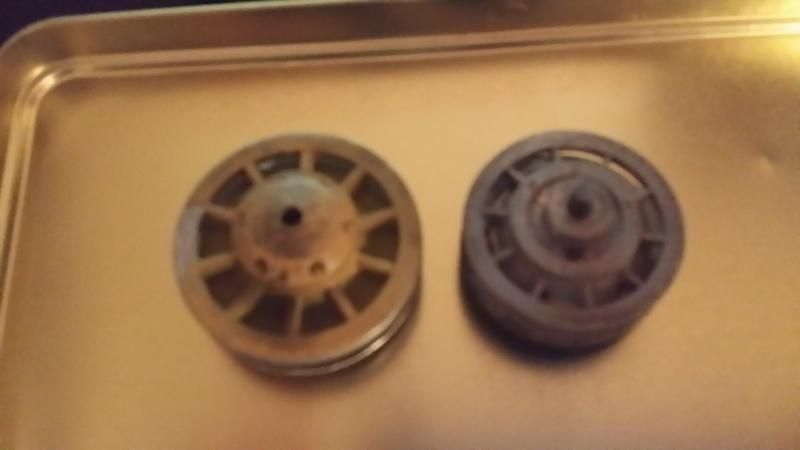
The left one is the one I took off to put the asiatam tensioners, the right one came with it. Did i just get the wrong size or do i really use an idler wheel that is about 30% smaller then the stock one? This doesn't make any sense to me but to use my old one I will need to go find some bearings at the hobby shop since they have too much slop, on the asiatam axles. And then install the bearings and axles and maybe even make new axles. The hole where the axles go is closed at the inside end anyway and axles are held in with the tiny hex screw.
The things I learned from this-if you are not sure of your zimmerit making skills, practice on a scrap piece first! Also if you use spackle, instead of putty, there is more working time. Even better, if you don't like how spackle zimmerit comes out-it just washes off with water. Unlike putty. I'm convinced they could use Testors putty on battleships, (can not find Milliput here and I doubt I'd do any better with that anyway) not even a naval gun could knock it loose-sanding, sanding, sanding! I saw someone had made a zimmerit tool from wire and a HL motor gear and that seems like the way to go, if i ever tried zimmerit by hand again, which i won't...
Anyway about installing the Atak zimmerit

It's made in Poland, came with no instructions but you don't really need any. You do have to take the turret off the hull, then undo the screws underneath to remove the turret piece behind the mantlet. And this part gets replaced with the one from the kit. The main gun is held by two small screws then you pull the gun out, enough to get the turret piece in place. (The muzzle device just unscrewed, i was surprised to find the barrel seems to be made of steel not plastic like I thought).

I examined the new armored door piece it comes with and saw there were protrusions that must go into slots in the turret. I assumed the turret was molded one piece but its not-the old armored door pries off. Then you glue the rear turret piece of zimmerit behind it and attach the armored door. I filled the seam with putty.
I used CA glue, medium thickness viscosity, and it did work well. Thin enough not to bulge the zimmerit and thick enough not to run.

The piece behind the mantlet is simply replace all as one-replaces the old piece. The zimmerit around the gun mantlet is made in two pieces to glue on.

The hull sides are in two pieces. Separated at the point of the slot about 2/3 back. The turret side, with the cuppola bulge, has an empty space for the bulge. A separate piece of zimmerit goes over it.
The front hull has an empty circle for the machine gun bulge, that's a bit of a tricky part that you glue on and sort of mold the zimmerit over the round bulge. The rear hull zimmerit comes in 3 pieces so you don't have to remove the mufflers or anything else, it has cut-outs for every molded on part.

The zimmerit is thick enough to show the zimmerit, unlike the awful Tamiya zimmerit, but it can t ear easily and requires ginger handling at times (no offense to any real gingers reading this
A question for anybody that knows it please, I am installing the asiatam idler tensioners-I have two sets of metal idler wheels, one came with it, and is way smaller diameter then the other.

The left one is the one I took off to put the asiatam tensioners, the right one came with it. Did i just get the wrong size or do i really use an idler wheel that is about 30% smaller then the stock one? This doesn't make any sense to me but to use my old one I will need to go find some bearings at the hobby shop since they have too much slop, on the asiatam axles. And then install the bearings and axles and maybe even make new axles. The hole where the axles go is closed at the inside end anyway and axles are held in with the tiny hex screw.


