First, just as a test if I succeed

Post all your larger scale RC Tanks, Half Tracks and Military Vehicles, build threads here. From 1/12 all the way up to 1/4! all here! Your Larger Scale figures are also welcome here.
User avatar
Edwin
Corporal
Posts: 394
Joined: Tue Jun 11, 2013 8:34 pm
Location: Rheinland Pfalz Germany
Contact:

First, just as a test if I succeed

Post by Edwin »

By the way, I'm just going to mill aluminum, a master and this time in a slightly larger scale of 1/6

If I succeed here is a joint report produced construction, first for a drive bassis which should surpass the previous ways the behavior of the suspension and the drive clearly and can then later be built in many variants.

But first I need the one I cut from a block of aluminum alloy shaft corresponding to the band saw.

Image

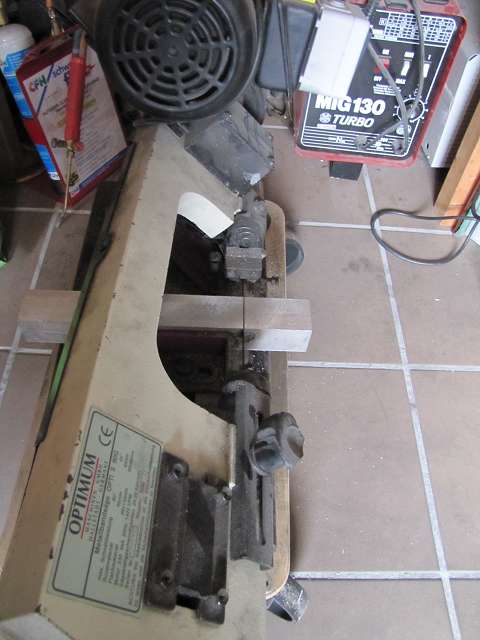
Outside it is getting so 66.66 x 28.81 x 24.41 mm, but at a cutting of about 85% if I succeed.

Image

Image

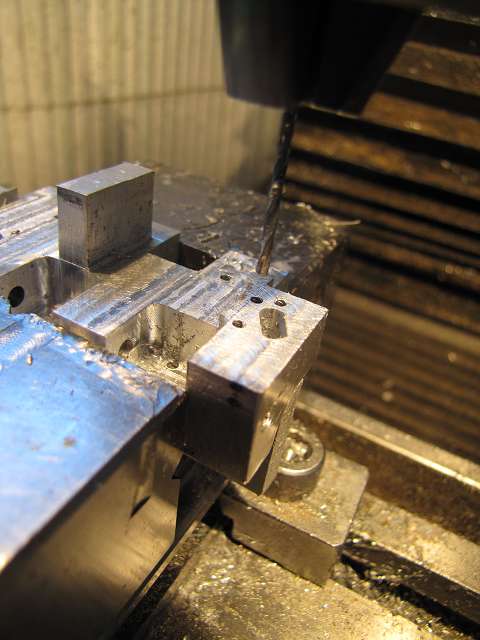
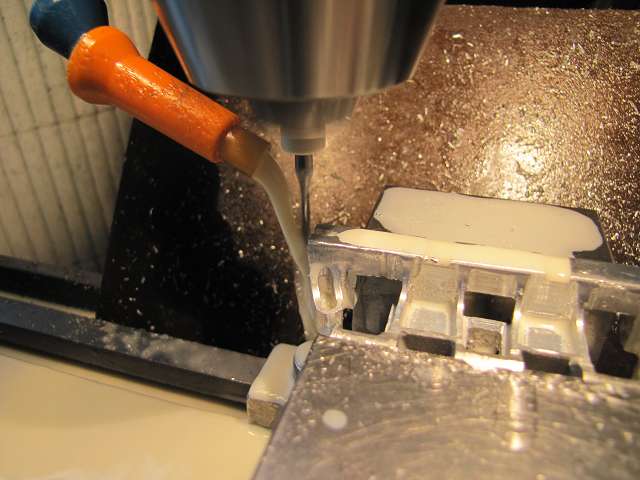
Next, I position the component using an edge finder to two holes to really precisely set.

Image

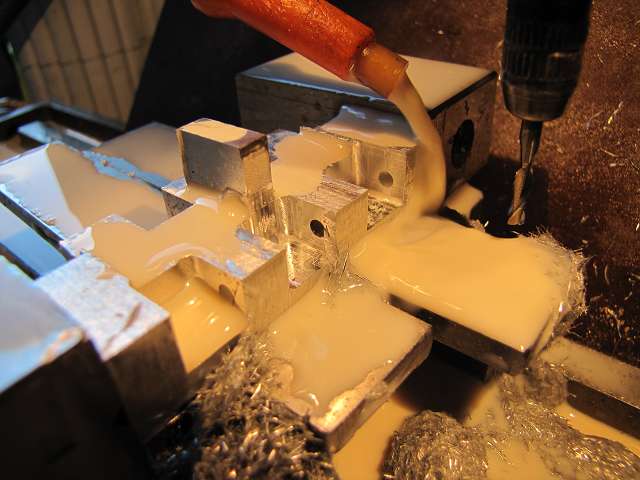
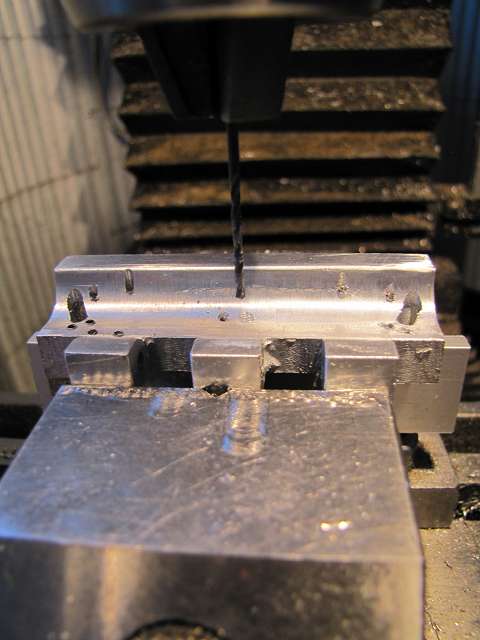
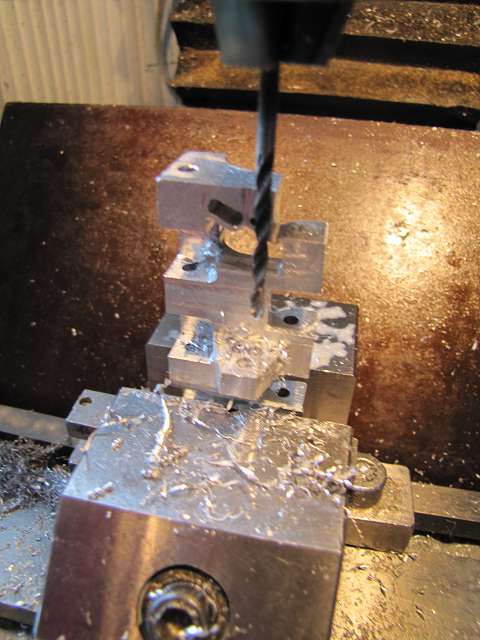
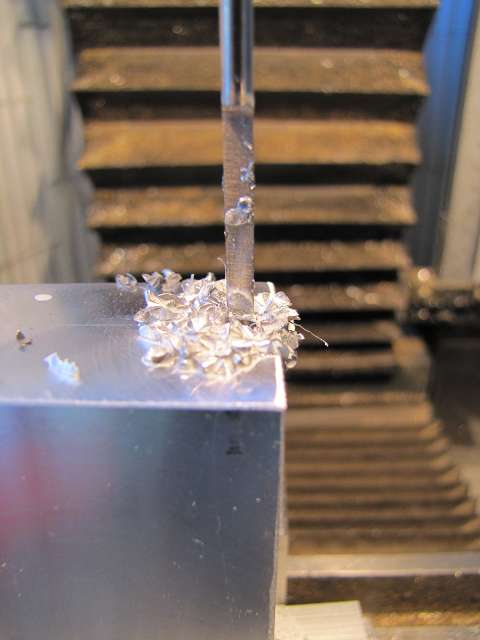
After I hit the right coordinates, and have a little pre-drilled so that the gun drill obtained its leadership, I drill two 3mm holes absolutely parralelle the 66 mm deep through the block. The canon is to drill absolutely necessary as a normal drill at this depth estimated at 2 mm above this level.

Image

Image

Image

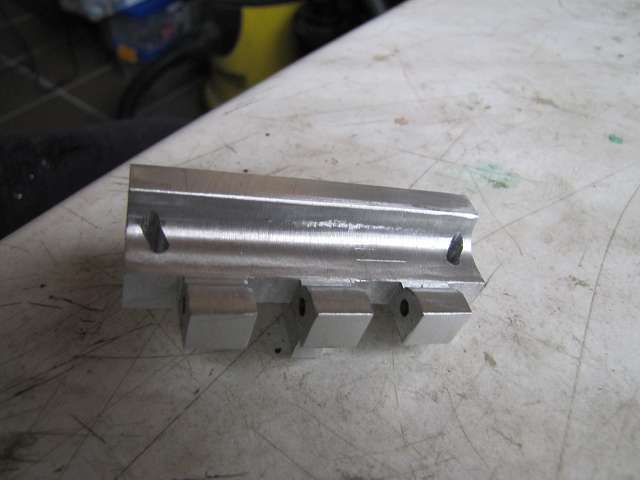
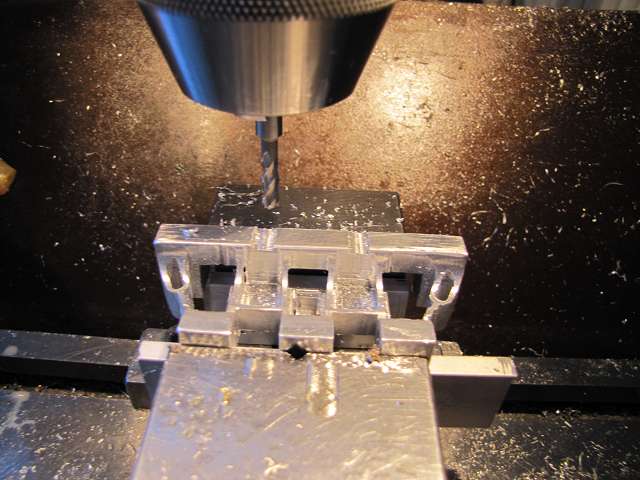
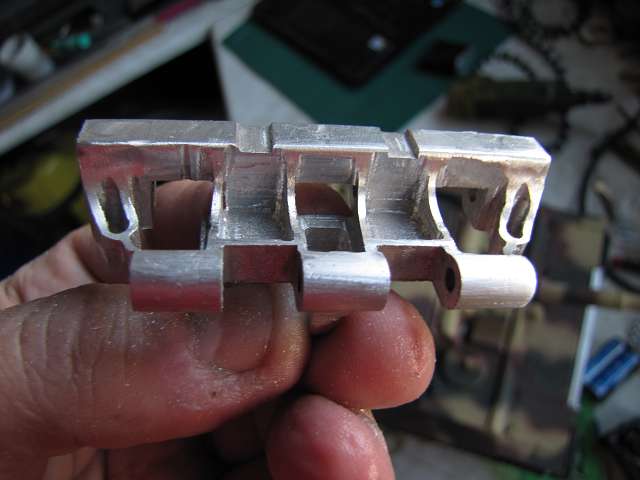
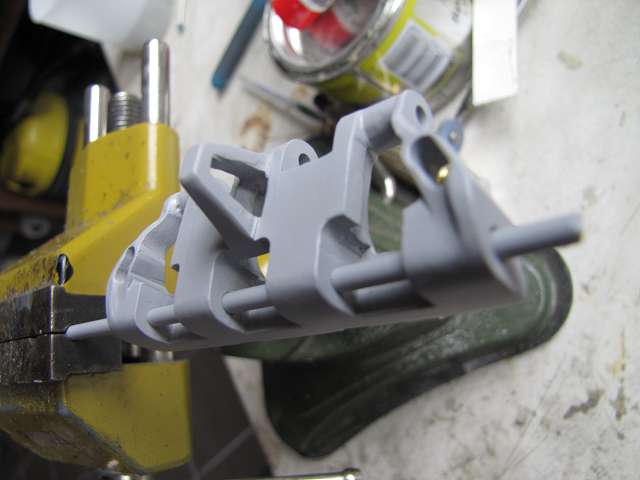
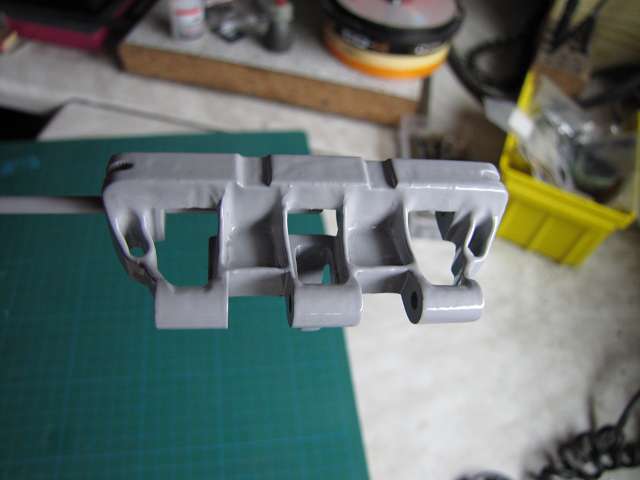
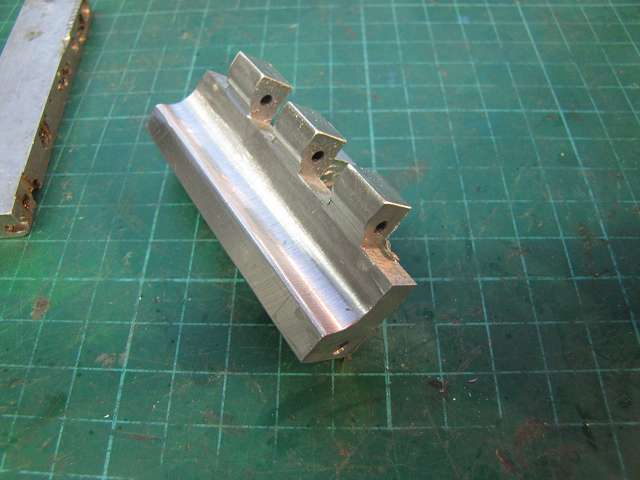
I then milled the top of the first level and then do a round with 6mm radius.

Image

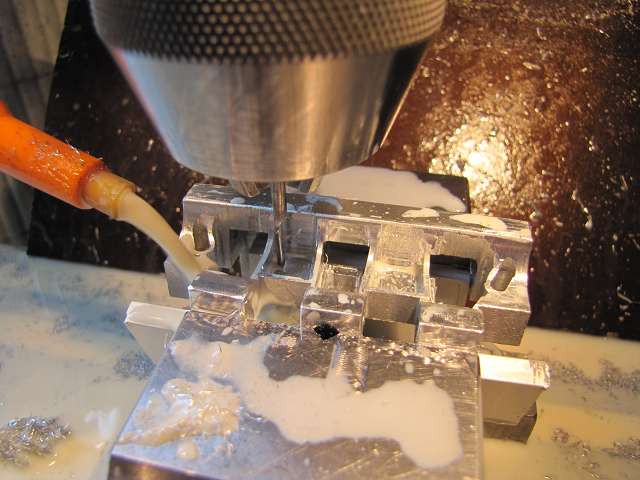
With a 6mm router will talk to one side of the segments milled.

Image

Image

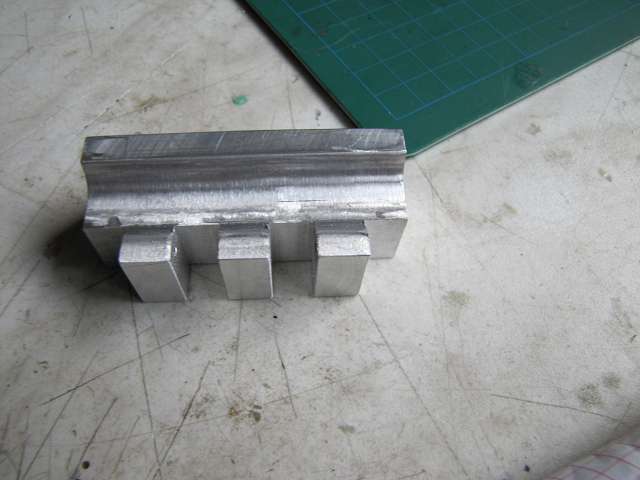
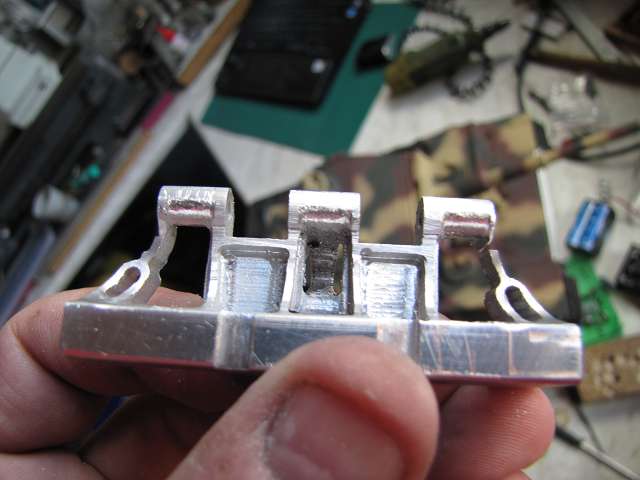
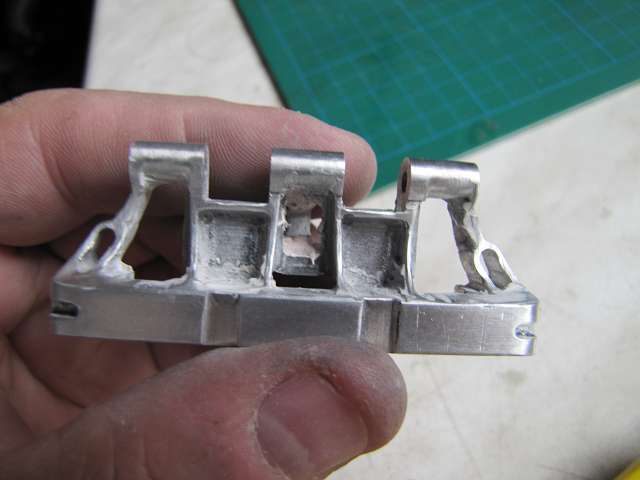
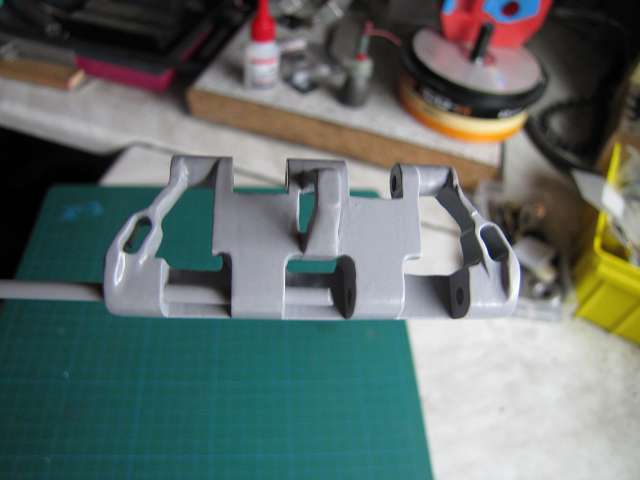
I work as the bottom, but leave in the middle of the guide bar are blank.

Image

Image

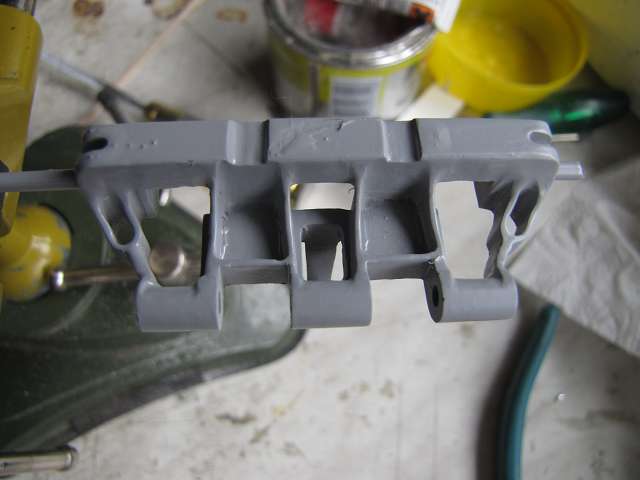
As far as times to the present.
APAMOTEC Model technology in detail
User avatar
[ICE]monkey
2nd Lieutenant
Posts: 2669
Joined: Wed Sep 10, 2008 5:58 pm
Location: pluckley ,ashford ,kent

Re: First, just as a test if I succeed

Post by [ICE]monkey »

wow , nice machine skills 8)
User avatar
Edwin
Corporal
Posts: 394
Joined: Tue Jun 11, 2013 8:34 pm
Location: Rheinland Pfalz Germany
Contact:

Re: First, just as a test if I succeed

Post by Edwin »

On the chain link today I occupied myself with the cutouts. This takes time, as the members are indeed a good fit and exactly later.

I milled the day with a 3mm router with abundant use of cooling lubricants.

Image

Image

And so it looks after two hours from then.

Image

Image
APAMOTEC Model technology in detail
User avatar
Edwin
Corporal
Posts: 394
Joined: Tue Jun 11, 2013 8:34 pm
Location: Rheinland Pfalz Germany
Contact:

Re: First, just as a test if I succeed

Post by Edwin »

It goes on ....

Today I drilled and milled only the notches on the lateral fins, the difficulty was that these are arranged inclined to the member.

after I had determined that of Issues on the drawing I could hit the 4 holes with the coordinate table and drill the ends of which a 2.9 mm hole.

Image

Image

After I determined the exact location and extent of the cutouts with the holes I could clamp the blank corresponding to a straight line between the holes and carefully milled out with a 2mm diamond cutter.

Image

After I have the whole then even prepared the rough with a file, it now looks like this. The real finishing takes place only when all milling operations are completed, but it will take some time. That was what you see here today again 2.5 hours work.

Image

Image
APAMOTEC Model technology in detail
User avatar
Edwin
Corporal
Posts: 394
Joined: Tue Jun 11, 2013 8:34 pm
Location: Rheinland Pfalz Germany
Contact:

Re: First, just as a test if I succeed

Post by Edwin »

And it goes back a little bit further.

To be able to mill out and file the openings in the chain link clean I drill the corners as a boundary with a 1.5 mm drill. The positions of the holes do I find out my CAD drawing again, and then they go on to coordinate table.
But first I must find the zero point of two axes with an edge finder.

Image

So I can now drill the first two lateral openings of the bottom of the chain link.

Image

For drilling the middle breakthrough I turn around the limb, there is in this way in the guide bar and the breakthrough is right below this.

Image

To see all the holes now out of the top.

Image

Since I still have a little time I milled the first breakthrough times already grossly out with the diamond cutter. The work I'm doing fine then later with a file.

Image

So you also get a little insight about how expensive something is ...... today I have used for about 2.5 hours.
APAMOTEC Model technology in detail
User avatar
Edwin
Corporal
Posts: 394
Joined: Tue Jun 11, 2013 8:34 pm
Location: Rheinland Pfalz Germany
Contact:

Re: First, just as a test if I succeed

Post by Edwin »

Today it was again about 2.5 hours which have brought me a little further.

First I milled the second breakthrough coarse.

Image

The next step was the finer milling of breakthroughs in the series, which the first part is the actual contours. And I've missed me but at a level which is not bad anyway, I still have to trim with wood filler in some places, so you can not mill and file the chain link.

Image

Image

The guide bar must of course also be edited and so gets its slopes.

Image

Since this is also broken through relatively complicated and I can not mill it directly I drill 3 holes in first.

Image

Then I fräses into a breakthrough from the top to the guide bar.

Image

The gross irregularities I file ever from the guide bar. The work I'm doing fine only if all milling operations are completed so far.

Image
APAMOTEC Model technology in detail
User avatar
Edwin
Corporal
Posts: 394
Joined: Tue Jun 11, 2013 8:34 pm
Location: Rheinland Pfalz Germany
Contact:

Re: First, just as a test if I succeed

Post by Edwin »

And again, it goes a little further on.

Yesterday and today I have the milled rhombus-shaped recesses. For this I must span the link several times, since the remaining webs do not run in a straight line to the component. Centered is the only straight and was quickly processed accordingly. For everyone else, I've studied again so about 2.5 hours.

Image

Image

Image

Image

Now that I have everything edited in link with the router, I can now mill off the pages appropriately.

Image

And so the chain link looks currently. Next to it is to compare a scale 1/16.

Image

So you can slowly start working with the fine belt sander, file, triangular scraper and emery cloth.
APAMOTEC Model technology in detail
User avatar
Edwin
Corporal
Posts: 394
Joined: Tue Jun 11, 2013 8:34 pm
Location: Rheinland Pfalz Germany
Contact:

Re: First, just as a test if I succeed

Post by Edwin »

Now were the last small milling of the series .

Image

Image

The works on the chain link to be fine now , piece by piece .

The outer curves I could still do with a belt sander .

Image

Image

The works are always fine now . Now I keep working to get the inner curves with different files.

Image

And so the chain link then again after about 2 hours seems to work.

Image

Image

Image

Image

Image

But there is still much work into the chain link and I'm still stuck in the rough work , although slowly so it looks like I imagine it .
APAMOTEC Model technology in detail
User avatar
Edwin
Corporal
Posts: 394
Joined: Tue Jun 11, 2013 8:34 pm
Location: Rheinland Pfalz Germany
Contact:

Re: First, just as a test if I succeed

Post by Edwin »

Now I had almost forgotten to cut a small groove on both sides of the web , but that was quickly rescheduled .

Image

Image

But then start working fine .

First I degreased the chain link clean . The cooling lubricant so leave a fine film of oil on the surfaces.
Then all defects with 2k auto Feinspachtel coated .

Image

Once the putty was hard I started to edit them with a rubber polishing wheel on the larger areas very carefully at low speed. As far as the for today.

Image

Image

Tomorrow I have worried me thin polishing points with which I can then edit the difficult areas .

Basically, I 'll edit the link largely smooth. I was able to with one of my regulars at the local entertain the Panzer IV was Komandant . The chains were delivered then provided mainly black with some kind of protective coating and were among the very fine cast by pretty smoothly . Moreover, his statement was that the chain looked after 2km in soft ground anyway as polished .
APAMOTEC Model technology in detail
User avatar
Edwin
Corporal
Posts: 394
Joined: Tue Jun 11, 2013 8:34 pm
Location: Rheinland Pfalz Germany
Contact:

Re: First, just as a test if I succeed

Post by Edwin »

And it goes on with the fine work .
Now this I am also taking a big magnifier for help.

Image

I've still polishing pins and worried with this , I can now edit the last twisty corner carefully .

Image

Image

Image

After the first cleaning was primed to better recognize where I need to reproduce .

Image

Image

Image

A few small points there is I do not like . This I have to split again .

Image

How can I get a little more careful with the polishing donate rework .

Image

And priming again . Now, the link looks like this as I imagine it . I realize this is not all surfaces perfectly designed , but light waves and depressions left as well as a coarser surface in the recess of the guide web .

Image

Image
APAMOTEC Model technology in detail
Post Reply

Return to “Larger Scale Military”