1/16 LCM 3 build

This section is for all of you who want to talk about RC boats, warships etc.
User avatar
Crispy
Sergeant
Posts: 566
Joined: Wed Oct 29, 2008 6:59 pm
Location: Redhill, Surrey
Contact:

1/16 LCM 3 build

Post by Crispy »

This evening Ive made a cardboard mockup of the 1/16 scale LCM 3 I've been planning to go with my HL Sherman Firefly project. I didn't have the tank to hand for the pics but my Tamiya 1/10 Landie does a pretty good job to compare the size of the thing.

Image

It's about 3ft long and 1ft wide and I'm pretty happy with the proportions so far. Now I can break it down and use the cardboard sections as templates for cutting out the plywood.

I'll keep you posted.
You aint gettin me on no plane fool!
User avatar
wibblywobbly
Major
Posts: 6395
Joined: Fri Oct 17, 2008 9:30 am
Location: South Wales Valley
Contact:

Re: 1/16 LCM 3 build

Post by wibblywobbly »

A few people have these, they are good fun, looking forward to the build. :)
Tiger 1 Late
Panther G
King Tiger
M36 B1
User avatar
Crispy
Sergeant
Posts: 566
Joined: Wed Oct 29, 2008 6:59 pm
Location: Redhill, Surrey
Contact:

Re: 1/16 LCM 3 build

Post by Crispy »

Couple of shots of the mock up with my HL Sherman.

Image

Image

I'm thinking I'll use 4mm plywood for the main structure and use plasticard for the details.
You aint gettin me on no plane fool!
User avatar
Panther Ausf G
Corporal
Posts: 457
Joined: Tue Sep 13, 2011 1:18 pm
Location: Bournemouth, Dorset. UK.

Re: 1/16 LCM 3 build

Post by Panther Ausf G »

Hi Crispy
In 1996 I scratch built 1/35th and 1/16th scale R/c landing craft.
One was a of 1/16th Lcm Mk6, I ran it at many shows displayed on and off the water. Loading and un-loading one of my Tamiya Sherman’s. (Regarded as mad at the time) no problems I made it unsinkable. (Heard that before).
I was always asked questions about how I got the ramp to go up and down. (Silly me some were traders), then everyone was building Lcm's. So I lost interest. But I still have it in the shed stored away.
I will search my pics and post some.
The Mk6 Lcm was the Higgins conversion, adapted to support a loaded Tank.
My research source was from Line drawings in a book about WW2 landing craft and any photographs I could get of the real thing.
The line drawings were enlarged using a photocopier.
So keep your build coming with pic's of course. :thumbup:
We do not stop playing because we grow old.
We grow old because we stop playing.
User avatar
Crispy
Sergeant
Posts: 566
Joined: Wed Oct 29, 2008 6:59 pm
Location: Redhill, Surrey
Contact:

Re: 1/16 LCM 3 build

Post by Crispy »

Will do Panther. I'd be interested to see the pics of your mk6. Thanks to EddyKs bargain deals I'm planning to use the standard HL RX18 and TX to control my LCM3. I'll have the motors running the props like tank steering so it may even be able to neutral turn or whatever the equivalent is on water. The turret rotation will work like a winch for the ramp control, gun elevation and the Airsoft control can be used to animate the crew and the machine gun flash and sounds will be worked into the 50.cal gunners. I'm hoping I can change the tone of the speaker to get more of a diesel engine throb. Would these craft produce a noticeable plume of exhaust? If so I want to try an idea I've been mulling over that involves incense burners in place of electric smoke generators.
You aint gettin me on no plane fool!
User avatar
Panther Ausf G
Corporal
Posts: 457
Joined: Tue Sep 13, 2011 1:18 pm
Location: Bournemouth, Dorset. UK.

Re: 1/16 LCM 3 build

Post by Panther Ausf G »

Hi Crispy.
I like your ideas, animated crew. :D :clap: :clap: :thumbup:

I will get some of my pic’s to post on here.
My Lcm was built and on the water in 1997. I stared the build and research about 1992 along with other landing craft projects.
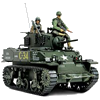
The first Sherman Tank I had then was the second series made by Tamiya about 1988. R/c but not the full sound module.
That gave me the Idea for a landing craft I was building in 1/35th scale at that time.
Our model boat club attended a lot of shows & exhibitions.
The shows were mainly local charity type, so lots children, as we had our own mobile pool. We involved the kids in have-a-go boats, this was too popular at some events, where we were placed near the entrance, not the ideal place for a crowd to gather.
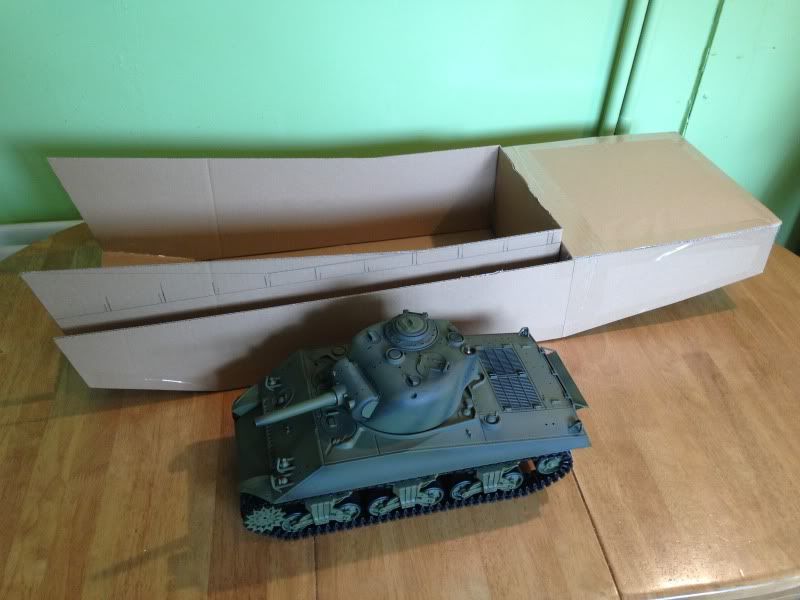
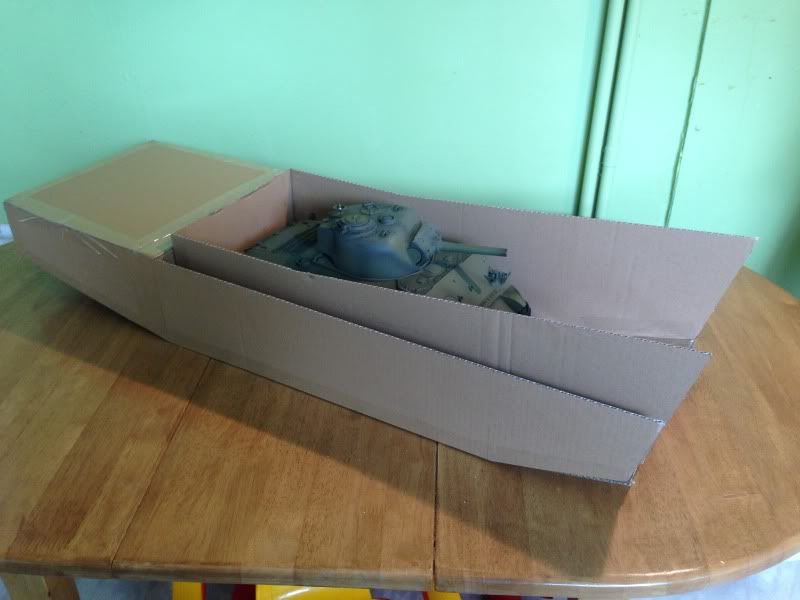
My 1/35 Lct’s were received well on both the water or as a static display. Looking for something different as an attraction, I did think at first I should scale up one of my Lct’s but at 1/16th it would have been enormous, with only one tank ridiculous. So at 1/16th scale the Lcm Mk6 plus Sherman, came about, not too large, also a scale model of the real thing. With all my research material, the book with the line drawings in and photographs of the real thing as they were in WW2.
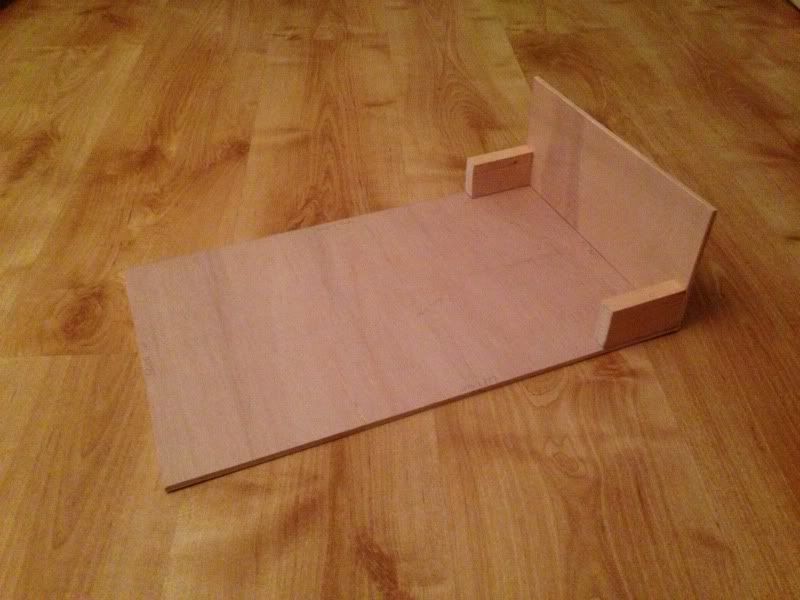
My ramp operation followed the original, cables going down the side and inside the model powered by a cheap cordless screwdriver motor and gear drive. The idea was right, but how to get it to work true to scale, that took me a while to work out, but sorted out with a cup of tea. Reaching for the cup knocked the boat the motor rolled around and fell into place. That saved me two more pulleys about two foot of extra cabling. Job done.
Operating live on water required two TXs. I needed help, One to drive the Lcm and one to control the Tank. (The tank was always running with one stick held back then when ready to exit the boat, the stick released the tank went through start up mode, then just drive off run around a little, fire the gun, return to the boat reload ramp up and back out on the water.
Where I was regarded as not quite the full ticket! When I bought the later Tamiya full sound Sherman.
Just to show how confident I was I took it out on a lake (the depth was about 40ft). My wife controlling the boat, :crazy: I drove the Sherman. (So not that confident, my wife usually drove the Tank).
Then got a little cocky when someone said “open the ramp, you claim it won‘t sink“, my wife did :wtf: and I was right, little or no water came in.
If it had, no problem the entire model is packed with polystyrene blocks between the inner and outer skins.
I’ll leave it there for now, screen getting a little out of focus, and you’ll be getting a little tired reading this lot.

A lot of technology has taken place since my build. I am looking forward to your build and how you resolve things.
Keep posting the pic’s and your build log. :thumbup:

Regards Brian.
We do not stop playing because we grow old.
We grow old because we stop playing.
User avatar
Panther Ausf G
Corporal
Posts: 457
Joined: Tue Sep 13, 2011 1:18 pm
Location: Bournemouth, Dorset. UK.

Re: 1/16 LCM 3 build

Post by Panther Ausf G »

Hi Crispy.
I have found some early piccy's.
These were taken in my workshop about 1995, showing electric installation, and how I positioned the motor for operating the ramp..
Image
The blue motor for ramp. The port motor and the gold coloured Esc in the side panel.

Image
The Starboard motor with it's Esc in the side panel.

Image
Image
[URL=http://s694.photobucket.com/user/Panthe ... 0.jpg.html]Image[/URL
I will find some more and post them.
But I have had three Pcs and a laptop since 1995 some are in photo albums, more are on my earlier computers and could be lost,
We do not stop playing because we grow old.
We grow old because we stop playing.
User avatar
Panther Ausf G
Corporal
Posts: 457
Joined: Tue Sep 13, 2011 1:18 pm
Location: Bournemouth, Dorset. UK.

Re: 1/16 LCM 3 build

Post by Panther Ausf G »

Hi Crispy
Fleet Air Arm Museum Yeovilton. Feb 2000
Image

You will notice the difference between the Mk6 & Mk3.
The Mk6 were modified Mk3 with the armament's removed and 6ft add to the length of the tankbay to increase the payload.
That 6ft at 1/16th adds 4-1/2" to the aol.
We do not stop playing because we grow old.
We grow old because we stop playing.
User avatar
Crispy
Sergeant
Posts: 566
Joined: Wed Oct 29, 2008 6:59 pm
Location: Redhill, Surrey
Contact:

Re: 1/16 LCM 3 build

Post by Crispy »

Great pics and write up Panther, looks like a very well detailed build. I may have to pick your brains over some questions I have but the main one for now is... How did your mk6 perform when loaded with a tank? Were you ever concerned about capsizing? Did it need any ballast? I was also thinking to fill my LCM with polystyrene, there's going to be a lot of space so it seems like a good precaution. I'm not concerned with loosing the "boat" but a can imagine the tank going for a drink.

Build wise I have all the 6mm plywood cut out and I've begun a dry fitting by screwing the parts together. Once I'm happy with that I'll strip it down and glue & screw it all back together. All the main hull pieces came out if a single 2x4ft sheet of 6mm exterior plywood, and I was able to cut it with a Stanley knife!

Image

Image

All going well... even the slice where I tried to remove the top of my thumb has stopped bleeding :)

Image

I've now got the sides and rear fixed on, I'll take some photos later and update the thread.
You aint gettin me on no plane fool!
User avatar
Panther Ausf G
Corporal
Posts: 457
Joined: Tue Sep 13, 2011 1:18 pm
Location: Bournemouth, Dorset. UK.

Re: 1/16 LCM 3 build

Post by Panther Ausf G »

Hi Crispy.
This one has my full option Sherman.ImageImage

It is very stable even loaded with a tank. The Tank sits right at the back of the Tankbay, not forward as in the photo.
On the water, It looks and behaves just like the real thing.
Never concerned about capsizing. The lake our club used at that time was 8ft at the edge and 40ft in the middle. that was why we built buoyancy into all our models.
The worry is the Tank climbing out of the boat.
To be effective the Tank is live on the boat, ready to disembark.
That's why I ran it with two TXs two operators, just a safety precaution.

Nice piccy of a model thumb. :lolno: Very realistic. :crazy:

The build was on ribs as full size practice.
They are laid out on a flat board, I will do some sketches over the weekend as not easy to explain with out piccy's.
You can see some of the ribs in the first pic's of the electrics.
Its built upside down, on a flat building board.
The outer skin is laid over them, then fibre glassed before it is cut free of the building board.
The inner skin I refer to, are the walls of the Tankbay.
I packed the polystyrene in-between the outer skin and the Tankbay skin. also under the Tankbay floor, The is over the full length of the Tankbay.
No ballast needed the Tank is the ballast.
The tubes the props run in I made from domestic sink waste pipe. They can be seen in photo 4 & 5 the grey bits under the battery.
In these two pic's you can also see one of the ribs.
The motor plate (made from scrap piece of aluminium plate). sits on the prop shafts.

Next week I will go in the Garage, get it out to do some sketches, I'll take some photos, then more will be apparent to you.
My ply came from a skip, I'm a typical scratch builder. (A tightwad ).
Last edited by Panther Ausf G on Thu Sep 19, 2013 9:37 pm, edited 1 time in total.
We do not stop playing because we grow old.
We grow old because we stop playing.
Post Reply

Return to “RC Boats / Ships”