Steel armoured 1/16 Tiger built from scratch

Kevlar
Recruit
Posts: 9
Joined: Sat Jun 15, 2013 10:07 pm

Steel armoured 1/16 Tiger built from scratch

Post by Kevlar »

With nothing to do I decided to build a Tiger tank from scratch. The tank itself is a copy of a Heng Long tiger tank I had on the shelf, and I have always loved the Tiger tank, so why not make it more... alive? The Heng Long tank is custom painted by myself.

The total length is about 34 cm, but I don't remember the accurate number.

The materials that has been used so far is steel plates and sheets.
And the tools I have used is a 140 MIG welder with flux-cored (without gas) and an angle grinder. Only two different discs has been used on the angle grinder, one type to cut the steel and an other to grind down my "perfect" welding. So far I have used around 8 cutting discs!
Almost forgot to mention it, but of course I have used an angle that is perpendicular, a couple of markers, a protractor and a ruler.

All measurements are in mm.
Thickness:
Front: 6 mm
Back: 5 mm
Both sides: 4 mm
Below/floor: 1,5 mm

The reason why I didn't use 5mm on the sides is because I didn't have enough, but lots of 4mm. Of course I didn't check that before I started, and I started with the back after the floor..

I know that I'm not a good welder, or an ok welder. This is really the first time that I have ever welded, and unfortunate the only teacher I had was the Internet.
First time I have worked with metal at all. I am 16 years old, so there is a limit for how good it can be too.


The is not a budget on this build, but I have used as little as around 30 $ until now.
The cost will shoot up when I am done and will get the tank to run, hopefully. Basic motors to run the tracks and tank won't be enough, because only the lower part weight about 6-7 kg is my guess. Haven't really weighted it yet.

New pictures and progress will be posted as soon as possible.
Because the sides and back isn't that thick I am also going to build "skirts" on the outside like the panzerkampfwagen 4 had, even though the Tiger never had extra armour.
This will hopefully make it extra bulletproof against at least .45 and 9mm.
Some of you may think that the "skirt" or extra armour will destroy everything and not accurate, that's why I am not going to permanently weld it on, but can put it in place and take it off and not permanent.

At the end the whole tank will be painted in some kind of forest camouflage, as accurate to the camouflage used on the real Tiger tanks as possible.

I hope that someone will take the time and read all that I have written although my english isn't that good. Some pictures will be posted below too.
Every comment and feedback is really appreciated!


Image
The welding machine used.

Image
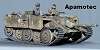
The Heng Long tank that I'm currently making a copy of, the bottom plate is also on that picture.

Image
Image
Back plate
Second picture: very bad cut, but will be fixed soon.
Image
Back plate (not at the original angle, was really hard to do, so I decided to go for a straight angle instead.

Image
Image

Image
Image
The front

Image
Image

Image
Up-side down.

Image
Making some progress

Image
Sorry for bad resolution

Image


Forgot to take some pictures for a while:

Image

Image

Image
Doesn't look angle-correct on this picture..
Image
Or this one


Image
Image
Start of one of the "skirts"
User avatar
Edwin
Corporal
Posts: 394
Joined: Tue Jun 11, 2013 8:34 pm
Location: Rheinland Pfalz Germany
Contact:

Re: Steel armoured 1/16 Tiger built from scratch

Post by Edwin »

Hi Kevlar,

an interesting project and it is sure to be still connected with many technical solutions.

As a tiger steel in 1:16 is not the first tank was constructed, but only a few have brought it as far as he could go.

The finished weight of your tiger, I guess in this construction to 20-25kg and there you will come when you need to have some drive and drive.

I look forward to your progress and solutions.

regards Edwin
APAMOTEC Model technology in detail
Kevlar
Recruit
Posts: 9
Joined: Sat Jun 15, 2013 10:07 pm

Re: Steel armoured 1/16 Tiger built from scratch

Post by Kevlar »

Weighted the tiger today, and the weight now is 7 kilos, so I think you are right :)

Did some work today, but the time flew by, so not that much was done:
(the back has not been cut down yet, and the front side .. things that i made today has not been cut down ether, yet)

Image

Image

Image

Image

Image


Spoiler: show
R2D2 scale 1/1 project was put on ice because of the tiger project
(ok, it was put on ice because of money)

Image

Image


I hope the same thing doesn't happen to the tiger.
User avatar
jarndice
Colonel
Posts: 8390
Joined: Mon Sep 03, 2012 11:27 am
Location: the mountains of hertfordshire

Re: Steel armoured 1/16 Tiger built from scratch

Post by jarndice »

Boy o boy do you like starting at the top of the hill,? This is one build I shall watch with great interest, I have so many questions but I suspect you are going to be a little busy for a day or two! I wish you great good fortune and I am extraordinarily envious. Well done. shaun
I think I am about to upset someone :haha:
User avatar
lliw180
Lance Corporal
Posts: 111
Joined: Thu Jul 18, 2013 2:25 am
Location: Adelaide South Australia

Re: Steel armoured 1/16 Tiger built from scratch

Post by lliw180 »

wow looking good cant wate to see more
scratch building is more fun
Kevlar
Recruit
Posts: 9
Joined: Sat Jun 15, 2013 10:07 pm

Re: Steel armoured 1/16 Tiger built from scratch

Post by Kevlar »

I started this build at our cabin/cottage and it was so windy there that I couldn't use gas, but here it is very possible.
How much does a regular CO2 bottle cost?
(of course not the big ones with 25 kilos of gas or something) I have read that the welding pool is much more controllable and visible with gas, so I think its a lot better.

The wheel plan is to drill wholes at the same point at each side, then connect the wholes with shafts inside. Have seen it before, but couldn't find the right picture of what I am thinking right now.
Kind of like this, but a lot more shafts:
Spoiler: show
Image
And unfortunately I don't have a lathe or access to one, that could make it a lot easier.

When every part and the upper hull is done I will get working on details, manly like the wheels.


I have seen tanks on rctank.de, about 6-7 kg heavy. Even with the same driving system I don't think my tank will move at all..
But I got a rc nitro car, it should be possible to take that motor and the fuel tank etc. over into the tiger tank as long as everything is fitted? The turning could be an exiting part though.


Jarndice, shoot away!
Will try to answer as good as possible, and as soon as possible ;)

Can't work at the evening or late, my neighbors with small children isn't too happy it I start up the angle grinder then, sadly.

Thanks everyone, I will get it going! Think I will pick up some useful knowledge along the way, like that weight to power ratio is going to be hard.
Kevlar
Recruit
Posts: 9
Joined: Sat Jun 15, 2013 10:07 pm

Re: Steel armoured 1/16 Tiger built from scratch

Post by Kevlar »

Not been updated because I had a family visitation in the weekend and couldn't really work before today.

Not that much progress, but takes a while. :)

Image
Image
Both track covers, supposed to go on the sides.


Image
Both side skirts and back skirt cut out, all angles are 45 degrees, at least supposed to be.


Image
Back skirt

Image
Side skirt


Image
Ready to cut out the top

Image
Top (the back has been cut down after this picture!)


Any suggestions about how to make the top stick would be very appreciated! Something easy is prefered, but the main thing is that it has to hold the turret in place too and easly removed. Any ideas are also welcome!
User avatar
Edwin
Corporal
Posts: 394
Joined: Tue Jun 11, 2013 8:34 pm
Location: Rheinland Pfalz Germany
Contact:

Re: Steel armoured 1/16 Tiger built from scratch

Post by Edwin »

Hi Kevlar,

why did the chain covers welded from steel so thick?
These were just pretty thin and bolted plates which were then also dented and bent quickly when driving in original.

regards Edwin
APAMOTEC Model technology in detail
Kevlar
Recruit
Posts: 9
Joined: Sat Jun 15, 2013 10:07 pm

Re: Steel armoured 1/16 Tiger built from scratch

Post by Kevlar »

You got a point, and I really didn't think about that. A bit late to change it now though.. :/ Would do that if I thought about it at the start.

Made a new top cover, perfect fit this time.
Image

Image


I had no (and still don't) idea on how I could do the wavy thing for air to get in on the back, or the boxes in a pattern either.
Image


I decided to do plain lines and holes on the back instead.

Image

The holes took a looonnnggg way to make, this is part of why:
Image

For every 15th hole it had to be recharged, took a couple of hours each time.

Image

All holes done, finally. Note the left lines, the one at the bottom is cut straight through by accident, will be filled in with a short weld.


Image

A net of steel wire will be in place under the top and under the holes and lines to keep unwanted things from entering. Will also try to make the lines more right and stop at the same point.


Image

Don't look very straight in the picture, I know. But seems a lot more straight in real life.
Its the 6 things (don't remember what I called them) I'm going to use to put the skirts on the tank. So these will be welded on the skirts, 2 on each.


Wont be a update for quite a while, I will be out of town for at least a few days.
rockstroke
Recruit
Posts: 6
Joined: Wed Aug 14, 2013 4:24 am
Location: Hawaii USA

Re: Steel armoured 1/16 Tiger built from scratch

Post by rockstroke »

Metal work is not easy thing to "jump" into, I have been welding with TIG, MIG, and ARC since i was 9-10 years old. I also worked for a "custom" welding company unit where we did things like spiral staircases, security gates, rails/fences, trailer repairs, automotive repairs. I have done quite a bit of welding in the military as well. MIG is perfect for this job, but as someone stated above, to use gas. Gas truly works wonders, though its NOT completely necessary because of the thickness of the metal you are using. Don't take offense, but one technique you may want to use is laying your beads ontop of one another. First dont start vertical when making your beads, hold at an angle. Do a circular motion and make your first bead, and move to the next bead. lay that next bead on the other bead you just made.(I am being kind of hard to follow, sorry) As far as welding the top, you will have grind the top plate on the border a bit so it DOES NOT fit flush. You will bring your beads to join the top and bottom, and then grind to make it flush. I will try and maybe draw up a picture or maybe make a movie if i get the chance if you would like. I wish I was there in person, its much easier to show then tell lol.

Regardless, You're doing a fantastic job keep it up, I am looking forward to seeing this puppy in the making. Good Luck!

Below is what i am talking about when is say "layng the bead on one another". Those welds are MUCH bigger then what is required for your material, but its just an example.
weld.jpg
weld.jpg (83.89 KiB) Viewed 3013 times
Post Reply

Return to “Tiger I”