Thanks for the messages!

Spent this week getting the lower hull ready for some paint. Still undecided what colour to paint the model, grey, dark yellow, winter camo, mixed colour camo, my heads spinning!

Any thoughts or images welcome.

Started by reworking the towing eyes. The hole is too small and a little low. Plastic strip was added to the top to bring it flush with the sloping frontal armour.

I filled the holes with some suitable plastic and sanded it smooth prior to drilling.

A 4mm HSS bit was used having first drilled a pilot hole.

Finally the corners were rounded with a sanding block.

A couple of posts back i was asked about how i do neat weld beads. Sorry for the delay 'wildboar44', i hadn't forgotten. I have been waiting on a chance to do a little demo and as the lower hull needed a couple of simple beads here goes. I hope the pictures are ok but its not that easy to photograph the process as your doing it.
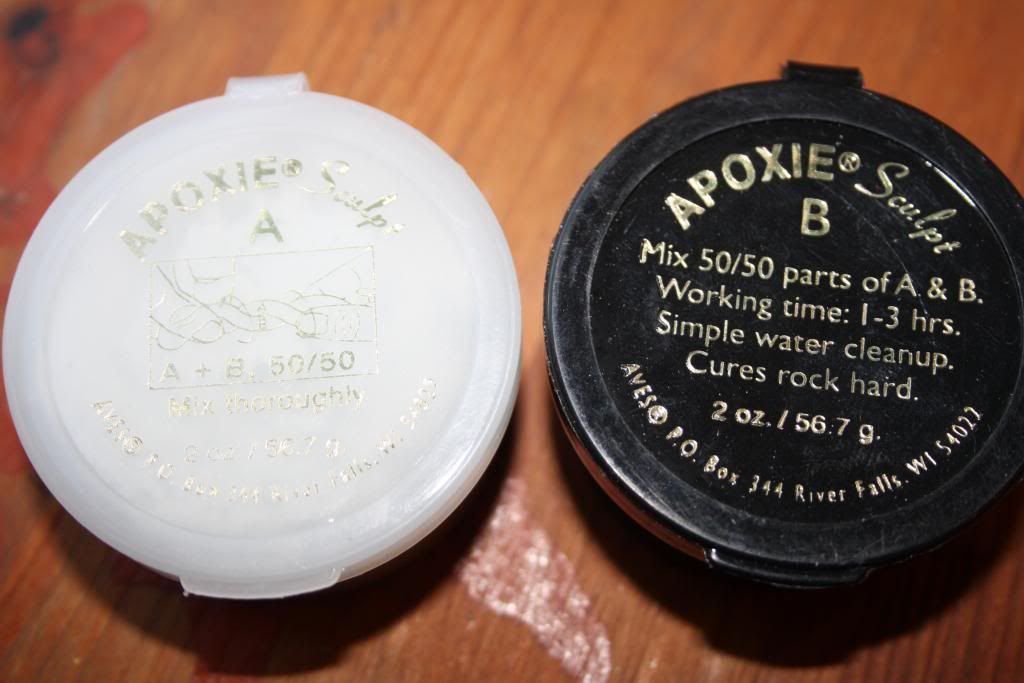
I used 'Apoxie sculpt' for these beads to see if it was any easier to use than 'Milliput'. Having now used both i can say there is nothing between them. Like 'Milliput' its mixed 50/50 to a uniform colour to start with.

Rolling out the putty on cardboard stops it sticking to the surface and applying 'talc' to the finger tips stops it sticking to them. I roll out the putty to a consistent 1mm thickness whilst removing the excess from the ends as i go.

Wetting the surface with a little water helps with positioning.

Using a wet paint brush to position the putty is essential as a dry tool will stick to the putty.

Nipping the ends down with a knife also helps hold the putty in position as you work on it.

Here i have made one pass with my improvised beading tool.(as explained earlier in the build). The tool is constantly dipped in water as its worked along the putty to stop it sticking to and lifting the putty. Leaving it for five minutes at this point for the water to dry helps.

Using a small steel rule press down and draw outwards from the very edge of the putty. Repeat on both sides.
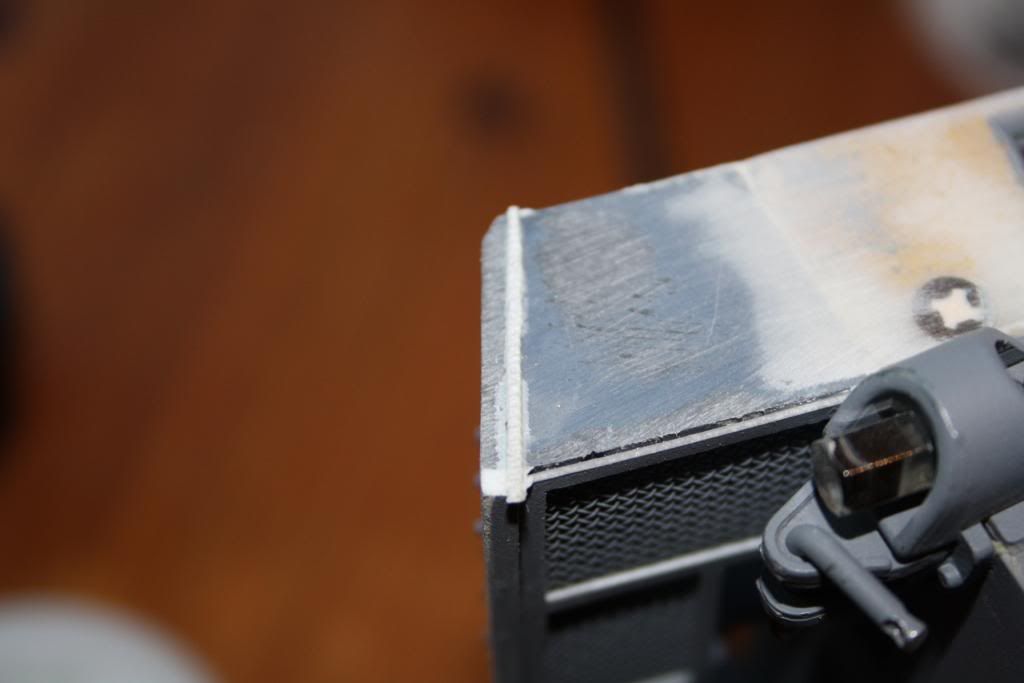
As you can see the bead has straightened up and is starting to look the part.

The process is then repeated as many times as needed until the bead is the required width and has been flattened to the surface its being applied to. After all its a weld and not an 'eyebrow'.


I hope this was of some help!

Some more added detail.


