tankme wrote: ↑Tue Feb 11, 2025 10:55 pm
From what I've seen and read, the color of the interior is closer to the Mig color as in more green than beige.
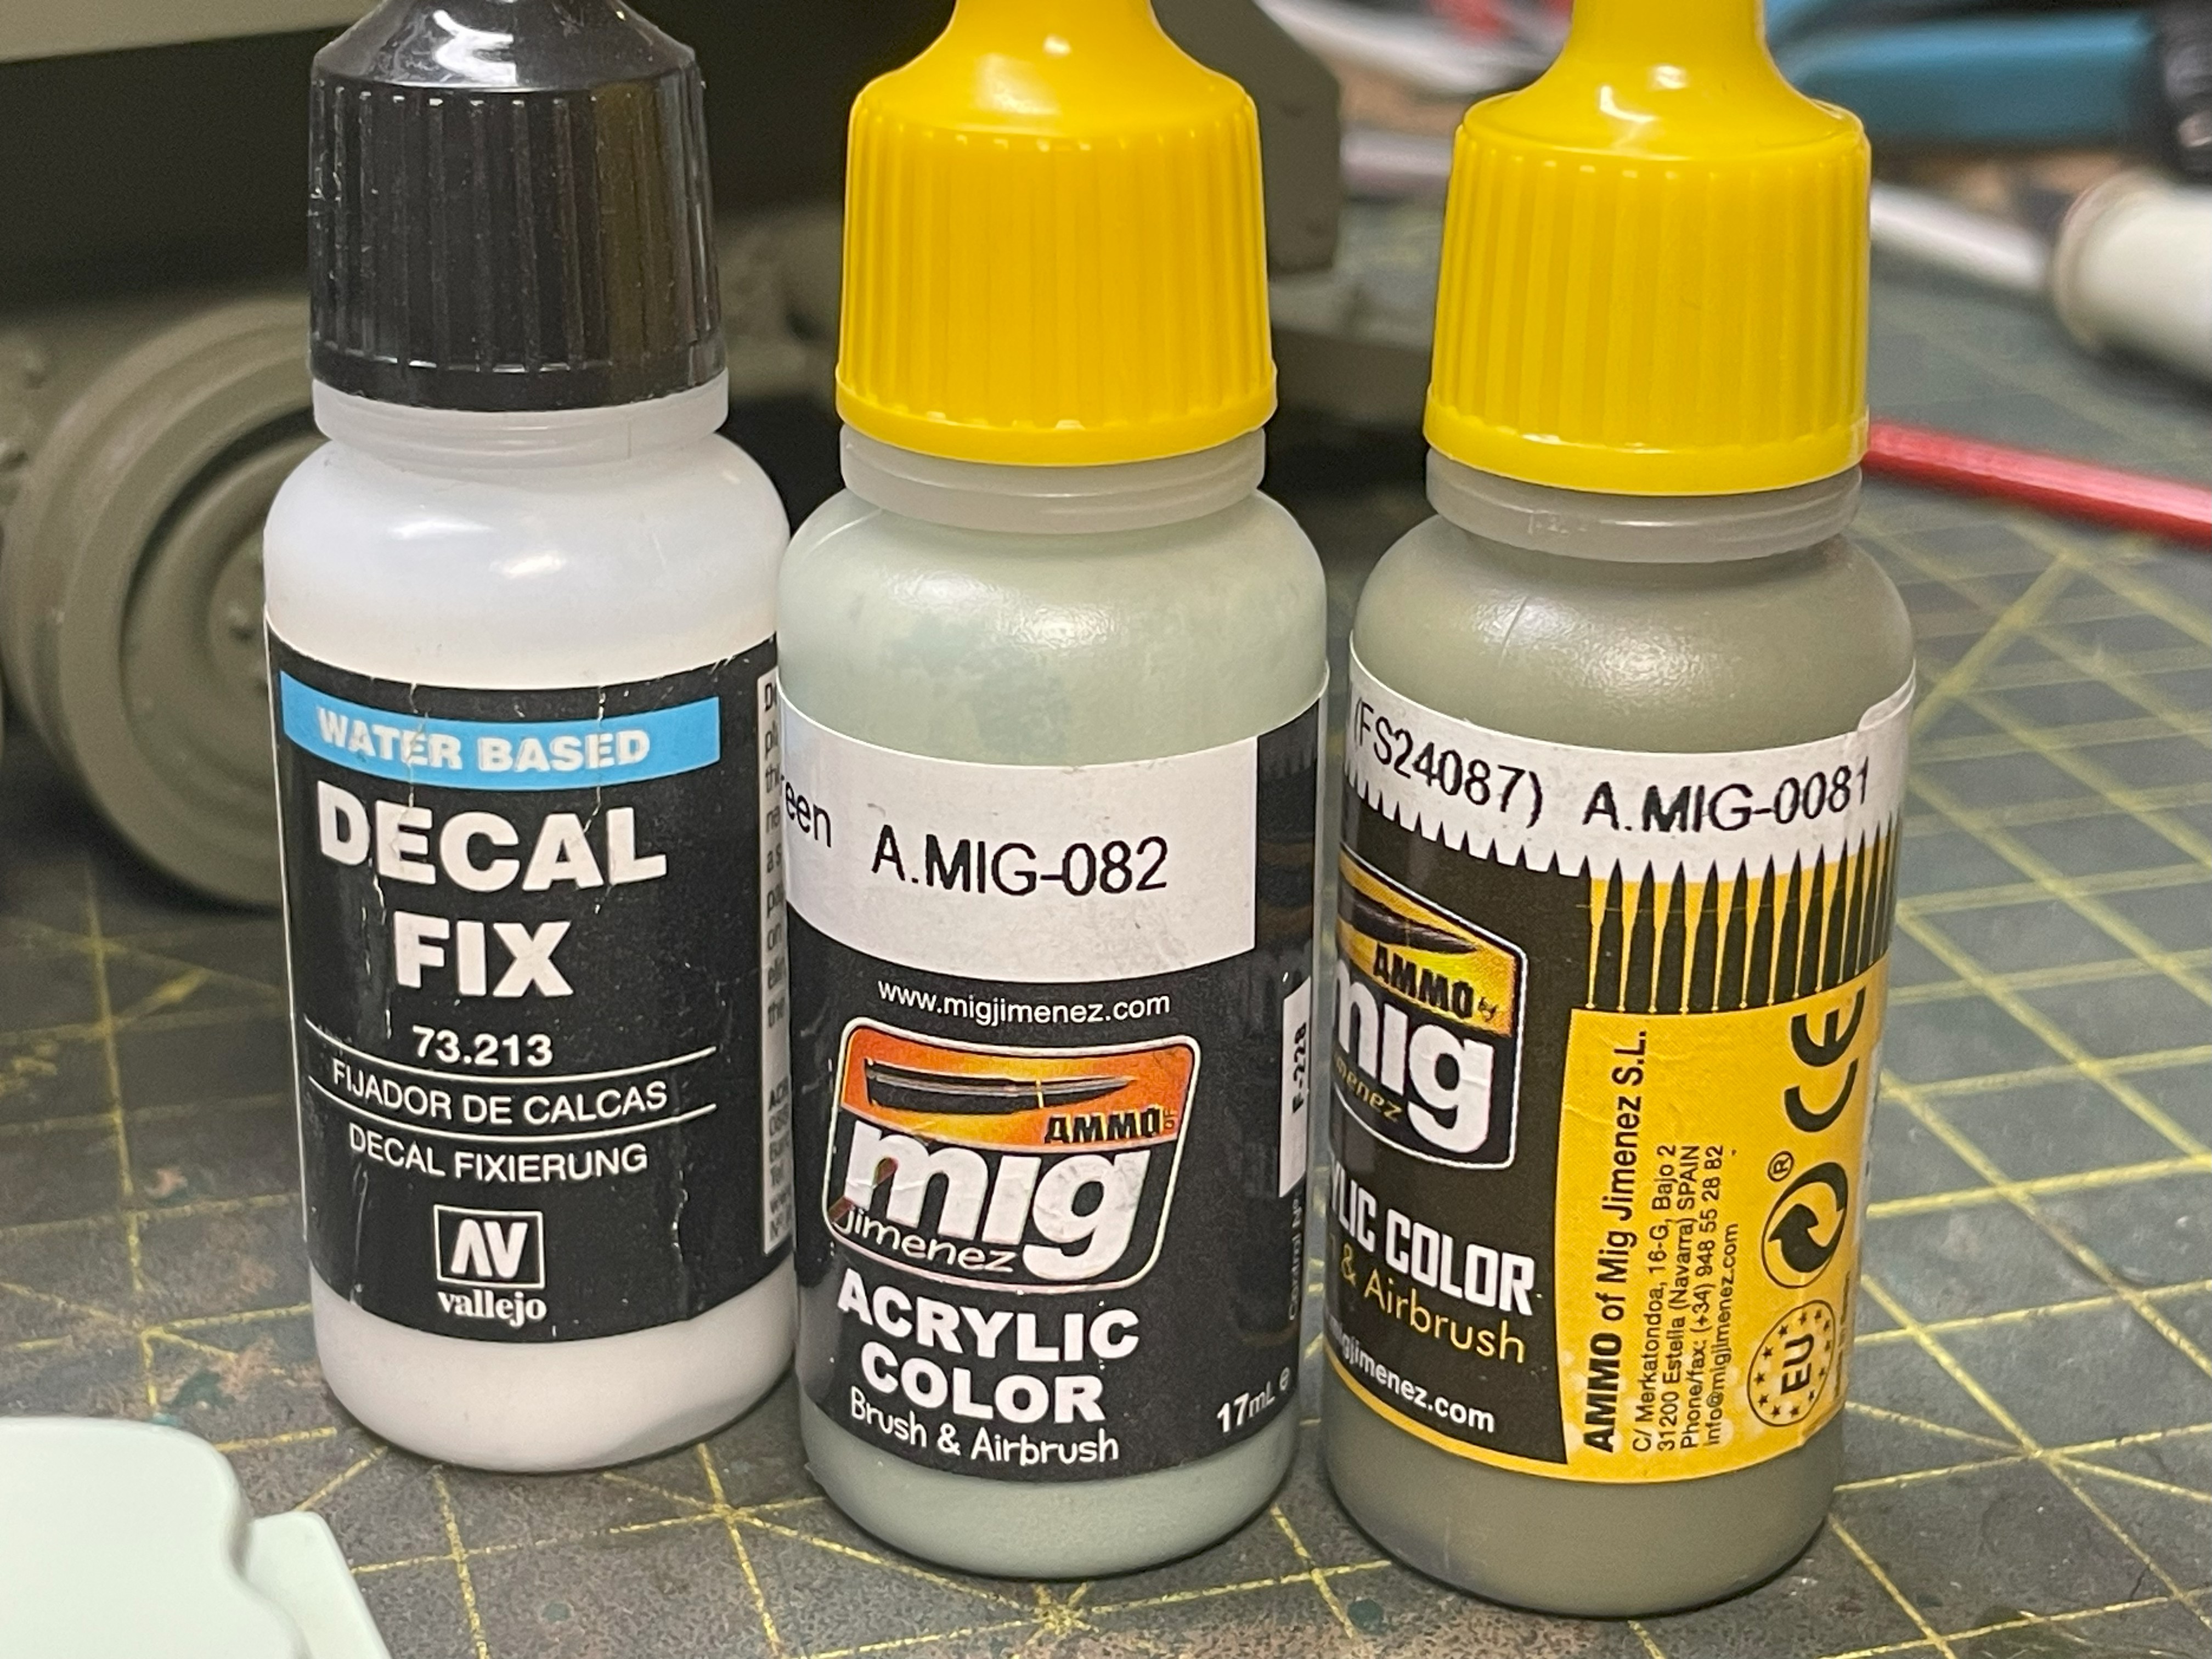
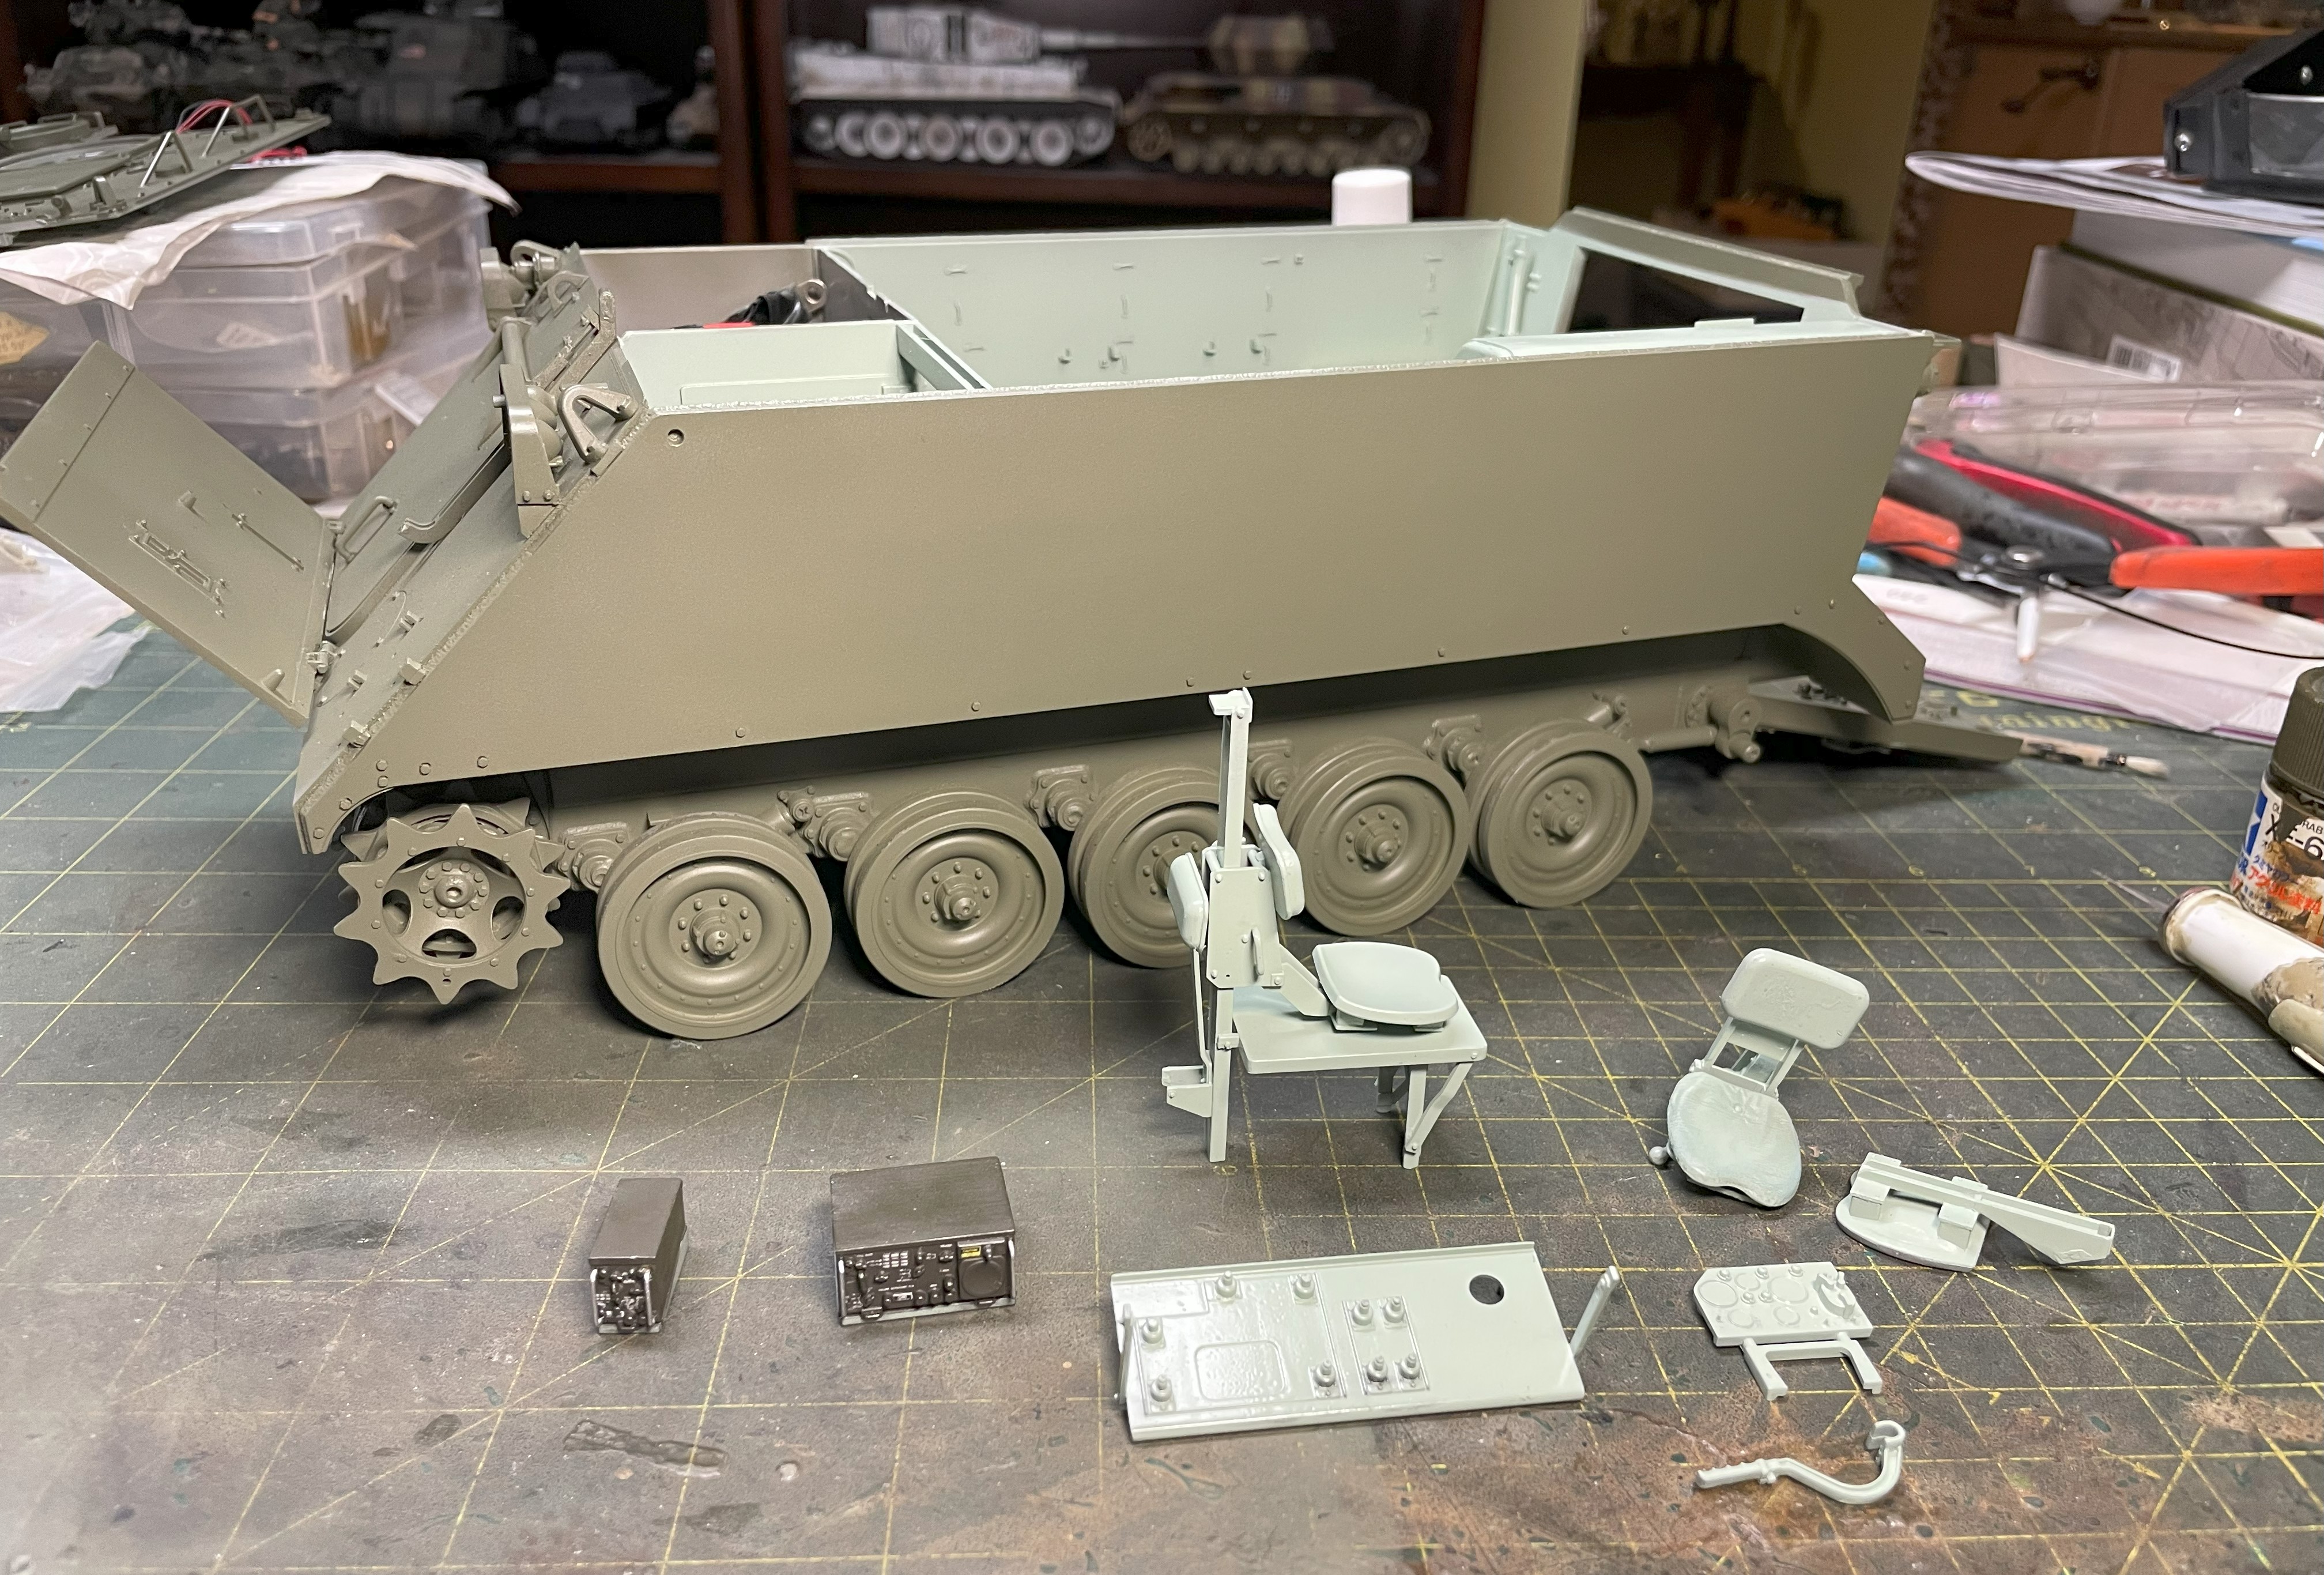
I agree, without waiting further, i started painting the model with the Mig Ammo Vietnam set. Also used Vallejo decal fixer for the radio further below. The exterior of the model was previously given a coat of AK Interactive acrylic primer.
- 1/16 RC M-113A1 ACAV - Converting the Takom/Andy's HHQ kit to RC
- 1.jpg (1.88 MiB) Viewed 1204 times
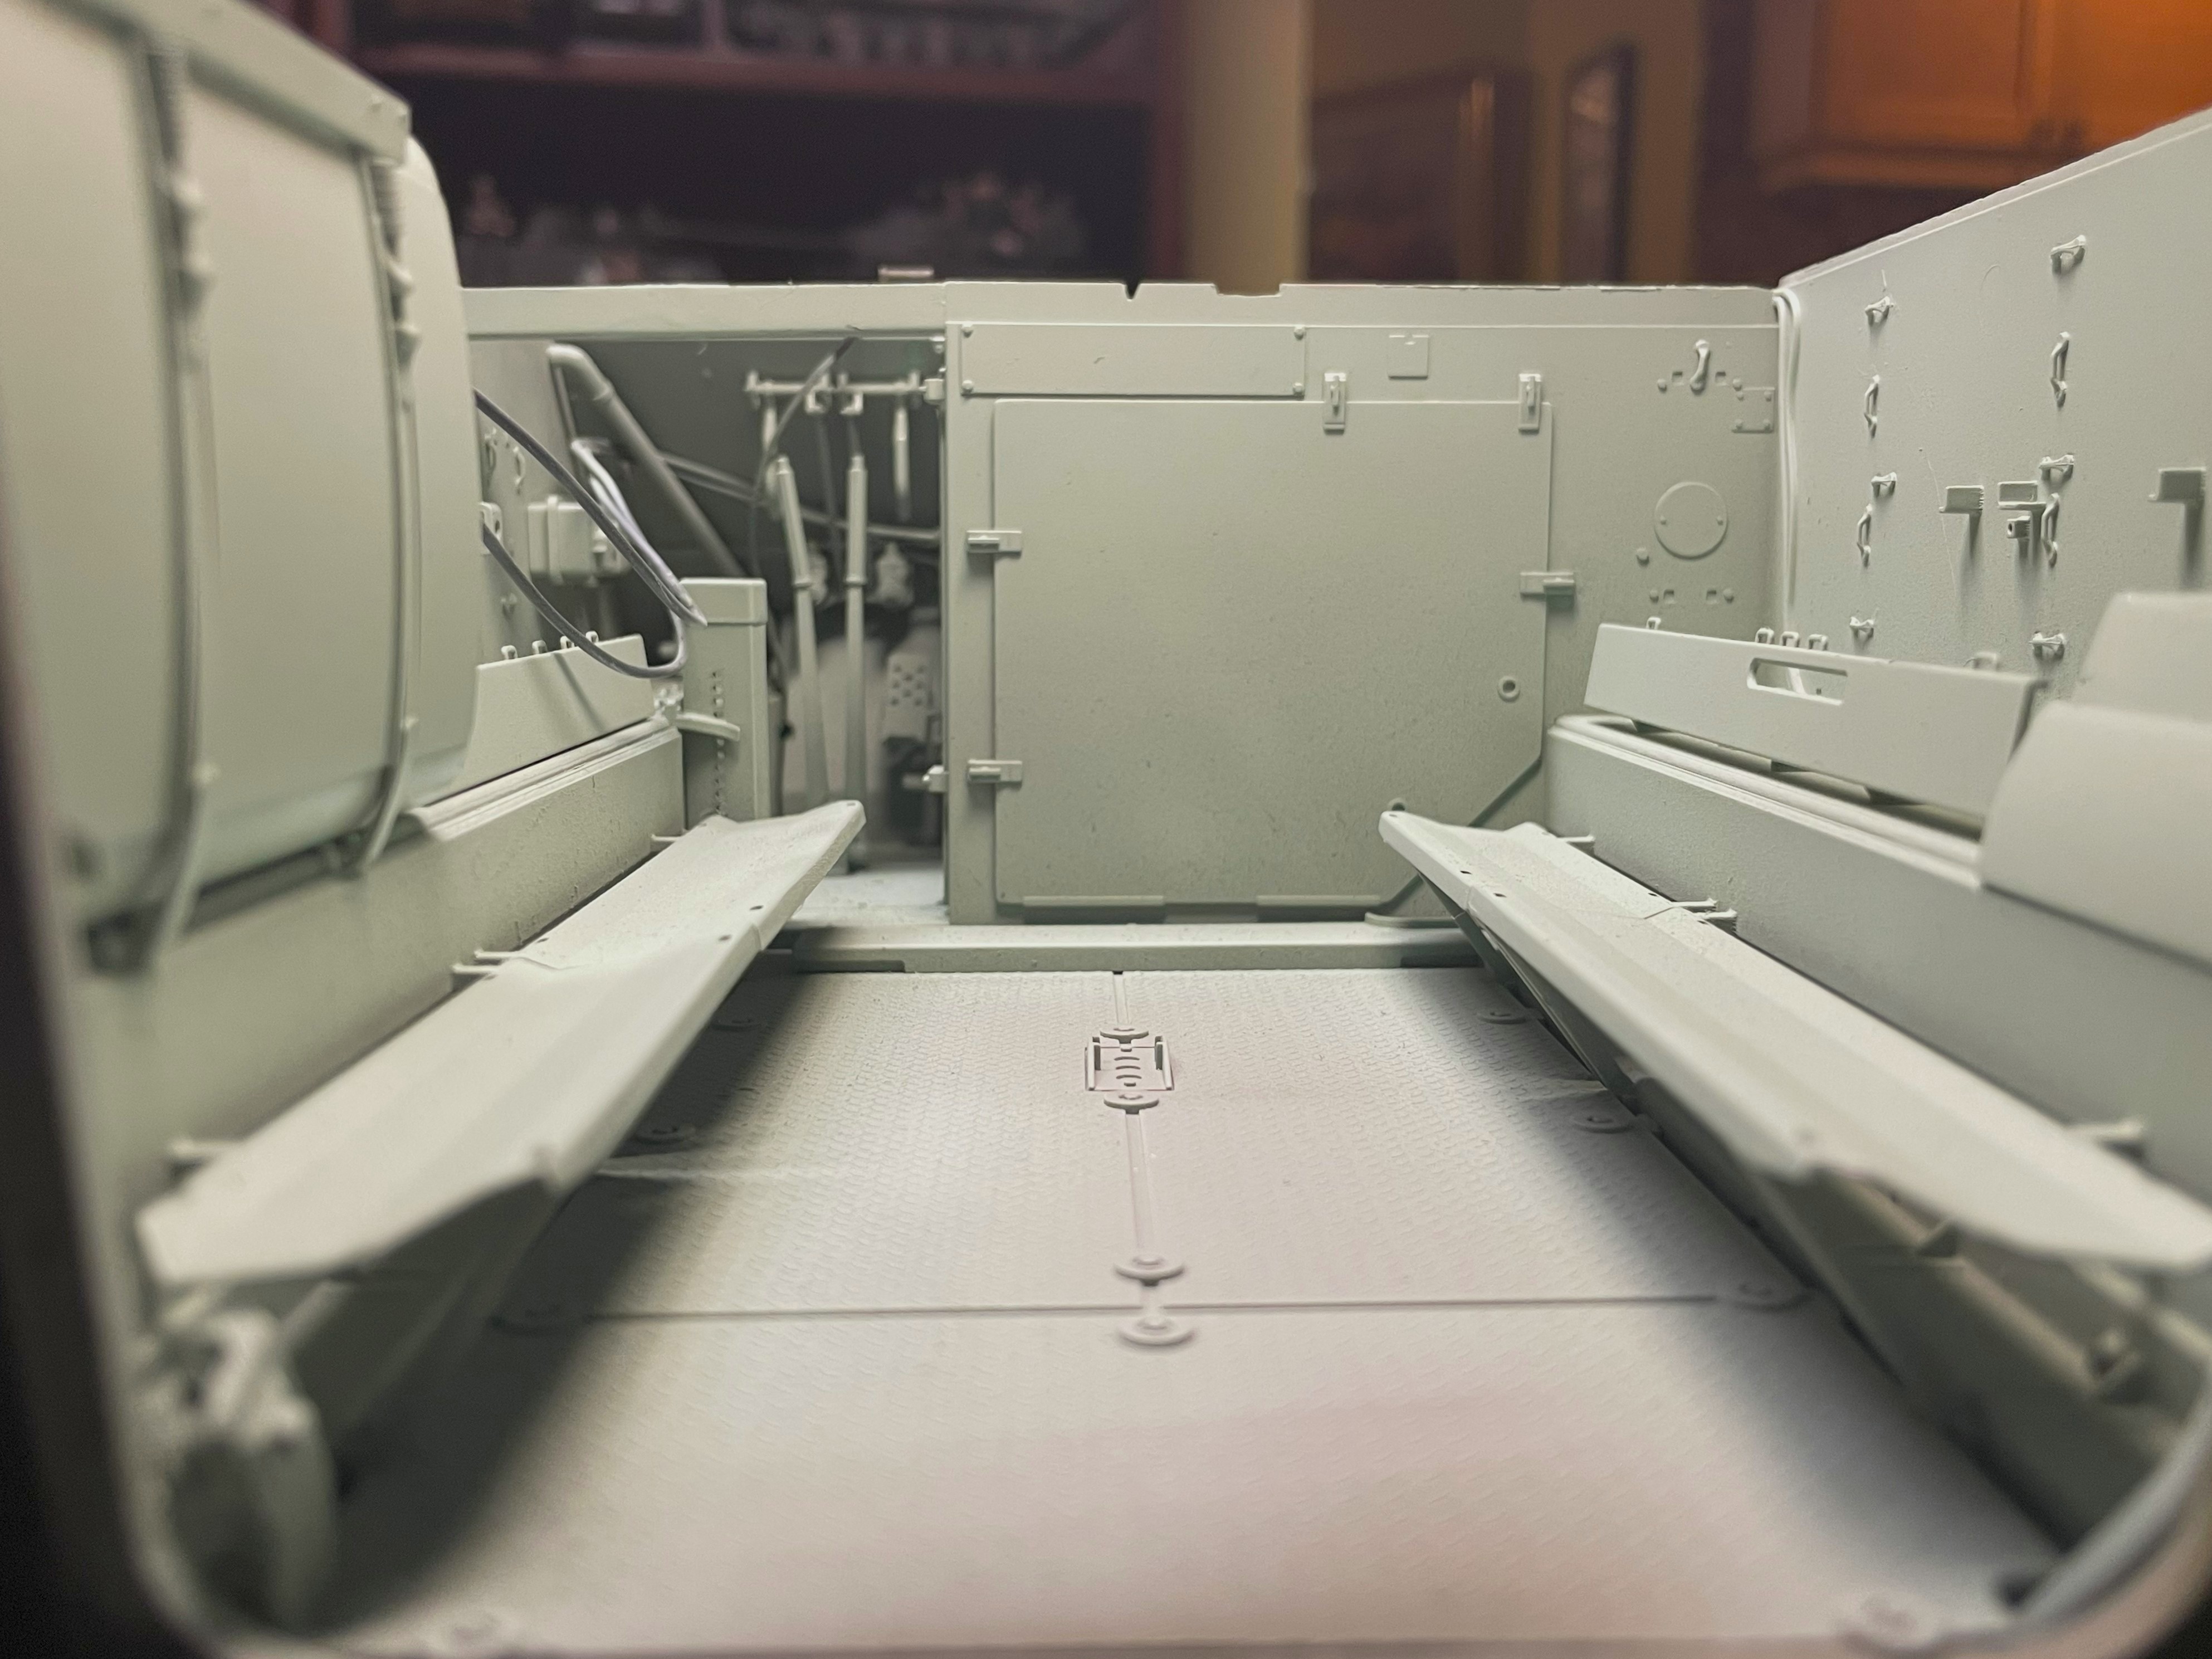
It looks good. Keep in mind that Interior green color gives different shades depending on the light used for the picture, sometimes more green, then more beige. It's not too dark, i like it. The floor will be painted aluminum color.

- 1/16 RC M-113A1 ACAV - Converting the Takom/Andy's HHQ kit to RC
- 2.jpg (1.82 MiB) Viewed 1182 times
- 1/16 RC M-113A1 ACAV - Converting the Takom/Andy's HHQ kit to RC
- 20250212_194707973_iOS.jpg (1.55 MiB) Viewed 1182 times
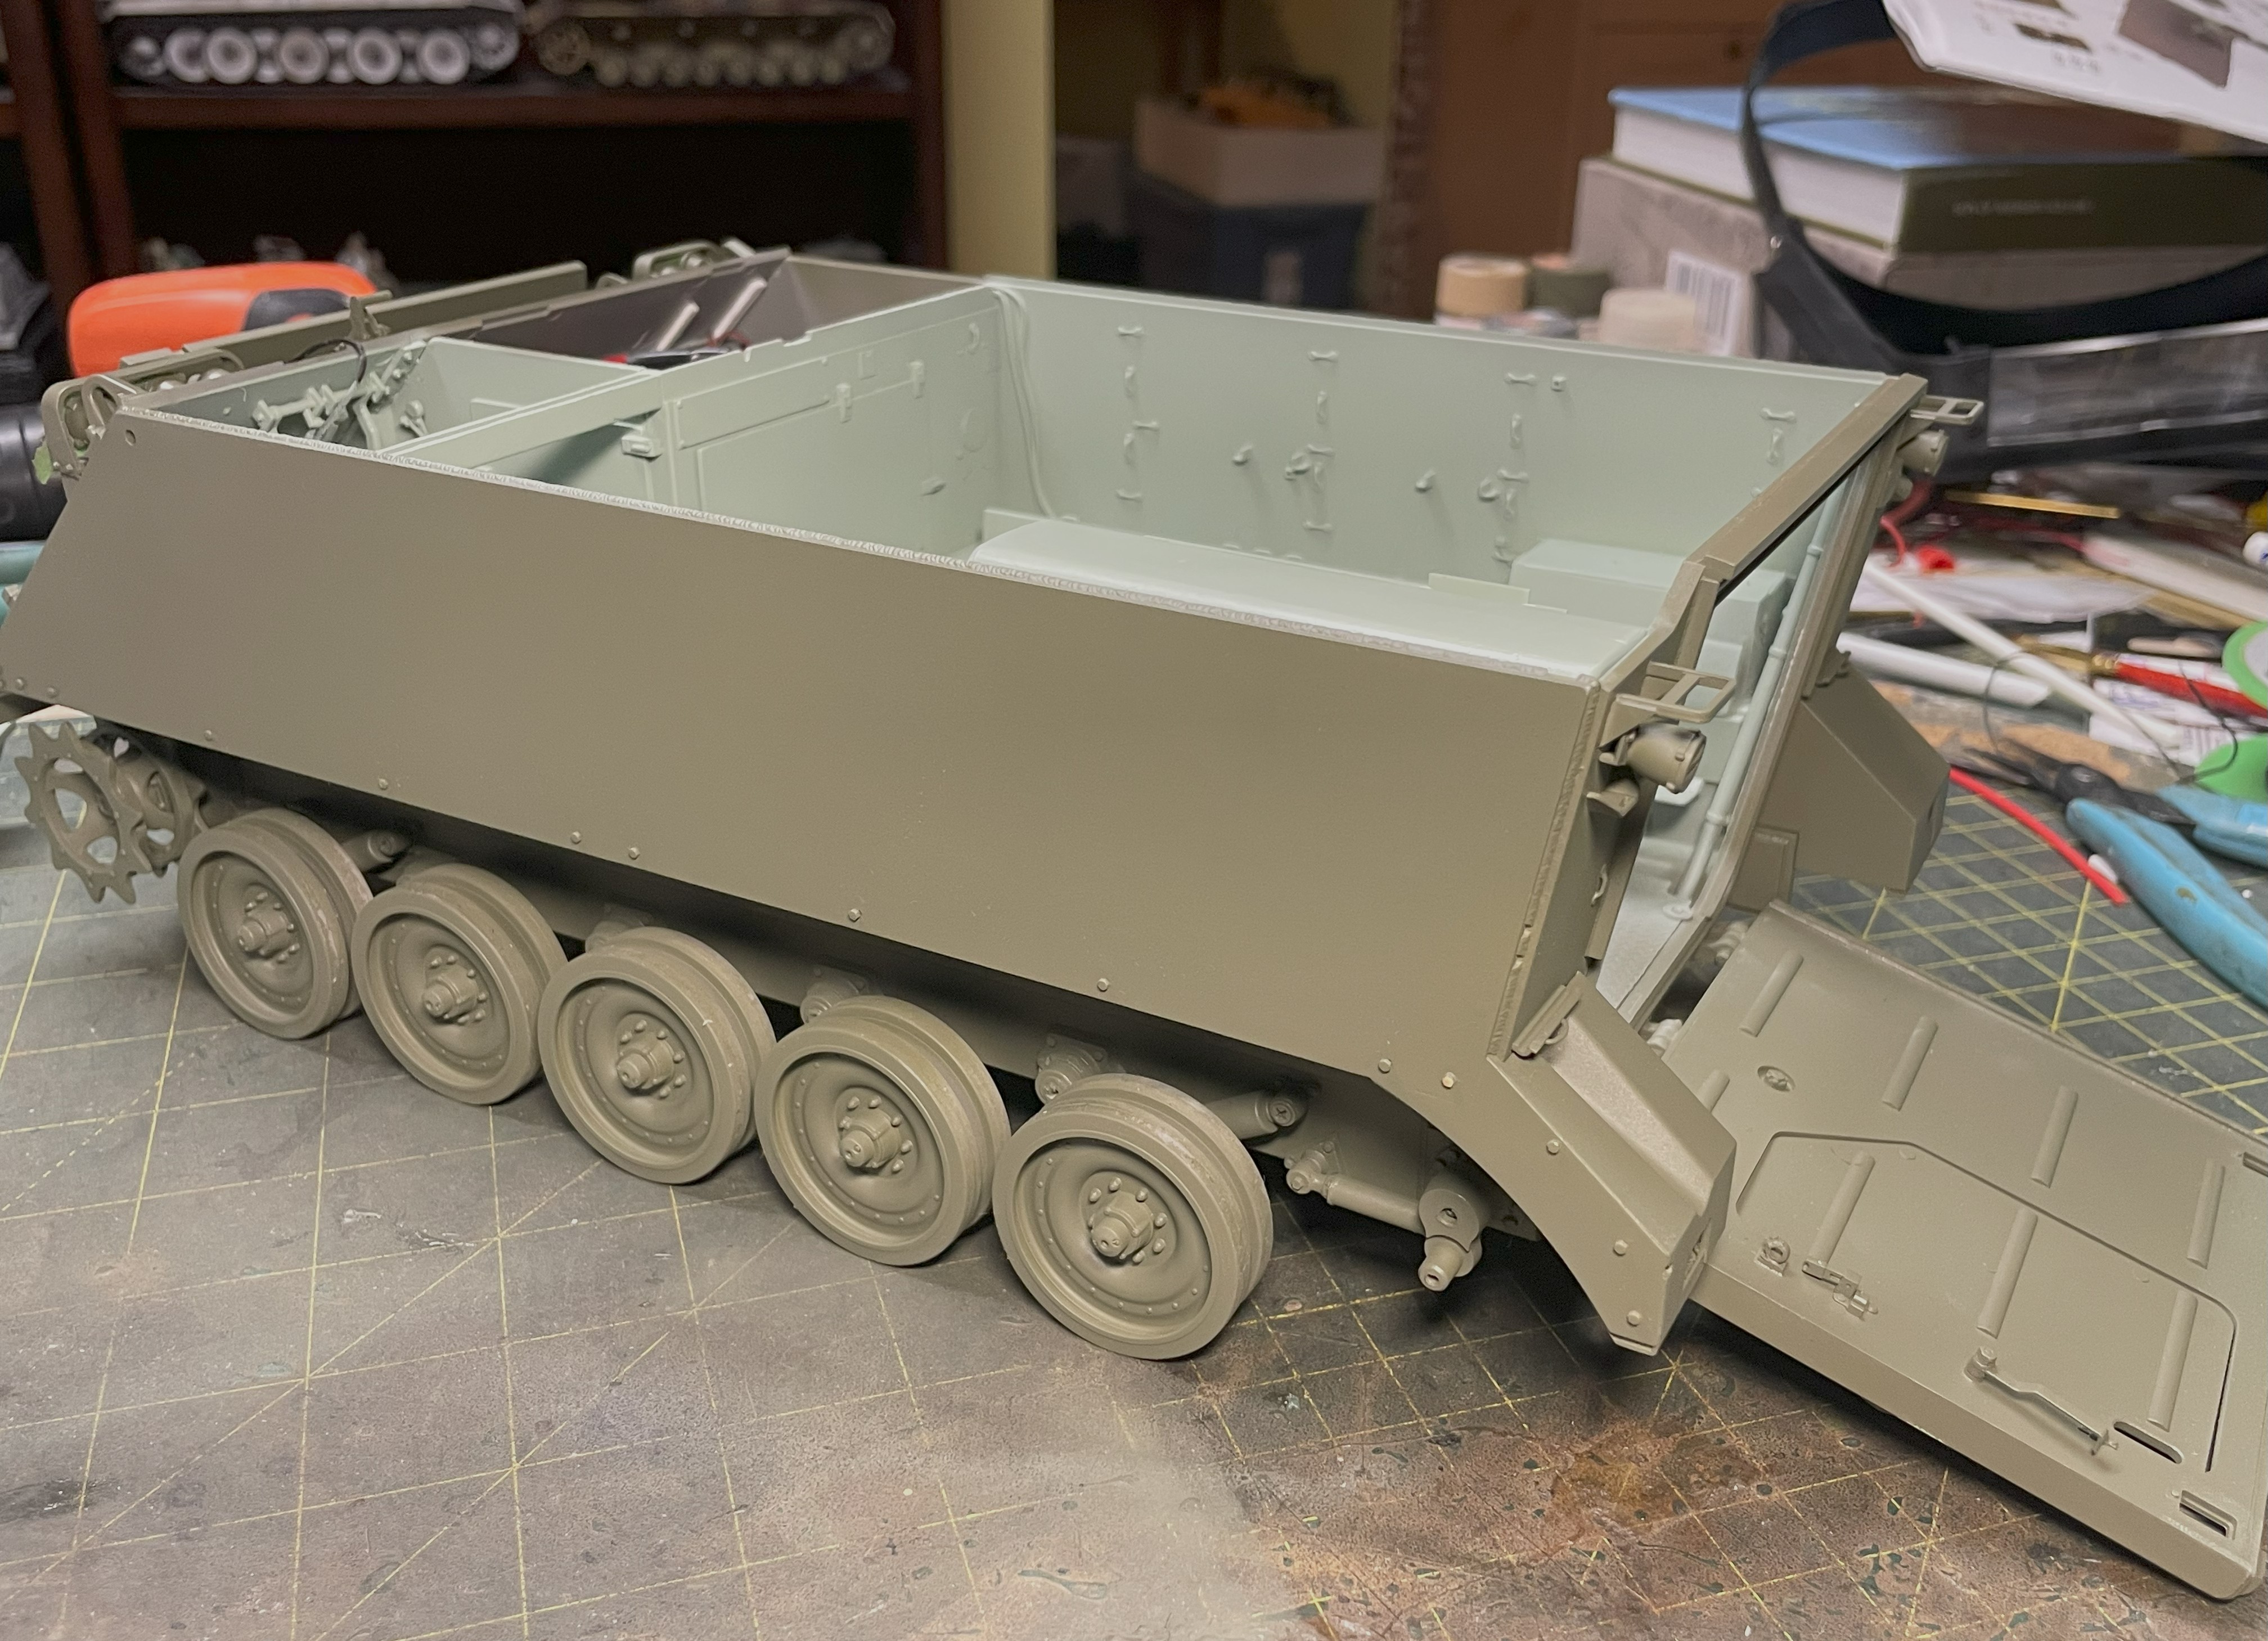
The US Olive Drab Post WW2 is also not too dark either.
- 1/16 RC M-113A1 ACAV - Converting the Takom/Andy's HHQ kit to RC
- 4.jpg (2.04 MiB) Viewed 1204 times
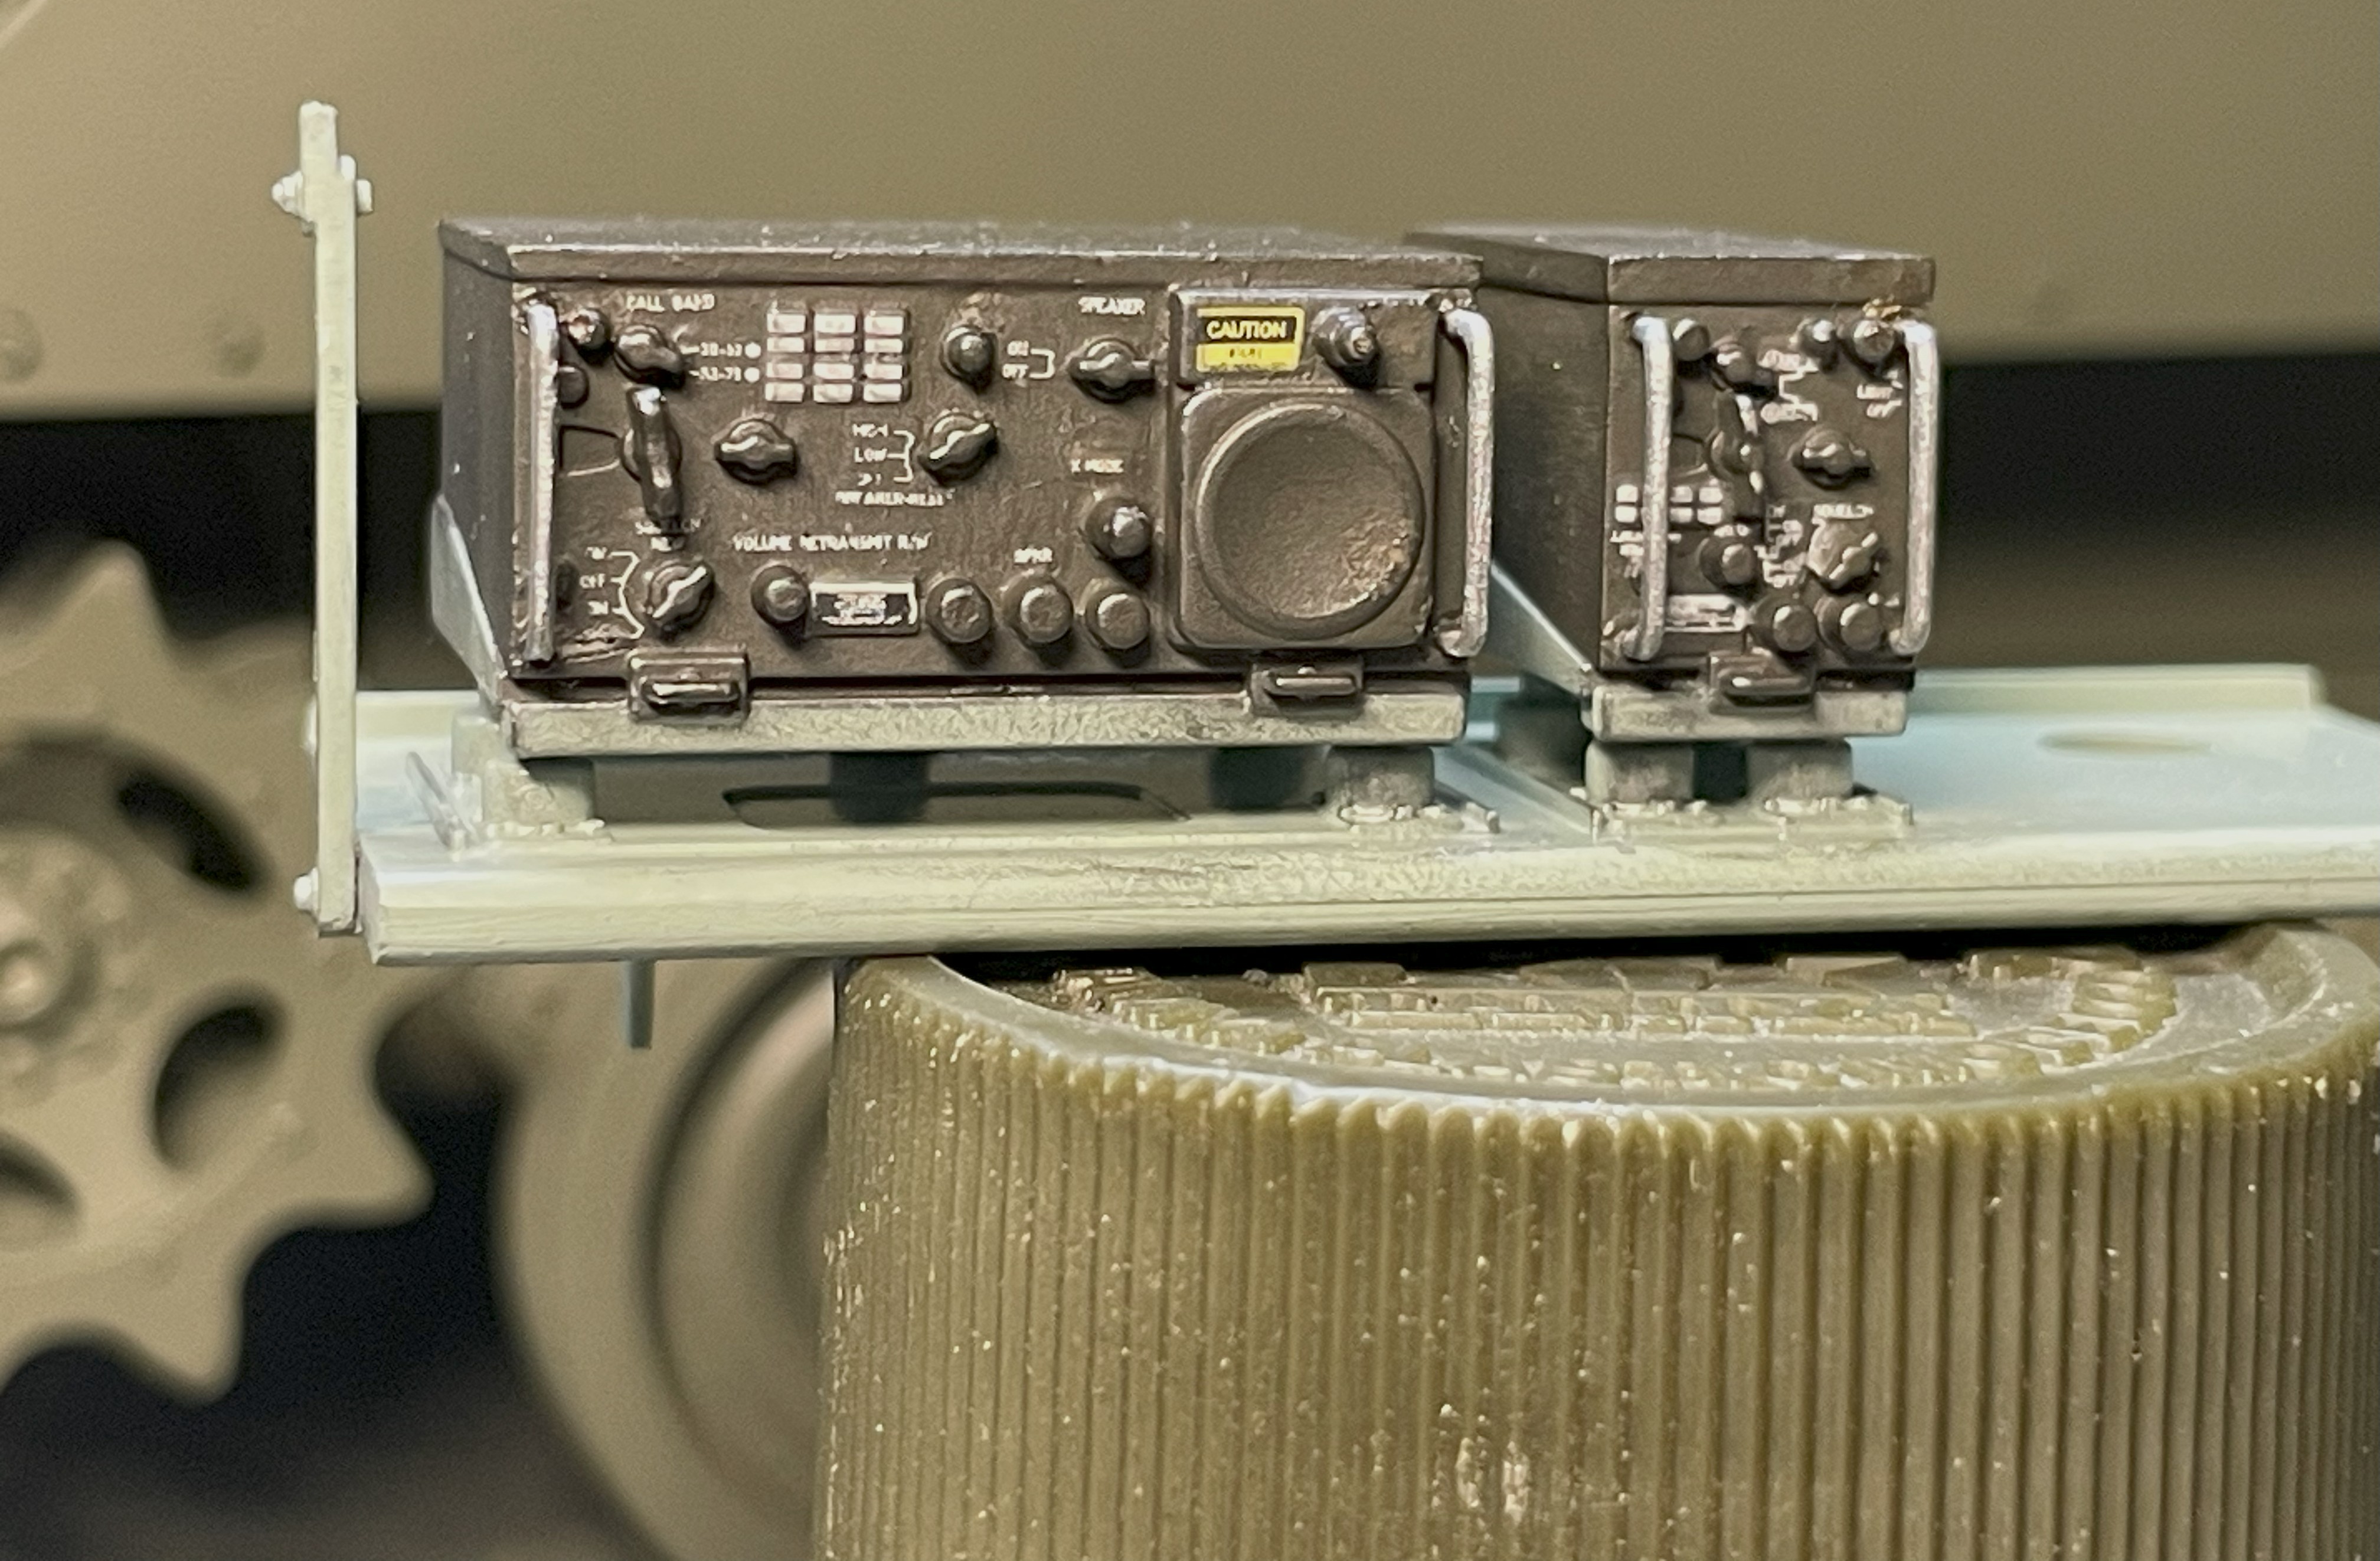
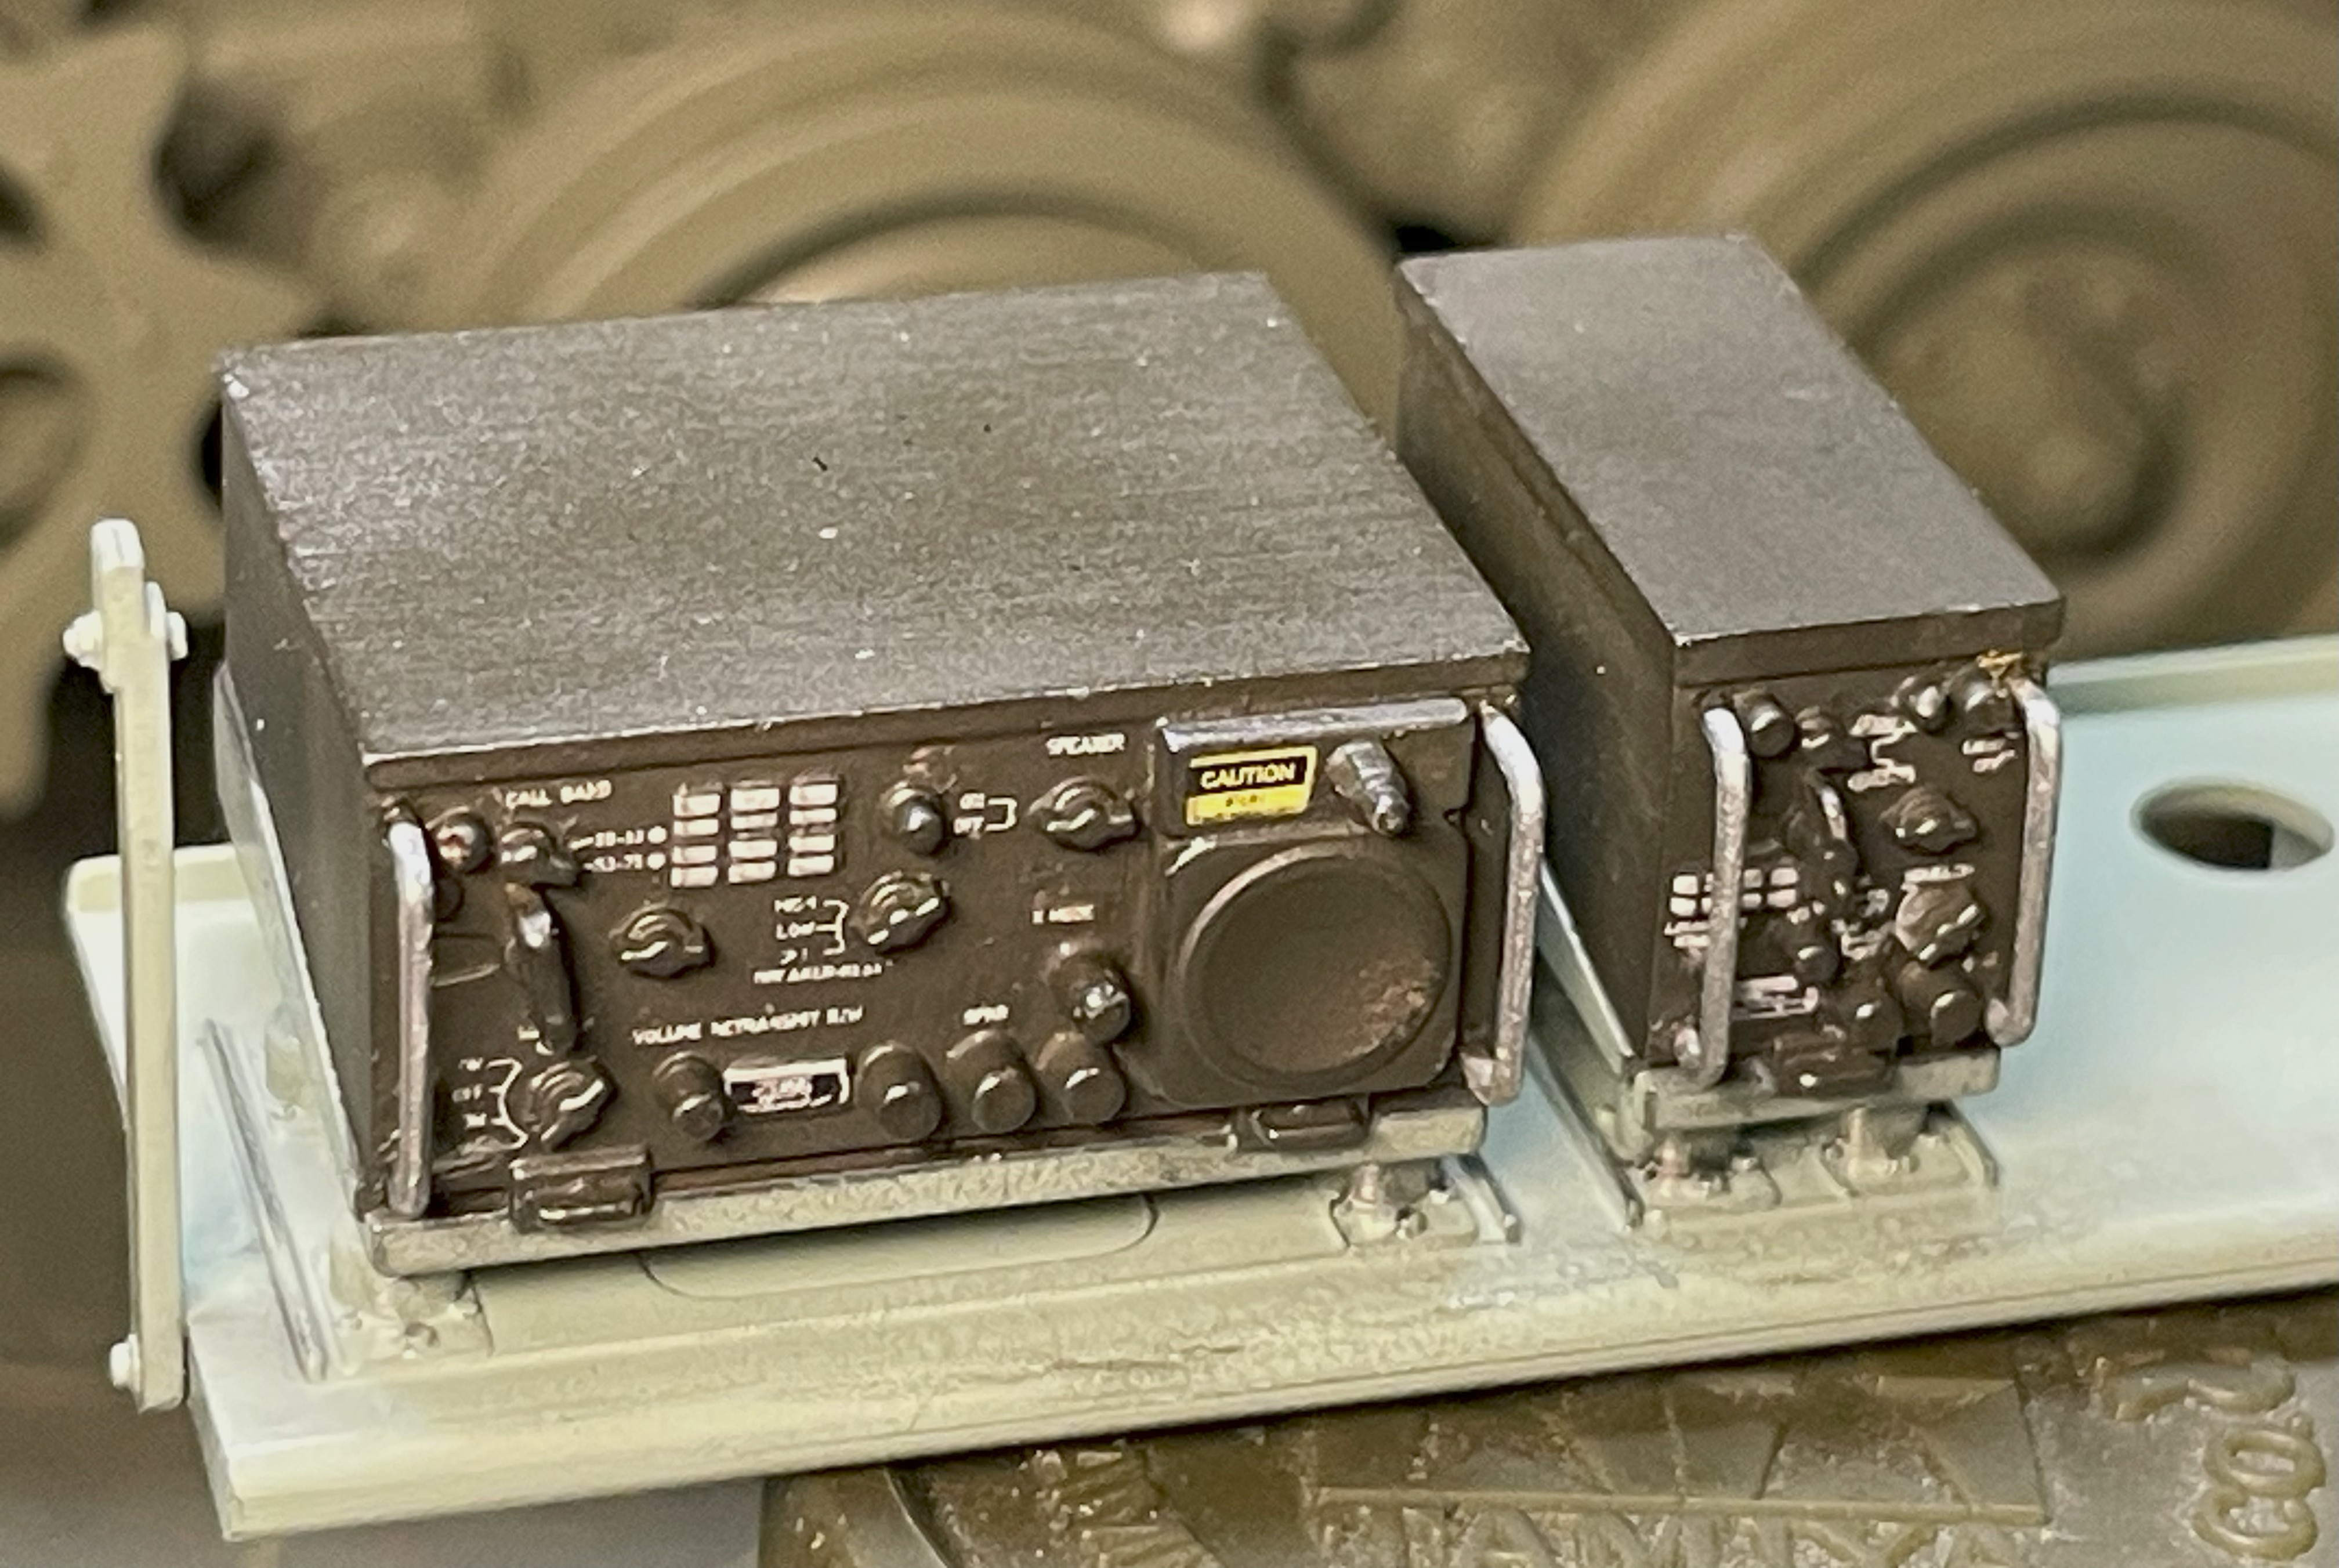
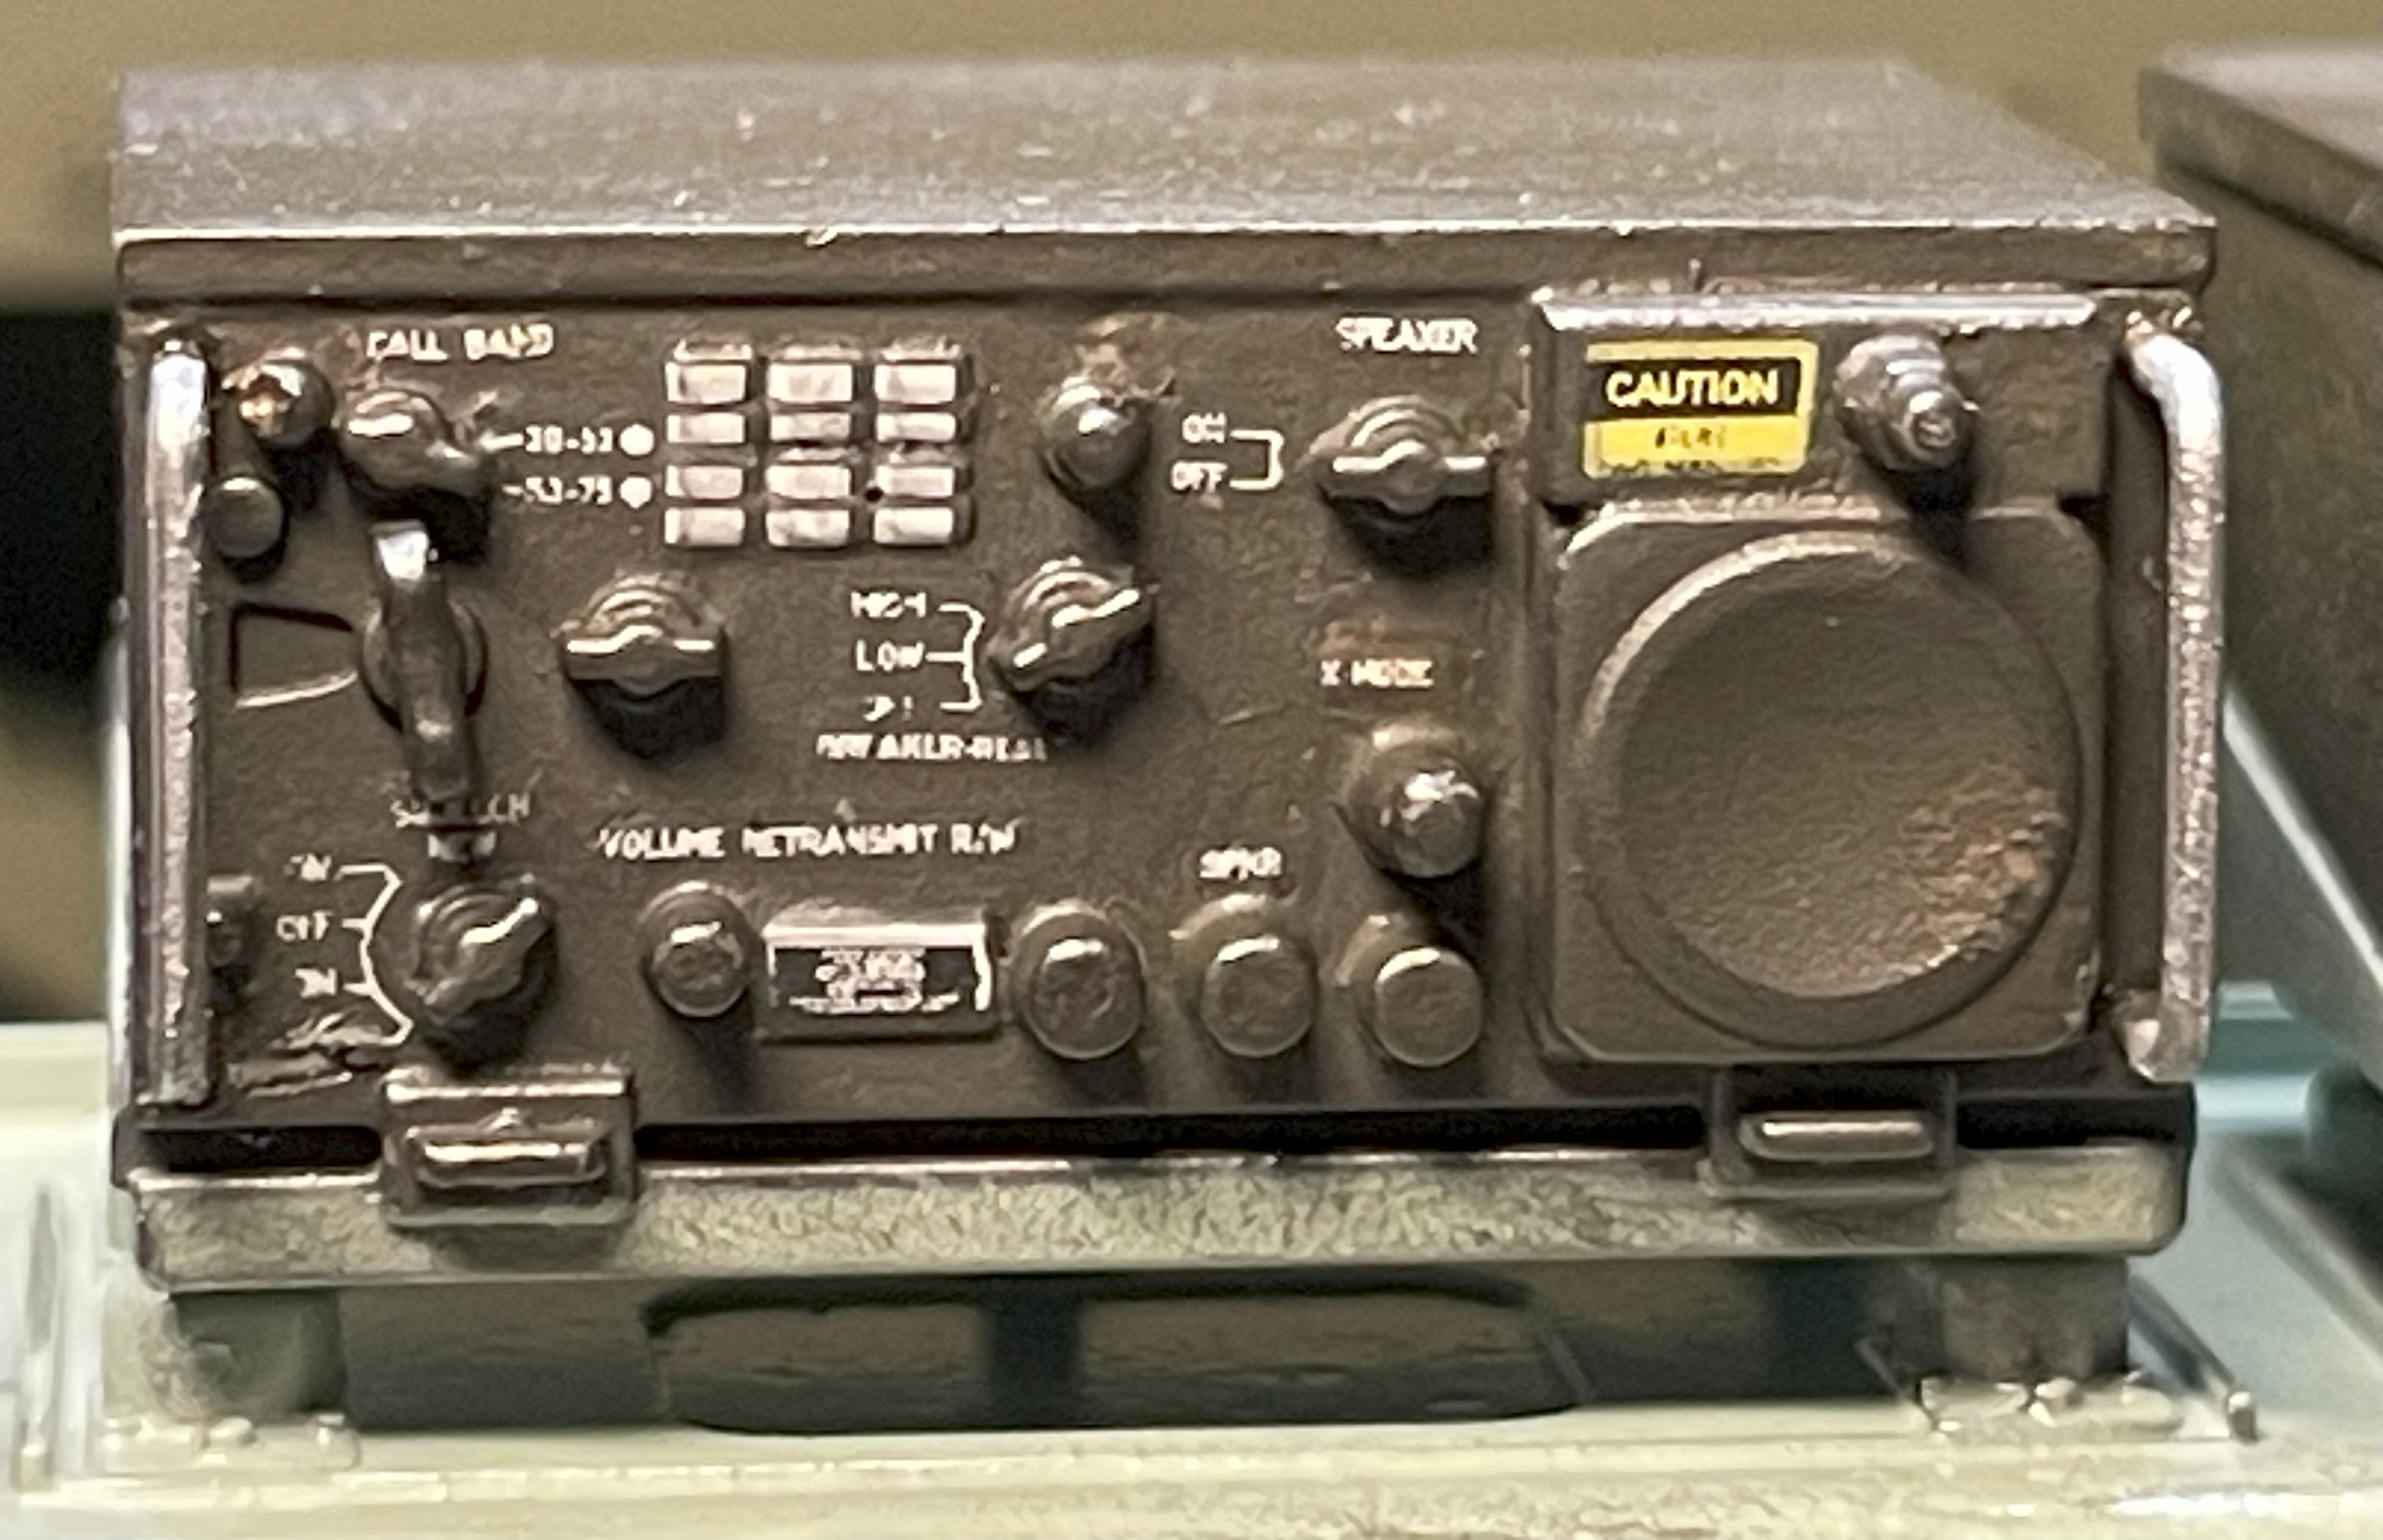
While waiting for the rest to dry, I worked on the radio and painted it with Tamiya Olive Drab XF-62, sprayed heavily diluted in order to get the smoothest surface to position the decals.
The installation of the decal was quite an experience. Starting with the biggest and most important decals, it went relatively well at first. The target area for each was soaked with Vallejo decal fixer. The decals only take a couple of seconds to come loose in warm water. It is difficult to pick them up and slide them, they are so tiny. They have to be picked with the tip of a blade. I had difficulty with the smallest ones. Even with two pairs of glasses and magnifier, sometimes, all i could see was a tiny white blur. After positioning, a thin cotton cloth was used to press them in place, sometimes with areas between buttons where the decals need to be pressed down. Minuscule decals can turn upside down during the process and it's difficult to make sure they are well positioned. I managed to install most of them, except some smallest ones. At one point, i had to make a business case; accuracy or my sanity.
After drying, the radio was sprayed with flat clear to seal everything, then dry brushed with Dark Steel pigments. It is far from perfect but its certainly the best looking tank radio i ever had. I am impressed by the quality of the decals and i thank the designer for giving me the opportunity to build this.
- 1/16 RC M-113A1 ACAV - Converting the Takom/Andy's HHQ kit to RC
- 6.jpg (1.43 MiB) Viewed 1204 times
- 1/16 RC M-113A1 ACAV - Converting the Takom/Andy's HHQ kit to RC
- 7.jpg (1.29 MiB) Viewed 1204 times
Believe me, it's small. It is on this picture with some zooming that i clearly see the results for the first time. I see lots of little things that could be better but with the naked eye, they can't be noticed.
- 1/16 RC M-113A1 ACAV - Converting the Takom/Andy's HHQ kit to RC
- 8.jpg (1.07 MiB) Viewed 1204 times
- 1/16 RC M-113A1 ACAV - Converting the Takom/Andy's HHQ kit to RC
- 9.jpg (1.27 MiB) Viewed 1204 times
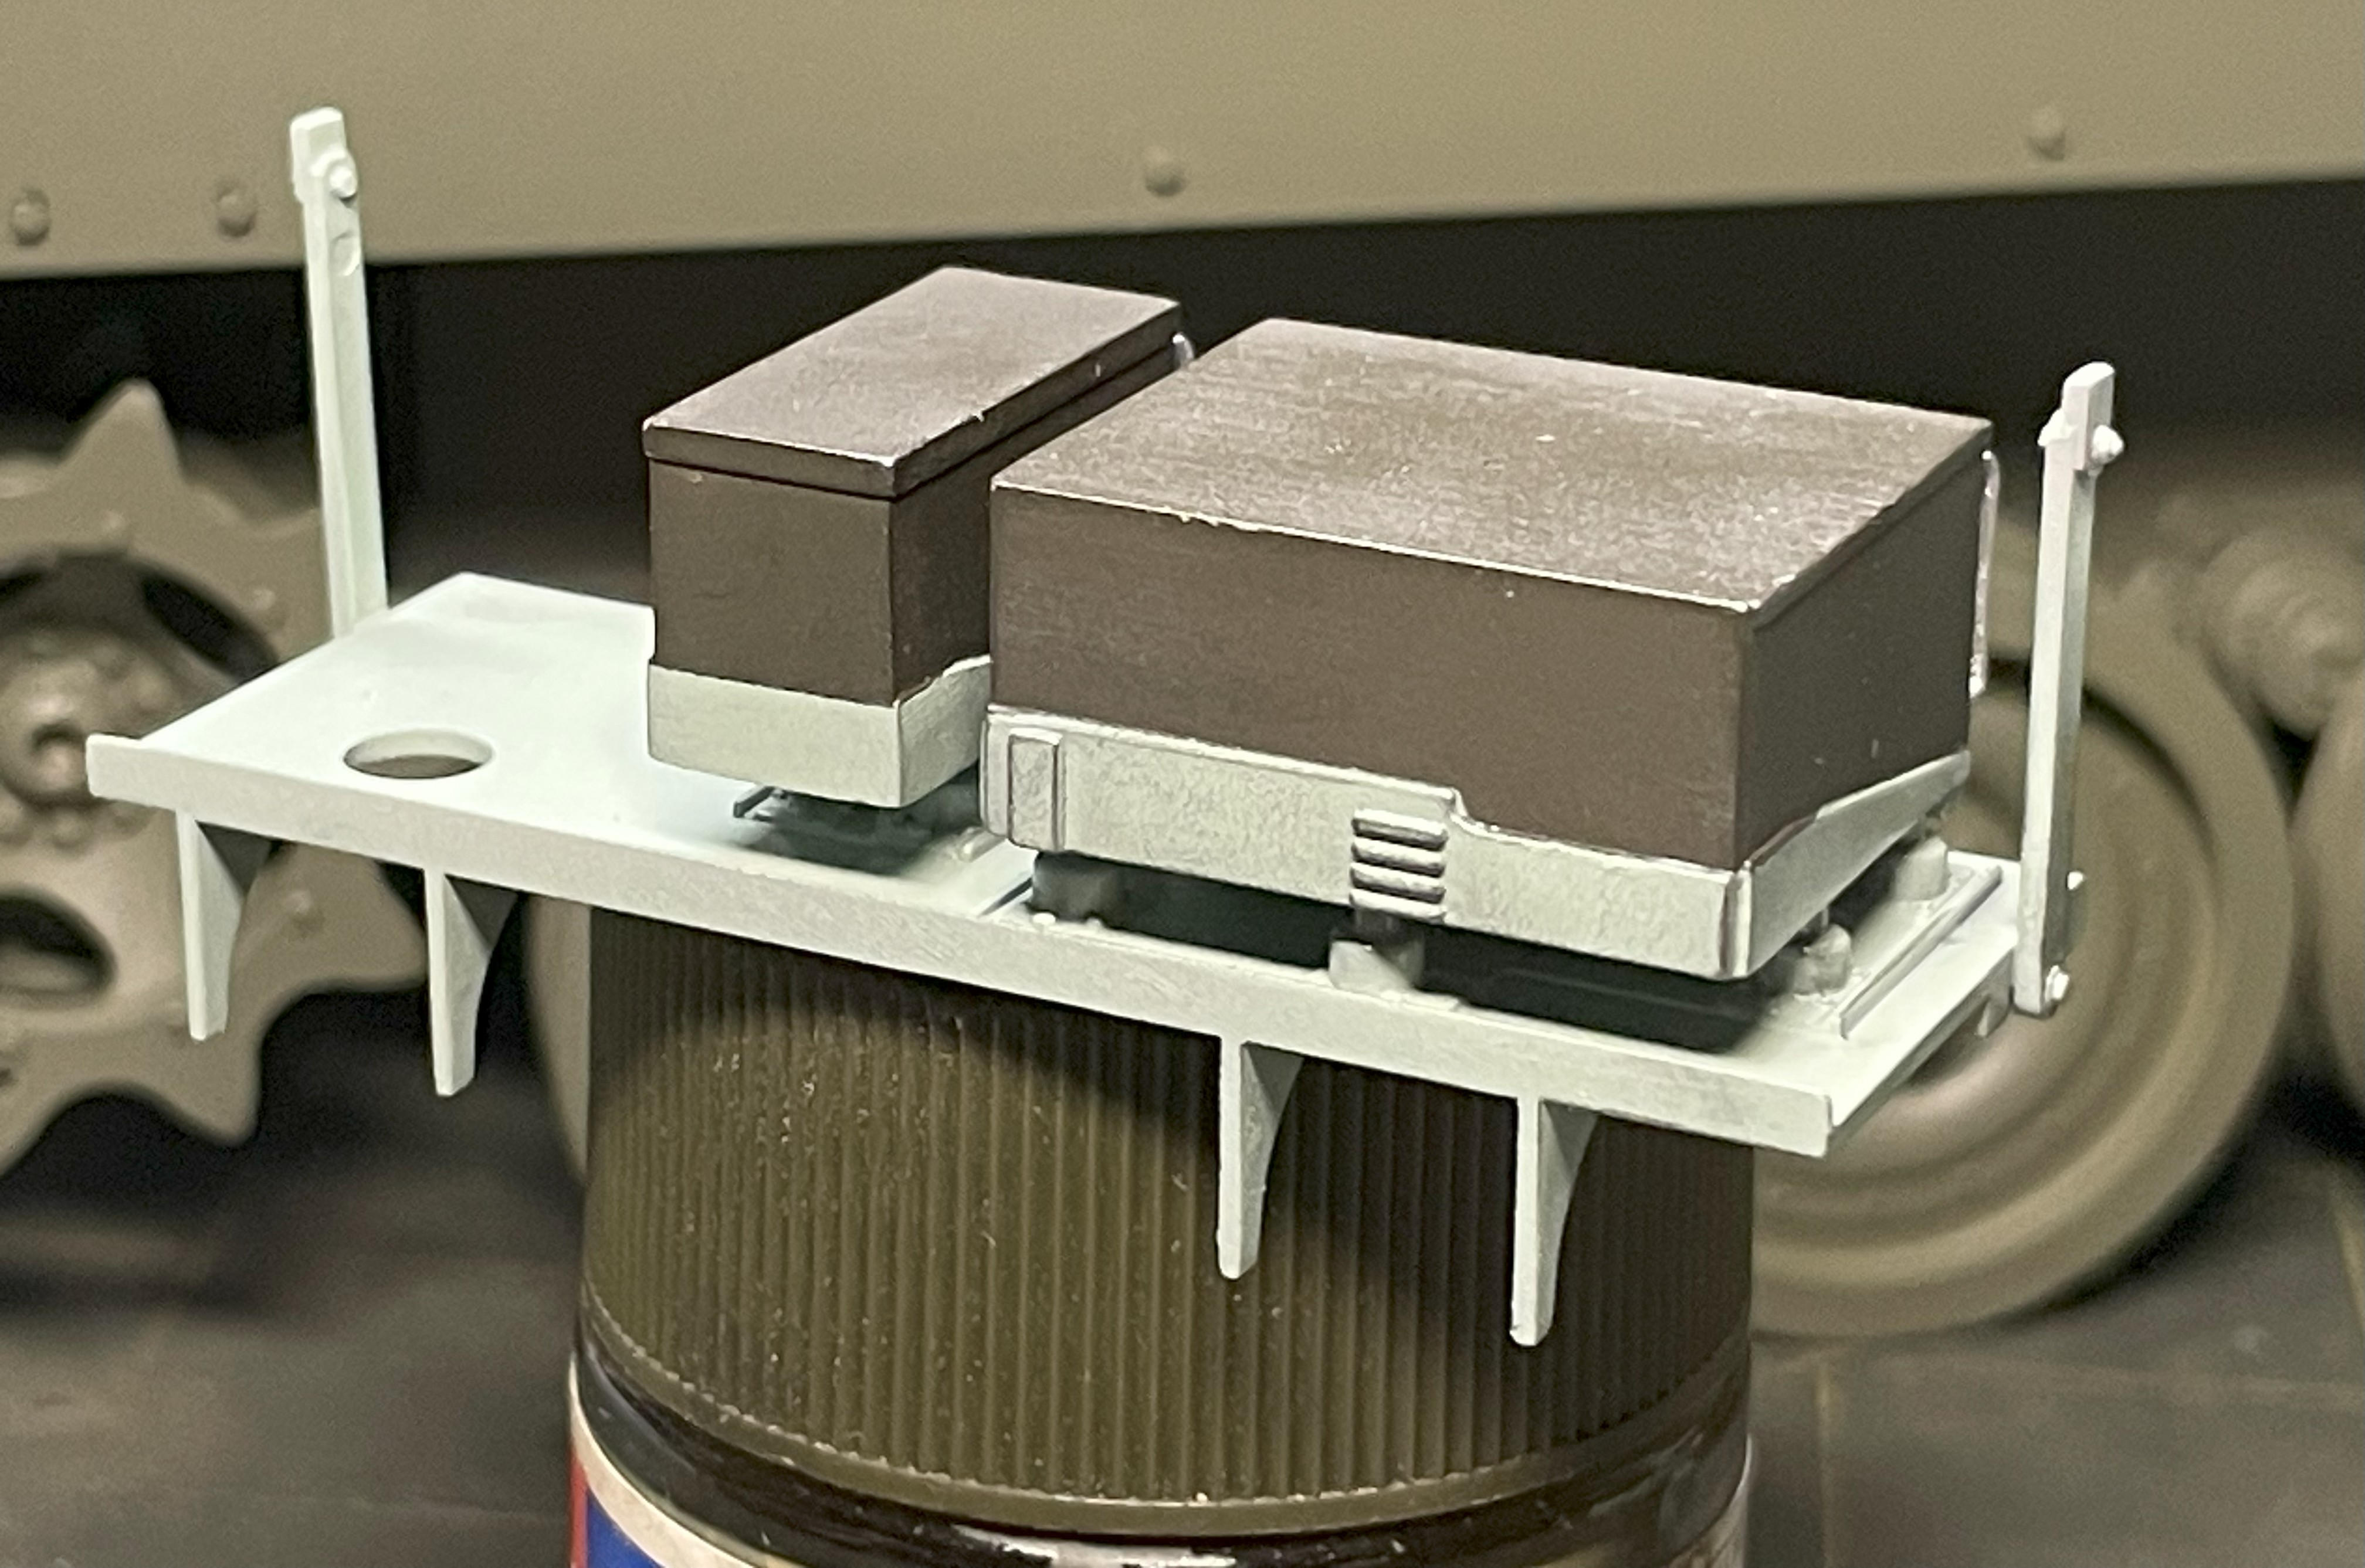
On this picture, you can see the completed radio, and its tiny decals in relation to the size of the model.
- 1/16 RC M-113A1 ACAV - Converting the Takom/Andy's HHQ kit to RC
- 5.jpg (2.43 MiB) Viewed 1204 times
When it will be positioned inside the vehicle, some wiring will be added, similar to this.
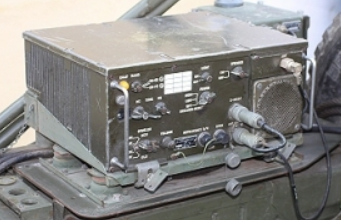
- 1/16 RC M-113A1 ACAV - Converting the Takom/Andy's HHQ kit to RC
- Screenshot 2025-02-12 083446.png (142.12 KiB) Viewed 1186 times
Regards, Louis
