It's time for a new build. This build will be my fifth M113 based RC vehicle. Previous builds were based on Ludwig basic kits, some with Verlinden details, Tank Modellbau components and were all quite heavy and complex. This new build will be a light and much simpler conversion of the latest Takom static kit presented by Andy's HHQ. This will be a low cost conversion and will use most of the components from the kit.
It will have the following features;
- Full crew compartment interior detail of the Takom kit
- Servo operated rear ramp
- Metal torsion bar suspension
- HL TK 7.1 control board
- Tamiya gearbox
- Takom Plastic tracks and roadwheels
- Browning M2 with flash and sound
- Headlights, tail lights and interior lights
- Vietnam war markings
- Figures, as they become available
More than 80,000 M113 were produced, many still in operation today.
- 1/16 RC M-113A1 ACAV - Converting the Takom/Andy's HHQ kit to RC
- 0a.png (902.95 KiB) Viewed 15515 times
The Takom kit has the frontal floaters on the trim vane and sides as shown below.
- 1/16 RC M-113A1 ACAV - Converting the Takom/Andy's HHQ kit to RC
- 0b.png (524.64 KiB) Viewed 15515 times
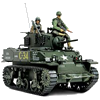
The Vietnam war M113 had colourful markings applied by the crews, making the model more interesting than in later periods.
- 1/16 RC M-113A1 ACAV - Converting the Takom/Andy's HHQ kit to RC
- 0c.png (749.28 KiB) Viewed 15515 times
The Takom presented by Andy's HHQ was just released. I expect more variants to come out.
- 1/16 RC M-113A1 ACAV - Converting the Takom/Andy's HHQ kit to RC
- 0ca.jpg (1.75 MiB) Viewed 15515 times
The model comes in a big box, with a lot of parts for the cost. I will not do an unboxing because Andy has already covered it all on his video.
- 1/16 RC M-113A1 ACAV - Converting the Takom/Andy's HHQ kit to RC
- 0cab.jpg (1.72 MiB) Viewed 15515 times
The model features a full interior of the crew compartment, but does not include interior of engine compartment on the front right. I plan to convert the model to RC while keeping all the interior details. It would be too sad to discard any of it. The whole thing will be a showcase.
- 1/16 RC M-113A1 ACAV - Converting the Takom/Andy's HHQ kit to RC
- 0cc.jpg (2.9 MiB) Viewed 15515 times
The intructions have a complete interior painting guide, supported by finely printed decals. It will be a real beauty.
I can imagine some of these tiny decals will be a challenge to install.
- 1/16 RC M-113A1 ACAV - Converting the Takom/Andy's HHQ kit to RC
- 0d.jpg (2.3 MiB) Viewed 15515 times
- 1/16 RC M-113A1 ACAV - Converting the Takom/Andy's HHQ kit to RC
- 0e.jpg (1.85 MiB) Viewed 15515 times
- 1/16 RC M-113A1 ACAV - Converting the Takom/Andy's HHQ kit to RC
- 0f.jpg (1.1 MiB) Viewed 15515 times
- 1/16 RC M-113A1 ACAV - Converting the Takom/Andy's HHQ kit to RC
- 0g.jpg (1.57 MiB) Viewed 15515 times
Continuing on following post