Page 7 of 20
Re: 1:16 Sherman convert to "Oddball's" tank
Posted: Wed Dec 08, 2010 9:13 pm
by sparks
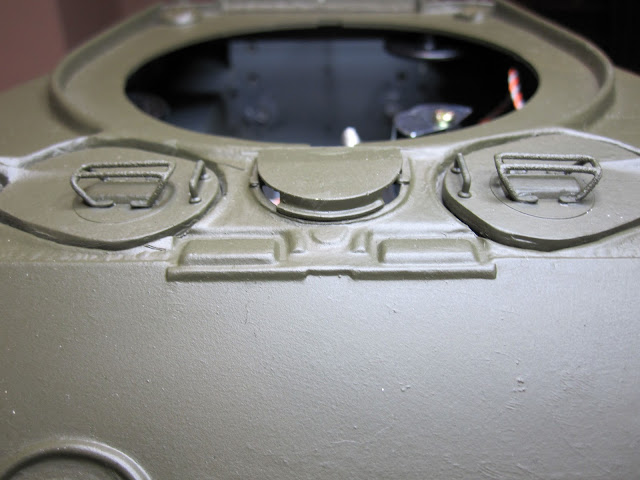
The rear air intakes, or "grousers", as I have found they were called, have been bugging me for some time now. Although you can't get a really good view of the rear deck in the film, due to all the stowage and infantry on it, it seemed to me that these air intakes were not there.
So I did a bit of research and found this pic of a Sherman rear deck.
So, convinced that this must be the case on Oddballs tank, I bit the bullit and ground off the intakes. Made the hole a bit more oval with dremel and file. Made blanking plates from styrene and glued into place.
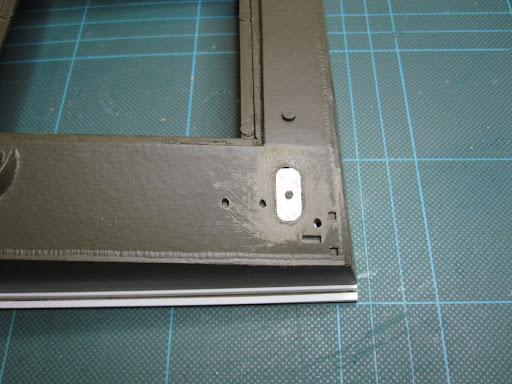
Needed a bolt effect, so cut and thinned them from kit pat B9, as this is not required with the fitting of Nick Aguilars transmission cover.
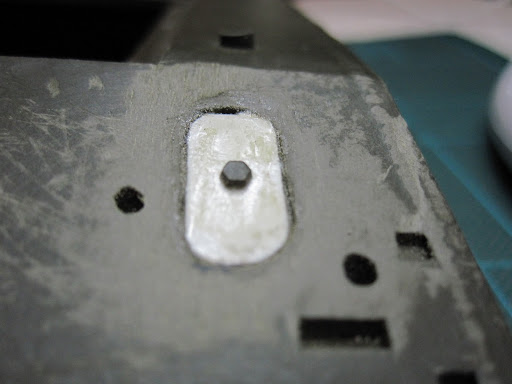
A bit of filler and paint....job done.

BFN

Re: 1:16 Sherman convert to "Oddball's" tank
Posted: Fri Dec 17, 2010 11:52 pm
by sparks
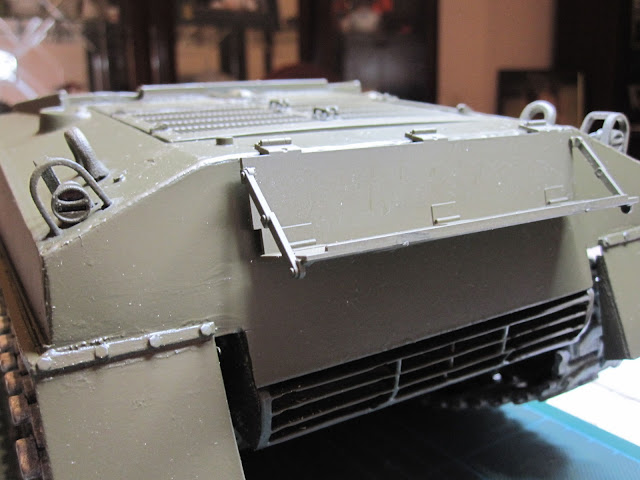
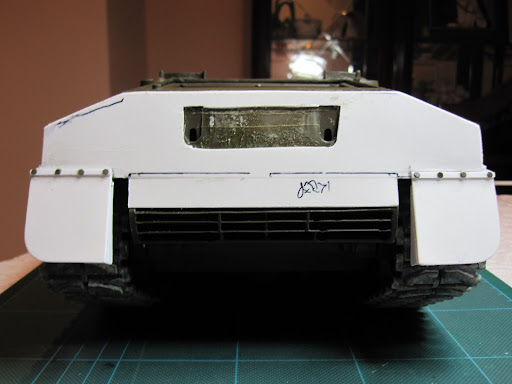
Sorry for slow progress, but finally got the .75mm styrene sheet and set to work making a new rear panel.

so that the rear would blend into the exhaust deflector.
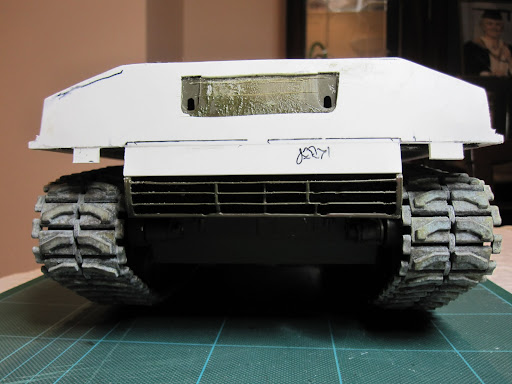
Left a cut out in the middle so that the stowage rack can still be fixed as per tamiya instructions. Note tabs on either side of exhaust deflector to aid in fitting of rear mud guards.
Re: 1:16 Sherman convert to "Oddball's" tank
Posted: Sat Dec 18, 2010 12:14 am
by sparks
Cut and shaped the rear mud guards from more .75mm sheet and small styrene angle and fixed into place with super glue and plastic weld.

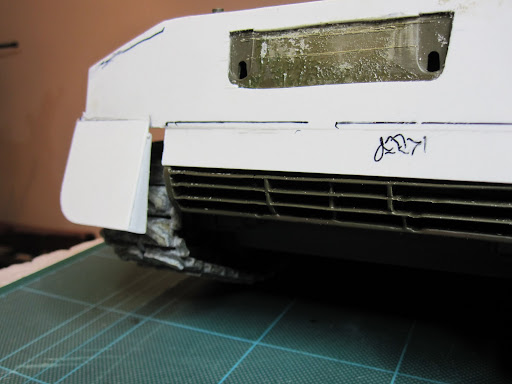
A bit of styrene trim, and to finish it off, the old shaved down bolt effect ploy, from kit part B9
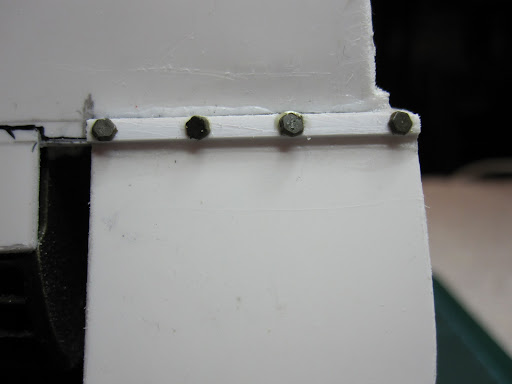
I've still got 7 of those left, wonder if I'll be able to use them all by the end of the build

I need to get this re-formed hull sprayed up, but there's no heating down my garage/workshop and I think its too cold to apply the paint, and the other half won't let me do it in the living room

Bloody cheek
BFN
Re: 1:16 Sherman convert to "Oddball's" tank
Posted: Sun Dec 19, 2010 8:47 pm
by sparks
The things we do for our hobby !
After hearing that the cold snap could last a month,much too long to wait, decided to take a small fan heater down the workshop to make it warm enough for painting. But after about two minutes, it was like being in a shower due to all the condensation dripping off the roof, so I had to make a tent over my work area to keep me, and more importantly, the tank dry

Anyway, now have the reformed hull painted so I can get on with adding some detail parts.

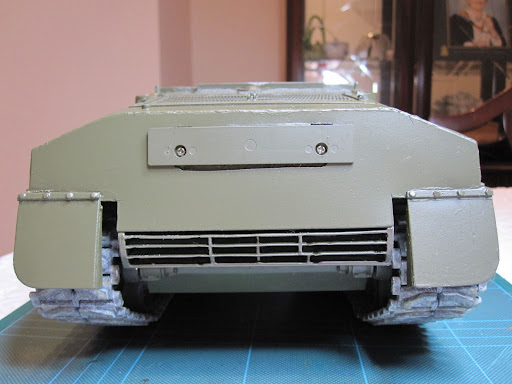
Had to fill a small joint line between the original tank rear and my new back panel, so I had a go at creating a weld line.
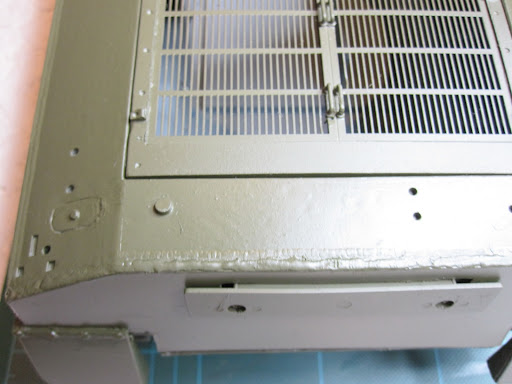
Not sure its come out that well, but most of it will be covered
BFN
Re: 1:16 Sherman convert to "Oddball's" tank
Posted: Sun Dec 26, 2010 8:46 pm
by sparks
Re: 1:16 Sherman convert to "Oddball's" tank
Posted: Sun Dec 26, 2010 11:19 pm
by [ICE]monkey
looking good , nice to get a coat of paint on , your one lucky guy as paint and moisture are not a good combination
Re: 1:16 Sherman convert to "Oddball's" tank
Posted: Sun Jan 09, 2011 4:09 pm
by sparks
Hi all,
Sorry for lack of progress at present
I am basically waiting to get my hands on the new smoker that Saxondog has mentioned (I know you're not directly involved Sax, but any progress report ?) so that I can sort out the positioning of the interior equipment.
Also, as you may have seen from another thread, I'm trying to sort out the TX for adding buttons to fire the guns.
Hope to get moving again soon.
sparks
Re: 1:16 Sherman convert to "Oddball's" tank
Posted: Sat Jan 29, 2011 6:18 pm
by sparks
Hi all,
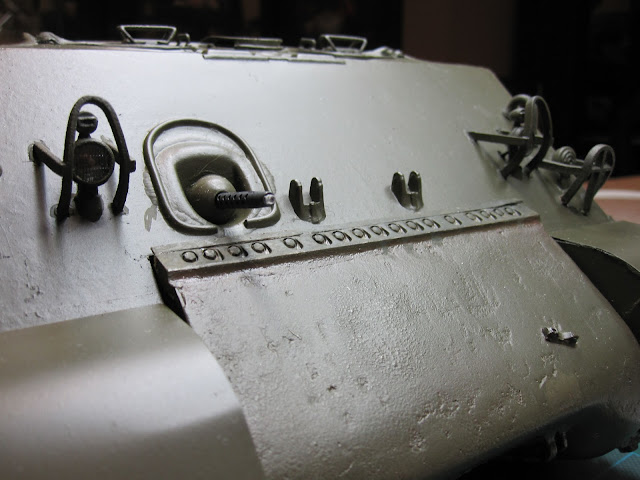
I've been fiddling with the gun mantlet to fit the battle system led transmitter and a working machine gun.
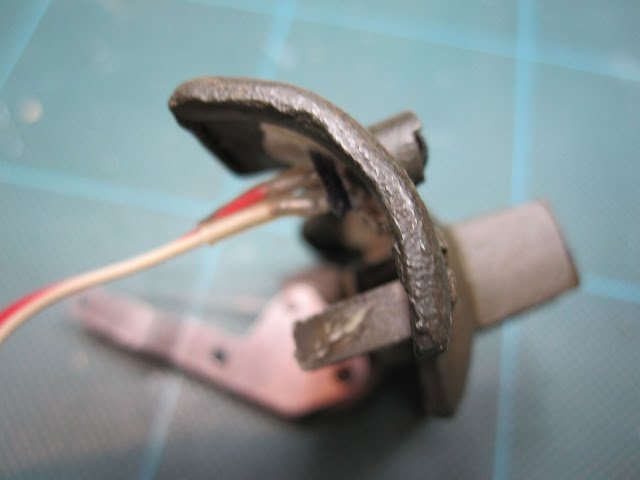
Drilled out the mantlet and fitted the transmitter into a cowl.
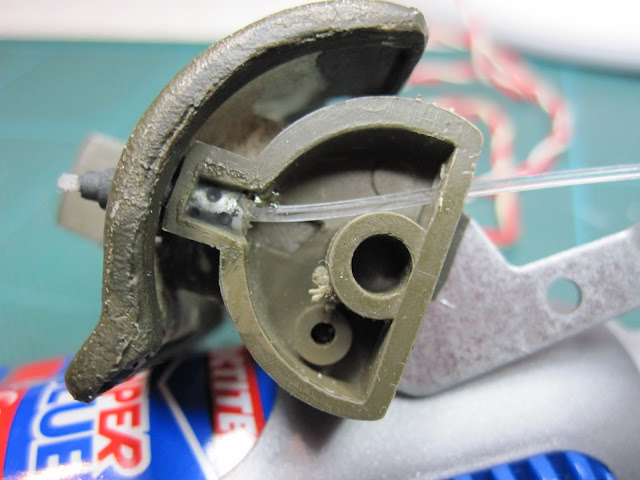
Cut down a spare MG and drilled out mantlet to fit. Fixed fiber optic to run back into the turret.
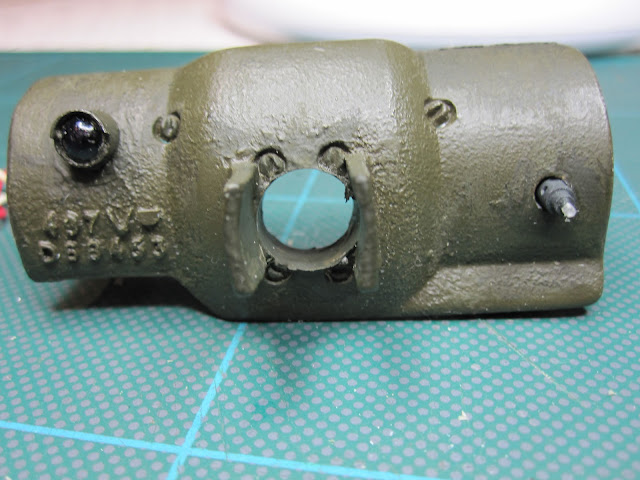
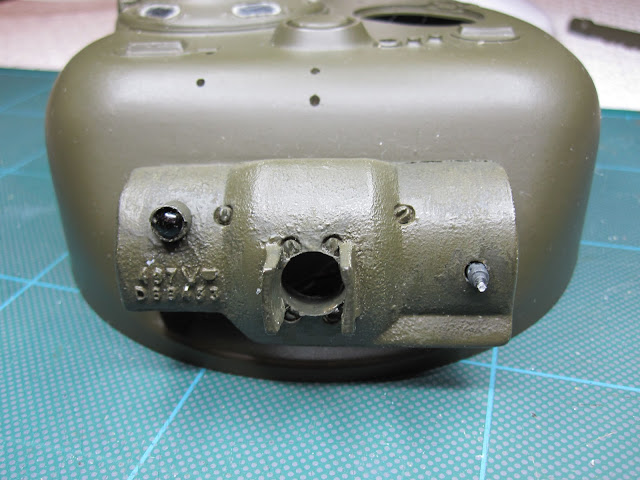
The Nick Aguilla mantlet was designed to work with the standard Tam Sherman gun elevation system and although it fits and works well, it leaves quite a gap around the mantlet.
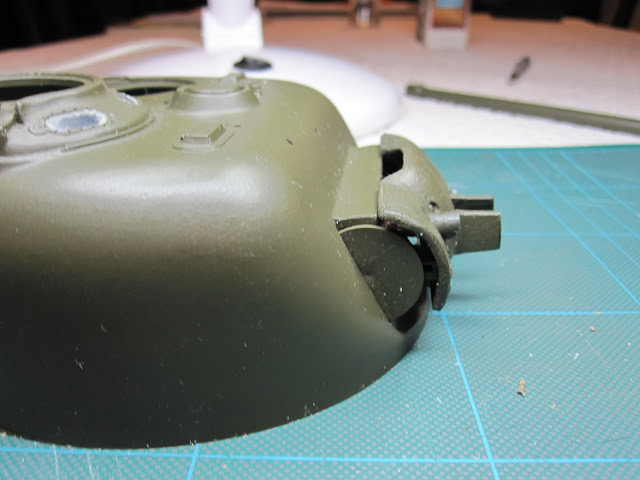
I have seen a rotor shield used for this conversion, and am waiting reply from RCU to get one as I am not happy with the gaps.
BFN
Re: 1:16 Sherman convert to "Oddball's" tank
Posted: Sat Feb 05, 2011 8:33 pm
by sparks
New smoker is on its way, and have ordered the rotor shield from Ethan at RCU, so hopefully things will be moving again soon.
Also sorted out my Futaba 7C for button firing of guns
Re: 1:16 Sherman convert to "Oddball's" tank
Posted: Sat Feb 05, 2011 8:37 pm
by [ICE]monkey
great, the 7cs are dearer then some but you can do loads with them , great piece of kit
cliff