Page 6 of 15
Re: D-Day. A very British Tiger
Posted: Mon Feb 26, 2024 6:27 pm
by MrChef
Ecam wrote: ↑Mon Feb 26, 2024 4:31 pm
They do look fabulous, but keeping them in that same shape will not be easy. I guess adding some thin card (pre-shaped) to the underside (as was mentioned) could help. But these are by far my favorite fenders I've seen to date.
Agreed with everything you're saying Ecam. Looks fantastic! But besides me pushing myself to try this I'm concerned with how resilient they'd be bashing around my yard with other tanks, let alone if I tried an IR club battle. But BIG

Re: D-Day. A very British Tiger
Posted: Mon Feb 26, 2024 6:42 pm
by Ecam
If I'm doing the math right in my head, .25mm is about 0.00984252 of an inch (roughly). Thicker than the walls of an aluminum can (but thinner than the can's bottom) but still pretty thin. In my opinion, brass is stiffer than similar sized aluminum (but does depend on the alloy mix). Might not get hurt too bad, but I'd guess they'd change shapes from time to time.
Re: D-Day. A very British Tiger
Posted: Mon Feb 26, 2024 9:11 pm
by Meter rat
I abandoned the plan to use beer cans. These are the Voyager brass PE mudguards. With all the ribs soldered in place they feel strong.
Got the second side finished.

- 25D99E02-C3E9-4341-853C-987CE6142853.jpeg (87.75 KiB) Viewed 817 times

- 50575B5A-E1AC-462B-A20F-4A41944E3745.jpeg (77.54 KiB) Viewed 817 times
I value your opinions as to whether I have captured the essence of the picture.
Re: D-Day. A very British Tiger
Posted: Mon Feb 26, 2024 10:33 pm
by Ecam
Did you end up using a soldering iron or torch and what solder? I've heard of some low temp stuff that gets applied before heat, but have never tried it.
Second side came out great as well! And yes, I'd call that a tremendous match to the pictures. It does amaze me that a single Sherman could push it off the road and from that picture and angle it would be using the track and right side drive wheel to do the pushing. I think the Tiger I is almost twice the weight of an M4.
Re: D-Day. A very British Tiger
Posted: Tue Feb 27, 2024 7:24 am
by Meter rat
Ecam wrote: ↑Mon Feb 26, 2024 10:33 pm
Did you end up using a soldering iron or torch and what solder? I've heard of some low temp stuff that gets applied before heat, but have never tried it.
Second side came out great as well! And yes, I'd call that a tremendous match to the pictures. It does amaze me that a single Sherman could push it off the road and from that picture and angle it would be using the track and right side drive wheel to do the pushing. I think the Tiger I is almost twice the weight of an M4.
Sorry, can’t help with the solder. I think it has flux in it, and it is on a role. I acquired it from work years ago, when we actually repaired things, rather than replace. I used a 60w soldering iron. Tin both parts, join using blue tack in the correct place, and apply soldering iron.
Re: D-Day. A very British Tiger
Posted: Tue Feb 27, 2024 5:20 pm
by MrChef
Meter rat wrote: ↑Tue Feb 27, 2024 7:24 am
Sorry, can’t help with the solder. I think it has flux in it, and it is on a role. I acquired it from work years ago, when we actually repaired things, rather than replace. I used a 60w soldering iron. Tin both parts, join using blue tack in the correct place, and apply soldering iron.
The solder with flux in it was what I was suggested to get and it works well. I was also told to avoid the lead free stuff as is supposedly more difficult to work with.
Yes learning to tin the two products to join was an important thing for me. This definitely helped me to Not make and waste big globs of solder. When I got the hang of it I was pretty impressed with the soldered join strength too. I went dumb cheap with my iron, like $10.99 at Autozone. Does what I need it to do but working with it I could definitely appreciate the $$$ better ones with more control.
H'mmm ya got me thinking Sir...
Re: D-Day. A very British Tiger
Posted: Tue Feb 27, 2024 6:29 pm
by Ecam
Probably 60/40 (tin/lead) rosin cored solder. Harder to find these days but it is available. I'm in the middle of nowhere these days but I have a Radio Shack about a half hour away. I've used the lead free with little success (except in plumbing)!
Radio Shack was a nation wide chain in the States, these days only a handful remain. And yes my store still has "Realistic" branded products, but the selection of the parts I used to hunt there are far less than the good ole days. Diodes, resistors and capacitors are all found on line these days.
Re: D-Day. A very British Tiger
Posted: Tue Feb 27, 2024 6:39 pm
by Meter rat
MrChef wrote: ↑Tue Feb 27, 2024 5:20 pm
The solder with flux in it was what I was suggested to get and it works well. I was also told to avoid the lead free stuff as is supposedly more difficult to work with.
Yes learning to tin the two products to join was an important thing for me. This definitely helped me to Not make and waste big globs of solder. When I got the hang of it I was pretty impressed with the soldered join strength too. I went dumb cheap with my iron, like $10.99 at Autozone. Does what I need it to do but working with it I could definitely appreciate the $$$ better ones with more control.
H'mmm ya got me thinking Sir...
I’m very lucky in that I learned to solder many years ago at work. I think the solder, I have had, since 1989. Some reels came with me. As did my soldering irons.
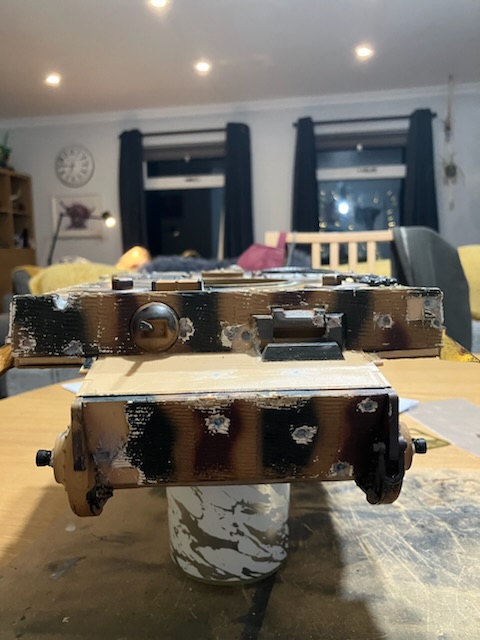
Started doing the battle damage, again trying to replicate the photograph.
- 499D6B95-5C6B-4583-9426-DE12CD5AD605.jpeg (87.13 KiB) Viewed 777 times
Mark up the holes with different size marker pens, Drill holes with different sizes of drills. And drill out. Fill hole with model filler, and allow to harden for five minutes. Press the end of an old paint brush into the filler. Use smaller brushes on smaller holes, to represent different calibre of weapons. Dress the edges, where the filler has been pushed out. Add a few scratches to represent shrapnel.
Re: D-Day. A very British Tiger
Posted: Tue Feb 27, 2024 7:10 pm
by HERMAN BIX
Love it
Re: D-Day. A very British Tiger
Posted: Wed Feb 28, 2024 6:21 pm
by Meter rat
Small gains today. Spayed the brass work with etch primer.

- 9765FA77-2837-4017-A5CD-643EA03AD681.jpeg (96.43 KiB) Viewed 742 times
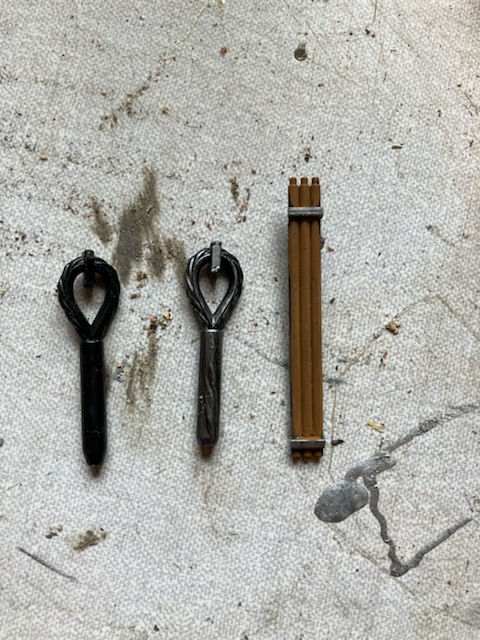
Then started to make the tow cables. Started by cutting the ends off the models tow cable, and the wire ones which came free with purchase. The model tow eyes were drilled out and the wire tow cables installed on them. I don’t think I have the skills to make new clamps. The the barrel cleaning rods were cut out as the detail is good. Small sections were made to represent the clamps. I might be looking for wing nuts. Just need to make the clamps on the engine deck.
- 00E6027E-8B7C-4C20-A04B-99387E0B896C.jpeg (144.83 KiB) Viewed 742 times
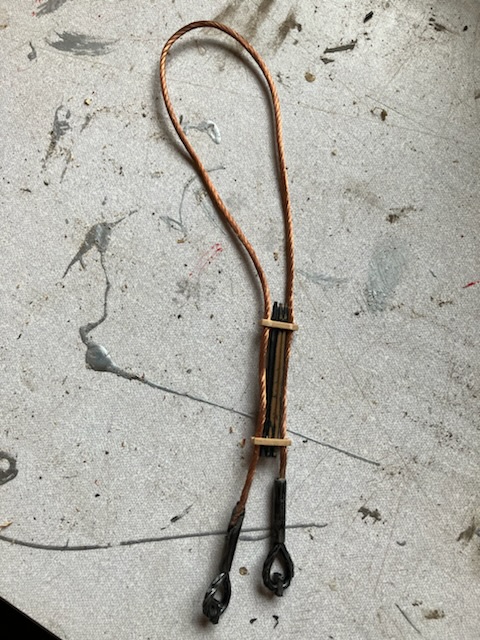
Finally, the completed tow cables.
- 06C65438-B8CB-402B-B0D9-68D1BC7FDD8E.jpeg (147.88 KiB) Viewed 742 times