Page 6 of 14
Re: My first tank build.
Posted: Sun Jul 27, 2014 12:39 am
by ALPHA
Re: My first tank build.
Posted: Sun Jul 27, 2014 12:57 am
by jackalope
Ok so I spent the WHOLE day building the new hull and its SOOOOOOOOOooooooooooo............ much better then the Heng Long one its silly! A couple of the arms feel a little loose so I may have to go back in and correct that but for now I'm THRILLED I can run my Tiger around the yard without throwing a track in less then 5 min. The right side, the one that was my problem, is now perfect! But the left side needs a little more work, I cut the mounting screws down too much so I can't add the washer it needs so between that and the fact they both had striped screw holes I ordered another set. The road wheels axles I made work surprisingly well but I opted to go ahead and order the correct axles I figure better safe then sorry. That little wobble from the sprocket didn't do anything I'm happy to report.
So all I need to do now is to mount the smoke unit once I get longer hoses for it, gonna try the vinyl hose from a weed wacker. I just need to figure out a way to have the smoke come out of the center of the exhaust like its supposed to and still be able to add smoke.

Next thing I need to figure out is how I'm gonna make access to the interior easier as the Taigen clip system doesn't want you to really be able to get into the tank. Not an issue for the switches as I've also ordered the metal hinged hatches so open the hatch turn on the tank! But the battery connection so it can be charged is looking to be a sticking point right now.
I also did some painting and decal work pics to follow let me know what you think. Please keep in mind this is my first time using an airbrush and my first time doing a camo job so if it looks like azz please let me know. Stand by for pics.
Re: My first tank build.
Posted: Sun Jul 27, 2014 1:10 am
by ALPHA
jackalope wrote:Ok so I spent the WHOLE day building the new hull and its SOOOOOOOOOooooooooooo............ much better then the Heng Long one its silly! A couple of the arms feel a little loose so I may have to go back in and correct that but for now I'm THRILLED I can run my Tiger around the yard without throwing a track in less then 5 min. The right side, the one that was my problem, is now perfect! But the left side needs a little more work, I cut the mounting screws down too much so I can't add the washer it needs so between that and the fact they both had striped screw holes I ordered another set. The road wheels axles I made work surprisingly well but I opted to go ahead and order the correct axles I figure better safe then sorry. That little wobble from the sprocket didn't do anything I'm happy to report.
So all I need to do now is to mount the smoke unit once I get longer hoses for it, gonna try the vinyl hose from a weed wacker. I just need to figure out a way to have the smoke come out of the center of the exhaust like its supposed to and still be able to add smoke.
Next thing I need to figure out is how I'm gonna make access to the interior easier as the Taigen clip system doesn't want you to really be able to get into the tank. Not an issue for the switches as I've also ordered the metal hinged hatches so open the hatch turn on the tank! But the battery connection so it can be charged is looking to be a sticking point right now.
I also did some painting and decal work pics to follow let me know what you think. Please keep in mind this is my first time using an airbrush and my first time doing a camo job so if it looks like azz please let me know. Stand by for pics.
Sounds like there is light at the end of the tunnel Jack

...rest assured...the adventure as well as the journey is never over....as most projects soon take a life of their own

....
Will be awaiting your photos
...Perhaps a "Show off " Thread
ALPHA
Re: My first tank build.
Posted: Sun Jul 27, 2014 1:26 am
by jarndice
If you look from inside the hull to the back of the Tiger you will see the exhausts are held in place by two screws each side, undo them and you will if you are careful be able to strip down the exhausts into their three component parts, which helps when painting some detail, at the same time you will have noticed between the two screw holes a hole in the centre of the muffler, it needs to be drilled out using a 6mm bit as does the complementary hole in the rear panel, the clear plastic tubes attached to the smoker will fit snugly, if you want a proper job done then while the exhaust is apart you might want to cover the back of the muffler as it will leak smoke. shaun
Re: My first tank build.
Posted: Sun Jul 27, 2014 4:36 am
by jackalope
I can not get the God damn pics to load! I do not know whats going on I'll have to try tomorrow I'm too tired and too pissed to keep tring or I'm gonna throw this damn laptop out the window!
Jardice, The rear panel has 4 holes in it already for the exhaust. The 2 that Heng Long uses that pumps the smoke into the shield next to the mufflers and 2 that would pump the smoke into the mufflers themselves. The top of the mufflers are open so the smoke would come straight up and out just like a real Tiger so thats not a problem, even the tubes are no biggie. My issue is once I do this how do I fill up the smoke generator with the fluid once I route the hoses into the mufflers?
Re: My first tank build.
Posted: Sun Jul 27, 2014 4:49 am
by jarndice
My Jacko you do sound fraught, Do you have the quick release or are you disconnecting top from bottom using those interminable screws, if you have the quick release then just open the Tank and top up your smoker by pulling free the two hoses and then put the Tank together, I generally do it at the same time as changing the battery and if you havn't got the quick release I would suggest you do. AND CALM DOWN you are doing this for fun, Take care my friend, have another swig from the bottle marked 75% proof and all will look much better. shaun, ps the exhausts are open at the back so the smoke comes out through the back of the muffler which is why I suggested you take them off so you can enclose the mufflers ensuring the smoke goes straight up.
Re: My first tank build.
Posted: Sun Jul 27, 2014 6:24 am
by HERMAN BIX
I dont have the smoker problem, but the stress of reading about it has driven me to the medicinal bottle marked No7.
Good advice mate, I feel much better

Re: My first tank build.
Posted: Sun Jul 27, 2014 6:28 pm
by ALPHA
Re: My first tank build.
Posted: Mon Jul 28, 2014 12:34 am
by jackalope
Re: My first tank build.
Posted: Mon Jul 28, 2014 12:48 am
by jackalope
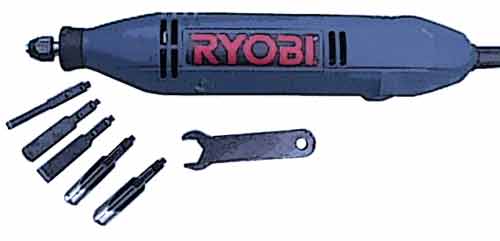
I also found out why the tracks would grab the idlers and pop, they had these little nubs on the inside of the track teeth that was causing a problem. A little time with my Dremmel tool and a grinding disc and the little nubs are all gone and the tracks run MUCH smoother! I have a new set of idler wheels on order due to issues with the first set I got as well as a set of metal mud flaps and a set of headlights and correct axle for the Taigen hull.
So what else should I do? I plan to replace the turret and upgrade all the hatches to metal ones that open and all the turret detail parts in metal as well. Should I get the tools in metal too? What about the tow cables and the cable thats on the side of the tank? I was thinking the one on the side I could make into the antenna to give the tank more of a scale look rather then a toy look. Either that or I'm gonna attach the antenna to the metal of the hull to make the whole tank into an antenna.