First, just as a test if I succeed

Post all your larger scale RC Tanks, Half Tracks and Military Vehicles, build threads here. From 1/12 all the way up to 1/4! all here! Your Larger Scale figures are also welcome here.
User avatar
Edwin
Corporal
Posts: 394
Joined: Tue Jun 11, 2013 8:34 pm
Location: Rheinland Pfalz Germany
Contact:

Re: First, just as a test if I succeed

Post by Edwin »

Currently here is more of a learning effect for Resincasting in multipart forms of complex parts.

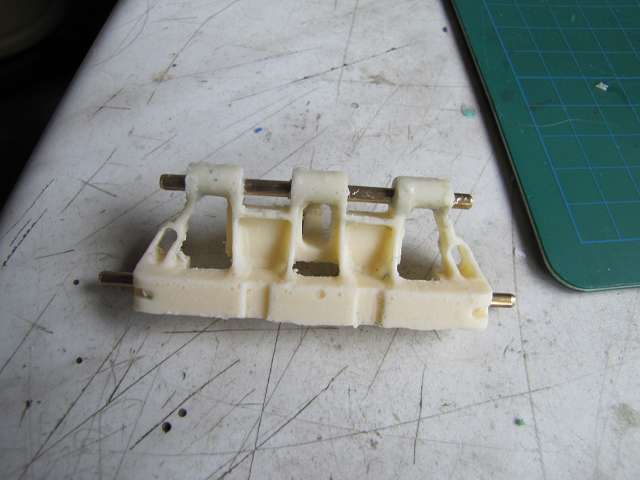
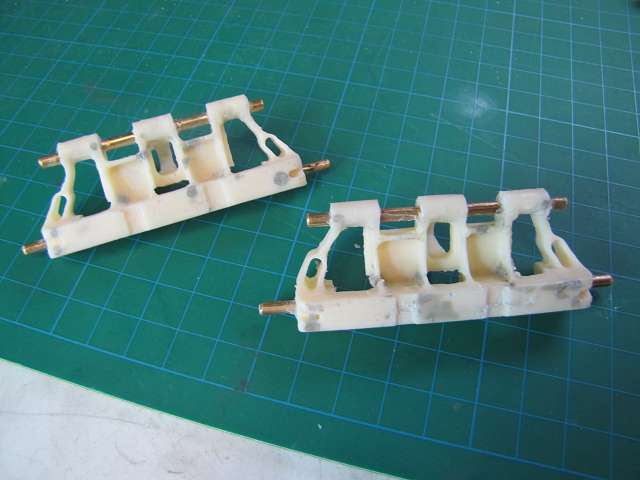
Although the surface is now reasonably well when I take the members out of shape, but sometimes only thinly over the bubbles collapse immediately when I edit the parts.
So continue in the trial.
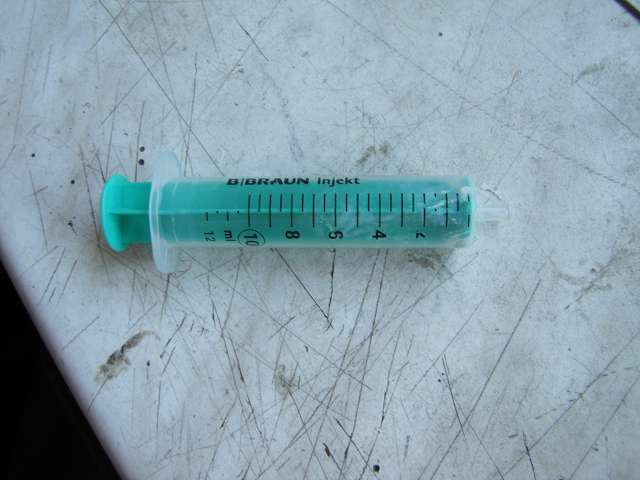
Meanwhile I injeziere the resin heated to 40 ° C with a syringe in which to vent it before just fine. Simply compress the opening and pull the piston and already all the air collects at the top and the resin is almost clear.
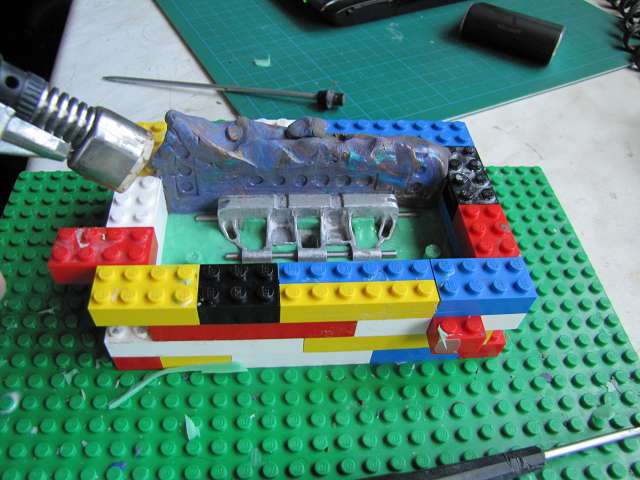
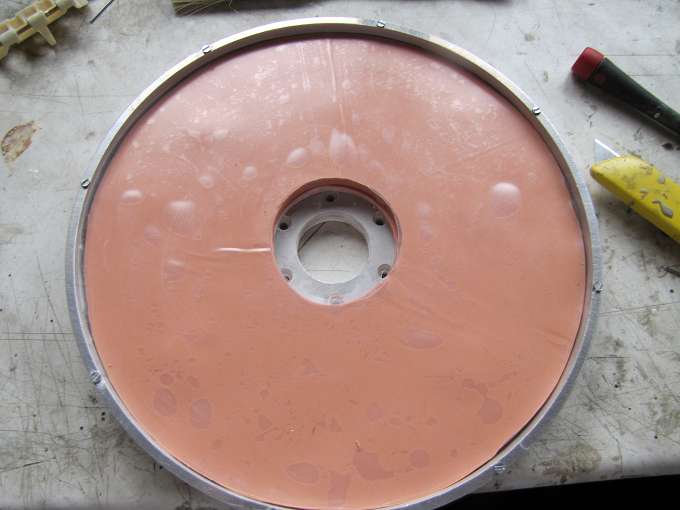
I also heat the mold in my little annealing prior to about 40 ° C . so that the resin can be almost water thin pressed into the mold and leave bubbles almost like water. Nevertheless, I have always more or less air to different , changing places. Oh yes breather is already there.

Image

Image

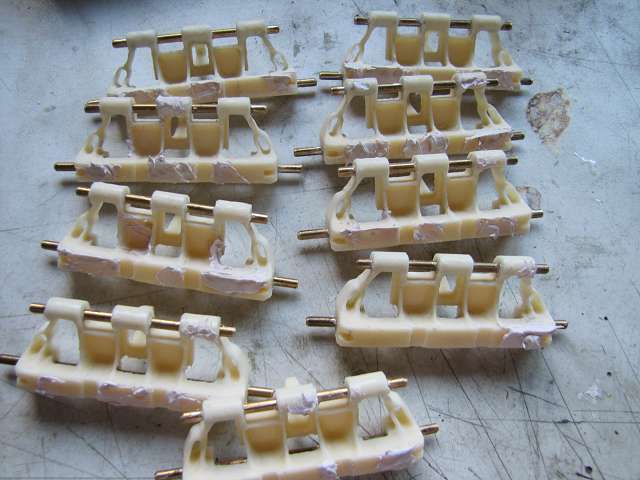
Now I just try out with what I can best repair defects. Apoxie is currently best suited , mainly because it after curing has a similar hardness.

Image

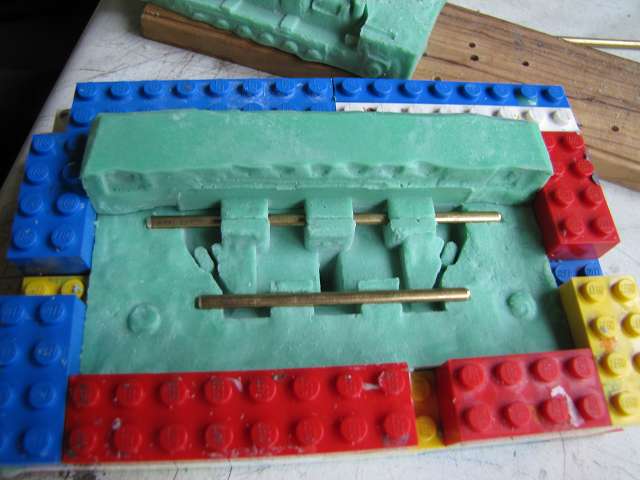
So I 'll probably have to build a third form with the experiences from the first two, but this completely interpret for the resin injection from below takes place in the form of a standing up so that the air is inherently displaced upward .
APAMOTEC Model technology in detail
User avatar
Edwin
Corporal
Posts: 394
Joined: Tue Jun 11, 2013 8:34 pm
Location: Rheinland Pfalz Germany
Contact:

Re: First, just as a test if I succeed

Post by Edwin »

Resinform the Third ...

After I so do not get the bubble theme with the second form in the handle , I build from the experiences of the first two of a new form again . This I will only provided with a single vent and a filling .
But first, back to embed the link in plasticine. To get this even particularly smooth the putty beflamme I still very carefully with a small gas burner.

Image

For mixing of silicone and Reesin I use a fine balance.

Image

After the silicone is networked I cut the surface tension raised by the edges with scissors so that the mold can lie flat .
so it looks from form to form better.

Image

Image

I share the top again with modeling clay and paint the silicone release agent before casting with a . For this I use a simple oil for cooking . But there is not any oil used . But you can easily find out by the silicone smeared with a thin film of oil. If it pulls evenly and thinly over the surface , you can use the oil , if it looks like water on a fresh car polish it will not work .

Image

So I 'll do it then with the third molding.

Image

In my annealing , curing works much faster and better.

Image

And so the new shape still looks as a block and then separated .

Image

Image

Now in the forms I make no vent in the casting sprue and more . These later I drill with a drill to the areas where they are needed.

Since I was approached because of the reuse of syringes.
I'll harden the resin is pull the plunger out and press the resin with a wire from the syringe. It is almost as often reusable.

Image

Image

Image

Even the thought of minimum weight of the tank I'll probably have to move by 5 to 10kg for top . I have today once weighed a chain link zamak and finished at about 55g the pair of chains will probably come to about 10kg . For this, the chain through their high weight but should run well .
APAMOTEC Model technology in detail
User avatar
Edwin
Corporal
Posts: 394
Joined: Tue Jun 11, 2013 8:34 pm
Location: Rheinland Pfalz Germany
Contact:

Re: First, just as a test if I succeed

Post by Edwin »

Finally it works so that I can accept it .......

But first, how to proceed.
This time I have no sprue and vents built into the form , I would like to fill the mold in an injection .
Therefore, I now still need a filling and venting in the mold. This I am simply by i install in the appropriate places with the narrowest rivers jewels form a hole with a 3mm drill bit. With a sharp drill rotates very high it works wonderfully .

Image

Add the powdered form I put back the 3mm brass rods, which I do I need as a placeholder in the form of the bearing tubes of the chain pins .
Here you can also recognizable that my forms from time to time also be better and more accurate.

Image

And I can now press the preheated in the syringe and slowly vented resin into the mold. Here I swing the on-edge shape slightly so that there are no air bubbles can collect in corners.

Image

I press the resin into the mold without stopping until no air bases with the resin from the mold exit .. The syringe daf while in no case be drawn from the injection port , otherwise you again inflated a bubble of air into the system.

Image

After the resin was hard now see the link like this.
I still have a few bubbles , but only on the bearing surface of the chain link and I certainly still get away .

Image

And so the raw plastered link then looks . The few bubbles I can now easily repaired with a spatula and then the link is now usable.

Image
APAMOTEC Model technology in detail
User avatar
Edwin
Corporal
Posts: 394
Joined: Tue Jun 11, 2013 8:34 pm
Location: Rheinland Pfalz Germany
Contact:

Re: First, just as a test if I succeed

Post by Edwin »

Moving ahead .......... :/

Although the Master of resin which I am doing now are not perfect and still need a little rework, but they are used and there will be more.
For the spin cast I need 9 pieces and when I have them together I can start with this form.

Image
APAMOTEC Model technology in detail
User avatar
Saxondog
Captain
Posts: 4293
Joined: Mon Apr 27, 2009 11:06 pm
Location: Tennessee-U.S.A.

Re: First, just as a test if I succeed

Post by Saxondog »

Excellent work edwin, need an apprentice? :thumbup: Will work for tank parts! :)
Urban dictionary-SAXONDOG-derogatory term for anglosaxon people
User avatar
Edwin
Corporal
Posts: 394
Joined: Tue Jun 11, 2013 8:34 pm
Location: Rheinland Pfalz Germany
Contact:

Re: First, just as a test if I succeed

Post by Edwin »

Again, it goes a little further.

The Resinmaster are now cleaned and the flaws I have been milled, which takes incredibly long.
So now I could touch up with 2K filler this.

Image

Tomorrow they will then sanded
APAMOTEC Model technology in detail
User avatar
Edwin
Corporal
Posts: 394
Joined: Tue Jun 11, 2013 8:34 pm
Location: Rheinland Pfalz Germany
Contact:

Re: First, just as a test if I succeed

Post by Edwin »

Thus , in small pieces precedes it .

I now have first made me a little form , so that I can recognize and assess problem areas better. Because an error costs only a fraction of the material and the time that is necessary in a spin cast .

Image

The resulting casts are as I did not expect at wide error-free , but now I know where I must begin . It is also a good test whether the chain so fit and works as I imagine it . I once put a piece of 1/16 chain next to my chain links . The 4 members now weigh even as much as a small chain .

Image

Image

Image

In addition, I have also tried the same , the strength of the chain , but at 1200 N train me the wooden backing of the links is broken without that I could impress the chain.

So now I have started to build the spin cast , which is very expensive .
I use to drive silicone, which is then crosslinked in the oven.

For cutting I use the pressure lids .

Image

Image

And so I work now the master link into the mold.

Image

Since I now have a lot of work , partly because the shape is not as usual in two parts, is special consist of 8 parts because of the complicated shape of the chain links .
APAMOTEC Model technology in detail
User avatar
Peiper
Recruit
Posts: 10
Joined: Fri May 13, 2011 12:06 am

Re: First, just as a test if I succeed

Post by Peiper »

This is amazing work and you have a lot more patience than me. !!!
Are you planing to make a full 1/6th scale model ? if so which one, how much will it cost and when will it be available to be bought ?
' A proud and heroic time !..Where we were standing was Germany and as far as my tank gun reached was my kingdom ! ...Our vision always has been the 'Dream of Reich ! '
User avatar
Edwin
Corporal
Posts: 394
Joined: Tue Jun 11, 2013 8:34 pm
Location: Rheinland Pfalz Germany
Contact:

Re: First, just as a test if I succeed

Post by Edwin »

Hi Peiper,

yes I have to make a commercially available model before it.
If the chain does, we will at least 3 different prototypes tank build on these chassis.

The most important goal for me is a model in 1/6 scale build that can be traded by just one person without much effort and in each trunk fits without driving restrictions to have.
In addition, it should be possible to offer the model of a highly variable Bassis-kit to the finished model.
There are some ideas of what the very different show other providers, such as a very powerful brushless drive with real inertia.

How long this will take and how much it is, I can not say yet. I am still on Try as I may make a chain that satisfies my needs. If this works is to have my goal to the fair next year in Munster a drivable drive.

Cheers, Edwin
APAMOTEC Model technology in detail
User avatar
Peiper
Recruit
Posts: 10
Joined: Fri May 13, 2011 12:06 am

Re: First, just as a test if I succeed

Post by Peiper »

Hi Edwin,
Thanks for the quick reply. I am looking forward to seeing this move on with the updates that you add. The fotos are great.
' A proud and heroic time !..Where we were standing was Germany and as far as my tank gun reached was my kingdom ! ...Our vision always has been the 'Dream of Reich ! '
Post Reply

Return to “Larger Scale Military”