Page 13 of 18
Re: Tiger I late version
Posted: Thu Jan 25, 2018 5:56 am
by Aljones34
Great detail added must have taken a lot of patience to get the position right and realistic looking.
Re: Tiger I late version
Posted: Thu Jan 25, 2018 6:42 pm
by hotte8487
Part two of the arise of my commander. He needs also still some shoulder boards.

Two pieces from polystyrene carved and…

…fitting with two little brass rivets.

The cap was also adjusted,…

…here the first try, which was later slightly reworked.

Thereafter were both headphones adjusted, glued and wired.

Followed from the start to the laborious creation of the oak leaf pattern; the middle green and brown are present.

Also the shoulder boards are completed and glued.

Then it goes on with the dark green pattern.

Felt hours later; my commander is almost finished.


Thereafter the completion of headphones and headset; the bow from the headphone have later to be adjusted.


First fitting in the Tiger cupola; here from far…

…and here a close up view.

The project commander is now finished – technical adjustments at the Tiger will later still follow.
Re: Tiger I late version
Posted: Thu Jan 25, 2018 7:46 pm
by rolling-thunder
Absolutely cracking job you've done there.
Re: Tiger I late version
Posted: Thu Jan 25, 2018 8:11 pm
by Ad Lav
Lovely job!
Re: Tiger I late version
Posted: Thu Jan 25, 2018 9:02 pm
by 43rdRecceReg
Outstanding, as usual, Hotte

When you can fix broken arms like that, we could use you in our National health Service

A great bit of modelling overall; but the Shoulder boards..well, a- bit of genius

Re: Tiger I late version
Posted: Sun Jan 28, 2018 12:12 am
by hotte8487
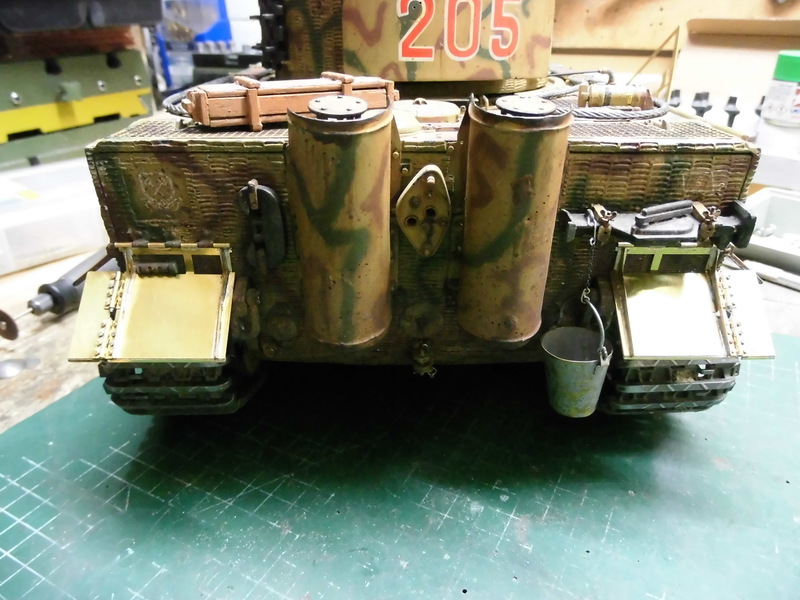
As I promised – now some technical adjustments – but not only. I’ve reworked my track tensioner; as role model I’ve used the tensioner from Detlef Bock – short named Bock-Tech. Unfortunately I’ve forgot to make some photos. But I tried the tensioner many times – a super driving behaviour. An additional mistake I’ve made at the rear mud guards. Both stiffeners are too short, the result was a break point. Also again new for me; at the dismantling of the idler wheel a little surprise…
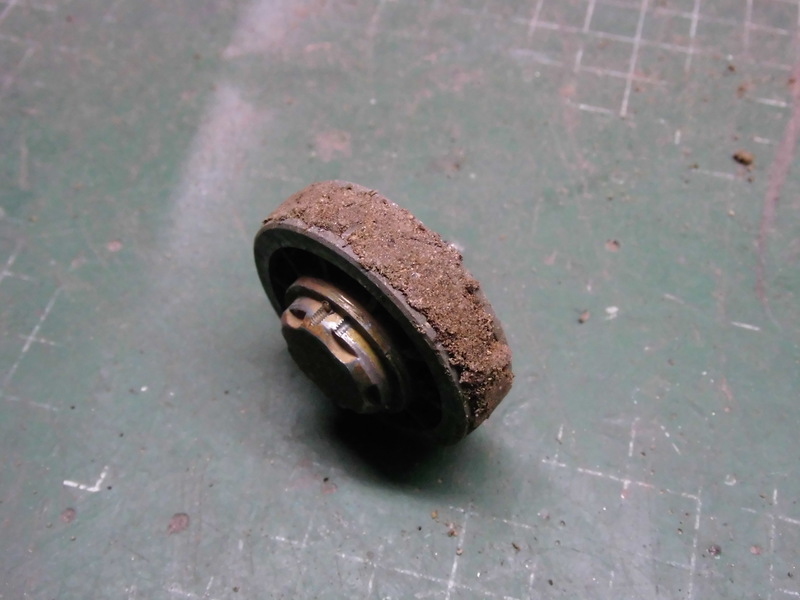
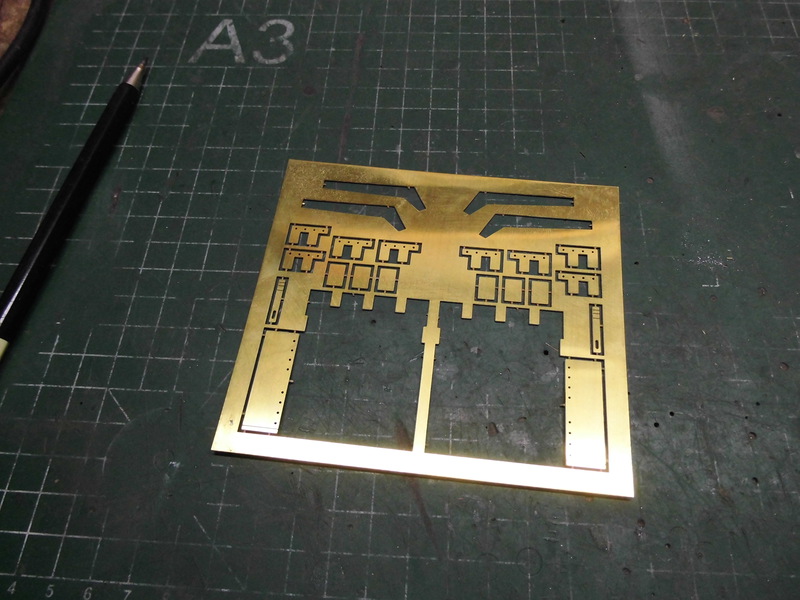
Through the damp ground were the groove complete filled; but the function was unrestricted. Now to the mud guards; this time not self-made. This time were etch parts used; I‘ve made drawings and these were then etched from brass sheets in 0,3 mm thickness. Here are both main parts and the stiffeners already cut out.
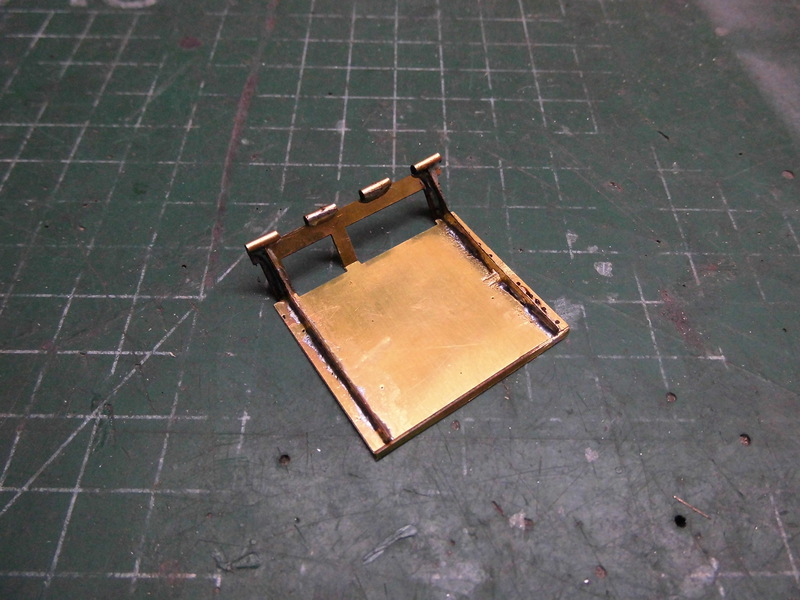
After bending were the stiffeners soldered; for a better leading has the main parts three little holes etched, the counterpart three little peaks. And good to recognize – the stiffeners come close to the hinge part and are there also soldered.

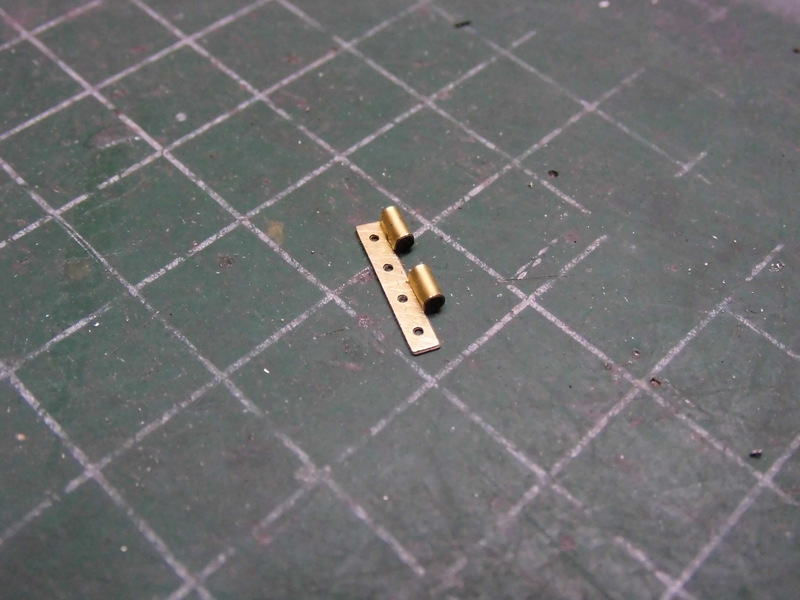
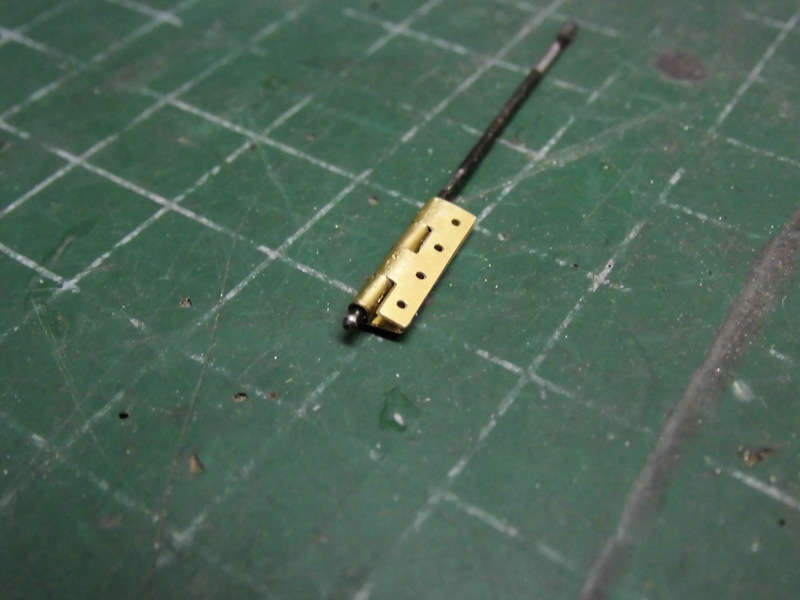
The rolled hinges were soldered too.
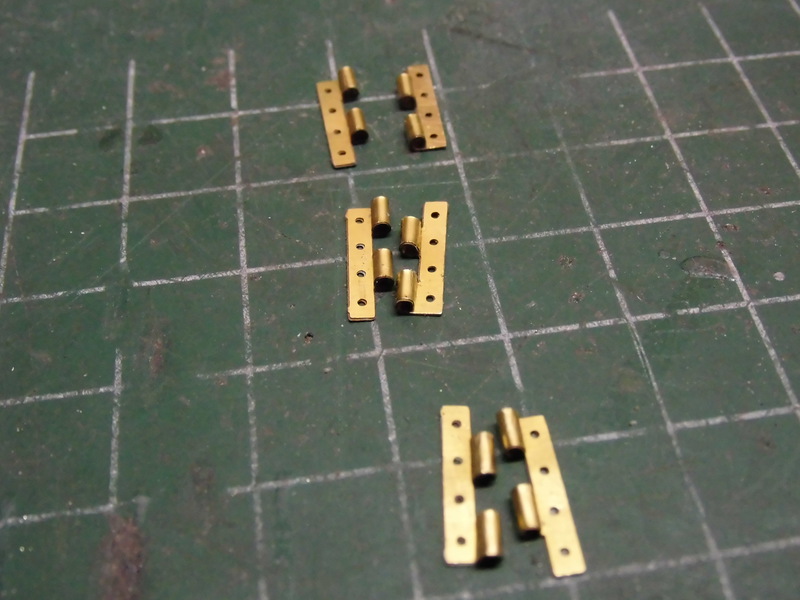
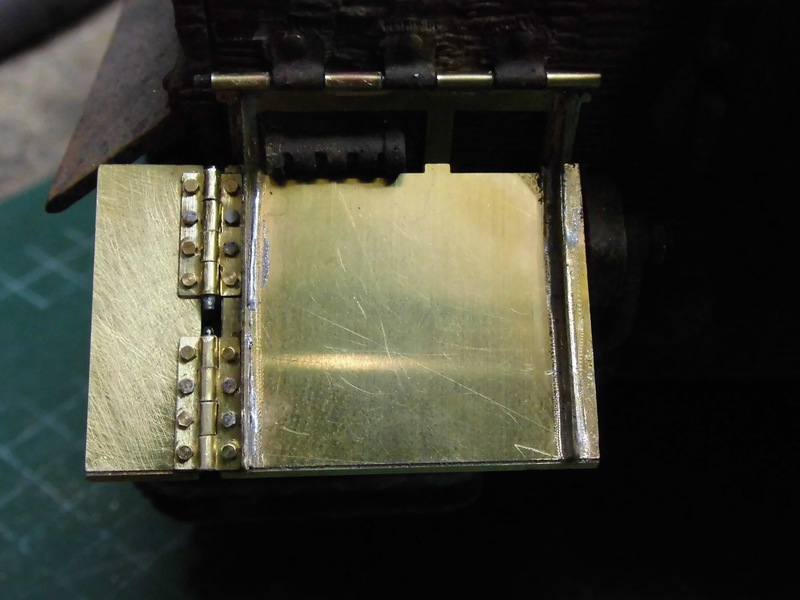
Continued with the hinges for the side parts; here some single parts.
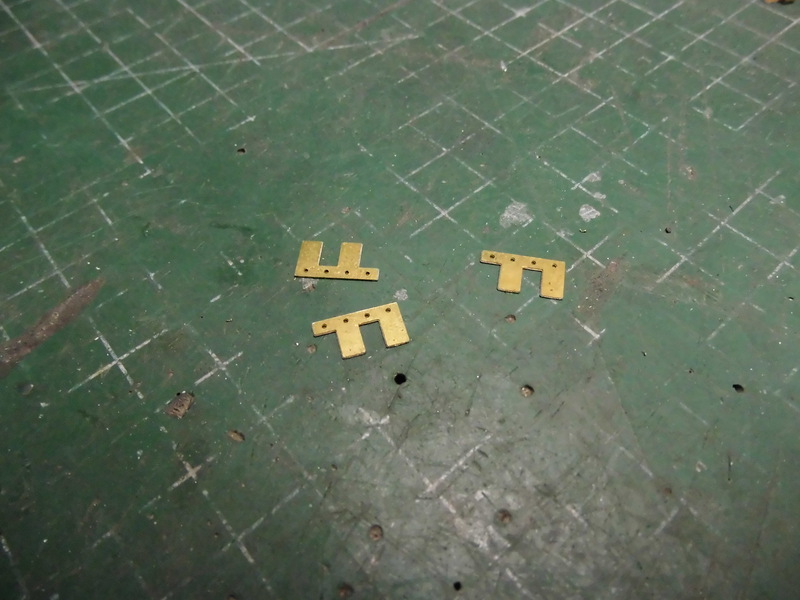
One hinge piece is rolled.
The side part was cut; this part receives no lateral fold, here were later little brass angles soldered.
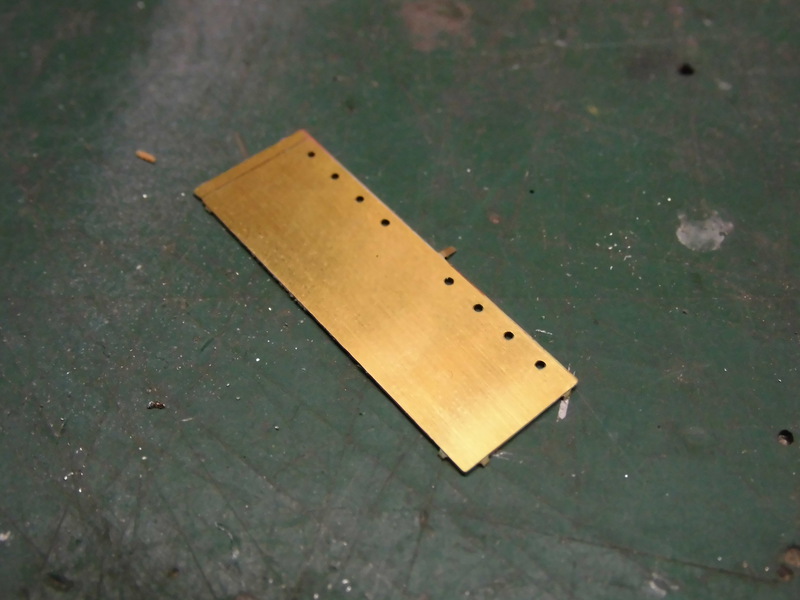
All side hinges are until this work step ready.
Connected with an old track chain bolt. Here opened…
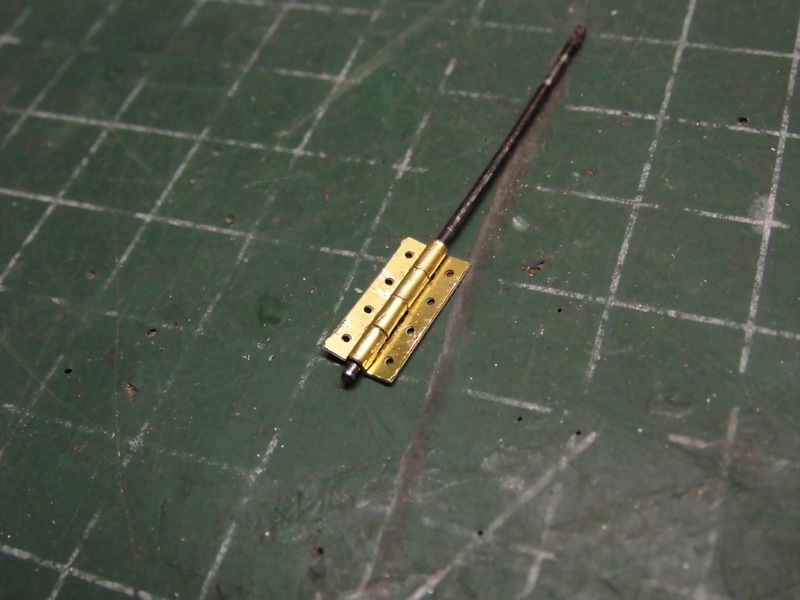
…and here in closed state.
Thereafter were the side parts at the main mud guard mounted; screws are M0,8.
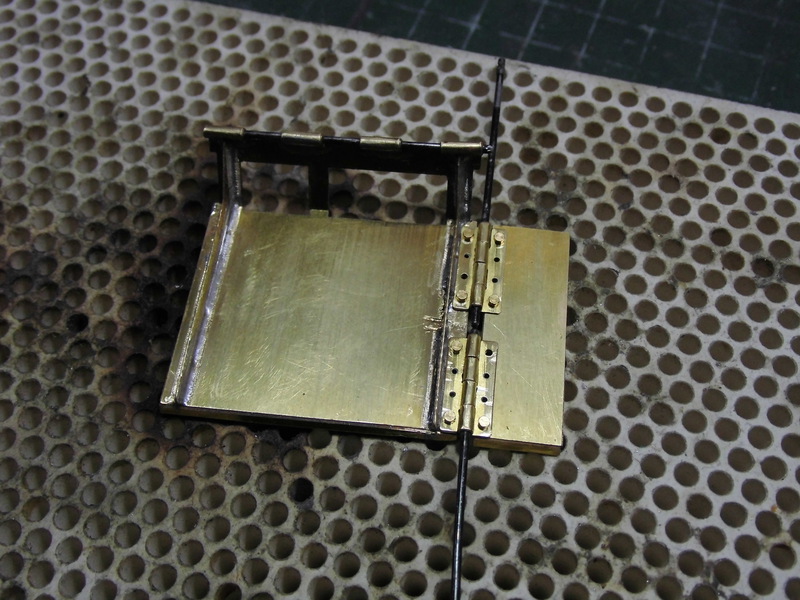
At the next picture is the soldered angle profile for stiffening good to recognize.
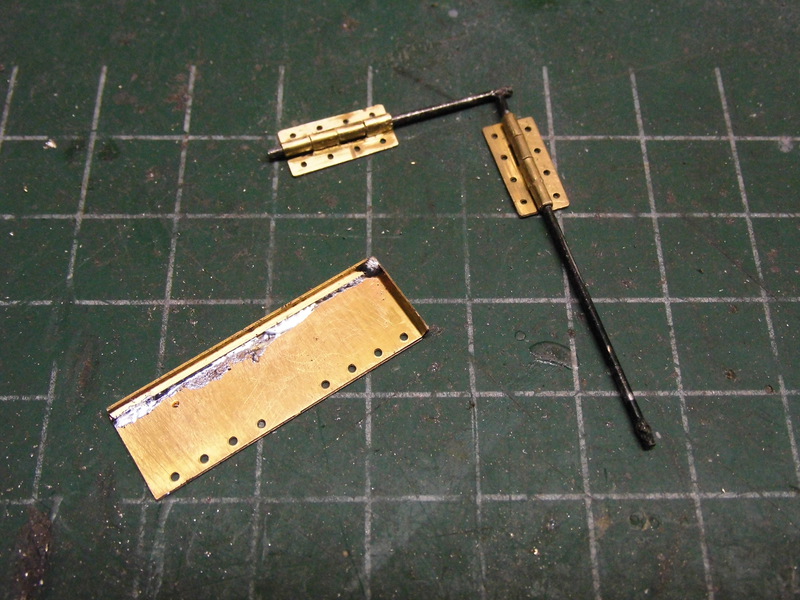
The old hinge counterparts for the mud guards needs no changes and were farther used.
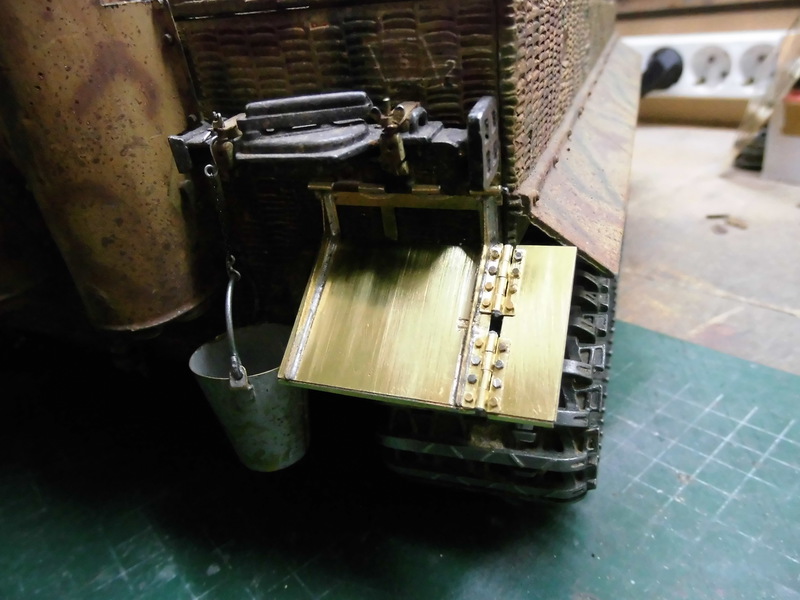
The hinge bolts were a bit shortened and the lock system mounted.
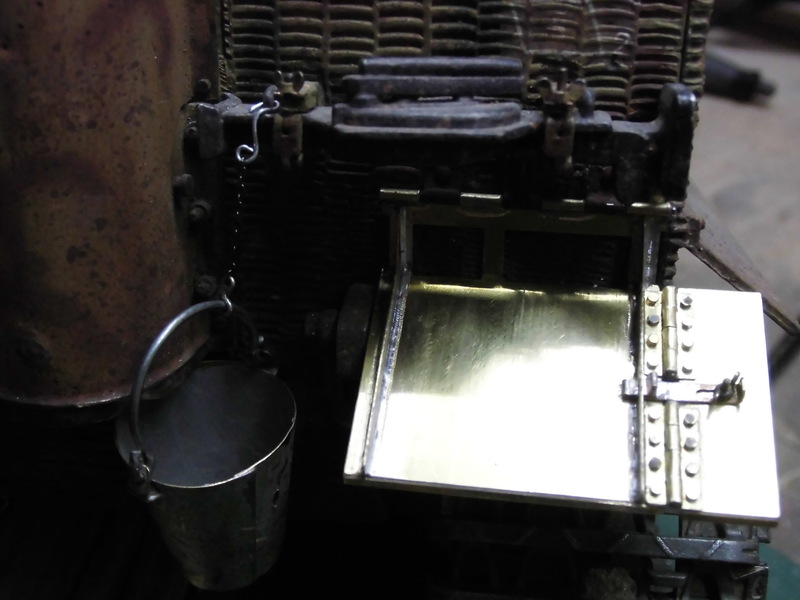

That’s all to the rear mud guards; at left side are some parts of the new track tensioners to see.
Re: Tiger I late version
Posted: Sun Jan 28, 2018 12:12 am
by hotte8487
As I promised – now some technical adjustments – but not only. I’ve reworked my track tensioner; as role model I’ve used the tensioner from Detlef Bock – short named Bock-Tech. Unfortunately I’ve forgot to make some photos. But I tried the tensioner many times – a super driving behaviour. An additional mistake I’ve made at the rear mud guards. Both stiffeners are too short, the result was a break point. Also again new for me; at the dismantling of the idler wheel a little surprise…
Through the damp ground were the groove complete filled; but the function was unrestricted. Now to the mud guards; this time not self-made. This time were etch parts used; I‘ve made drawings and these were then etched from brass sheets in 0,3 mm thickness. Here are both main parts and the stiffeners already cut out.
After bending were the stiffeners soldered; for a better leading has the main parts three little holes etched, the counterpart three little peaks. And good to recognize – the stiffeners come close to the hinge part and are there also soldered.
The rolled hinges were soldered too.
Continued with the hinges for the side parts; here some single parts.
One hinge piece is rolled.
The side part was cut; this part receives no lateral fold, here were later little brass angles soldered.
All side hinges are until this work step ready.
Connected with an old track chain bolt. Here opened…
…and here in closed state.
Thereafter were the side parts at the main mud guard mounted; screws are M0,8.
At the next picture is the soldered angle profile for stiffening good to recognize.
The old hinge counterparts for the mud guards needs no changes and were farther used.
The hinge bolts were a bit shortened and the lock system mounted.
That’s all to the rear mud guards; at left side are some parts of the new track tensioners to see.
Re: Tiger I late version
Posted: Sun Jan 28, 2018 12:28 am
by woolenspark
that is some awesome work!
Sent from my SM-G935V using Tapatalk
Re: Tiger I late version
Posted: Sun Jan 28, 2018 12:43 am
by jarndice
It just gets better. Lovely attention to detail,
For those builders who rely on "Voyager" or "Aber" Brass Photo-Etch to build their Fenders,
Because the brass sheet is so thin unlike "Hotte's" beautiful scratch built fenders I always back the Front and rear Mudguards with 1mm thick Plasti-Card. and I replace the PE Hinges with a set from a Dolls House website where I also get the hinged flap retaining bolts.
The Rivet effect around the edges l get by pin vising then pushing dressmakers pins through the drilled holes,
But my efforts don't compare to your tour de force.
Shaun.
Re: Tiger I late version
Posted: Sun Jan 28, 2018 11:12 am
by hotte8487
Thank you very much Shaun. You're right, this is the reason to build my own mud guards and side skirts - the thickness of etch parts by Aber and other manufacturers. Not appropriate for rc tanks which will drive outdoor. Apart from the effort to create the drawings, this method is ultimately even cheaper.
And, stay curious, some other little nice details will still follow...