Greg's Stug 3

Re: Greg's Stug 3
Thanks for he encouragement, the mantlet came from Asiatam web site. 8 dollars Eruo, which I can not remember what it was in US dollars. Shotgun
Normal is a cycle on a washing machine
Re: Greg's Stug 3
More parts are in, the upper hull, the gun, and the Asiatam recoil unit. I posted some questions in the General discussion board about the fording exhaust on how it is attached. I cut out the old exhaust and shaped the new peace, will need to fill gaps and prime it when it's ready. Need to get the starting hatch, at least I think I order it before I finished this part of it. Greg
- Attachments
-
- It's just setting lose till I figure out attachment and get the metal starting hatch
-
- looking for photos of how it's attached and it any thing I need to add on the lower hull
-
- Asiatam recoil unit
-
- Woopie I get to start working on it now
Normal is a cycle on a washing machine

Re: Greg's Stug 3
Hey Shotgun, I was curious about the breed of the dog? Seems like a German Shepard mix, very good looking animal for sure.
Thanks Sax
Thanks Sax
-
Wizzard033

- Corporal
- Posts: 339
- Joined: Thu Sep 30, 2010 4:51 am
- Location: Lubbock, Texas
Re: Greg's Stug 3
How do you seal your Gearbox shafts where they exit the body so that you are able to ford water?


Re: Greg's Stug 3
Blake, he is a Shiloh German Shepherd. I got him from Dayspring Shiloh German Shepherds in Tenn. They are great very big Shepherds with great temperament. Shotgun
Normal is a cycle on a washing machine
Re: Greg's Stug 3
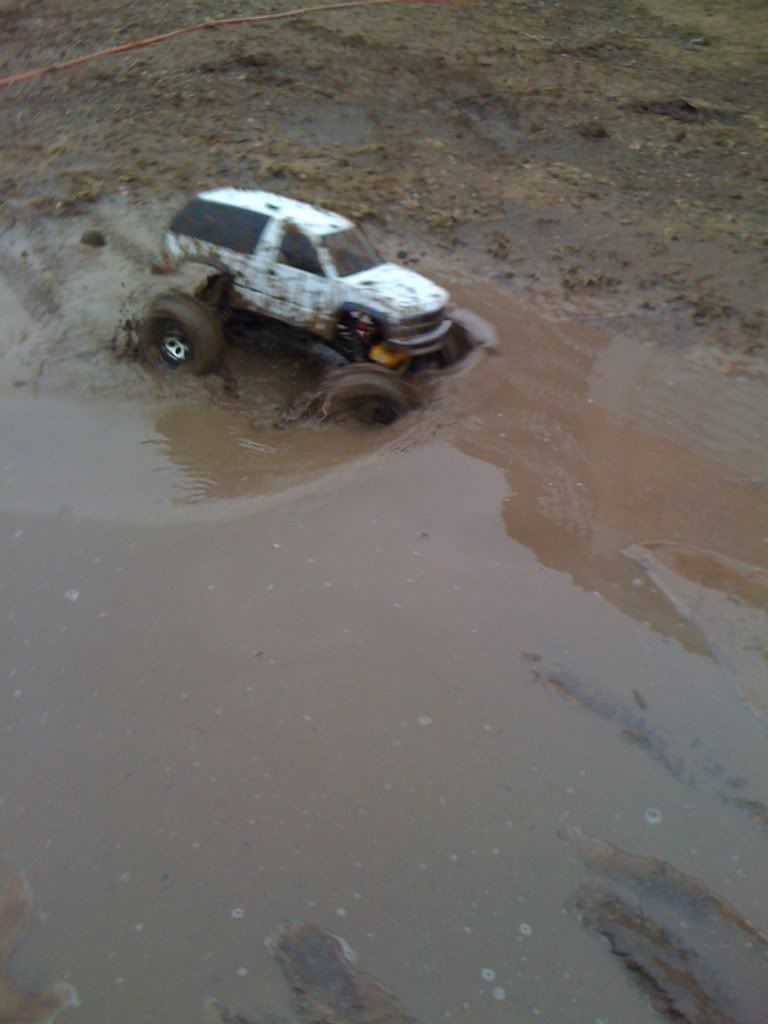
Wizzard, that is a good question. I am looking for answers myself on that one. I was looking at that problem and still scratch my head on that one. What I done so far is stop a hugh leak and turned it into a small stream. Anyone out there have any suggestions for that. Someone told me at a GJ hobby shop that since it is DC motors, he brakes his motors in by running them in distilled water. I'll still think any water will bring on corrosion. Shotgun
Normal is a cycle on a washing machine
Re: Greg's Stug 3
Thanks for the information, I live in Tennessee and will look into this company. The shaft seal could be heat shrink or maybe tubing around the shaft as it exits the hull? Sax
-
Wizzard033
- Corporal
- Posts: 339
- Joined: Thu Sep 30, 2010 4:51 am
- Location: Lubbock, Texas
Re: Greg's Stug 3
True the Water will not harm the motors. I have driven my crawler in very deep water and submerged the electronics will no apperant ill affects. I was concerned about getting my VTx wet though.shotgun wrote:Wizzard, that is a good question. I am looking for answers myself on that one. I was looking at that problem and still scratch my head on that one. What I done so far is stop a hugh leak and turned it into a small stream. Anyone out there have any suggestions for that. Someone told me at a GJ hobby shop that since it is DC motors, he brakes his motors in by running them in distilled water. I'll still think any water will bring on corrosion. Shotgun

Re: Greg's Stug 3
Thanks for showing me that Wizzard, I guess that cares of my concerns. Although the mud maybe an issue for the inner works. Shotgun
Normal is a cycle on a washing machine
Re: Greg's Stug 3
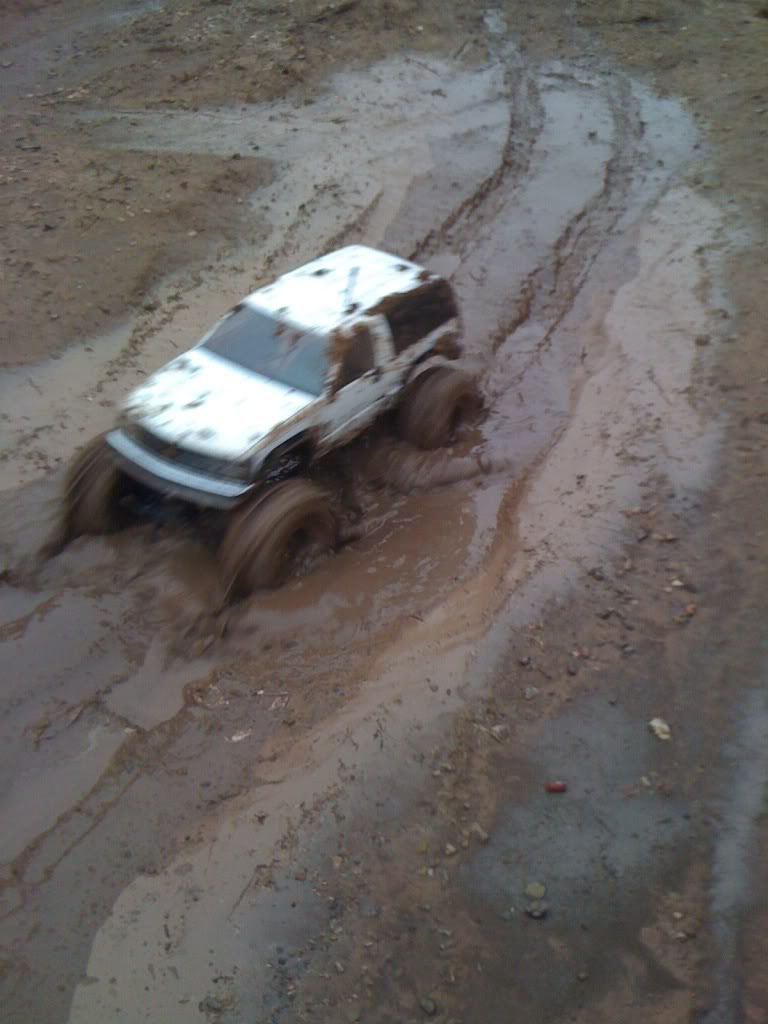
I got some work done the build this Sunday. Worked on the pig's head, bolt on armor and the lower hull. Will post the work images as I get them done in Lightroom. I might have bit off more than I can chew with the bolt on armor. I decided to pull the bolt armor off ( used nail polish to unglue the parts ) drill new holes and grind on the bolts and replace them with real ones. Harder than I thought. Later I finally figured out to file the round bolt holes flat to bolts, then drill the center holes. They line up better that way ( holes for the bolts ). They are not perfect, wish I had a drill press and better vise to hold and work on parts with. I guess this is why we have this forum, to let everyone know of a easier way and less painful learning curve on your one and only parts. When the hull images get down will post. Shotgun
- Attachments
-
- Using putty to fill in the gaps from fitting armor on. ( note when you drill out plastic bolts, the holes drilled will not allow for the mantel armor to go back in place with out filing hull to make it fit. Then you have to fill in gaps. This photo shows I need to sand down the filler which I may do later tonight. Well thats it for a Sunday build.
-
- This image shows bolted on armor with new bolts and nuts fitted and primed.
-
- This shows the bolt is too short, need to order longer ones.
-
- This is with the bolts filed flat to nut allowing "most" to be able to center drill bit closer. Why I needed a drill press as my hand is not steady for centering bit.
-
- Primer
-
- Front hull armor ready for bolts. (Note the bolts I have are too short for front armor will have to order longer ones in as you will see in a later photo.
-
- The first way of working on bolts, not recommended. Next to impossible to center drill bit on the rounded top.
-
- Here you can see my first attempted at finding a way to drill the holes for the bolts. Not lining up well.
-
- Primed the mantel
-
- Worked on making it look as casted mantel.
Normal is a cycle on a washing machine
