Re: Another Torro Pro-Metal King Tiger
Posted: Fri Apr 29, 2016 9:38 pm
Lower Hull – Chassis
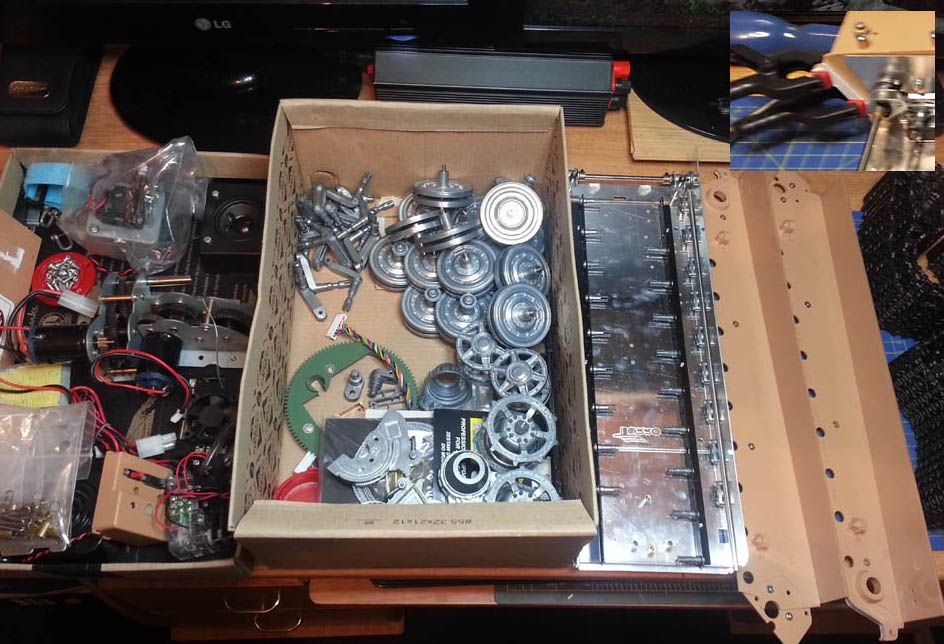
The next thing I decided to tackle was the lower hull and chassis as frankly the upper hull, which is mainly plastic, will be a lot more detailing work. So to begin the process I of course stripped the chassis right down to all its many component parts ready for modding and/or painting. For anyone new to tanks this is a bit of a '8O' moment – there really are LOTS of bits! Top right insert pic just shows the addition I did before dismantling of adding styrene to the rear side armour, at the tail ends, as this is too thin standard to be to scale (or so others have said – scale should be around 5mm I believe);
Next I begin airbrushing the hull main structures, first all with red oxide primer (see top right insert in next pic) then the side walls with the base coat (dunkelgelb), all new and clean just like the factiory fresh one! I have decided to paint in sections, rather than all at the same time, and I am planning a tri-colour camo finish but this will be mainly on the upper hull and turret so these lower hull parts can be in a single colour I think:

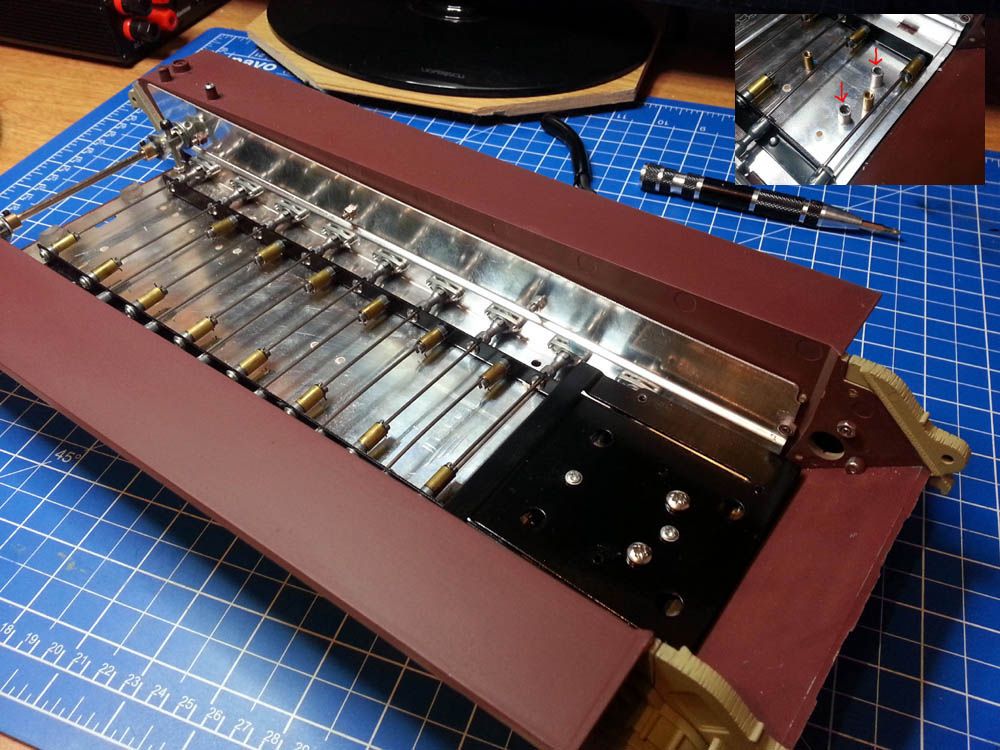
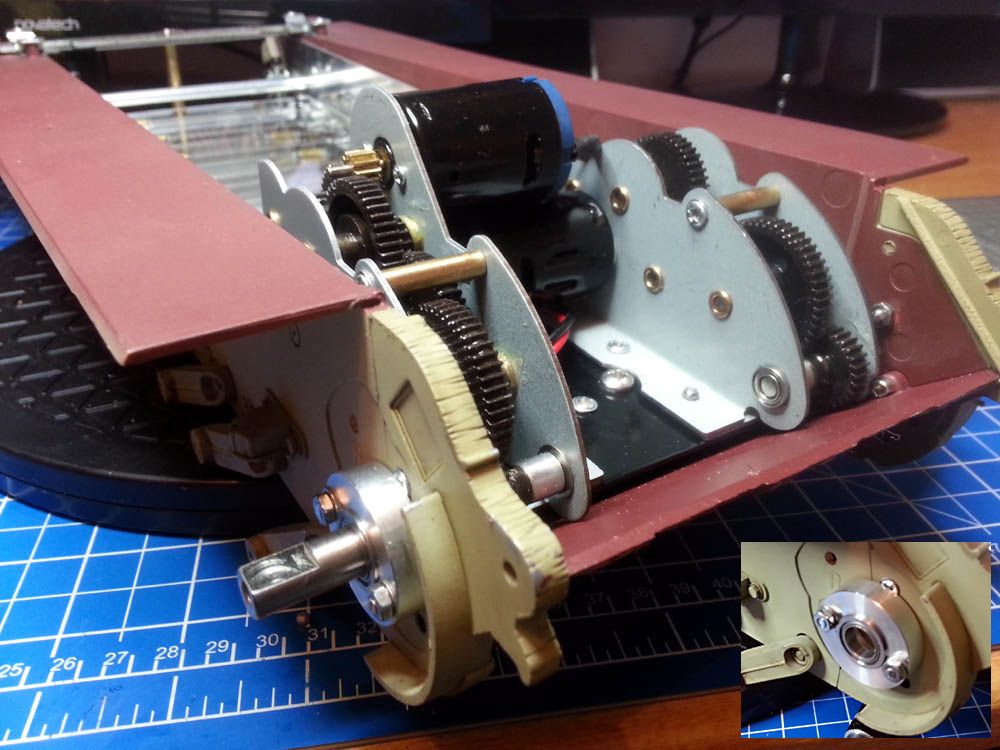
In the next pic can be seen the re-assembled hull with the motor mounting plate in place. This plate is the source of a lot lateral movement at the drive shafts and sprockets. To help towards remedying this I added two additional aluminium stand-offs (see top right insert) and large screws. This helps to stop the movement of the motor plate quite a bit (I took this idea from others too);
In the following picture we turn to the rear of chassis which shows to Torro idler adjusters. These works pretty well but the retaining axel located between the left and right adjusters bends when lateral force is applied to the idler wheels. Moreover, the adjusters themselves are constructed with rather loose tolerances and fit. Given the size and weight of the Torro KT the forces exerted on the idlers this can cause the adjuster bodies to twist and the bar to bend. This may not be a problem but many seem to think it needs addressing, including me.
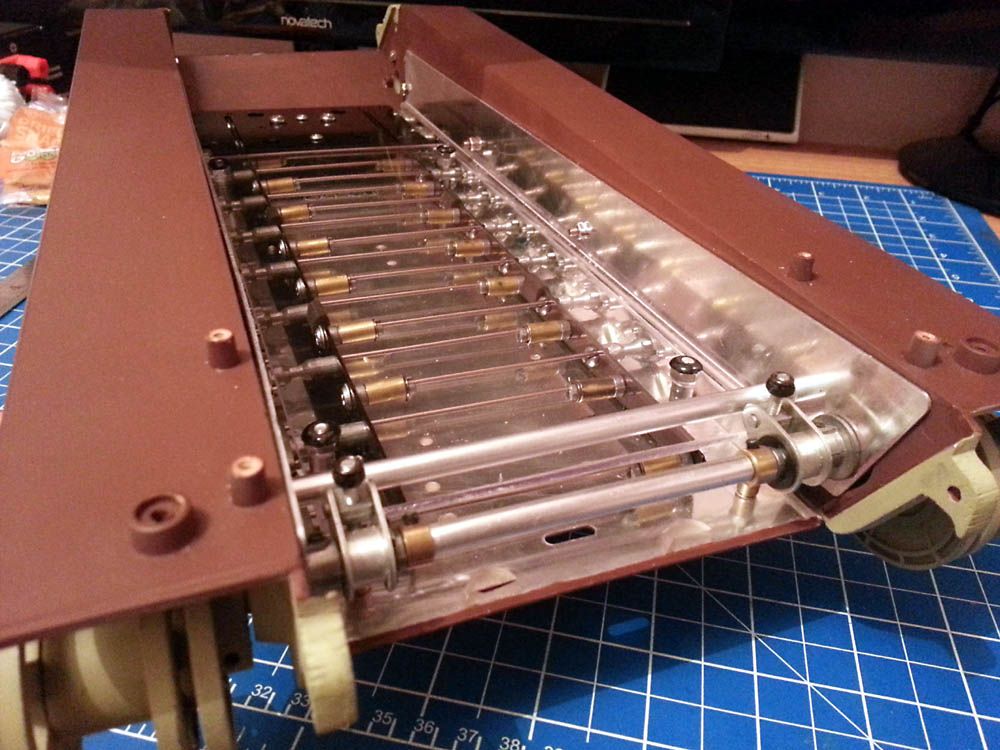
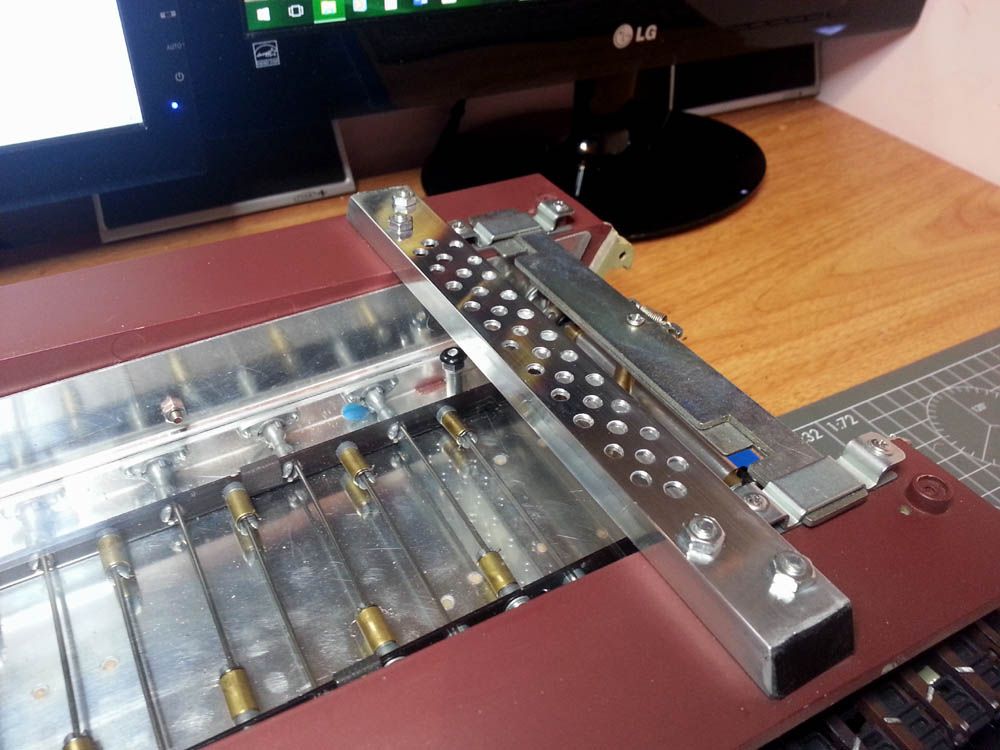
So, some model builders much better than me have (e.g. Hotte here) have constructed spring-loaded modifications to these adjusters but I do not have the equipment needed to fabricate such, even if I had the skill. So my solution is this (next pic). Firstly, I have sleeved the adjuster axel with heavy gauge aluminium sleeve. Secondly, using the same aluminium rod, I added a support bar behind it bolting through the chassis. The is a simple modification and has added substantial rigidity to the rear of the hull and the idler adjusters. The trick is to get the length of both the sleeve and the reinforcing bar fairly precise. Also notice the nice glass (acrylic) floor replacing the rubbish Torro one. This thick acrylic is secured with bolts through metal stand=off and helps make the chassis bucket more rigid - it also makes checking what's going on with the torsion bars much easier (and looks pretty ).
).
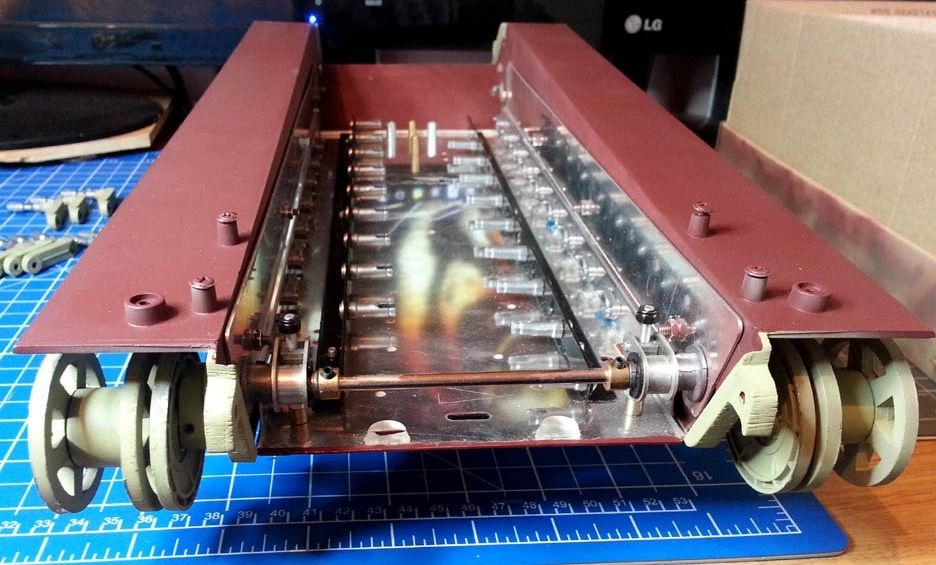
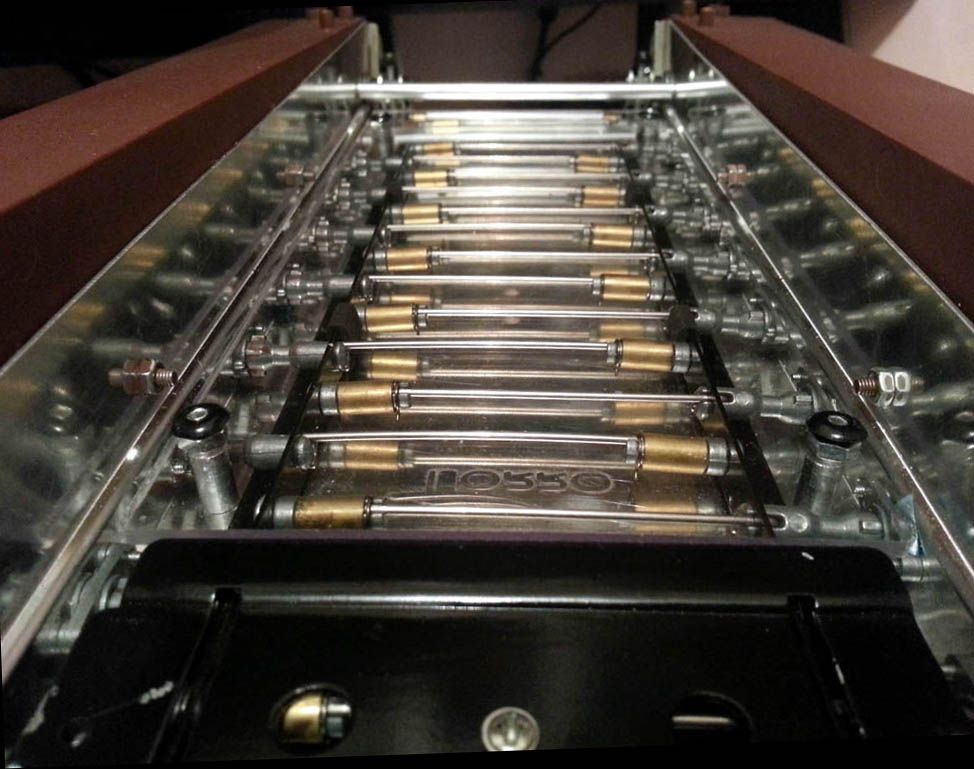
And here is a nice view of the Torro lower hull and torsion bar suspension system:
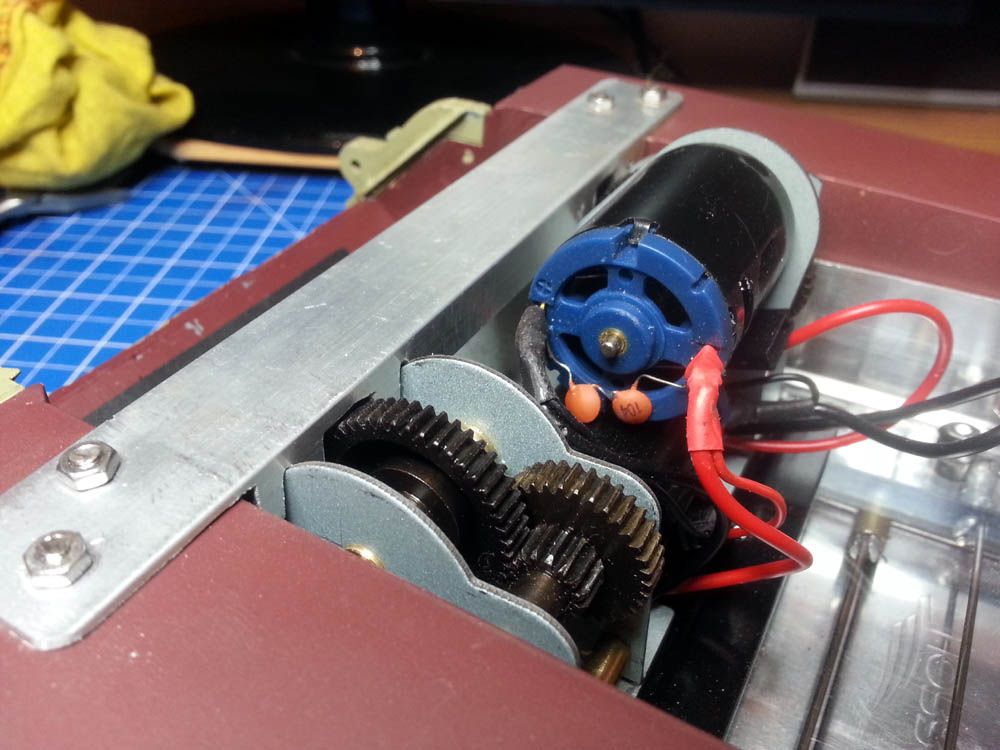
Returning to the front of the hull here can be seen the motor and gearboxes back in place. The important addition here, though, is the ball-raced drive shaft supports/reinforcements. These are not KT specific (I got them from Forgebear on this forum) but with a little gentle sanding of the drive shaft are a perfect fit (7.99mm). However, the placing of the fixing hole was very convenient because the forward most of these allowed for me to bolt completely through the bearing, the hull track guide mount, and the lower glacis plate. This brought the gearboxes forward a couple of millimetres but resulted in a very strong assembly of all the metal components across the front of the tank, increasing rigidity even further;
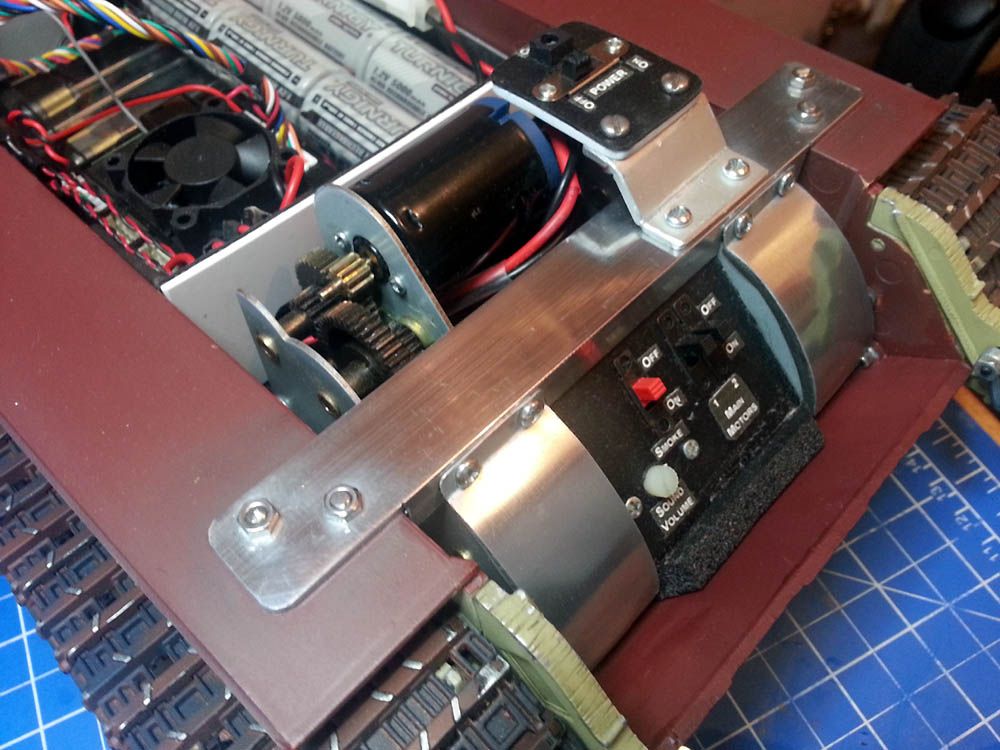
Next I add further support for the hull in the form a aluminium cross bar. This I slotted down into the gearbox side plates to eliminate any movement or tendency to twist (the fit to these plate is tight;
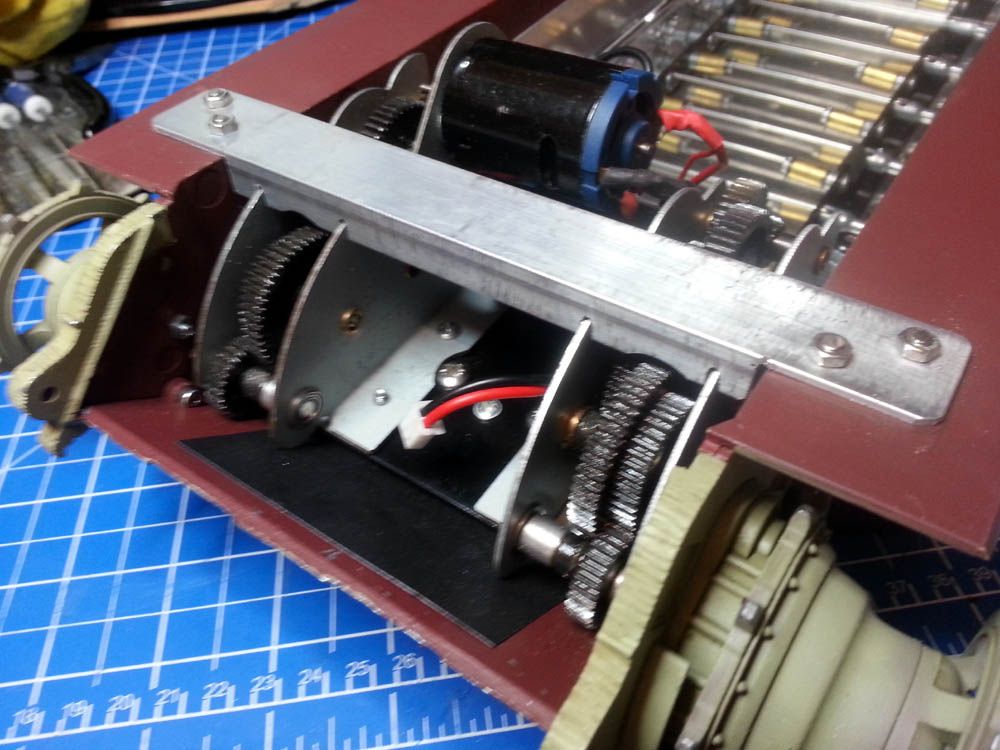
And again the back edge of the cross bar is slotted and shaped around the gears and the gearbox side plates;
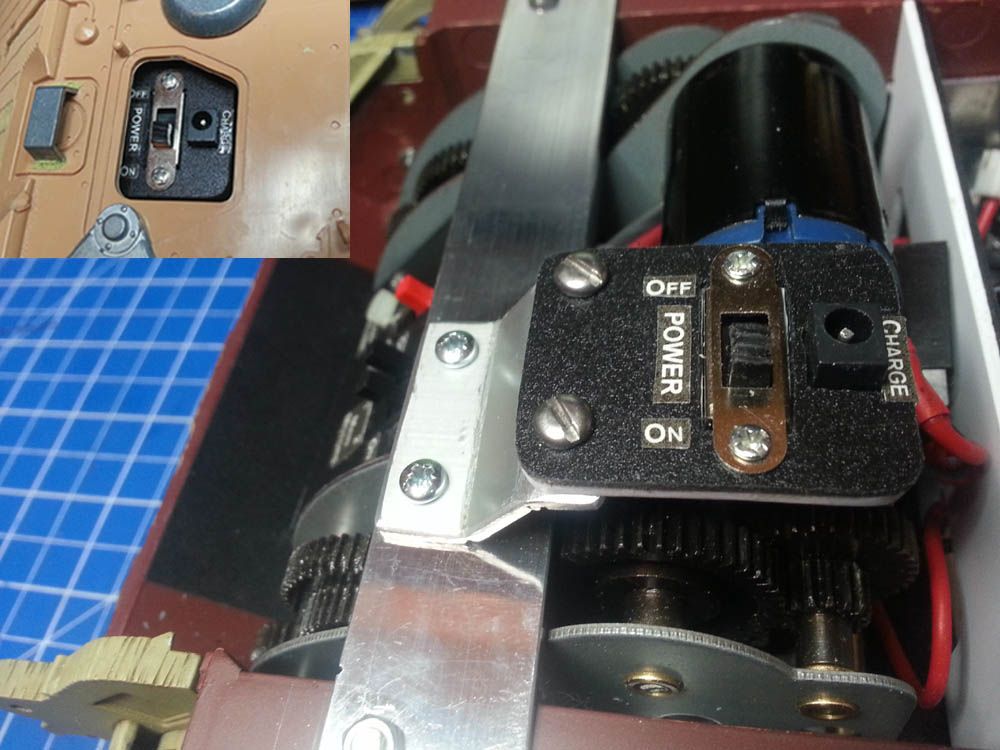
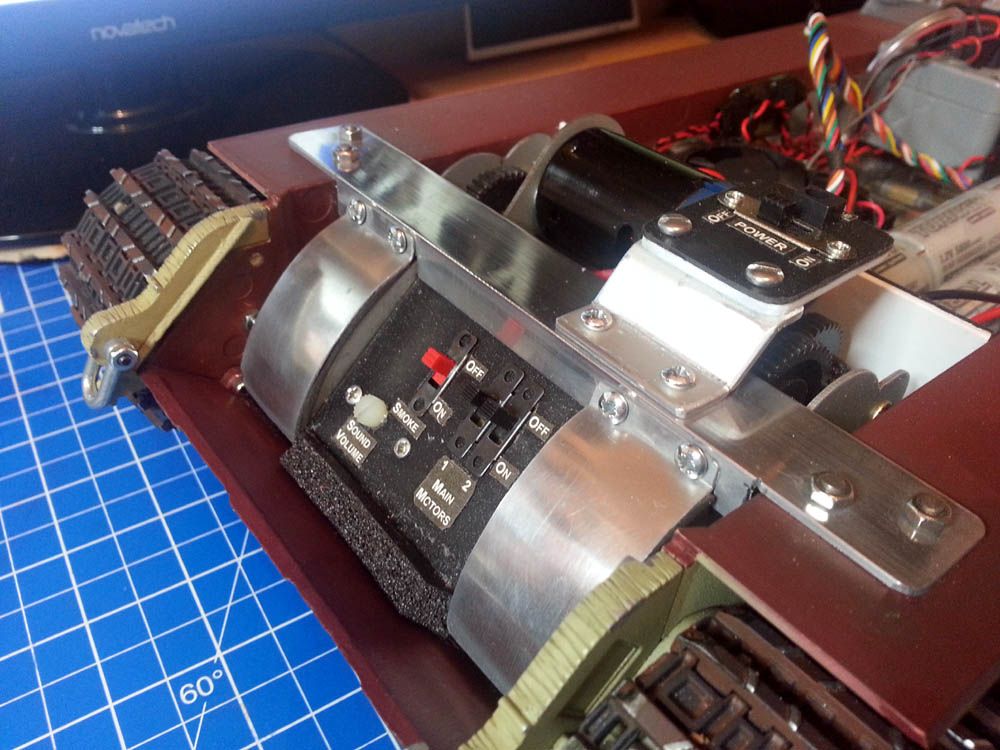
In the next pic it can be seen I added a switch panel to the front and a raised switch plate on the cross bar. The raised switch plate carries the newly position power switch and charging port (for better ease of access). The switch panel at the front between the gearboxes has multiple functions; Here can be found the audio volume control the smoker switch, and independent switch for each left and right motor. This was another idea someone had here and I have adapted. It allows for all the electrics to be powered up (for various testing for example) but with motors either both on, one on one off, or both off. This is also a very good safely feature when working on the tank. Also I left room for further switches to be added if required at a later date:

And here (following pic) can be seen in the top left insert access to power switch and charging port is now available through the front drivers hatch (less wiring, easier access as the rear engine port, I found, inconvenient if the turret was covering it);
Back to the rear of the hull a reinforcing cross bar is added here too - the holes were added at the time I was planning to place the new speaker beneath but, as it turned out, there is plenty of room in the KT so no need to cover the speaker under the support beam;
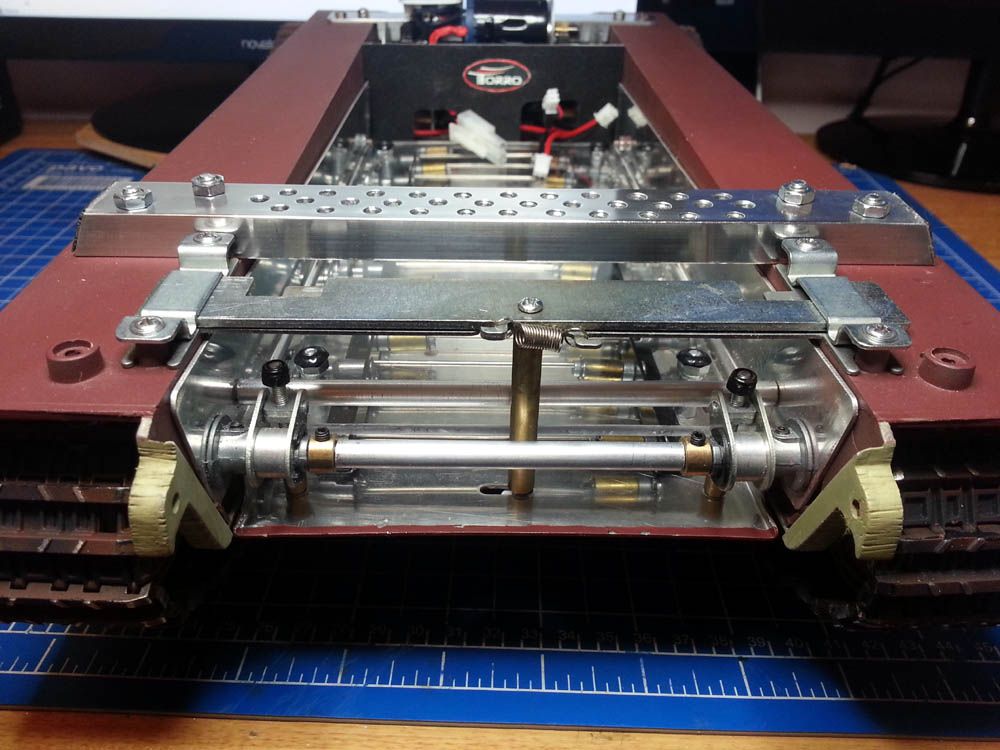
Here is a view from the back showing all the rear reinforcement together as well as the now thicker side armour;
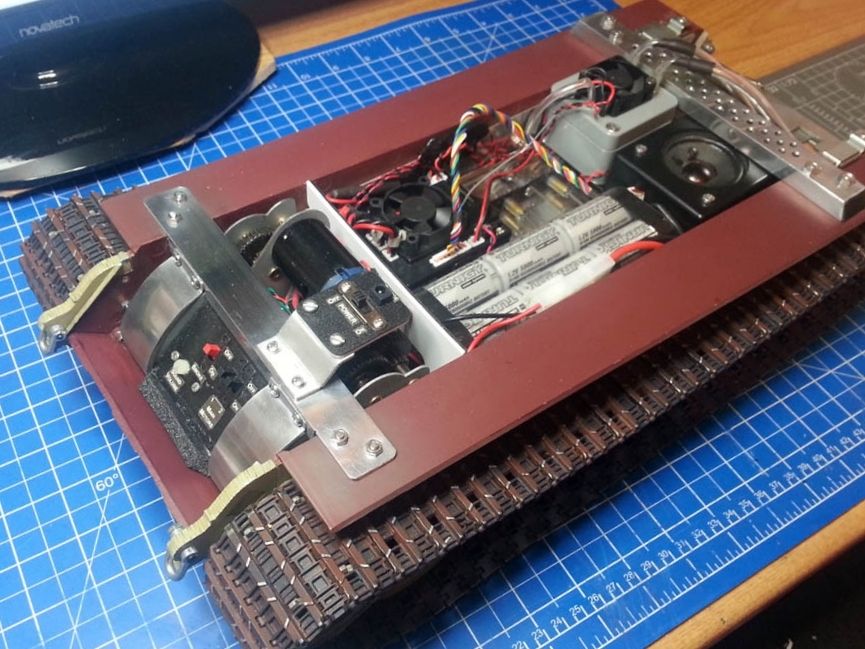
Now all the electronics are put back - I added a upgraded speaker and the excellent Tarr Mk4 Smoker but, for now, I'm keeping the Taigen MFU and battle/turret system as I still pondering the upgrade options (also I have installed gearbox covers - more in next pic);
Finally my aluminium gearbox covers;
That's pretty much it folks for the lower hull for now. I am starting work of the rear armour and painting and some weathering of the wheels next and I'll post some more as soon as I have some further pictures. I'm also (slowly) struggling with tools, clasps, and tow cables, etc,.... so many pieces, so little time!
The next thing I decided to tackle was the lower hull and chassis as frankly the upper hull, which is mainly plastic, will be a lot more detailing work. So to begin the process I of course stripped the chassis right down to all its many component parts ready for modding and/or painting. For anyone new to tanks this is a bit of a '8O' moment – there really are LOTS of bits! Top right insert pic just shows the addition I did before dismantling of adding styrene to the rear side armour, at the tail ends, as this is too thin standard to be to scale (or so others have said – scale should be around 5mm I believe);

Next I begin airbrushing the hull main structures, first all with red oxide primer (see top right insert in next pic) then the side walls with the base coat (dunkelgelb), all new and clean just like the factiory fresh one! I have decided to paint in sections, rather than all at the same time, and I am planning a tri-colour camo finish but this will be mainly on the upper hull and turret so these lower hull parts can be in a single colour I think:

In the next pic can be seen the re-assembled hull with the motor mounting plate in place. This plate is the source of a lot lateral movement at the drive shafts and sprockets. To help towards remedying this I added two additional aluminium stand-offs (see top right insert) and large screws. This helps to stop the movement of the motor plate quite a bit (I took this idea from others too);

In the following picture we turn to the rear of chassis which shows to Torro idler adjusters. These works pretty well but the retaining axel located between the left and right adjusters bends when lateral force is applied to the idler wheels. Moreover, the adjusters themselves are constructed with rather loose tolerances and fit. Given the size and weight of the Torro KT the forces exerted on the idlers this can cause the adjuster bodies to twist and the bar to bend. This may not be a problem but many seem to think it needs addressing, including me.

So, some model builders much better than me have (e.g. Hotte here) have constructed spring-loaded modifications to these adjusters but I do not have the equipment needed to fabricate such, even if I had the skill. So my solution is this (next pic). Firstly, I have sleeved the adjuster axel with heavy gauge aluminium sleeve. Secondly, using the same aluminium rod, I added a support bar behind it bolting through the chassis. The is a simple modification and has added substantial rigidity to the rear of the hull and the idler adjusters. The trick is to get the length of both the sleeve and the reinforcing bar fairly precise. Also notice the nice glass (acrylic) floor replacing the rubbish Torro one. This thick acrylic is secured with bolts through metal stand=off and helps make the chassis bucket more rigid - it also makes checking what's going on with the torsion bars much easier (and looks pretty

And here is a nice view of the Torro lower hull and torsion bar suspension system:

Returning to the front of the hull here can be seen the motor and gearboxes back in place. The important addition here, though, is the ball-raced drive shaft supports/reinforcements. These are not KT specific (I got them from Forgebear on this forum) but with a little gentle sanding of the drive shaft are a perfect fit (7.99mm). However, the placing of the fixing hole was very convenient because the forward most of these allowed for me to bolt completely through the bearing, the hull track guide mount, and the lower glacis plate. This brought the gearboxes forward a couple of millimetres but resulted in a very strong assembly of all the metal components across the front of the tank, increasing rigidity even further;

Next I add further support for the hull in the form a aluminium cross bar. This I slotted down into the gearbox side plates to eliminate any movement or tendency to twist (the fit to these plate is tight;

And again the back edge of the cross bar is slotted and shaped around the gears and the gearbox side plates;

In the next pic it can be seen I added a switch panel to the front and a raised switch plate on the cross bar. The raised switch plate carries the newly position power switch and charging port (for better ease of access). The switch panel at the front between the gearboxes has multiple functions; Here can be found the audio volume control the smoker switch, and independent switch for each left and right motor. This was another idea someone had here and I have adapted. It allows for all the electrics to be powered up (for various testing for example) but with motors either both on, one on one off, or both off. This is also a very good safely feature when working on the tank. Also I left room for further switches to be added if required at a later date:

And here (following pic) can be seen in the top left insert access to power switch and charging port is now available through the front drivers hatch (less wiring, easier access as the rear engine port, I found, inconvenient if the turret was covering it);

Back to the rear of the hull a reinforcing cross bar is added here too - the holes were added at the time I was planning to place the new speaker beneath but, as it turned out, there is plenty of room in the KT so no need to cover the speaker under the support beam;

Here is a view from the back showing all the rear reinforcement together as well as the now thicker side armour;

Now all the electronics are put back - I added a upgraded speaker and the excellent Tarr Mk4 Smoker but, for now, I'm keeping the Taigen MFU and battle/turret system as I still pondering the upgrade options (also I have installed gearbox covers - more in next pic);

Finally my aluminium gearbox covers;


That's pretty much it folks for the lower hull for now. I am starting work of the rear armour and painting and some weathering of the wheels next and I'll post some more as soon as I have some further pictures. I'm also (slowly) struggling with tools, clasps, and tow cables, etc,.... so many pieces, so little time!