Page 2 of 15
Re: sponges challenger 2 build
Posted: Sat Dec 12, 2015 2:52 pm
by atcttge
The gun looks soooooooooooooooooo much better with the clutch gaiter. Is that a standard size? If not, can you tell me wot size it is? I'm gonna look for something similar over here even when I don't have a Challenger yet hahahahaha!
Re: sponges challenger 2 build
Posted: Sat Dec 12, 2015 5:58 pm
by spongehoobtank82
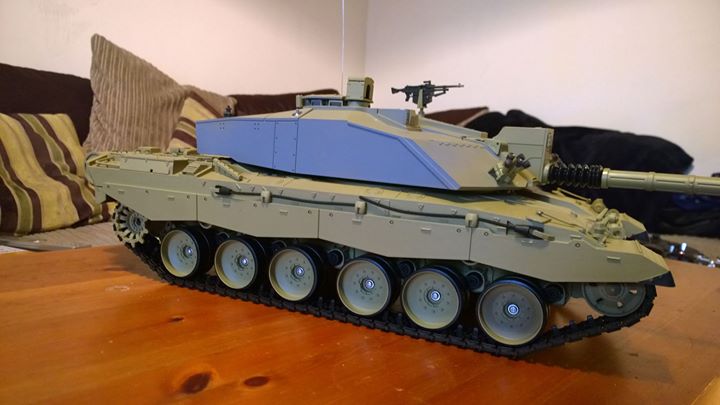
Will thought I would dry fit everything today and see how it all went together so here's a few photos-
Extended the power switch and roughly installed the switch in the rear plate also if you look closely you can see the feed for the 12v fan spliced in AFTER the power switch and a 360 turet ring

- 03004912.jpg (49.4 KiB) Viewed 9077 times
- 03004911.jpg (36.07 KiB) Viewed 9077 times
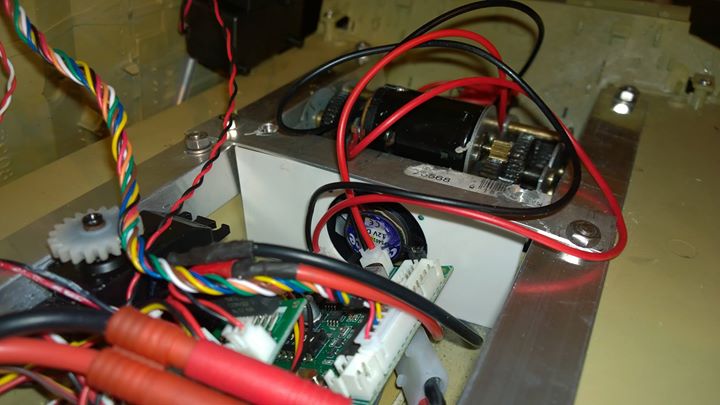
Here's the fan buried behind the gearboxes and blowing over the IBU2 / TPA
- 03004910.jpg (49.04 KiB) Viewed 9077 times
So here is the wiring jungle! All roughly placed to see how it goes, made a speaker box for the turret speaker but forgot to take a pic of this! Need to make brackets for the IBU2 and the hull speaker is temporary until I get some more plasticard to make a box for the other visaton frs7 I have

- 0300490f.jpg (57.03 KiB) Viewed 9077 times
Also removed the CIP panel and sanded down

- 0300490e.jpg (37.68 KiB) Viewed 9077 times
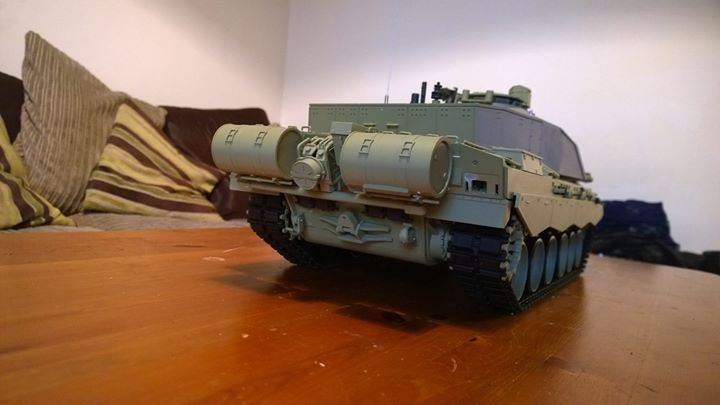
Dry fitted the accessories too there's alot!
- 0300490d.jpg (41.08 KiB) Viewed 9077 times
- 0300490c.jpg (33.08 KiB) Viewed 9077 times
And a little comparison shot with my Leo

- 0300490a.jpg (53.99 KiB) Viewed 9077 times
Just waiting on me postman to bring my jp480 and I can pretty much finalise the internals and make it all nice and neat, then onto paint! May also install the 2 volumes somewhere! And a charging socket.
Re: sponges challenger 2 build
Posted: Sun Dec 13, 2015 3:26 am
by atcttge
The clutch gaiter makes all the difference to that main gun. Impressive. I will be copying that, I just need to find one.
Re: sponges challenger 2 build
Posted: Sun Dec 13, 2015 8:53 am
by spongehoobtank82
atcttge wrote:The clutch gaiter makes all the difference to that main gun. Impressive. I will be copying that, I just need to find one.
Ebay dude 75mm' motorcycle clutch boot' it's was like £1.80p, you have to cut it abit and put a load of grease/ lube in the barrel to stop it sticking, hope that helps.I can get you a link if you need it
Re: sponges challenger 2 build
Posted: Sun Dec 13, 2015 10:05 am
by spongehoobtank82
Re: sponges challenger 2 build
Posted: Sun Dec 13, 2015 10:26 am
by Ad Lav
Big beasty!
Hard to fathom that these new mbt weigh about the same as a King tiger yet are so much better armed and armoured. Armour technology eh

Re: sponges challenger 2 build
Posted: Sun Dec 13, 2015 10:42 am
by spongehoobtank82
Yeah guess you would of thought they would of got smaller and better armoured! But big is always better as the saying goes! Just wish I could afford 1/6 or 1/8 scale! Maybe for my 40th!

Re: sponges challenger 2 build
Posted: Sun Dec 13, 2015 12:36 pm
by spongehoobtank82
Cheers Paul, will see if I can do some more later dude!
Re: sponges challenger 2 build
Posted: Sun Dec 13, 2015 1:12 pm
by spongehoobtank82
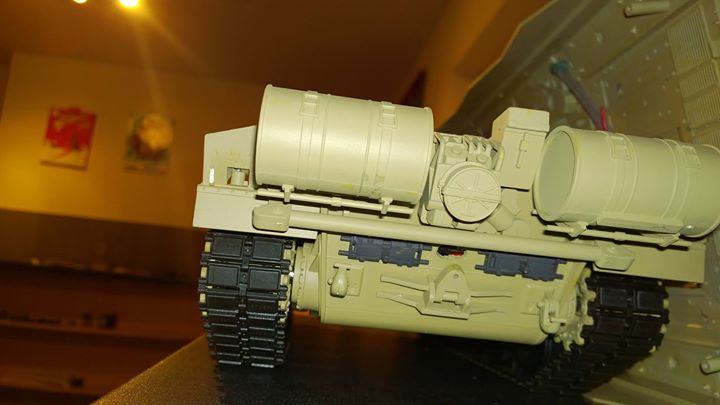
Moment of genius! Mounted power switch and charging port in rear pull drums!
Grind it out
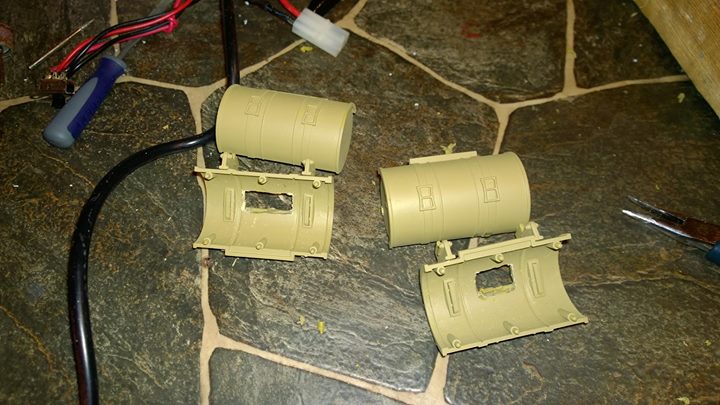
- 0300497a.jpg (69.22 KiB) Viewed 8413 times
And voilà!

- 0300497b.jpg (40.68 KiB) Viewed 8413 times
Although now I have to fill the hole I cut in the rear plate for the power switch and make new ones behind the oil drums!
Re: sponges challenger 2 build
Posted: Sun Dec 13, 2015 5:05 pm
by greengiant
Really like the recoil action. nice and quick almost like a real one would be.