Yes I'm one of think are two people who did that conversion but the other one didn't attempt to get the roadwheels and drive sprocket closer to the hull to get the width quite right. His was finished as a Postwar German model. Mine was finished as an early mid production unit. The M41 was light weight but by no means a small tank. By cutting out that strip off hull you may have noticed that you have already shortened the tank slightly.
Here are a few pics of the dimensions you end up with if you go all the way.
You seemed to be having problems with the barrel length and what material to use. I just took the aluminum airsoft tube and added some length by drilling it out a little bit at the mantel end and doing the same with an extra airsoft barrel I had laying around then taking some thin tin from a empty mineral spirits can cutting it to and bending it into a round pipe that just fit into the enlarged airsoft tube ends and superglueing the two tubes together and then cutting it to correct length. I then used the leftover pieces to make the muzzle brake. the bore evacuator is the original one just melted down a bit to fit tight to the new gun tube and then filed down to the correct size and shape by putting the barrel with the evacuator attached in a drill and using the file like a lathe tool.
The clothe mantle cover hides the jointed barrel. Still haven't gotten around to putting in a recoil unit but that's coming sometime.
Bulldog build
-
greengiant
- Warrant Officer 2nd Class
- Posts: 1138
- Joined: Tue Jun 26, 2012 12:15 am
Re: Bulldog build
- Attachments
-
-
- m41 new mzzle brake (3).JPG (98.29 KiB) Viewed 7873 times
-
-
-
wibblywobbly

- Major
- Posts: 6396
- Joined: Fri Oct 17, 2008 9:30 am
- Location: South Wales Valley
- Contact:
Re: Bulldog build
Following Greengiants very useful guide to the correct placement of turret roof ironmongery, I have set about rectifying the HL issues.
Firstly I scratch built a new vent. Looking at various pics and blueprints it appears that the correct vent size uses the same centre as the HL one, but the diameter takes it to the rear of the turret. I therefore cut a new one, marked and drilled new bolt holes, bevelled the edges, and glued it on. A 20 minute job.
I cut the mg mount off using a styrene cutter and dental floss as I wanted to retain it. It was then remounted in the correct location.
The next problem was that the HL holes for mounting the mg and the locking mechanism are square, but both needed to allow the mg rest and the mg barrel to align in new positions. I resolved this by drilling round holes in both locating holes, so that I could rotate each component to line up.
I now have a turret roof that is more in keeping with what it should be, many thanks to Greengiant for the info, I had read about the mod in the past but it was only when I looked at his pics that it was crystal clear what needed to be done.
I will have to wait until Tuesday to get some brass rod to make stowage handles for the turret sides. The HL ones snap off at the slightest touch, and some are missing on this basket case, so I may as well replace them all.
I also need a pile of rucksacks and jerry cans to complete the turret, so will have to see what I can find on Ebay...along with tracks, sprockets, low profile gearboxes, replacing missing headlights etc etc. Apart from that, there isn't a lot left to do on this one.
RobG
- Attachments
-
-
-
-
-
Tiger 1 Late
Panther G
King Tiger
M36 B1
Panther G
King Tiger
M36 B1
-
wibblywobbly
- Major
- Posts: 6396
- Joined: Fri Oct 17, 2008 9:30 am
- Location: South Wales Valley
- Contact:
Re: Bulldog build
Just came across this site that has a few useful pics. Interesting to see those light boxes on each corner of the turret I assume that's what the NZ version installed...if they aren't lights, can anyone shed any errr...light on the subject, if I make those they can be used to house IR sensors.
http://www.kitmaker.net/modules.php?op= ... 19#1085768
http://www.kitmaker.net/modules.php?op= ... 19#1085768
Tiger 1 Late
Panther G
King Tiger
M36 B1
Panther G
King Tiger
M36 B1
-
wibblywobbly
- Major
- Posts: 6396
- Joined: Fri Oct 17, 2008 9:30 am
- Location: South Wales Valley
- Contact:
Re: Bulldog build
Progressing on this one.
The suspension units had a lot of play in them, so I added two washers behind each one. It has solved that problem but the road wheels still have play in them, and that isn't an easy fix on one of these.
I made a cable reel to mount on the side of the turret, the cable is dental floss??
The Tank Modelbrau scale barrel is not cheap, so I thought, what have I got to lose, I may as well try making one using the inner barrel. Shaping the alloy tube and drilling it was a bit of a nightmare, the bore evacuator is made from a small section of barrel, with two styrene 'O' rings at each end. It cost nothing to make, and if it falls apart I will go and buy one, I am not doing all that again!
- Attachments
-
-
-
-
-
-
-
-
-
Tiger 1 Late
Panther G
King Tiger
M36 B1
Panther G
King Tiger
M36 B1
-
wibblywobbly
- Major
- Posts: 6396
- Joined: Fri Oct 17, 2008 9:30 am
- Location: South Wales Valley
- Contact:
Re: Bulldog build
Did some more work on the turret today. The issue with the Bulldog, especially if it is being used for IR battling, is the barrel depression...there isn't any.
I have tackled this on previous models without much success. The problem is caused by the way that HL designed the turret. It's ok for airsoft versions, but not much use for IR.
I had to (in no particular order):
Relocate the tab on the back of the airsoft, dropped it down a few mm.
Cut off the unwanted airsoft drive, the lower part with the motor.
Dismantle and glue the two halves together.
Ground off part of the BB loading shute.
Ground and filed various parts of the upper turret, lower turret, and mantlet.
There are bits of moulding all over the place that stop the 'breech' going as high as it needs to in order to allow the barrel to drop. Most of it can't be seen so it was a matter of studying what was moving, and what was hitting what, and then removing plastic where necessary.
I still don't get much depression (maybe I should stop feeding the tank on Prozac )
)
Why?
It's the front of the turret and the inner mantlet. The inside of the mantlet hits the front of the turret just along the edge of the plate that is 'bolted' onto the turret roof. I have sanded the inside of the mantlet, and smoothed around the front of the turret which has improved things, but still nowhere near the real thing.
If anyone else is contemplating the same mod, its a fair bit of work, but worth it to get the result.
Oh, and I also cut the missing teeth into the turret ring so that I get 360 turret rotation.
The new barrel got tapped and fell apart, so I am off to buy some metal bonding putty to see if that will fix it....
I have tackled this on previous models without much success. The problem is caused by the way that HL designed the turret. It's ok for airsoft versions, but not much use for IR.
I had to (in no particular order):
Relocate the tab on the back of the airsoft, dropped it down a few mm.
Cut off the unwanted airsoft drive, the lower part with the motor.
Dismantle and glue the two halves together.
Ground off part of the BB loading shute.
Ground and filed various parts of the upper turret, lower turret, and mantlet.
There are bits of moulding all over the place that stop the 'breech' going as high as it needs to in order to allow the barrel to drop. Most of it can't be seen so it was a matter of studying what was moving, and what was hitting what, and then removing plastic where necessary.
I still don't get much depression (maybe I should stop feeding the tank on Prozac
Why?
It's the front of the turret and the inner mantlet. The inside of the mantlet hits the front of the turret just along the edge of the plate that is 'bolted' onto the turret roof. I have sanded the inside of the mantlet, and smoothed around the front of the turret which has improved things, but still nowhere near the real thing.
If anyone else is contemplating the same mod, its a fair bit of work, but worth it to get the result.
Oh, and I also cut the missing teeth into the turret ring so that I get 360 turret rotation.
The new barrel got tapped and fell apart, so I am off to buy some metal bonding putty to see if that will fix it....
- Attachments
-
-
-
-
-
-
-
-
Tiger 1 Late
Panther G
King Tiger
M36 B1
Panther G
King Tiger
M36 B1
-
wibblywobbly
- Major
- Posts: 6396
- Joined: Fri Oct 17, 2008 9:30 am
- Location: South Wales Valley
- Contact:
Re: Bulldog build
The metal bond worked, solid as a rock now. The airsoft tube cleaned up nicely too.
- Attachments
-
Tiger 1 Late
Panther G
King Tiger
M36 B1
Panther G
King Tiger
M36 B1
-
wibblywobbly
- Major
- Posts: 6396
- Joined: Fri Oct 17, 2008 9:30 am
- Location: South Wales Valley
- Contact:
Re: Bulldog build
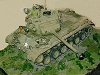
All loosely assembled, and everything fits.
- Attachments
-
Tiger 1 Late
Panther G
King Tiger
M36 B1
Panther G
King Tiger
M36 B1
-
HERMAN BIX

- Lieutenant-General
- Posts: 12059
- Joined: Sun Jan 12, 2014 12:15 am
- Location: Gold Coast,Australia
Re: Bulldog build
Got to hand it to you Mr Wobbly, the much maligned Bulldog is getting a deserved image make over thanks to this post.
good onya
good onya
HL JAGDPANTHER,HL TIGER 1,HL PzIII MUNITIONSCHLEPPER, HL KT OCTOPUS,HL PANTHER ZU-FUSS,HL STuG III,HL T34/85 BEDSPRING,
HL PZIV MALTA,MATORRO JAGDTIGER,HL F05 TIGER,TAMIYA KT,HL PANTHERDOZER,HL EARLY PANTHER G,TAIGEN/RAMINATOR T34/76,
HL AN-BRI-RAM SU-85
HL PZIV MALTA,MATORRO JAGDTIGER,HL F05 TIGER,TAMIYA KT,HL PANTHERDOZER,HL EARLY PANTHER G,TAIGEN/RAMINATOR T34/76,
HL AN-BRI-RAM SU-85
-
wibblywobbly
- Major
- Posts: 6396
- Joined: Fri Oct 17, 2008 9:30 am
- Location: South Wales Valley
- Contact:
Re: Bulldog build
I guess because its post war and was only a scout tank, it doesn't have the glory of the WW2 machinery. They did knock out T72's in Korea though, from what I have read.
The reason I like them is down to the way that they run so well on rough terrain. The flat track pads mean that there is no resistance to turns, the tank just goes across anything that it is pointed at. I know its a matter of opinion, but its also a great looking tank, and as all of the mods are so easy to do, and free, its a no brainer for me to do this.
I did all of the brass turret rails today, pics below.
One thing that I forgot to mention about lowering the upper hull, is that the standard gearboxes will no longer fit as the motors are mounted above each other. The solution is to get hold of Jagdpanther ones, as they have a low profile and the long shafts. I have a pair on the way from Dave, I am just praying that they fit as otherwise I will have to buy some aftermarket ones at vast expense.
And yes, I know that is a Pershing track, its only on there for the pics.
- Attachments
-
-
-
Tiger 1 Late
Panther G
King Tiger
M36 B1
Panther G
King Tiger
M36 B1
-
PainlessWolf

- Colonel
- Posts: 7985
- Joined: Sun Feb 26, 2012 9:09 pm
- Location: Southern Colorado Rocky Mountains
Re: Bulldog build
W.W.,
Impressive work! The gun is choice, indeed as are all of the metal loops you added. Following along,
regards,
Painless
Impressive work! The gun is choice, indeed as are all of the metal loops you added. Following along,
regards,
Painless
...Money!? What's that!?...
