Page 2 of 5
Re: Lert's JagdPanther
Posted: Wed May 14, 2014 11:18 am
by HERMAN BIX
The Jagd for me was one I was happy with, but still felt could have had more justice. Boiling it all down............your tank is the one that means the most to you.
I have a seed planted for my next Jagd already, Im going to need a bigger house.
Re: Lert's JagdPanther
Posted: Thu May 15, 2014 12:58 pm
by Lert
First mods!
Still nothing very impressive, though. I added a single link to each track to make them a little bit more loose since they were very tight out of the box. I then added a bucket ...

... and some flexible metal towcables that I had lying around from my Pz IV build:

They're all just clipped on and easily removable for when I get around to painting her. Her? Yes. She's a girl to me, despite having a long, hard barrel.
I also opened her up (not necessarily in this order) ...

... to put some lubricant on the plastic gears.
Then I took some plasticard and fashioned a make-shift 'cover' ...

... that perfectly fits over the gearboxes ...

... to both prevent lubricant from spraying all over the insides and dirt from getting into the gearboxes.
She really needs some stronger legs in the form of metal gearboxes, but I'm poor and it'll be a while before I can afford those.
Next step: acquiring the appropriate paints and painting her. ETA: A few weeks, see above.
Re: Lert's JagdPanther
Posted: Thu May 15, 2014 2:43 pm
by ALPHA
I've been working on tanks with really tight compartments... I forget how roomy that Jagd is lol...nice job on the engine cover...good design ... I might copy those if you don't mind
Good Show Lert

ALPHA
Re: Lert's JagdPanther
Posted: Sat May 17, 2014 9:34 pm
by Lert
Took the Jagd apart and made the following mods:
- Used some plasticard to make simulate 'hatches' for the stowage bins on the rear panel and put the panel in primer:

- Took some fly-screen, cut it up and put it on the engine deck vents to simulate the grates, then put the upper hull in primer:

I'm not entirely happy how the grates turned out, especially on the ground vents, but I could always put some stowage on the engine deck to cover it up. I haven't decided yet.
Next step: basic paint.
Re: Lert's JagdPanther
Posted: Sat May 17, 2014 10:06 pm
by ALPHA
Hey Lert ... nice Job ... you planning on relocating the Antenna? not that difficult on the Jagd....you just have to be careful when pulling out the brass node Heng Long uses ...and for your grates... I don't see any real problems... you could just chase the edge with some filler or two part epoxy putty ..just put an appropriately sized round tube in the center and push it in the gap between the tube and the inner part of the vent
What kind of color scheme are you going to do?
ALPHA
Re: Lert's JagdPanther
Posted: Sat May 17, 2014 10:20 pm
by Lert
ALPHA wrote:Hey Lert ... nice Job ... you planning on relocating the Antenna?
Probably. That's a good idea, actually. Just need to get rid of the node and fill up the hole.
ALPHA wrote:
What kind of color scheme are you going to do?
Something like this:
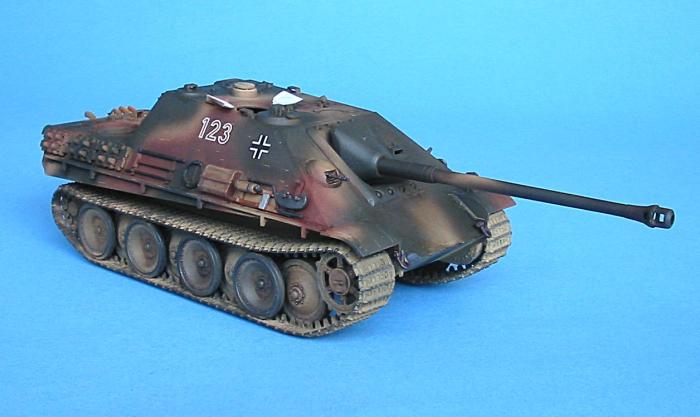
Or similar to. I like three-color woodland camo. Probably not going to bother with the 'measles' that I put on my Pizzle IV.
Re: Lert's JagdPanther
Posted: Sat May 17, 2014 10:34 pm
by ALPHA
Filling the node hole is easy... use sprue ... burn one end ... press it on a flat surface... burn it again ..blow out the flame ..and push it in the hole... then cut the residual off with a flush cutter and sand it

when you move the antenna.. drill a hole the same size as the antenna wire in the hull right below the mount ...drill a hole in the mount ... bend the antenna in a 90 degree bend ... pass it through the holes... and reattach the antenna inside the tank

Cool paint job... can't wait to see the finished tank
ALPHA
Re: Lert's JagdPanther
Posted: Sat May 17, 2014 10:52 pm
by Lert
ALPHA wrote:Filling the node hole is easy... use sprue ... burn one end ... press it on a flat surface... burn it again ..blow out the flame ..and push it in the hole... then cut the residual off with a flush cutter and sand it
I was gonna use a small bit of plasticard, glue it in, fill up the rest with green stuff and sand that down.
Re: Lert's JagdPanther
Posted: Sat May 17, 2014 11:16 pm
by ALPHA
Lert wrote:ALPHA wrote:Filling the node hole is easy... use sprue ... burn one end ... press it on a flat surface... burn it again ..blow out the flame ..and push it in the hole... then cut the residual off with a flush cutter and sand it
I was gonna use a small bit of plasticard, glue it in, fill up the rest with green stuff and sand that down.
That's cool too Lert.... personally I don't like putty too much... shrinks with time ...but if you are going to use plasticard...and don't want to wait for the putty to dry... another trick is to just cut a piece the same size as the cover the node is sticking out of and just cover the whole thing sanding the edge will give you the same look.. and you won't have to worry about the putty shrinking later
Good Luck Lert
ALPHA
Re: Lert's JagdPanther
Posted: Sun May 18, 2014 1:00 am
by Lert
Green stuff doesn't shrink. That's part of why I like it.