Page 2 of 3
Re: My DUKW build
Posted: Fri Jul 19, 2013 10:35 am
by lliw180
Hi Denzil how did you set up your stering system ? If you look at my pics the Tamiya gear box will hang in a box inside of the gap behind the noise pulled and pushed by a sevo rod ether side. your thought ?
one prop I can se coming is the servo that pulls and pushes the ( what call the gantry steering set up) will have to other rods going back and turning the rudder the prob is when its in the water when the gantry steering goes left the rudder will go rite theonlly way I can see to over come this is to cross over the rear sevo rods or have to servos and wiere up the plug on one backwards and idears
also check out my post on batteries
Re: My DUKW build
Posted: Fri Jul 19, 2013 1:10 pm
by hawkeye3guns
Hi the front steering was by a vertical post through the hull just to the left of the hull centre with a tiller arm at the bottom connected to the left wheel hub and a cross link then accross to the rh wheel hub at the top a simple push pull tiller to the front servo. At the back a normal boat rudder and post through the hull to a second servo so that the two worked together for steering the 2 servo's was connected with a "Y" lead to the same channel. my DUCK is 42" long and both in the water and on land has a turning circle of about 2.5m if you pm me I try and send some photo's of my set up or if people want I'll put a post on this site of my model.
regards Denzil
ps shes nearly 10 years old now and still going strong.
Re: My DUKW build
Posted: Sat Jul 20, 2013 2:27 am
by lliw180
While i think of it do you guy have any thoughts on speed contolers ill only need 1 it will need to run 3 motors a 330 a 230 and a 130 all at once any thoughts
Ill start a new post on it as im working on more pics this weekend
Will
Re: My DUKW build
Posted: Tue Jul 23, 2013 1:40 am
by lliw180
Part 3
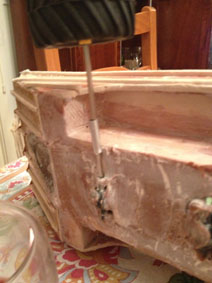
last night i started with the more ribbing the cured part around the front
- IMG_0488.jpg (41.19 KiB) Viewed 5322 times
and more on the other side thismorning then cover with bog and cut trim sand and swear in to shape
i then thought it would be a good time to cut the mini or axel stuffing boxes
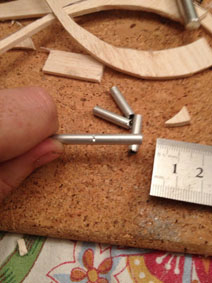
- IMG_0491.jpg (41.92 KiB) Viewed 5322 times
as it turns out i will need 20mm on the back and 15mm on the front
this small pece of pipe will sit over all 3 axels and be filled with some sort or gress to keep water out
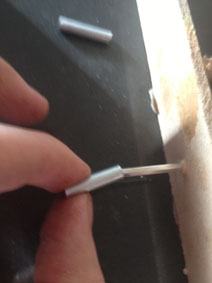
- IMG_0494.jpg (24.42 KiB) Viewed 5322 times
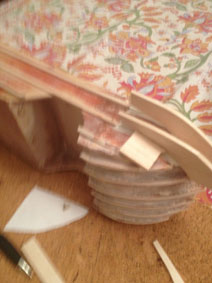
i then set about cutting the one for the front should look somthing like this
- IMG_0496.jpg (35.61 KiB) Viewed 5322 times
and on the back
- IMG_0490.jpg (35.75 KiB) Viewed 5322 times
that will but up with the tamiya chaise and well you get the idear.
plan for tonight is to fine tune the ribbing file the stuffing boxes to size the reson ther is a lot of over hang on the stering unit is having it way to long ment i could put the hole for the axel anywhere and i would fit when i trim it down. so ill do that wiere it up make 2 more panels to fully enclose it and then this fun job

- IMG_0497.jpg (39.84 KiB) Viewed 5322 times
more coming tomrow
will
Re: My DUKW build
Posted: Wed Jul 24, 2013 1:27 am
by lliw180
Part 4
Ok i finshed up the side ribbing and back plate ribbing i will in duecore be cuting a slot for a wintch like a real one
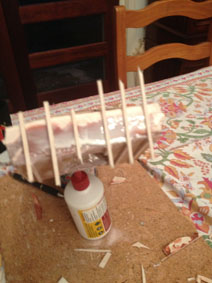
- IMG_0500.jpg (38.58 KiB) Viewed 5301 times
Then while wating for the rule to dry on the ribs turned may attention to the marine drive motor
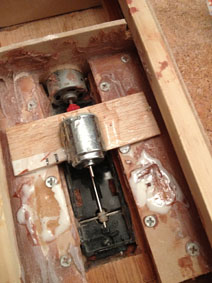
- IMG_0503.jpg (42.82 KiB) Viewed 5301 times
I then cut the front drive to shape and

- IMG_0499.jpg (47.82 KiB) Viewed 5301 times
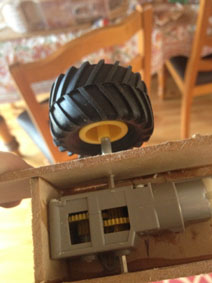
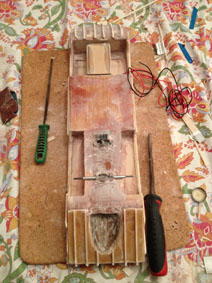
i could not help my self i had to have a bit of a mock up
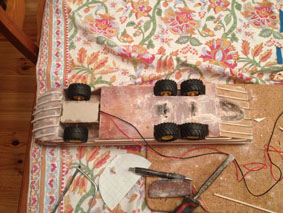
- IMG_0501.jpg (52.42 KiB) Viewed 5301 times

- IMG_0502.jpg (43.4 KiB) Viewed 5301 times
the wiers hanging out are to the motor housed in the box i then set about ajucting the wheel arches with sand papper and chisels ( this may
not have the best turning cercal ) but the real one prob didnt ether
I then painted the wheels
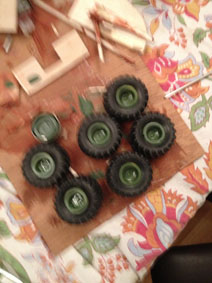
- IMG_0506.jpg (42.87 KiB) Viewed 5301 times
same tin of humbrol green i painted the little DUKW
i then had another mock up with the axel stuffing boxes on
- IMG_0505.jpg (51.86 KiB) Viewed 5301 times
Re: My DUKW build
Posted: Wed Jul 24, 2013 9:11 am
by hawkeye3guns
She looking good. I admire your skill working with wood. You must have getter wood out there whenever I try to work with it, it splits or is full of knots. Your doing a great job
Re: My DUKW build
Posted: Wed Jul 24, 2013 11:07 pm
by tankmad
Its coming along nicely keep up the good work.
Stevie
Re: My DUKW build
Posted: Thu Jul 25, 2013 1:22 am
by lliw180
the bottom plate that it all hangs off is an Australian hardwood called tasmanian oak witch is a red oak its not a realy heavy wood it used alot for structural work and wooden boat frams alot of people over here build the kitchen out off it because it has a nice grain pattern to it. I would be very surprised if you couldnt get hold of somthing similer. It has a faily straght stringy like grain
The sides are MDF witch is Medium Density Fibreboard witch is made from vic ash and another native oak call Australian Oak and gule witch will get coverd in epoxie resin with a few hours sanding hah and then 2 coats of paint
the ribing is just balsa wood with bog filling in the gaps
my woodworking skill is ok with out being brilliant
if you want to get better at working with wood a few tips from me are
* sharp blads
* if your wood keeps spliting when ever you try screwing in to it you eather need a poilt hole or a smaller screw
* enough bog ,swering and beer fixes anything
But I also do a bit of woodwork with other projects aswell
As far as colour scheam goes ill just go same green as the wheels as far as insignia goes iam having a little trouble finding insignia that would have appeard on a real DUKW. As with the deck and paint i want to go fealy detailed
Re: My DUKW build
Posted: Thu Jul 25, 2013 1:49 am
by lliw180
and prob the best pece of advise i have ever had about woodworking is
Wen you mark the timber where you want to cut. Use a sharp knife not a pen or pencil
this has 2 benefits . 1 less tear out the blade that you cut with now has a chanla to ride in meaning it dosnt have to make its own.
2 greater accuracy because are scored line with a blade is narower then a pen you can get bang on down to the 0.5 of a mm
any way a little of topic back to the DUKW
Re: My DUKW build
Posted: Tue Jul 30, 2013 1:07 am
by lliw180
part 5
starting work on the deck
affter doing some measurements it would apperar that my DUKW is 2mm narrower than it is meant to be. but i can live with that.

I first set about sizing up the deck
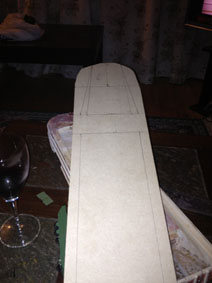
- IMG_0535.jpg (27.39 KiB) Viewed 5261 times
and placed on top
- IMG_0534.jpg (28.74 KiB) Viewed 5261 times
the line are scaled up from the airfix 1/76
as this toke me a while i dindt get much done and im still working on what parts of the deck will be removale and what will be preminrtly in place.
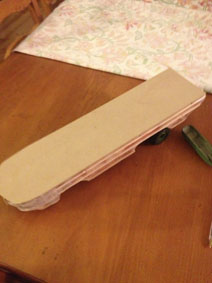
what i can olny desribe as the bonet i cut 4 peces of 5mm balsa wood gules them together to be carved and sanded in to shape at a later date.
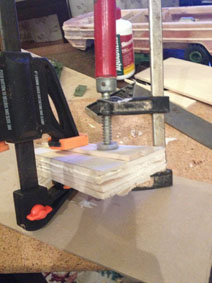
- IMG_0536.jpg (39.46 KiB) Viewed 5261 times
- IMG_0537.jpg (24.11 KiB) Viewed 5261 times
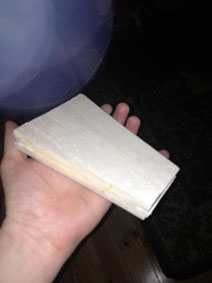
and what it looked like when i woke up
ok next time fine tuening the deck ajusting where the stering box will sit maby prop and stering servo