Christian Ludwigs new Tiger-Chassis for HL-Tiger I

User avatar
birger
Lance Corporal
Posts: 138
Joined: Fri Aug 16, 2013 12:08 pm

Christian Ludwigs new Tiger-Chassis for HL-Tiger I

Post by birger »

Hi everybody,

and now something completely different....... or not????? Ähhhh!!!

Well, doesn´t matter.

What new project are we talking about?

Christian wanted to create a Tiger-I-Chassis that eliminates most of the known constructional mistakes of the HL-Chassis, with a kind like scale armor thickness.

So we started to create something. The measures are almost equal to the Aeromate-Chassis. It is not a rip-off. It is created to upgrade the old HL-Chassis. Well, you´ll see.

Just follow the report about the first prototype and form your own opinion. And, of course, you can post this opinion. I´ll be glad to read it.

Let us begin:

All mistakes which will appear while building this model will be eliminated in construction. So the production model should be without mistakes.

Let´s staaaaaaaart:

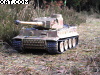
What´s that? Oh, it is a HL-Tiger. Let´s do some magic.

Image

What are we going to use??

A lot of poly:::::::

Image

Let´s start with these parts.

Image

Here we rip off the first plate. Left side.

Image

Next plate, lower front armor plate.

Image

Image

All parts need to be prepared. Why?

Well, all inner angles should be 90°.

Because of using a 1mm chamfer, those angles have an arc diameter of 1mm.

So there is a little bit of adaption to do.

Than all parts should fit perfect.

Don´t glue the parts together, yet. First all parts should fit.

Image

Now the upper front plate.

Image

Image

As you can see, there are two prepared holes at the inside of the plate. If you want to use the HL-spare tracks at the front, you need to drill them through (2mm-drill).

Otherwise you should leave them as they are. In this case, I want to use them. So drill it.

Image

Image

Image

Now the second plate can be prepared.

Image

Next Part: The back plate.

Image

Image

Image

So far, so good. Rip off second plate (right side) and prepare for assembling.

Image

Image

Image

Everything needs to be disassembled. Than you can assemble again with glue in the same order as before.

The small back plate follows next. Rip off, prepare and glue.

Image

Image

Image

The next parts need to be prepared the same way. Rip off, prepare and glue.

Image

Image

Image

Image

One part left side, one part right side.

Image

Image

Image

One part left side, one part right side.

Image

Image

On the next pictures you can see the actual thickness of the plates.

Image

Image

To be flexible with spring tension, you have the choice of three different mounting holes.

Image

That´s for today. Report will continue.

Greetings
Birger
Fahrzeuge einsatzbereit: Tiger I HL 313, Tiger I Tamiya S33, Star Wars Tiger, Bergetiger
In der Inst: HL-PIII Lackierung, Vollkettenschlepper, Tiefladeanhänger
In Planung: MLRS,Crusader, KöTi, Jagdtiger, PIII, PIV,
User avatar
birger
Lance Corporal
Posts: 138
Joined: Fri Aug 16, 2013 12:08 pm

Re: Christian Ludwigs new Tiger-Chassis for HL-Tiger I

Post by birger »

The next steps are preparing and mounting the track covering. Same procedure, rip off, prepare and glue.

Image

Image

Image

Image

Image

Image

Image

Image

Image

Now we will assemble the front, upper hull. This one is removable.

Image

Image

Well, here you have two possibilities. First Tiger with mud flaps (left part) or without (right part). I use the version with mud flaps. The other one doesn´t fit anyway. It is mirror inverted. Will be corrected.

Image

Image

Image

Image

Image

Image

Image

Image

Image

Here come the side plates of the upper hull.

Image

Image

Image

Image

Here you see them assembled.

Image

Image

Till this step I need to say, all parts can only be chamfered on one face. That means either one side or the other. According to this fact, there will be no miter at the cut edges.

As a result, most plates have a little gap to the next one. Also there won´t be chamfers on both faces. See next picture as an example. On one face you have an offset. There for the welding line to the front plate is missing. Second example, the chamfer at the top of the front plate is also missing.

Image

Nobody is perfect. We really try our best.

Report continues.
Greetings

Birger
Fahrzeuge einsatzbereit: Tiger I HL 313, Tiger I Tamiya S33, Star Wars Tiger, Bergetiger
In der Inst: HL-PIII Lackierung, Vollkettenschlepper, Tiefladeanhänger
In Planung: MLRS,Crusader, KöTi, Jagdtiger, PIII, PIV,
User avatar
birger
Lance Corporal
Posts: 138
Joined: Fri Aug 16, 2013 12:08 pm

Re: Christian Ludwigs new Tiger-Chassis for HL-Tiger I

Post by birger »

Next step.

During this report you´ll see different accessories, which either are necessary or optional.

This one is a must have. Because we need the sockets and the screws. Why? See the pictures.

Image

Image

Image

Image

And the next parts.

Image

Image

Image

Image

Image

Image

Image

Image

Image

Image

Now we assemble the additional armor for the transmission.

Image

Image

Image

Image

Next part is the ground plate for the gearboxes. There should be four of those spacers. I just found two. Two are missing. So I have to make two of my own. Will be corrected.

Image

Image

Image

Image

Image

Image

Image

Image

Image

Image

Image

Will be fixed later.

Now the lower hull is almost finished. Lets switch to the HL-Tiger.

Change the spare tracks.

Image

Additional Transmission armor needs to be fixed. This one is under construction and will be part of the kit.

Image

Image

Change the shackles..

Image

And now, change the chassis parts. Springs, arms and wheels. Shit, the spring holes are 2mm to small. Well, I make them bigger. Will be corrected.

After correction, springs, arms and wheels were fixed on the left side.

Image

And now the track tensioner from Henntec. It is all prepared for using this one. It is a must have.

Image

Image

Report will be continued.

Greetings

Birger
Fahrzeuge einsatzbereit: Tiger I HL 313, Tiger I Tamiya S33, Star Wars Tiger, Bergetiger
In der Inst: HL-PIII Lackierung, Vollkettenschlepper, Tiefladeanhänger
In Planung: MLRS,Crusader, KöTi, Jagdtiger, PIII, PIV,
User avatar
Red Devils
Staff Sergeant
Posts: 872
Joined: Sun May 06, 2012 2:38 pm
Location: Edmonton, Alberta, Canada
Contact:

Re: Christian Ludwigs new Tiger-Chassis for HL-Tiger I

Post by Red Devils »

Thanks for the post Birger, Chris does excellent work, a true craftsman. Now, can he do something about the HL Panther G?

Derek
The Princess Patricia's Canadian Light Infantry
First in the Field - Since 1914.
User avatar
PainlessWolf
Lieutenant-Colonel
Posts: 7612
Joined: Sun Feb 26, 2012 9:09 pm
Location: Southern Colorado Rocky Mountains

Re: Christian Ludwigs new Tiger-Chassis for HL-Tiger I

Post by PainlessWolf »

Good Morning,
AAAIIIIEEEE! What's wrong with the HL Panther G (other than the fact that I am 'working' *loosely termed* on one)? The build components on this Tiger chassis are amazing! It's as if the factory built one out of scaled down rolled plate.
regards,
Painless Wolf
...Here for the Dawn...
User avatar
jarndice
Colonel
Posts: 8390
Joined: Mon Sep 03, 2012 11:27 am
Location: the mountains of hertfordshire

Re: Christian Ludwigs new Tiger-Chassis for HL-Tiger I

Post by jarndice »

I sometimes have my doubts about these builds for I am in constant danger of drowning in my own dribble. How does he do it and rather more to the point why cant I? MAGNIFICIENT!!!!! shaun
I think I am about to upset someone :haha:
User avatar
Red Devils
Staff Sergeant
Posts: 872
Joined: Sun May 06, 2012 2:38 pm
Location: Edmonton, Alberta, Canada
Contact:

Re: Christian Ludwigs new Tiger-Chassis for HL-Tiger I

Post by Red Devils »

Hey Painless,

Ref my comment about the HL Panther hull, they're actually are some minor details that are wrong with the hull. Jeff1101's Panther build corrects them but with Chris's abilities, he could make a structurally sound hull with the correct details. So we're O.K., the hull is not that bad, I just like have to reinforce the lower hull. That's it. I'm going with it...with Jeff1101's work as my template...

Derek
The Princess Patricia's Canadian Light Infantry
First in the Field - Since 1914.
User avatar
PainlessWolf
Lieutenant-Colonel
Posts: 7612
Joined: Sun Feb 26, 2012 9:09 pm
Location: Southern Colorado Rocky Mountains

Re: Christian Ludwigs new Tiger-Chassis for HL-Tiger I

Post by PainlessWolf »

Good Evening,
That's good to know, RD. I know Jeff added the track control wheels up by the sprockets and moved a molded on suspension down. *laughs* I was envisioning something along the lines of cutting up the Tiger 1 deck and turret to fix the turret overhang or somesuch. ;o)
regards,
Painless
...Here for the Dawn...
User avatar
birger
Lance Corporal
Posts: 138
Joined: Fri Aug 16, 2013 12:08 pm

Re: Christian Ludwigs new Tiger-Chassis for HL-Tiger I

Post by birger »

Ok, just to make it clear:

This is not a Scale-Tank. The dimensions for the lower hull and the upper hull were taken from an Aeromate-Tiger.

The dimensions for the suspension were taken from a HL-Tiger, of course. Also the dimensons for the engine deck and the rest of the accessories.

The meaning of this kit is to get a Tiger with almost scale armor thickness to be completed by a HL-Tiger old style that so many guys have sleeping on their shelfs.

It also corrects the most known model failures from the HL-Tank, including the turret center point. Just keep on watching.

Greetings
Birger
Fahrzeuge einsatzbereit: Tiger I HL 313, Tiger I Tamiya S33, Star Wars Tiger, Bergetiger
In der Inst: HL-PIII Lackierung, Vollkettenschlepper, Tiefladeanhänger
In Planung: MLRS,Crusader, KöTi, Jagdtiger, PIII, PIV,
User avatar
birger
Lance Corporal
Posts: 138
Joined: Fri Aug 16, 2013 12:08 pm

Re: Christian Ludwigs new Tiger-Chassis for HL-Tiger I

Post by birger »

Now the gearboxes. You fix the ground plate with the four screws connecting the HL-hull to the chassis. The holes need to be copied to the plate. Than drill them with a 2mm drill. Now screw them.

Image

Image

Insert the gears and fix them. Than mount the drive sprocket.

Image

Image

Here the view with the upper front armor.

Image

Now put the Tiger on his tracks.

Image

The next steps are a little work-intensive.

Let´s handle the back plate first.

Remove all screwed parts and mount them to the new plate.

Image

Image

Image

Rip off the two frames and glue them to the back plate.

Image

Image

Image

Image

Remove all glued parts and mount them to the back plate. They might need a little adjustment. Leave the lifting jack. That one we need later.

Image

Image

At last cut off the shown parts, adjust them and glue them to the back plate.

Image

Image

Now there is a small highlight. It is a functional jack bracket.

Rip off parts and adjust them.

Remove about 1mm from the middle of the big parts and about 1mm left and right from the small parts (as shown by the pictures). Adjust both parts and connect them with a 1mm axis.

Image

Image

Image

Image

Image

Image

Image

Image

Prepare the lifting jack as shown.

Image

Image

Image

Image

Connect the jack to check.

Image

Report will be continued.

Greetings

Birger
Fahrzeuge einsatzbereit: Tiger I HL 313, Tiger I Tamiya S33, Star Wars Tiger, Bergetiger
In der Inst: HL-PIII Lackierung, Vollkettenschlepper, Tiefladeanhänger
In Planung: MLRS,Crusader, KöTi, Jagdtiger, PIII, PIV,
Post Reply

Return to “Tiger I”