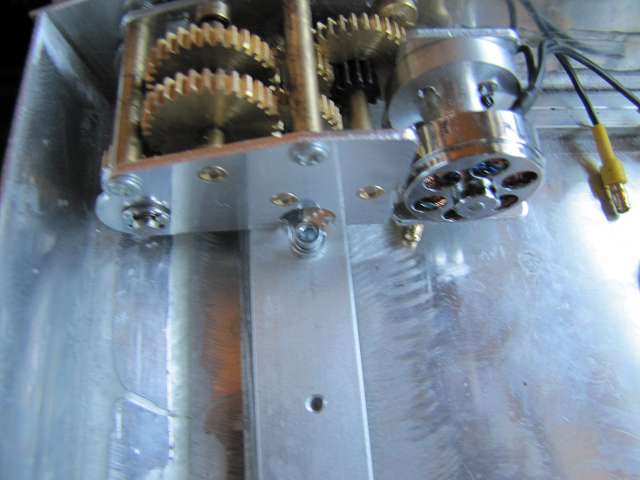
So, now was the gearbox fitted to the series.
First there was the tub with the large standard motors turn. Need so that they fit into the bath but all the gear back to the exterior walls and the axes need to be shortened.

the attachment of the gear I can reduce my assembly by way of one, easily accessible screw each gear. So I had to choose only the points for drilling, boring and cut the thread.
img]
http://up.picr.de/15363273ln.jpg[/img]
But now I had to shorten the shaft clearly as you can see here.


For this, the support bearing is now sitting quite outside.


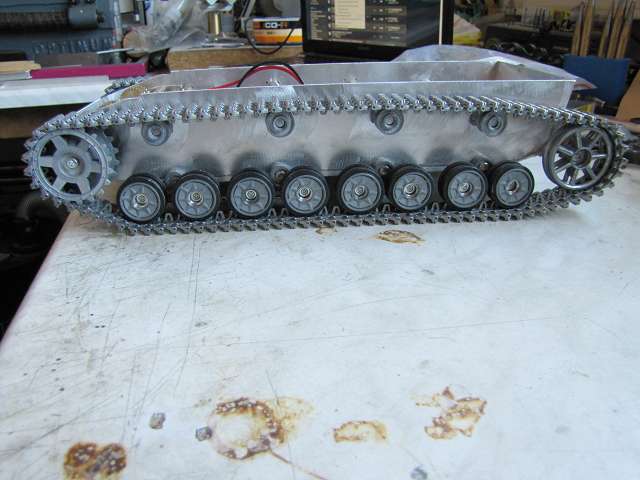
After fitting the chains as far as the tub is then finished and can be her new owner.


In the second pan with the brushless motor I have the same time also set the gear all the way to the outside and cut the axes.
The flattening of the axes had to be prolonged in all gears, of course. The easiest way is by being careful abfeilt.

Here again the fastening of a transmission with only one screw and then the whole pan with chains

Wed of brushless pan I also made another test drive because the controller settings.
http://www.youtube.com/watch?v=w0ue48w_ ... e=youtu.be
The suspension works in the context of the possible suspension travel now quite well. Your owner will first have to stick together all the roles well. I did the same at the beginning of the test drive lost half of the rollers.
But this tub is not yet clear. In it, I will test new engines with flywheels and if they are good to their owners must also equal delighted ...


