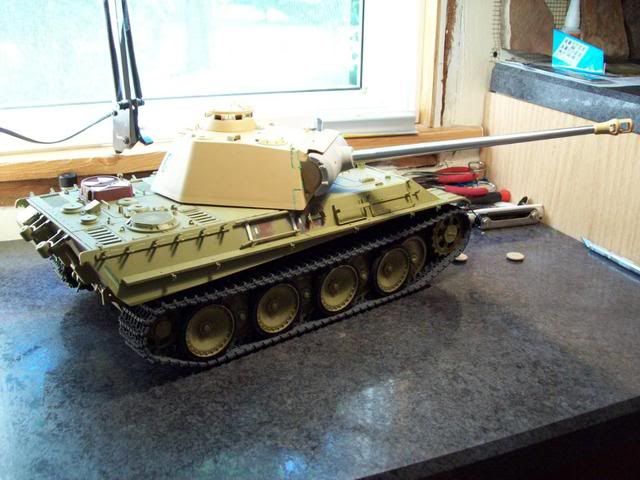
The 1st Panther is Started........

User avatar
JayBrd
Lance Corporal
Posts: 148
Joined: Wed Apr 27, 2011 11:16 pm

Re: The 1st Panther is Started........

Post by JayBrd »

Eastern Front wrote:Well, Looking at your Panther,,,"I am getting Wood" But then, I love the Panther! Love the weld details... I took my "G" and did it in a late war style with the crew heater as well as a few other mods, I painted it in the Eastern front camo pattern, don't know why I did, just felt like I needed to :shifty:
Have you decided on the camo pattern?
I am waiting for someone to make the M10 Panther imposter from the Ardennes,,,thats an interesting build...

Looking good!!

Cheers!
Thank you for the compliments guys!

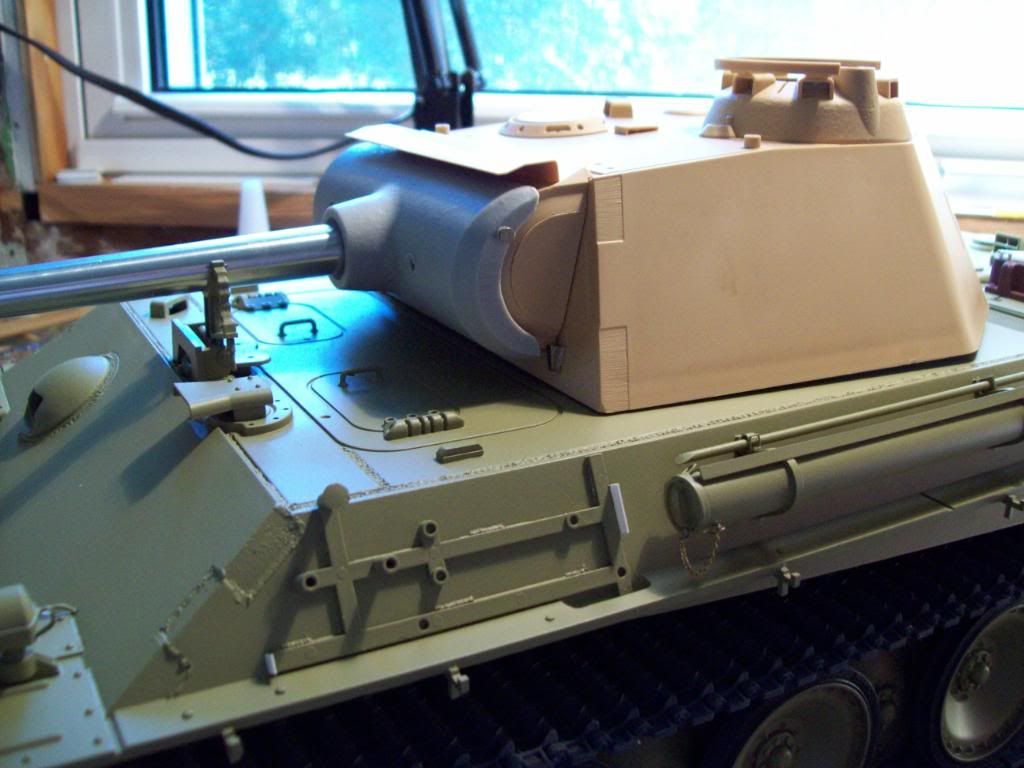
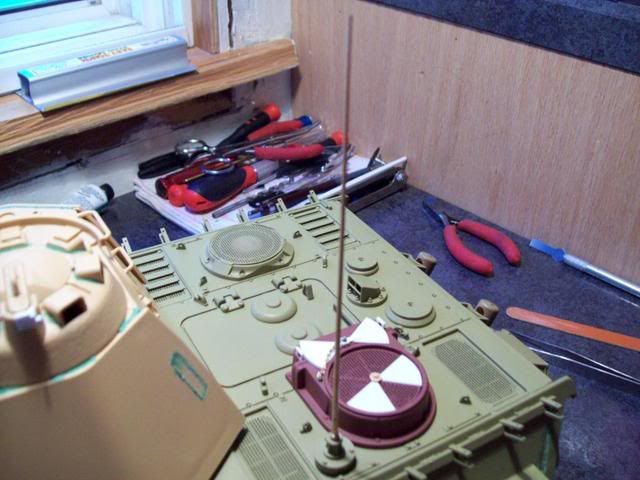
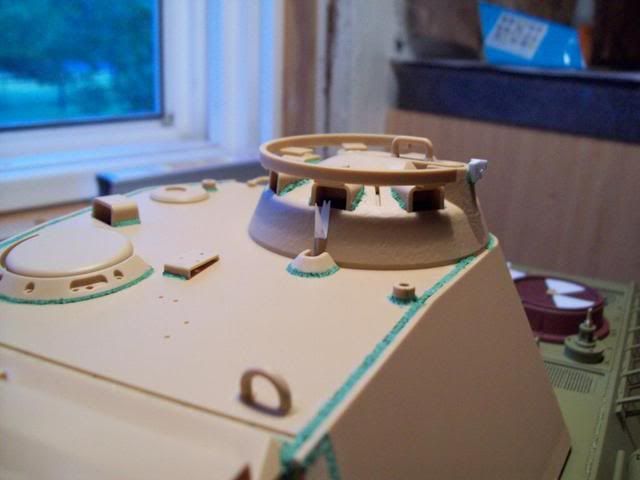
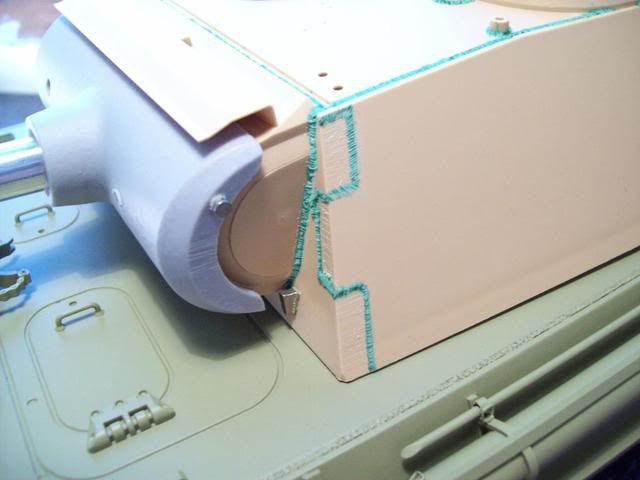
I ordered the Schumo early mantlet, along with the ABER 2m ant kit from ETO for it last Friday, and hope it's here by this weekend so I can finish the turret..

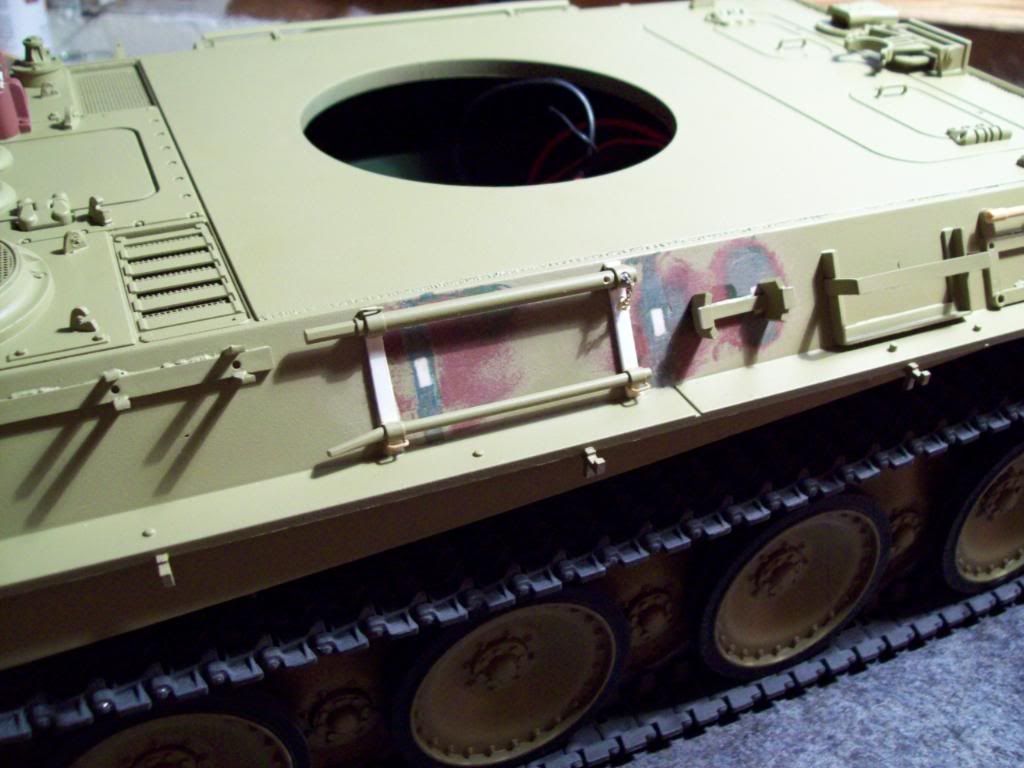
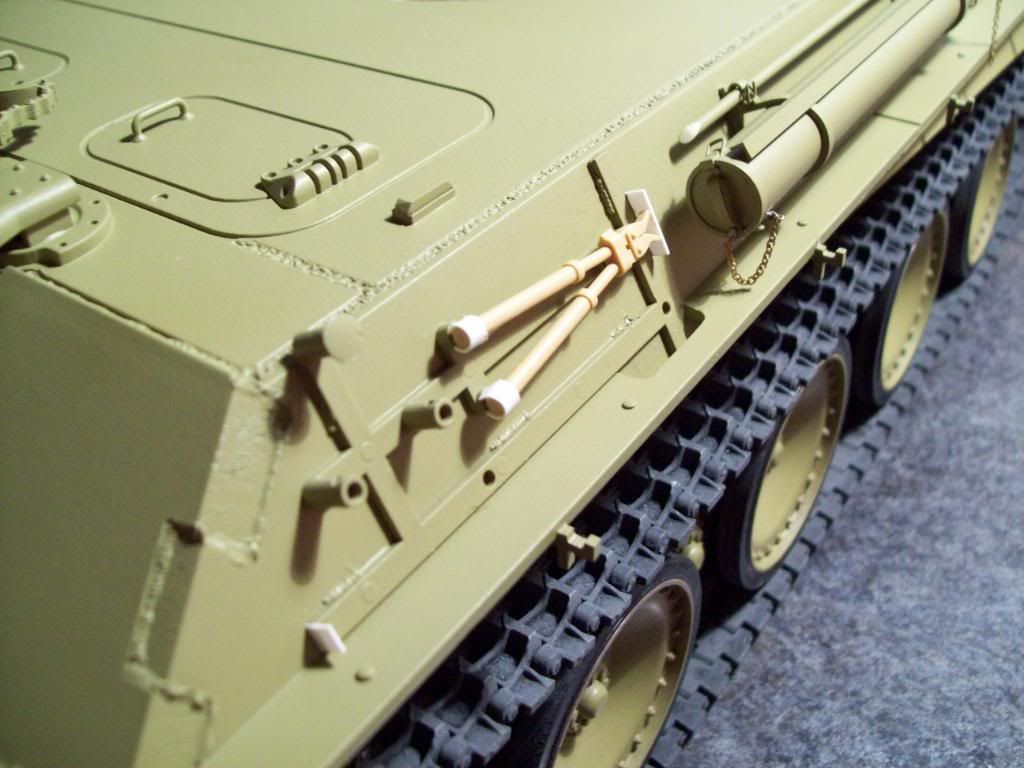
I ended up re-doing the rightside rear tool rack (have to upload the pics yet) But right now I am sticking to my guns on doing it up in the "ambush" scheme, with the heater left in red oxide to look like a field add on.

I do believe there is someone that has done one, I have seen it on video. I want to say it is one of the Demark crews but could be wrong. I do know it was definately UK/European though. It looked incredible to say the least. :thumbup:
Streiken Sie schnellen, Streik hart!!
User avatar
Saxondog
Captain
Posts: 4293
Joined: Mon Apr 27, 2009 11:06 pm
Location: Tennessee-U.S.A.

Re: The 1st Panther is Started........

Post by Saxondog »

Hi Jaybird, the hooded fan has a lower and upper screen? I can't really tell but this is the same detail I have been trying to resolve on my Jagdpanther. Did you check out the Panther section of Panther 1944? They list deployment numbers by month and Unit,

It was the first evidence that a Grossdeutschland unit FGB received Jagdpanther's late war. The Baltic states zone of defence. That's when I developed the idea of a Urban warfare scheme.

Have you decided on a finale paint scheme, sticking to the original post picture or maybe something else. Really like the details,have the parts been delicate,or difficult to handle without breaking?

The weld seams look really good,mine were done using Evergreen round stock and after gluing in place the exacto saw blade cut the beads.Some area's were a little thick but I found that sanding still revealed the beads and looked pretty good.

Their alot of work but really are an excellent detail, look forward to the completion,Saxondog
Urban dictionary-SAXONDOG-derogatory term for anglosaxon people
User avatar
Saxondog
Captain
Posts: 4293
Joined: Mon Apr 27, 2009 11:06 pm
Location: Tennessee-U.S.A.

Re: The 1st Panther is Started........

Post by Saxondog »

Forgot this link, would welcome your input? http://www.rctankwarfare.co.uk/forums/v ... =22&t=6128" onclick="window.open(this.href);return false;

Have you considered a smoker unit? Here's the super smoker installed in my Jagdpanther.Above link third page, My detailing was nowhere near you level,but some of the same issues I experienced as you have, great job mate,Blake
Urban dictionary-SAXONDOG-derogatory term for anglosaxon people
User avatar
JayBrd
Lance Corporal
Posts: 148
Joined: Wed Apr 27, 2011 11:16 pm

Re: The 1st Panther is Started........

Post by JayBrd »

Hey Sax, I think just an upper screen on the RC tank in our scale (you'd never see the bottom one anyway)

The only detail parts that are fussy is working with the brass chain, total pain in the arse. the tool latch handles are too, but once glued they are pretty solid.. I have been slowly re-doing the tool racks also.

I used squadron green putty for my welds and this;
http://www3.towerhobbies.com/cgi-bin/wt ... LXGGG7&P=K" onclick="window.open(this.href);return false;

It works great, the putty does not react to the plastic and it can be cleaned once the putty left inside dries. I am on the 3-4th use on the same one. I just load it with a little shoot a fine line on, tamp it with my finger a bit when it starts to set. Once it's dry I just use an hobby knive to score it. (just wished I would have done it this way for the upper deck welds)

As far as a smoker unit, I don't care for the way the smoke looks really, so I do not plan on one in any of the builds I am planning on doing..

The best news is my ETO order showed today :thumbup: I have the mantlet fitted, but will get to it more tomorrow for sure..
Streiken Sie schnellen, Streik hart!!
User avatar
Saxondog
Captain
Posts: 4293
Joined: Mon Apr 27, 2009 11:06 pm
Location: Tennessee-U.S.A.

Re: The 1st Panther is Started........

Post by Saxondog »

excellent tips, And Bob at ETO is a great guy, has alot of knowledge first hand about the Balkans,Ukraine and the black sea areas of conflict on the Eastern Front. Well I will continue to enjoy your build, and thanks for the weld seam tips,the method I used was complicated but over all turned out well. Enjoy,Blake
Urban dictionary-SAXONDOG-derogatory term for anglosaxon people
User avatar
JayBrd
Lance Corporal
Posts: 148
Joined: Wed Apr 27, 2011 11:16 pm

Re: The 1st Panther is Started........

Post by JayBrd »

OK somewhat of an update. Forgive me with the lack of tech or steps, it was a crazy day to say the least..

The Schumo early G mantlet I just love the casting / detail quality of their parts)

Image

As I said earlier I have been re-doing some of the smaller details as I find better documentaion.

Tool racks, ect..

Image

A little better detail to the bolt cutters.

Image

I also added some detail I wish HL would have done to the front.

Image

The ABER Annt, and combat sight.

Image
Image

Saxondog, here are some of the welds done with the syringe I linked..(they look better after paint)

Image

A few more details and shooting some color and she's ready to prowl!
Image
Streiken Sie schnellen, Streik hart!!
User avatar
JayBrd
Lance Corporal
Posts: 148
Joined: Wed Apr 27, 2011 11:16 pm

Re: The 1st Panther is Started........

Post by JayBrd »

Sorry there has not been much of an update lately. I have been tending to some work, family and preparing for a upcoming hunting trip. Believe me I am chomping at the bit to work on it (I could really use the break! :crazy: )
Streiken Sie schnellen, Streik hart!!
User avatar
Saxondog
Captain
Posts: 4293
Joined: Mon Apr 27, 2009 11:06 pm
Location: Tennessee-U.S.A.

Re: The 1st Panther is Started........

Post by Saxondog »

Earier in this thread you mentioned the Tamiya recoil unit? Which unit are you fitting? Me and Alb have worked on several of these to create a better recoil simulation,and a better mounting position.

Rccommand did offer a custom barrel mounting made for them by a forum member,I don't have that members premission to name him but I do have the mounting as this member built my Tamiya Porsche King Tiger which I purchased from him.

This can be made with other material,and I have a Henschel Version and soon a Tiger Version that may work out better,the turret space is minimal,but for I/R and real fast recoil their are some other steps. I would help with the parts list and assembly details if interested.

The picture is older as I have stripped the old paint and polished the parts to their natural brass and aluminium,not very German looking but I wanted to clean the assembly up before repainting. Also this recoil does not reflect the snap recoil modification which does resemble a more natural barrel motion.Sax
Tamiya Porsche Turret Gun Recoil Assembly.
Urban dictionary-SAXONDOG-derogatory term for anglosaxon people
User avatar
JayBrd
Lance Corporal
Posts: 148
Joined: Wed Apr 27, 2011 11:16 pm

Re: The 1st Panther is Started........

Post by JayBrd »

Saxondog wrote:Earier in this thread you mentioned the Tamiya recoil unit? Which unit are you fitting? Me and Alb have worked on several of these to create a better recoil simulation,and a better mounting position.

Rccommand did offer a custom barrel mounting made for them by a forum member,I don't have that members premission to name him but I do have the mounting as this member built my Tamiya Porsche King Tiger which I purchased from him.

This can be made with other material,and I have a Henschel Version and soon a Tiger Version that may work out better,the turret space is minimal,but for I/R and real fast recoil their are some other steps. I would help with the parts list and assembly details if interested.

The picture is older as I have stripped the old paint and polished the parts to their natural brass and aluminium,not very German looking but I wanted to clean the assembly up before repainting. Also this recoil does not reflect the snap recoil modification which does resemble a more natural barrel motion.Sax
Porsche King Tiger Dec.2010 057.JPG


With having the full Tam turret, I went with the Tam recoil and elevation units. I don't plan to run the full stock HL electronics so I wasn't too worried about wiring in anything. But this could be a good "upgrade" if it seems slow on recoil..


Thanks for mentioning Sax :thumbup:
Streiken Sie schnellen, Streik hart!!
User avatar
Dietrich
Staff Sergeant
Posts: 973
Joined: Thu Aug 13, 2009 10:29 am
Location: England and Aquitaine,France

Re: The 1st Panther is Started........

Post by Dietrich »

Very nice build so far and very educational ...keep the photos coming.........I know I am going to regret this question as he answer is probably obvious....but you say
'I am still debating on taking the PE plunge or not. And also if I will keep the HL turret or go for the Wecohe or a Tam turret. But we'll see what happens....'
........What is PE..??? :{ ... (no smart replies from anyone else...like 'Private Enterprise' or 'Physical Exercise' :haha: )
Never Forget......
   The Propaganda of the Victors....... becomes the History of the Vanquished
Post Reply

Return to “Panther”