Right done some digging on line. And found on a Honda forum that typically red (yellow and green) LED want 1.7v and 20mA. White & blue 3v and 20mA.
The calculation used was supply voltage - LED voltage, result divided be current.
So in my case measured voltage about 2.8v so say 3v - 1.7v =1.3v / 0.020A + 65 Ohm
Therefore going to try 100 Ohm resistor as this should dim the LED even further, after all the tail light shouldn't be bright.
Just need to buy a resistor and try it.
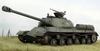
KV-1 Project.
Re: KV-1 Project.
www.mad-tanks.weebly.com
www.rctankelectronics.com
www.rc-truck.weebly.com
www.rc-boat.weebly.com
www.rctankelectronics.com
www.rc-truck.weebly.com
www.rc-boat.weebly.com
Re: KV-1 Project.
Next job - Gearbox.
I did plan to buy a 3:1 Mato gearbox, but nobody had any in stock at the moment.
Plan B. Buy Asiatam 3:1 gear box for Tiger, use metal gearbox parts to mod KV-1 gearbox to low ratio.
Guide here. http://www.rctankwarfare.co.uk/forums/v ... =38&t=4981" onclick="window.open(this.href);return false; Thanks to Dietrich.
So off I go to Welsh Dragon Models, gearbox added to basket, plus Asiatam metal hull for Tiger, plus Metal Sprockets & idlers for Tiger.
 how did that happen.
Email saying dispatched at 21:50 last night so how surprised was I when it arrived today. Cheers Steve.
Unfortinately I had to stay late at work so no time to fit it all to the Tiger. So I thought I connect the gearboxs up to a battery and let them run to break them in. Opened the box up and found that the gearboxes come with both long and short shafts and the the long ones was already fitted.
So Plan C. Fit the gearbox into the KV-1 and convert the Tiger 1 gearbox. (Well I did start the KV-1 project first)
Sorry no pictures as phone battery died but I think the gearbox change is well documented and straight forward.
Anyway all fitted and tested. And great performance, the turning now is awesome.
I did plan to buy a 3:1 Mato gearbox, but nobody had any in stock at the moment.
Plan B. Buy Asiatam 3:1 gear box for Tiger, use metal gearbox parts to mod KV-1 gearbox to low ratio.
Guide here. http://www.rctankwarfare.co.uk/forums/v ... =38&t=4981" onclick="window.open(this.href);return false; Thanks to Dietrich.
So off I go to Welsh Dragon Models, gearbox added to basket, plus Asiatam metal hull for Tiger, plus Metal Sprockets & idlers for Tiger.
Email saying dispatched at 21:50 last night so how surprised was I when it arrived today.
Unfortinately I had to stay late at work so no time to fit it all to the Tiger. So I thought I connect the gearboxs up to a battery and let them run to break them in. Opened the box up and found that the gearboxes come with both long and short shafts and the the long ones was already fitted.
So Plan C. Fit the gearbox into the KV-1 and convert the Tiger 1 gearbox. (Well I did start the KV-1 project first)
Sorry no pictures as phone battery died but I think the gearbox change is well documented and straight forward.
Anyway all fitted and tested. And great performance, the turning now is awesome.
www.mad-tanks.weebly.com
www.rctankelectronics.com
www.rc-truck.weebly.com
www.rc-boat.weebly.com
www.rctankelectronics.com
www.rc-truck.weebly.com
www.rc-boat.weebly.com
Re: KV-1 Project.
So my list of jobs goes
* Transfer RX18 and other bits into the tank. Done
* Fix hatch door.
* Install metal exhaust outlets Done and rig smoke unit to these.
* Install tail light. Done
* Install LED machine gun.Done
* Install cooling fan to RX18 board.
* Modify smoke unit so is speed proportional.
* Modify gearbox so is low ratio. Done
* Possibly install second battery for more power and extra weight. Decided not to do.
* Possibly move switches and stuff from bottom of tank to an easy to get to hatch on the top of the tank.
New Items
* Fix loose idler wheels.
* Change taIl light resistor.
* Add another machine gun LED to back machine gun.
www.mad-tanks.weebly.com
www.rctankelectronics.com
www.rc-truck.weebly.com
www.rc-boat.weebly.com
www.rctankelectronics.com
www.rc-truck.weebly.com
www.rc-boat.weebly.com
Re: KV-1 Project.
Tonights job try fix the loose idler wheels.
First job take lid off.

Then unscrew idler

And remove idler wheel

That leaves the tracks easy to remove

Next splt the idler

The problem screw. As with other HL tanks which allows the wheel to have to much free play.

Quick drink, well is Friday.

Finished drink, cut up tin so had thin strip of tin to rap round screw

All that, and even one layer of tin didn't fit. So haven't managed to fix problem yet.
First job take lid off.
Then unscrew idler
And remove idler wheel
That leaves the tracks easy to remove
Next splt the idler
The problem screw. As with other HL tanks which allows the wheel to have to much free play.
Quick drink, well is Friday.
Finished drink, cut up tin so had thin strip of tin to rap round screw
All that, and even one layer of tin didn't fit. So haven't managed to fix problem yet.
www.mad-tanks.weebly.com
www.rctankelectronics.com
www.rc-truck.weebly.com
www.rc-boat.weebly.com
www.rctankelectronics.com
www.rc-truck.weebly.com
www.rc-boat.weebly.com
Re: KV-1 Project.
Next task rig up the smoke unit to the metal exhaust.
Ordered some 5mm diameted plastic pipe other day, which arrived today. But couldn't get it to work as pipe too rigid, as I planned to put pipes from smoke unit under/round gearbox motors and u bend round to the outlets.
So tried moving things around a bit. Swapped the smoke and speaker round.

But then found as the pipes where long the smoke unit didn't have the pump to get enough smoke out.
So all that is on hold until I figure something else out. Thinking along the long the lines of moddifying the smoke unit to a bigger fan and see if that helps.
Ordered some 5mm diameted plastic pipe other day, which arrived today. But couldn't get it to work as pipe too rigid, as I planned to put pipes from smoke unit under/round gearbox motors and u bend round to the outlets.
So tried moving things around a bit. Swapped the smoke and speaker round.
But then found as the pipes where long the smoke unit didn't have the pump to get enough smoke out.
So all that is on hold until I figure something else out. Thinking along the long the lines of moddifying the smoke unit to a bigger fan and see if that helps.
www.mad-tanks.weebly.com
www.rctankelectronics.com
www.rc-truck.weebly.com
www.rc-boat.weebly.com
www.rctankelectronics.com
www.rc-truck.weebly.com
www.rc-boat.weebly.com
Re: KV-1 Project.
Another day and another attemp to fix stuff.
Got a used laptop cooling fan so decided to install the RX18 cooling mod.
As it is a laptop cooling fan it sucks from centre and discharges to one side. Quick hook up to juice to check it works.

It did so onto soldering the 5v voltage regulator and power plug.

Now this is wear i've gone for some thing different, as previously I discovered I had to relocate the smoke unit with longer pipes but the standard pump didn't have enough to push the smoke out. I've decided to use the cooling fan exhaust to pump the smoke unit. Therefore the fan is pluged into the smoke socket. Therefore only comes on when the tank comes out of standby.
Any way I deviate. Cut and drill RX18 lid


Drill holes suck air in over electronics and pulled out by the fan.
Decided to tape together to see if I could plug leads in as the fan case covered them. Turns out to difficult so went for some tape.

Slight mod tape over fan stopped it spinning, change that to some plastic from an old drinks bottle.

Reason for taping up is the fan sucks from both sides, therefore block one and sucks more through the RX18.
Fan held in place with rubber bands.

And moddified smoke unit piped up to the cooling fan.

Also changed the wiring so the heater element is fed off supply after tank switch through the smoke unit switch. So when I turn tank on the heater comes on and then when I take tank out of standby the cooling fan pumps into the smoke chanmber and pushes out.
Then spent hours trying to figure out a way to pipe up the exhaust outlets in the lid as one of them has a motor in the way. still haven't figured that out.
Also got some diodes ready so can attach to motor supply to make the fan speed propoertional but leaving that for another day.
Got a used laptop cooling fan so decided to install the RX18 cooling mod.
As it is a laptop cooling fan it sucks from centre and discharges to one side. Quick hook up to juice to check it works.
It did so onto soldering the 5v voltage regulator and power plug.
Now this is wear i've gone for some thing different, as previously I discovered I had to relocate the smoke unit with longer pipes but the standard pump didn't have enough to push the smoke out. I've decided to use the cooling fan exhaust to pump the smoke unit. Therefore the fan is pluged into the smoke socket. Therefore only comes on when the tank comes out of standby.
Any way I deviate. Cut and drill RX18 lid
Drill holes suck air in over electronics and pulled out by the fan.
Decided to tape together to see if I could plug leads in as the fan case covered them. Turns out to difficult so went for some tape.
Slight mod tape over fan stopped it spinning, change that to some plastic from an old drinks bottle.
Reason for taping up is the fan sucks from both sides, therefore block one and sucks more through the RX18.
Fan held in place with rubber bands.
And moddified smoke unit piped up to the cooling fan.
Also changed the wiring so the heater element is fed off supply after tank switch through the smoke unit switch. So when I turn tank on the heater comes on and then when I take tank out of standby the cooling fan pumps into the smoke chanmber and pushes out.
Then spent hours trying to figure out a way to pipe up the exhaust outlets in the lid as one of them has a motor in the way.
Also got some diodes ready so can attach to motor supply to make the fan speed propoertional but leaving that for another day.
www.mad-tanks.weebly.com
www.rctankelectronics.com
www.rc-truck.weebly.com
www.rc-boat.weebly.com
www.rctankelectronics.com
www.rc-truck.weebly.com
www.rc-boat.weebly.com
Re: KV-1 Project.
Not had much time this week to work on the KV-1, as been messing around fitting the Asiatam hull to my Tiger 1.
Had some time yesterday, so decided to install the 100ohm resistor to the tail light. I actually bought a ten pack so tried one that didn’t dim the tail light much but the headlight was much brighter. Then thought I try two in series again headlight a bit brighter and the tail a bit dimmer. So I was happy with that so soldiered them in place. Gave it a go later on when it was proper dark in the garden and well pleased with results the headlight giving loads of illumination and the tail light just adding to the effect rather than been a red torch.
Next up carry on trying to rig up the smoker. Now last time I played with this it was making smoke but gradually les and less so thought it needed more oil. Topped it up and still nothing. Bit of investigation element getting voltage, checked the resistance of the element and showing more than 20k resistance. I think the element has failed. So next job is to try make another using details from Strmnd54. i.e. using a ceramic wire wound resistor as the element and Kevlar string for the wick. But that will be another day when I’ve sourced the bits.
www.mad-tanks.weebly.com
www.rctankelectronics.com
www.rc-truck.weebly.com
www.rc-boat.weebly.com
www.rctankelectronics.com
www.rc-truck.weebly.com
www.rc-boat.weebly.com
Re: KV-1 Project.
Been playing around with making my own smoke unit, so was happy with that went for the install into the tank.
First job if you wanting to use proper exhaust you'll find one of the motors is smack bang under one of the exhaust. Now Blimp lowered he's gearbox to give more clearance, I've gone a different route. Move the motor


Now you can't move too far round i.e. as low as other motor otherwise the pinion gear won't mesh with the gears, so as you can see more or less same height but moved to other side of gear.
Then you find the tank top connector might get in way so that is easy solved.

Then finally position the home made smoke to the exhaust.

Still need to sort the wiring out as need some kind of small plug in connector as the smoker is now on the top and the power source in the hull.
I've also a few videos showing it working but haven't a you tube account so at moment don't know how to upload (any suggestions?)
First job if you wanting to use proper exhaust you'll find one of the motors is smack bang under one of the exhaust.
Now you can't move too far round i.e. as low as other motor otherwise the pinion gear won't mesh with the gears, so as you can see more or less same height but moved to other side of gear.
Then you find the tank top connector might get in way so that is easy solved.
Then finally position the home made smoke to the exhaust.
Still need to sort the wiring out as need some kind of small plug in connector as the smoker is now on the top and the power source in the hull.
I've also a few videos showing it working but haven't a you tube account so at moment don't know how to upload (any suggestions?)
www.mad-tanks.weebly.com
www.rctankelectronics.com
www.rc-truck.weebly.com
www.rc-boat.weebly.com
www.rctankelectronics.com
www.rc-truck.weebly.com
www.rc-boat.weebly.com
Re: KV-1 Project.
Here you go
DIY smoke unit
http://www.youtube.com/watch?v=VUna1vLIiXs" onclick="window.open(this.href);return false;
and installed
http://www.youtube.com/watch?v=MLvUsSFDIfY" onclick="window.open(this.href);return false;
DIY smoke unit
http://www.youtube.com/watch?v=VUna1vLIiXs" onclick="window.open(this.href);return false;
and installed
http://www.youtube.com/watch?v=MLvUsSFDIfY" onclick="window.open(this.href);return false;
www.mad-tanks.weebly.com
www.rctankelectronics.com
www.rc-truck.weebly.com
www.rc-boat.weebly.com
www.rctankelectronics.com
www.rc-truck.weebly.com
www.rc-boat.weebly.com