M4A1 75mm Sherman from BOB

User avatar
MarkofZollo
Corporal
Posts: 328
Joined: Mon Jul 05, 2010 6:16 pm
Location: Honiton, East Devon

Re: M4A1 75mm Sherman from BOB

Post by MarkofZollo »

Right I will be getting some joint compound later to try out, will be away for next 36 hours so next update Monday maybe?
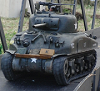
Anywho thought I would do a guide of the slightly simplified version of bubbajoexx's bogie mod, the more copies there are of it the less likely it will be lost or forgotten. All recognition goes to him, links to his guide are in one of the older posts in this thread. Also I had to use my phone camera 'cos my girlfriend is away and had the cheek to take her camera with her! :O
Firstly locate the two screws securing the bogie to the tank;

Image

Once undone remove the bar held by the screws;

Image

bogie can just pulled off tank now, remove the two screws here;

Image

and remove the three screws on the back of the bogie;

Image

prize apart and this is what you see;

Image

remove the screw for the spring and remove that too;

Image

then carefully seperate the two halves of the wheel clamps;

Image

the rods above can stick and its easy to damage/break the arms. Now I used a rotary tool with cutting disk to do these bits as its quicker, but a craft knife will suffice, the middle section needs to go so cut this on both ends;

Image

try to cut the following staying flush to inner cylindar, this means the wheel arms wont meet and foul in use;

Image

then remove this shaft for lower screw;

Image

and file down the other side of it. Now I managed to get some 2.4mm brass covered steel rod from a fellow moddeler friend at Uni, but you can use any size rod really, so I drilled these shafts out with a 2.5mm drill bit;

Image

and same with the bogie sides;

Image

for the outer side I add a small bit of 1mm styrene sheet and stick in;

Image

without I found that the rods were able to work loose.
The rod I have mentioned, I cut two 30mm and two 20mm lengths;

Image

Place a 30mm rod in the new shaft, and rebuild around wheel;

Image

this lines up following for drilling;

Image

now that adhesive is dry drill the outer bogie side;

Image

find the spring and try to bend each side out to around 80 degrees apart and put a 90 degree bend at either end;

Image

the further you bend here the stronger the spring action on the wheels, but if you go too far they can ping off.
Now replace spring, place one side of new shaft in the bogie side and hook the spring on to the upper shaft;

Image

replace other bogie side, reassemble, and it should work like this;

Image

If there is any fouling or you cant push down this far, just go back to the bar cutting/seperating stage and file either side down a little.
Thanks for the interest :thumbup: Dave
Last edited by MarkofZollo on Thu Jan 01, 2015 3:39 pm, edited 1 time in total.
There is always a fifth Sherman
sassgrunt
Staff Sergeant
Posts: 750
Joined: Wed Oct 29, 2008 9:08 am
Location: Hawaii, USA

Re: M4A1 75mm Sherman from BOB

Post by sassgrunt »

I really like BubbaJoexx's mod for the mato bogies, and used it for two tanks so far. However, I found that if you alter all six bogie units, the tank has a tendancy to "dip" in the front, (a lot like what people say about the Sherman "Jumbo" - that the front suspension units should flatten out due to all the increased weight). For mine, I did add bearings to all the roadwheels, but kept the front bogies stock. I feel it looks better when it runs, that way. -Mike
User avatar
MarkofZollo
Corporal
Posts: 328
Joined: Mon Jul 05, 2010 6:16 pm
Location: Honiton, East Devon

Re: M4A1 75mm Sherman from BOB

Post by MarkofZollo »

Mike I can only see a very slight dip on the front bogies for now, I still have yet to put in all the turret gear (middle bogies) and a bigger speaker and perhaps smoke unit in back so it will even out. To be fair from the real tank the 1/16 one should have 26mm of ground clearance, the stock Mato is around 31mm so it needs to be balanced out lower anyway, thanks for heads up though :D
Not really a huge amount I can do for now until the rotor shield comes, Ethan said I should have it by weekend really. Referring back to my first post, does anyone have a picture of the engine cover or whats under it? I still havnt found that info.
Cheers, Dave
There is always a fifth Sherman
User avatar
Saracen
Lance Corporal
Posts: 205
Joined: Mon Dec 29, 2008 8:51 am

Re: M4A1 75mm Sherman from BOB

Post by Saracen »

> does anyone have a picture of the engine cover or whats under it?

All that is under the cover is a hole, protected by a metal grill to stop debris being sucked in.

The Continental R-975 engine, being air-cooled, has a huge fan on the forward end - you can see it spinning here:

http://www.youtube.com/watch?v=m6tL69gH ... re=related" onclick="window.open(this.href);return false;

The fan sucks colling air in under the metal plate, it then passes over/through the engine, and is blown out under the overhang of the rear hull. One of the reasons this type of Sherman always creates big clouds of dust when running !

Adrian.
User avatar
MarkofZollo
Corporal
Posts: 328
Joined: Mon Jul 05, 2010 6:16 pm
Location: Honiton, East Devon

Re: M4A1 75mm Sherman from BOB

Post by MarkofZollo »

Adrian thanks for info, I was just unsure whether it was just a hole and what shape it was, if the Mato mold was correct etc. I found a pic with some info on a 1/35 Sherman build that helped;

Image

Have since sorted that and the other vent things with mesh, just trying to hinge the cover at the moment which is proving harder than thought, especially as things wont do what you want! Joint compound came this morning but I think it may be wrong stuff as its for plumbung rather than dry wall, trying it out anyway but it probably wont work. I remember seeing something else which may work better in Poundland (so will be cheap!) so may give that a try too.
May have more later, cheers, Dave
Last edited by MarkofZollo on Thu Jan 01, 2015 3:52 pm, edited 1 time in total.
There is always a fifth Sherman
User avatar
MarkofZollo
Corporal
Posts: 328
Joined: Mon Jul 05, 2010 6:16 pm
Location: Honiton, East Devon

Re: M4A1 75mm Sherman from BOB

Post by MarkofZollo »

Will start this update with yesterday and todays minimal progress :S As said above I found some pics of the engine vent so got that done;

Image

hinged for use, hinges are made from the ali sheet I mentioned here: http://www.rctankwarfare.co.uk/forums/v ... =38&t=7391 and staples as the rod. Mesh underneath is just ali reinforcement mesh for vehicle bodywork repair (89p), also applied to rear vent at top of pic.
I also filled in the loaders hatch, not present on early turrets, and a few other holes, also removed rear vent;

Image

From more research pic generation (print screen of slowed down Band of Brothers) I noticed these tanks have low bustle turrets, I contemplated doing that mod but I dont like the look. I have been trying to hinge the pistol port too and nearly done.

Moving on to cast texture, I applied the joint compound to T23 turret rear for practice, it stinks and is horrible to work with, still not close to dry after eight or nine hours. For these reasons I wont use it, it is on right of pic around curve of turret;

Image

So I ventured into town today and had a look at the product in Poundland, compared it to similar better known brand stuff in Wilkinsons and other hardware/tool shops and found it to be pretty identical, it looks like this;

Image

so I guess any filler may have same effect. I mixed with water to consistency of yoghurt (got some to check, yum :D ) as I had done with the joint compound (though turps was only thing it would thin with) and applied with a sponge using the stipple method, after maybe an hour was dry and I sanded with 120 grit (all I had) to the effect on left of turret pic above. I know it doesnt look as good as streetsquid got it to but I think I did it too thick and I need to put more on and get finer grit sand paper. I will try again later in week (away tomorrow) so will let you guys know, but I am pretty confident it will work as well as streetsquid got it to.
Thanks for looking, Dave
Last edited by MarkofZollo on Thu Jan 01, 2015 3:54 pm, edited 1 time in total.
There is always a fifth Sherman
User avatar
MarkofZollo
Corporal
Posts: 328
Joined: Mon Jul 05, 2010 6:16 pm
Location: Honiton, East Devon

Re: M4A1 75mm Sherman from BOB

Post by MarkofZollo »

Following on I applied some this morn to one side, sanded with 120 grit (all I have :S ) and applied some more a bit thicker, then sanded again and the result is as follows;

Image

I am happy with that, though fewer ditches and a bit more eneven surface will look better. I will get some finer grit sand paper tomorrow and may put the odd bit of un thinned filler on the surface to give that eneven look. Will report back once done, for now I have covered the turret and I think I have the key to consistency.
Cheers :D
Last edited by MarkofZollo on Thu Jan 01, 2015 3:54 pm, edited 1 time in total.
There is always a fifth Sherman
nickmow
Lance Corporal
Posts: 215
Joined: Fri Dec 25, 2009 1:06 am
Location: Berkshire U.K

Re: M4A1 75mm Sherman from BOB

Post by nickmow »

sassgrunt wrote:I really like BubbaJoexx's mod for the mato bogies, and used it for two tanks so far. However, I found that if you alter all six bogie units, the tank has a tendancy to "dip" in the front, (a lot like what people say about the Sherman "Jumbo" - that the front suspension units should flatten out due to all the increased weight). For mine, I did add bearings to all the roadwheels, but kept the front bogies stock. I feel it looks better when it runs, that way. -Mike
I came to the same conclusion but I left the centre bogies un-modded thinking they would provide a bit of central support, seems to work, I hadnt thought of the fact that the centre of gravity is probably quite far forward.
User avatar
MarkofZollo
Corporal
Posts: 328
Joined: Mon Jul 05, 2010 6:16 pm
Location: Honiton, East Devon

Re: M4A1 75mm Sherman from BOB

Post by MarkofZollo »

Nick, I have balanced out motors and gearbox at front, battery in middle and speaker in back, it tips a little forward at the mo but the ride height needs to come down a little anyway.
Right been running around the electronics for a few days and not getting far, but have jumped the first hurdle today :D which is the last bit (pics and vid).
Cut out the battery bay the other day, then glued the cover in place as bottom;

Image

will fill and smooth edges. Battery is central to tank to keep it balanced but not sure where to put other stuff lol.
I have fitted recessed fittings for turret bottom to turret using the shafts cut from bogies '8 ;

Image

Have cut a bit out of the turret ring;

Image

And then the piece de resistance (forgive missing accents) for this update, the BB gun modded to recoil, here is how it looks;

Image

Image

and a short video of a few cycles;
http://www.youtube.com/watch?v=XMjJv09uG3c" onclick="window.open(this.href);return false;
The idea was not mine sadly, I first saw it at the following and have to give credit to blimp (third post from bottom);
http://www.rctankwarfare.co.uk/forums/v ... =33&t=6821" onclick="window.open(this.href);return false;

Trying to keep it short, I fitted extended shaft to final gear in gun, made cams to fit to the end (I calculated from a vid of 75mm firing recoil is around 7mm at scale). A sort of cradle running down each side from the pipe section which fits behind the rotor shield, with a square on each side which runs in the cradle. Added a spring to return gun to forward position and CAd the jump switch behind the left side of cradle. If anyone wants more info just ask away........ :D
Cheers, hope to have elevation done tomorrow
Last edited by MarkofZollo on Thu Jan 01, 2015 3:55 pm, edited 1 time in total.
There is always a fifth Sherman
User avatar
MarkofZollo
Corporal
Posts: 328
Joined: Mon Jul 05, 2010 6:16 pm
Location: Honiton, East Devon

Re: M4A1 75mm Sherman from BOB

Post by MarkofZollo »

Last few days have been a bit slow, I have been chopping down the elevation unit to work in the cramped turret and got it down to just 42mm tall, a perfect fit! :D
Following is a quick vid to show turret electrics working, elevation is a tad noisy though!
http://www.youtube.com/watch?v=QpFMDntnfMM" onclick="window.open(this.href);return false;
It looks a fair bit different too, I managed to fit the motor within the big cogs rear section (appologies for the mess!);

Image

Image

Image

The rod that sticks out simply runs in a channel on the side of the gun, enough room added for the recoil too. The idea again came from blimp, so I have to give him credit and say cheers for the good ideas mate!!
The following is my pretty poor attempt at altering to the low bustle, a rough cut around the edge of the bustle,

Image

trim the bottom where it meets the ring and re-stick;

Image

I still need to fill the gaps and join it all into the right look. I do prefer the look of the high bustle but seeing as all Grizzlys and probably a majority of M4A1s had low bustle turrets.
Here is how the tank looks before adding the detail bits, texturing and painting;

Image

I have also turned the front half of the barrel to try to replicate its increase in thickness, not sure what I can use to get the thickness up to mantle??
Any one have any ideas how to remove the track recoil short of electronics swap?
Last edited by MarkofZollo on Thu Jan 01, 2015 3:57 pm, edited 1 time in total.
There is always a fifth Sherman
Post Reply

Return to “Sherman”