Scratchbuilding C&Cs Mammoth Tank
Re: Upcoming scratchbuild - much advice needed!
I have a set of plastic tracks and plastic gearboxes if you want them dude.  . Looks like a good project. I am a gamer as well. Cut my teeth on red alert! But nowadays I play company of heroes. )))
Re: Upcoming scratchbuild - much advice needed!
Oops! I posted twice! My bad! What's ur name on coh???

Re: Upcoming scratchbuild - much advice needed!
That would be great if you no longer have a use for them dsv! I've no idea what my name is on CoH, I completed it sometime ago and haven't played since. Will let you know next time I drag it out of the cupboard though for sure  Is there good multiplayer or co-op fun to be had as I've only played through the single player campaigns.
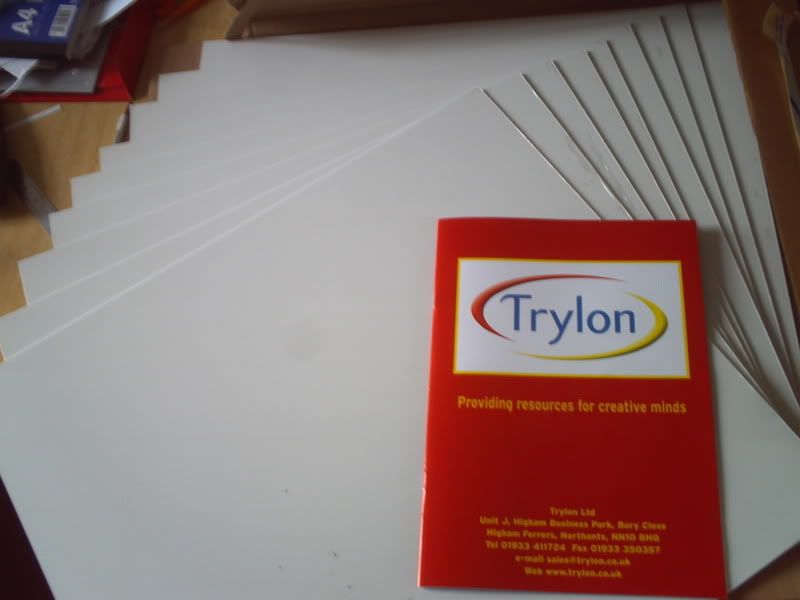
On a more on-topic note, my materials have arrived!!! And yes I really did just place the order yesterday so I'm amazed at the sub-24hour delivery time. Another reason to recommend Trylon I think, they also sent a great catalogue with my order which has all sorts of bits and pieces in. Very pleased to have found this company, I'm sure it'll be helpful in the future.
Further to having received the sheet, I've just this moment got back in from a trip to the model-shop (I flogged an old kit of the Graf Spee to a mate of mine so he wanted to go for paints anyway) I managed to pick up a decent 60cm metal rule, a slightly more hard core knife (though sadly not a stanley) and a super cheap but decent looking file.
I've already cut out the hull base but had almost 1mm of excess material in places so sanding would have been rather soul-destroying, even with coarse grit. I'm hoping the file will make short work of it and I can carry on building up tomorrow. I've taken a few pics of plans and comparisons that I'll upload when there are more of them, for now I've done very little though.
It turns out my maths is a little off as the sheet which I was absolutely certain would be long enough for single piece hull construction is about 1" too short. It's no major drama as it tapers toward the front anyway but it's the first oopsie of the project already and I've barely even picked up a pencil
Will aim to finish the hull tomorrow as it's not in too many pieces, I have a child to attend to though so he may have different ideas about how I spend my time! If I get that far (or further, who knows?!) I'll put up a few pics as the one piece I've cut so far already has a larger footprint than my tiger so it'll be nice to share the scale of this thing with you guys!
On a more on-topic note, my materials have arrived!!! And yes I really did just place the order yesterday so I'm amazed at the sub-24hour delivery time. Another reason to recommend Trylon I think, they also sent a great catalogue with my order which has all sorts of bits and pieces in. Very pleased to have found this company, I'm sure it'll be helpful in the future.
Further to having received the sheet, I've just this moment got back in from a trip to the model-shop (I flogged an old kit of the Graf Spee to a mate of mine so he wanted to go for paints anyway
I've already cut out the hull base but had almost 1mm of excess material in places so sanding would have been rather soul-destroying, even with coarse grit. I'm hoping the file will make short work of it and I can carry on building up tomorrow. I've taken a few pics of plans and comparisons that I'll upload when there are more of them, for now I've done very little though.
It turns out my maths is a little off as the sheet which I was absolutely certain would be long enough for single piece hull construction is about 1" too short. It's no major drama as it tapers toward the front anyway but it's the first oopsie of the project already and I've barely even picked up a pencil
Will aim to finish the hull tomorrow as it's not in too many pieces, I have a child to attend to though so he may have different ideas about how I spend my time! If I get that far (or further, who knows?!) I'll put up a few pics as the one piece I've cut so far already has a larger footprint than my tiger so it'll be nice to share the scale of this thing with you guys!
-
Von kraftwerk

- Lance Corporal
- Posts: 217
- Joined: Thu Mar 24, 2011 11:54 am
- Location: London England
Re: Upcoming scratchbuild - much advice needed!
Oh I see I thought your design was future 21st century,so plenty of welds then,maybe some reactive armour,maybe get weld ideas from Challenger 1/2Munty wrote:Thanks Von K! I'm not looking too far into the future as the original game that featured the Mammoth tank was set in the 90s and it's originally of Soviet design (fictionally of course) I think I can almost build the armour plating as if it's simply a later addition to the design as that's how it looks in some of the images I have. So I can have these armour plates quite literally bolted onto the original structure just for some additional protection. The carriages are heavily plated ant the top of the turret is too but most other places are without additional armour so this could quite easily be treated as a post-production development. I'll decide as I go but the welds are something I'll need to decide before beginning construction so I'll take a look into that tomorrow!
Re: Upcoming scratchbuild - much advice needed!
Thanks VK, just been checking out some pics this morning and actually the Challenger has a very slight resemblance to the Mammoth in parts (the large and angular turret being the main one) but I can't really find any detailed images or info on it. So I started looking to see where my nearest Tank Museum is, sadly it's quite some distance though!
So that begs the question, where are the rest? Surely the UK has more than one big tank museum? (I'm centrl south coast by the way and the nearest to me is http://www.tankmuseum.org/" onclick="window.open(this.href);return false; which is a long way west! Alternatively, if there isn't one closer, maybe there are some people here who fancy a bit of a roadtrip? I'd like to get a look around some of these tanks first hand so I can come away with thoughts on how to build and detail my own, additional knowledge from others is always good too!
Anyway, I'm going to get stuck into the hull build again now as I said I would! I've changed the plans slightly to allow for more space in the main compartment now though so the job is now larger than it was last night!!! Wish me luck and let me know if there's anyone out there who fancies a day out to the tank museum
-
Von kraftwerk
- Lance Corporal
- Posts: 217
- Joined: Thu Mar 24, 2011 11:54 am
- Location: London England
Re: Upcoming scratchbuild - much advice needed!
I afraid thats your best bet I get down there from London and I don't drive,I get a train that goes there via Southampton, Bournemouth,Poole.the best stop is Wool,and its a mile or so walk,the other choice is Duxford,but Bov is better for 1980's on,I,O,W,has a small museum,and they do a show each summer,not been yet,I go to most others,Beltring,Tankfest,etc,so treat your self,there are a few minor collections,I was lucky to get a view of the private Wheatcroft collection that featured on tank overhaul on TV referbing a Panther,its a shame that he does'nt display it to the public,some rare stuff,we can live in hope,D,Day museum nr Portsmouth has a few bits inc Canadian built Sherman Grizzly,and the east coast collection nr Cromer Suffolk,school of military technology at Shrivenham Wilts is sometimes open to public,and a few other army museums that have a little armour,
Re: Upcoming scratchbuild - much advice needed!
Cheers VK, you planning a visit anytime soon? I don't think I'll get much 'work' done if I go there with the family so if there are any forumites who fancy paying a visit we could make a day of it sometime. Take a train and get some beers after haha
Anyway enough of that, the build has commenced! And I must say, although I'm only about 60% of the way towards the goal I set myself today I'm really pleased with how it's going. The sheet I have is really good to work with, the new knife I got is good enough to allow me to score and break the material sometimes rather than hacksaw and file it to a finish. That's been very useful in a few situations already as it achieves a straighter and cleaner edge and also minimises loss of material (1mm from a hacksaw blade and another .5 from filing is bad if you haven't allowed for it before cutting a piece out) I LOVE my big metal ruler, even if it is tragically an inch or two shorter than the tank I'm building.
Everything is nice and straight and strong so far and I'll easily finish the hull tomorrow morning which is what I'd been hoping to do today. It's been pretty fiddly working on the hull sides due to the way in which I'm building it to create more internal space and use less material but I'm working up a good familiarity with the material already so should turn out ok as long as I keep concentrating
Anyway enough blabbing and let's see some pics. I'm afraid my camera is awful and some of these images are made even harder to make out due to bad lighting and the fact that every part of the build is currently flat white. Still, I'll try to use the better images I have as we certainly don't need all 38 of them I have in photobucket :p Here goes!
First off, here's the awesome package I mentioned from Trylon. The good stuff I could say about them should really prompt a sponsorship deal but it really was a very quick, cheap and pleasant buy so I'd recommend it to anyone
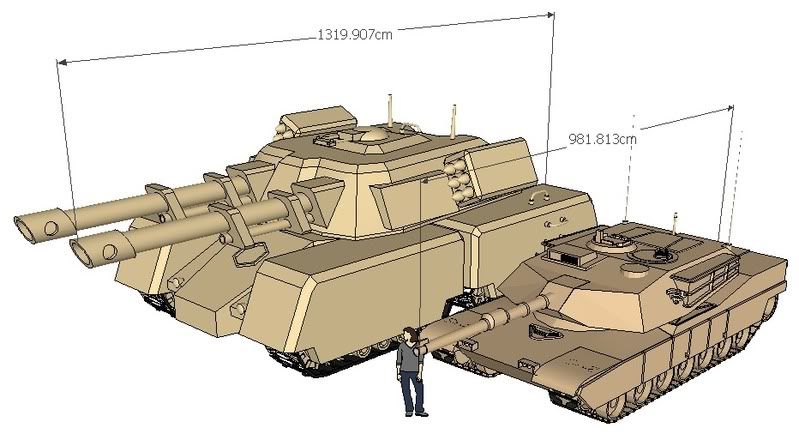
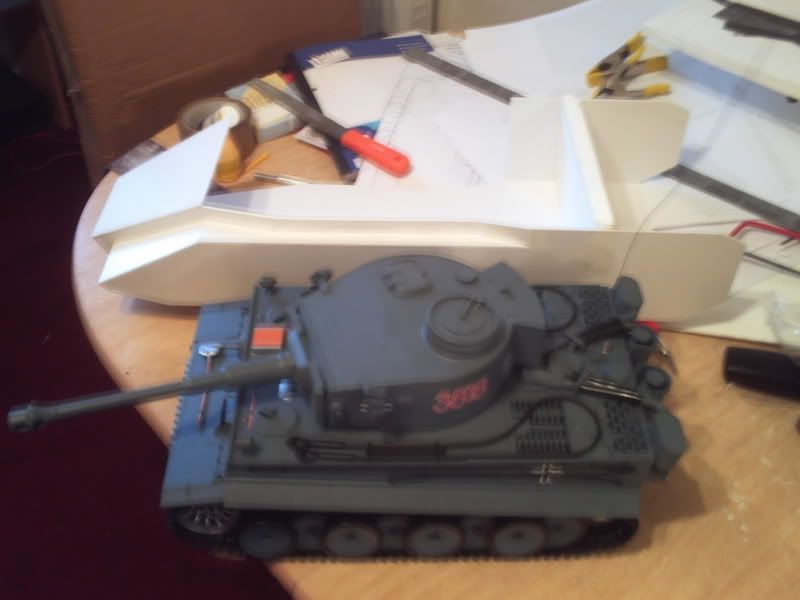
And as a quick reminder to what I'm attempting to build, here once again is the comparison shot of your friend the Abrams with my friend the Mammoth!
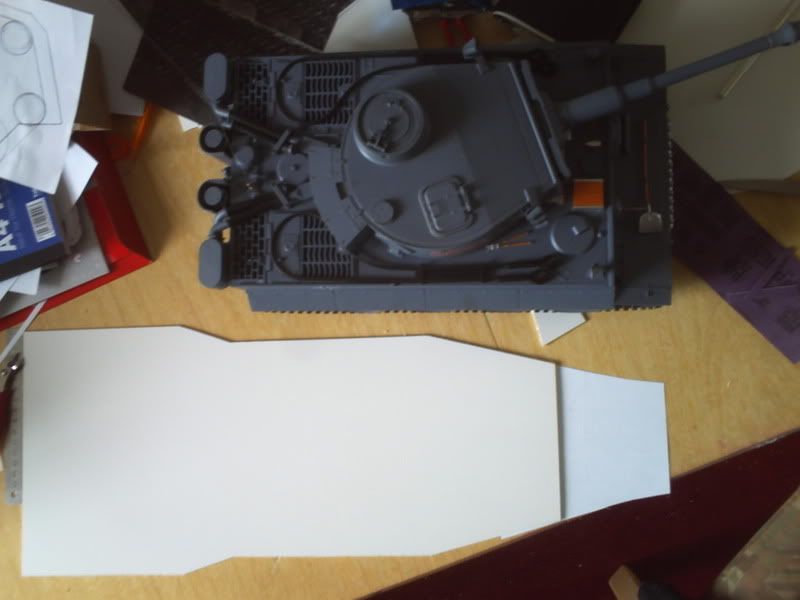
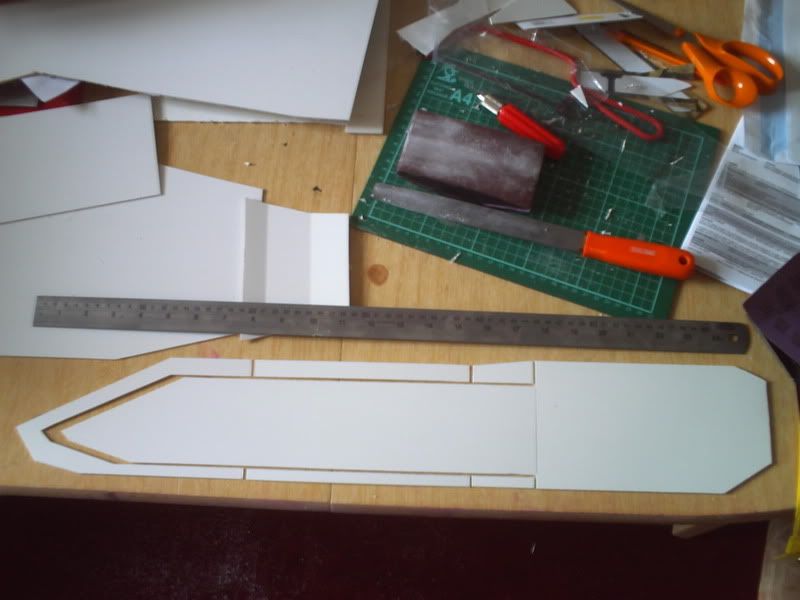
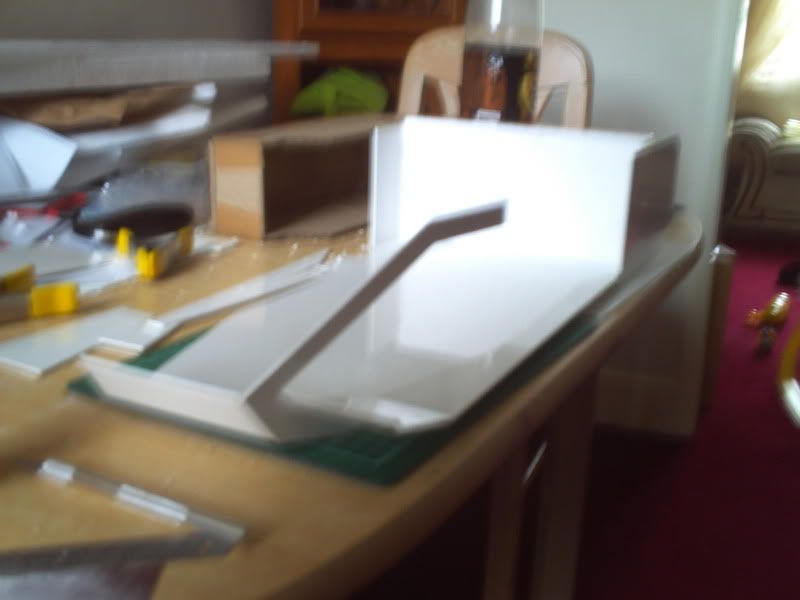
This build is essentially 6 major components, the hull, the turret and four track carriages. I'm going to tackle the hull first, then the tracks before finishing off with the turret and moving onto hardware and detailing. So the first thing to bring to life is the hull and where better to start than the bottom! I actually cut out this first piece yesterday but it turned out the sheet I'd ordered was 21mm too short to make it in one piece... Seriously, how gutted am I that my maths sucks this week?! Anyway, there's a piece of paper in this shot to show the full hull length in comparison to my Tiger of the same scale.
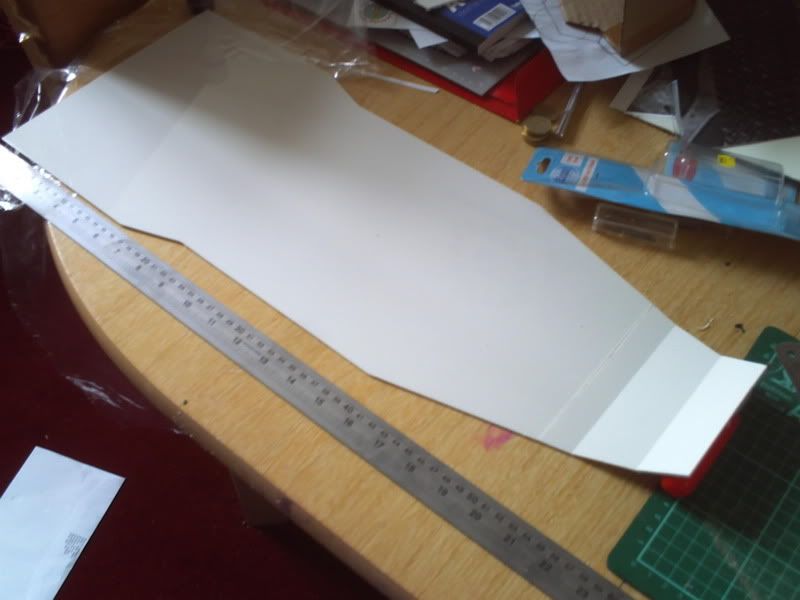
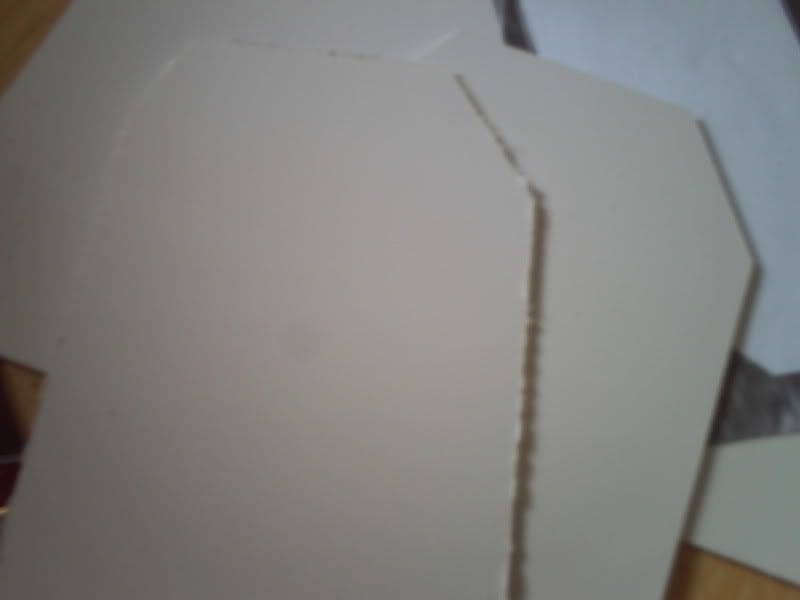
And the first thing I did this morning was to complete the remaining pieces for the hull bottom, cut from a single piece of material and scored in this image (though later they're separated to be fixed correctly in place)
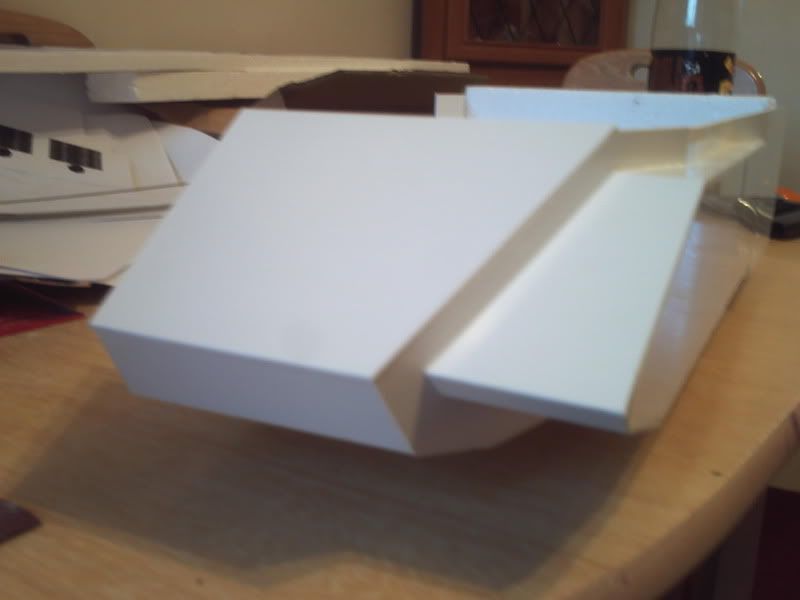
Once the fairly easy but cumbersome bottom piece was finished I sat back for a while and pondered where to start with the sides. My initial plan was to create a solid, boxy shape for the hull and then build onto that but as you'll shortly see I've decided to incorporate some additional construction into the main hull itself to allow for more interior space (and I'm glad I did!)
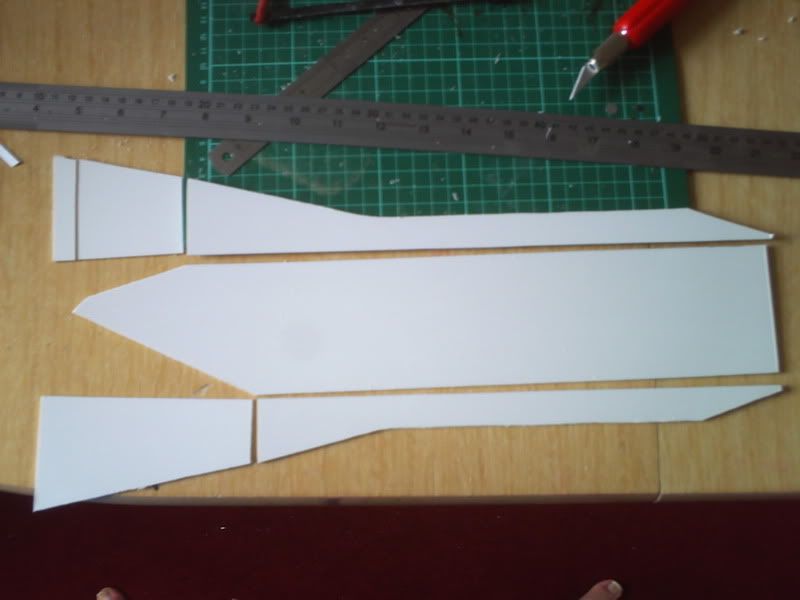
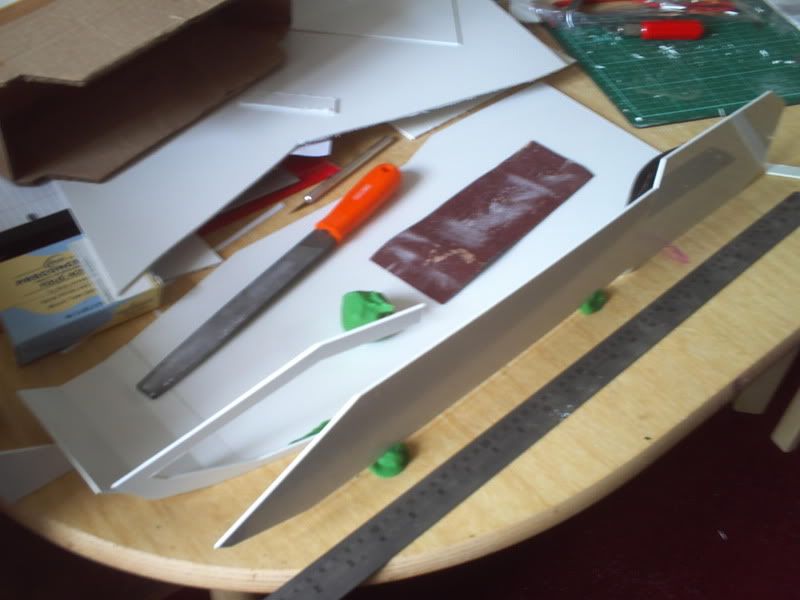
It's very hard to explain exactly what I was going to do and then what changed en-route to arrive at what I did do but this image helps a little (don't expect to know what it is but use it for reference!)
See the large squarish bit to the right and the long narrow central piece on the left should ideally be one long piece. Sadly the size of material I'm using meant that wasn't possible, but unlike my hull bottom this was not an oversight on my part. It was simply affected by my changing of the plans!
The next few images will show the overall construction but put simply, the thin 'frame' pieces in the above picture form the wall of the main hull compartment and so follow the shape of the floor I've already cut. I was initially planning to use a solid piece here (ie not thin frames but full height pieces without the long central piece) The long central piece would then be constructed on top of the inner hull wall, providing an outer hull wall onto which the tracks will late be mounted.
As a result of my plan change there will be much more space inside the hull to facilitate some funky happenings with my inevitably unorthodox drive system. It also saves a lot of material as the pieces shown in the above image were cut as you see them - except the rightmost piece which was made on another sheet. This pair are shown below, one having been filed and sanded to shape, the other fresh from the hacksaw.
Next up I cut the pieces that would connect the inner and outer hull walls, which can be seen here upside down! The long piece is the same one you just saw, I only cut those parts for the left side as they were pretty fiddly to get right so I have the right side still to do!
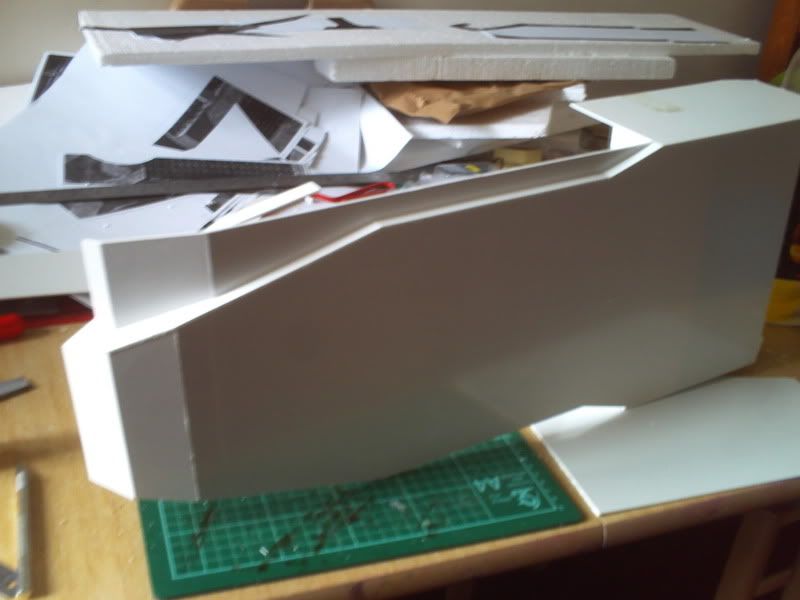
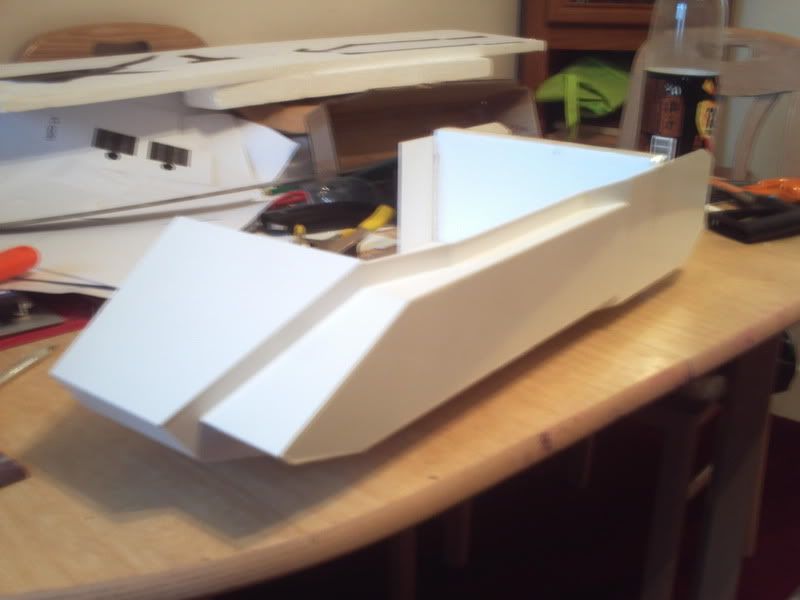
I then got a bit lax at tanking pictures but you don't miss anything fun, it's too early on for that stuff to be happening yet! This is an image from the rear with the two large sides fitted and a block of foam to help hold the shape while I build up the left side (in fact that's the only reason I fitted the piece to the right side) You can probably almost make out some more parts on the let side but it's not easy in this picture.
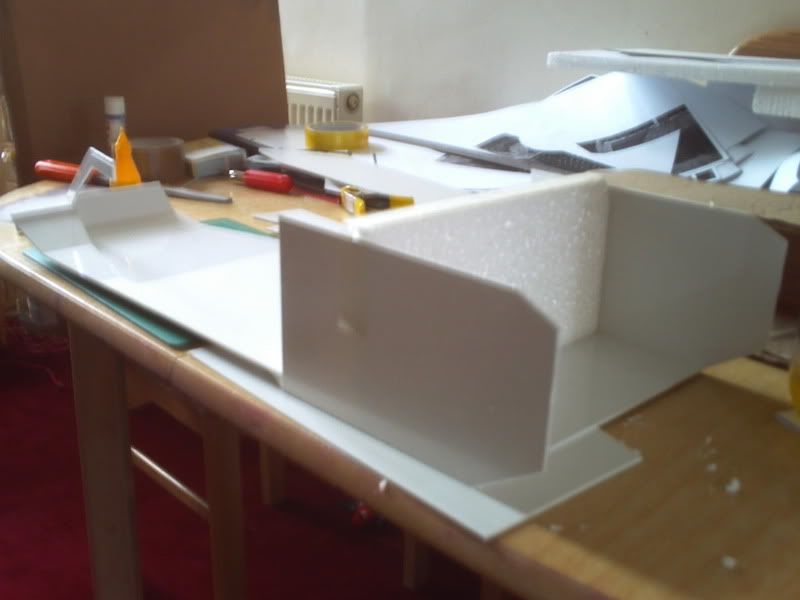
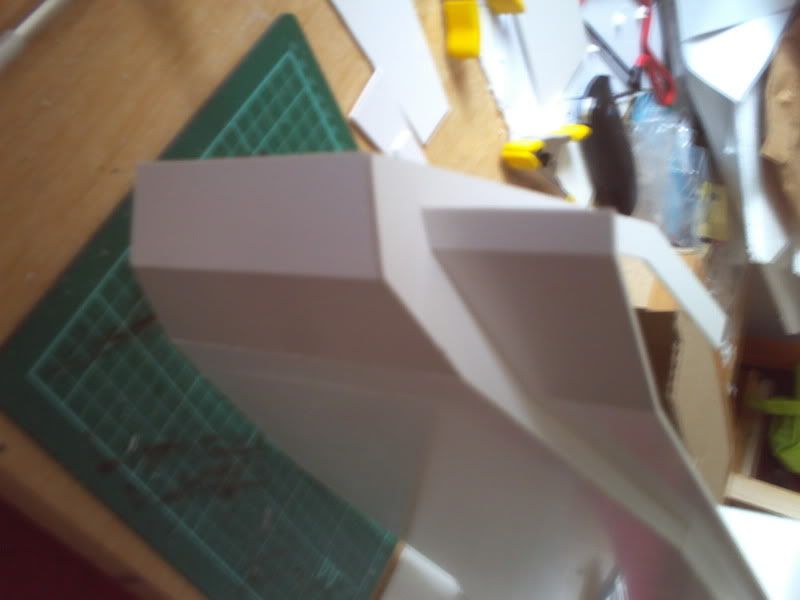
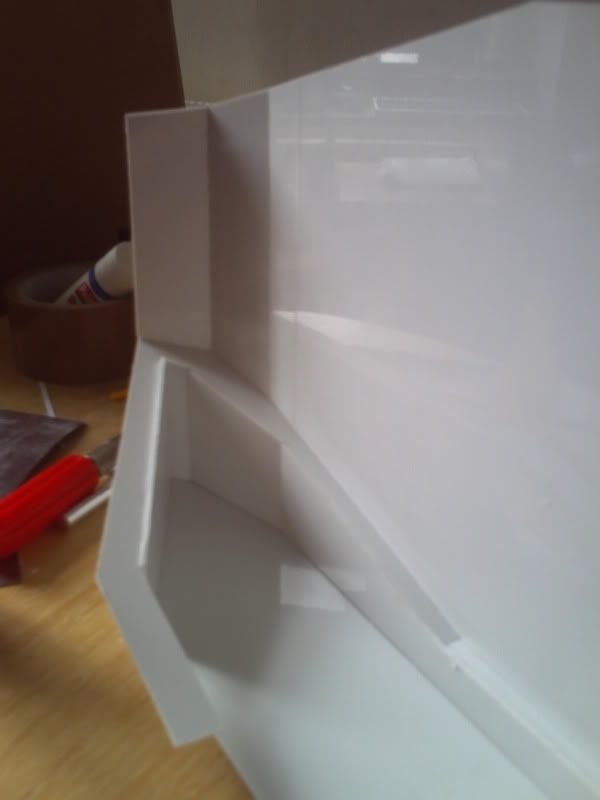
This next picture is fuzzier but strangely a little clearer due to it's angle! You can see the angled front of the hull has been fitted here and the large C-shaped piece is also in place. Invisible due to having done too much without taking pictures are the 2 long narrow pieces in the above picture which are now underneath the long horizontal running from front to back. There are also 2 more pieces fitted in front of that which are blurry but visible!
It's worth noting I've already made a bit of a blunder by this point but I don't realise it yet... The joins in the hull pieces are all tapered so that each one is a perfect point. Similarly, the ones in the sort of wing-bit I'm building now are also tapered. The central piece which will fill this hole shortly has been cut 2mm smaller than it needs to be so it will fit inside the pieces you see now. This was deliberate as it's easier and noone will ever see this part!
What I didn't think about was how I'd attached the sides themselves to the main body. Or rather I did think about it but not very well... When I first attached the big bits at the back I wondered how to do it and I figured 'sod it, onto the sides, 4mm more width won't make a difference!' Now that's fine as the join's underneath, noone will see it, blah blah blah. But I didn't think to change this when I fitted the front part of the hull which is visible so that has some nastly joins either side of it where it's sandwiched between the two hull sides.
Luckily I noticed this just before I cut the front of the top piece (I wanted to put that on temporarily to give a better idea of shape before I posted progress) so I decided I'll cut the rest of the top pieces 4mm wider, give the edges a 45degree taper and file the same angle into the sides of the hull. That way, the only embarrassing corners will be the ones on the front. I can live with that!
Anyway enough of my cock-ups, I don't want to dwell on that I'm running out of order now but I just found an image of the test fit before anything was glued. Will post it up because I can, it shows the front still scored but not cut and none of the horizontals are in place so you can see the gap that needs filling between the two walls.
Finally a good picture to give an idea of the bits you can't see! This is the bottom of the hull and you can just about make out the long narrow pieces I mentioned earlier (or at least where they are and what their purpose is...) Yo ucan also make out the 3 horizontals that are currently in place and even make out what I mean about the sandwiching of the front pieces by the sides (or side, will be a sandwich when the other one is on...
Another similar shot of the front just because I have it and I can. Doesn't show anything new but may help those who are lost to catch up again
I had a bit of a nightmare getting the point at the front of this side nice and sharp due to some intolerances in my measurements. Took a lot of very careful cutting, filing and sanding to get the first of the top pieces to fit (on the left of this pic) and then I was able to attach the wall. You can see from this image what I mean by having gained some extra usable space in the hull. In the original plan this wall would be solid and the space inside the wings would be useless.
The last 3 pieces on this side went in fairly nicely after this, each one needing just a little final trimming to fit perfectly with it's neighbours. The top cover on the nose of the tank in these next few shots is only temporary and it was at this point (before cutting it out thankfully!) that I realised my error with the wall joints. Anyway that'll come off tomorrow and be properly fitted along with the right side and remaining hull top.
The hull is about an inch off the table here, held up by some rolls of sellotape to replicate it's ground clearance when finished, albeit very roughly...
Took a few comparsion shots with the Tiger again now just to finish off for the night. Here's one showing length though of course we're missing the barrel and the tracks extend a little further than the hull at both the front and back.
Anyway that's it for now, thanks to anyone who chooses to watch this build, I'll try not to disappoint! Also thanks to those who have already helped with advice and in advance to those who are just about to! Tomorrow's job it to build up the right side of the hull and finish the top to complete the first component of the build. I'm yet to decide how to retain access to the interior of this hull as that'll clearly be vital if I do plan to RC it and such.
To be honest, with one side already attached all I can really do is leave the top removable, maybe rely on a turret held in by weight (there'll be enough of it!) and then hide some securing screws underneath that so there would be nothing unpleasant visible when fully assembled. I'll sleep on it and show you the finished hull tomorrow I hope!
It's too early for anyone to tell me I'm doing something great or awful (I hope!) but when the time comes that you think either is true please tell me. If you think I can do something differently or better then let me know and if you like what I'm doing then ditto. I'll be happy for any feedback so let me have it and thanks for looking
Anyway enough of that, the build has commenced! And I must say, although I'm only about 60% of the way towards the goal I set myself today I'm really pleased with how it's going. The sheet I have is really good to work with, the new knife I got is good enough to allow me to score and break the material sometimes rather than hacksaw and file it to a finish. That's been very useful in a few situations already as it achieves a straighter and cleaner edge and also minimises loss of material (1mm from a hacksaw blade and another .5 from filing is bad if you haven't allowed for it before cutting a piece out
Everything is nice and straight and strong so far and I'll easily finish the hull tomorrow morning which is what I'd been hoping to do today. It's been pretty fiddly working on the hull sides due to the way in which I'm building it to create more internal space and use less material but I'm working up a good familiarity with the material already so should turn out ok as long as I keep concentrating
Anyway enough blabbing and let's see some pics. I'm afraid my camera is awful and some of these images are made even harder to make out due to bad lighting and the fact that every part of the build is currently flat white. Still, I'll try to use the better images I have as we certainly don't need all 38 of them I have in photobucket :p Here goes!
First off, here's the awesome package I mentioned from Trylon. The good stuff I could say about them should really prompt a sponsorship deal but it really was a very quick, cheap and pleasant buy so I'd recommend it to anyone
And as a quick reminder to what I'm attempting to build, here once again is the comparison shot of your friend the Abrams with my friend the Mammoth!
This build is essentially 6 major components, the hull, the turret and four track carriages. I'm going to tackle the hull first, then the tracks before finishing off with the turret and moving onto hardware and detailing. So the first thing to bring to life is the hull and where better to start than the bottom! I actually cut out this first piece yesterday but it turned out the sheet I'd ordered was 21mm too short to make it in one piece... Seriously, how gutted am I that my maths sucks this week?! Anyway, there's a piece of paper in this shot to show the full hull length in comparison to my Tiger of the same scale.
And the first thing I did this morning was to complete the remaining pieces for the hull bottom, cut from a single piece of material and scored in this image (though later they're separated to be fixed correctly in place)
Once the fairly easy but cumbersome bottom piece was finished I sat back for a while and pondered where to start with the sides. My initial plan was to create a solid, boxy shape for the hull and then build onto that but as you'll shortly see I've decided to incorporate some additional construction into the main hull itself to allow for more interior space (and I'm glad I did!)
It's very hard to explain exactly what I was going to do and then what changed en-route to arrive at what I did do but this image helps a little (don't expect to know what it is but use it for reference!)
See the large squarish bit to the right and the long narrow central piece on the left should ideally be one long piece. Sadly the size of material I'm using meant that wasn't possible, but unlike my hull bottom this was not an oversight on my part. It was simply affected by my changing of the plans!
The next few images will show the overall construction but put simply, the thin 'frame' pieces in the above picture form the wall of the main hull compartment and so follow the shape of the floor I've already cut. I was initially planning to use a solid piece here (ie not thin frames but full height pieces without the long central piece) The long central piece would then be constructed on top of the inner hull wall, providing an outer hull wall onto which the tracks will late be mounted.
As a result of my plan change there will be much more space inside the hull to facilitate some funky happenings with my inevitably unorthodox drive system. It also saves a lot of material as the pieces shown in the above image were cut as you see them - except the rightmost piece which was made on another sheet. This pair are shown below, one having been filed and sanded to shape, the other fresh from the hacksaw.
Next up I cut the pieces that would connect the inner and outer hull walls, which can be seen here upside down! The long piece is the same one you just saw, I only cut those parts for the left side as they were pretty fiddly to get right so I have the right side still to do!
I then got a bit lax at tanking pictures but you don't miss anything fun, it's too early on for that stuff to be happening yet! This is an image from the rear with the two large sides fitted and a block of foam to help hold the shape while I build up the left side (in fact that's the only reason I fitted the piece to the right side) You can probably almost make out some more parts on the let side but it's not easy in this picture.
This next picture is fuzzier but strangely a little clearer due to it's angle! You can see the angled front of the hull has been fitted here and the large C-shaped piece is also in place. Invisible due to having done too much without taking pictures are the 2 long narrow pieces in the above picture which are now underneath the long horizontal running from front to back. There are also 2 more pieces fitted in front of that which are blurry but visible!
It's worth noting I've already made a bit of a blunder by this point but I don't realise it yet... The joins in the hull pieces are all tapered so that each one is a perfect point. Similarly, the ones in the sort of wing-bit I'm building now are also tapered. The central piece which will fill this hole shortly has been cut 2mm smaller than it needs to be so it will fit inside the pieces you see now. This was deliberate as it's easier and noone will ever see this part!
What I didn't think about was how I'd attached the sides themselves to the main body. Or rather I did think about it but not very well... When I first attached the big bits at the back I wondered how to do it and I figured 'sod it, onto the sides, 4mm more width won't make a difference!' Now that's fine as the join's underneath, noone will see it, blah blah blah. But I didn't think to change this when I fitted the front part of the hull which is visible so that has some nastly joins either side of it where it's sandwiched between the two hull sides.
Luckily I noticed this just before I cut the front of the top piece (I wanted to put that on temporarily to give a better idea of shape before I posted progress) so I decided I'll cut the rest of the top pieces 4mm wider, give the edges a 45degree taper and file the same angle into the sides of the hull. That way, the only embarrassing corners will be the ones on the front. I can live with that!
Anyway enough of my cock-ups, I don't want to dwell on that
Finally a good picture to give an idea of the bits you can't see! This is the bottom of the hull and you can just about make out the long narrow pieces I mentioned earlier (or at least where they are and what their purpose is...) Yo ucan also make out the 3 horizontals that are currently in place and even make out what I mean about the sandwiching of the front pieces by the sides (or side, will be a sandwich when the other one is on...
Another similar shot of the front just because I have it and I can. Doesn't show anything new but may help those who are lost to catch up again
I had a bit of a nightmare getting the point at the front of this side nice and sharp due to some intolerances in my measurements. Took a lot of very careful cutting, filing and sanding to get the first of the top pieces to fit (on the left of this pic) and then I was able to attach the wall. You can see from this image what I mean by having gained some extra usable space in the hull. In the original plan this wall would be solid and the space inside the wings would be useless.
The last 3 pieces on this side went in fairly nicely after this, each one needing just a little final trimming to fit perfectly with it's neighbours. The top cover on the nose of the tank in these next few shots is only temporary and it was at this point (before cutting it out thankfully!) that I realised my error with the wall joints. Anyway that'll come off tomorrow and be properly fitted along with the right side and remaining hull top.
The hull is about an inch off the table here, held up by some rolls of sellotape to replicate it's ground clearance when finished, albeit very roughly...
Took a few comparsion shots with the Tiger again now just to finish off for the night. Here's one showing length though of course we're missing the barrel and the tracks extend a little further than the hull at both the front and back.
Anyway that's it for now, thanks to anyone who chooses to watch this build, I'll try not to disappoint! Also thanks to those who have already helped with advice and in advance to those who are just about to! Tomorrow's job it to build up the right side of the hull and finish the top to complete the first component of the build. I'm yet to decide how to retain access to the interior of this hull as that'll clearly be vital if I do plan to RC it and such.
To be honest, with one side already attached all I can really do is leave the top removable, maybe rely on a turret held in by weight (there'll be enough of it!) and then hide some securing screws underneath that so there would be nothing unpleasant visible when fully assembled. I'll sleep on it and show you the finished hull tomorrow I hope!
It's too early for anyone to tell me I'm doing something great or awful (I hope!) but when the time comes that you think either is true please tell me. If you think I can do something differently or better then let me know and if you like what I'm doing then ditto. I'll be happy for any feedback so let me have it and thanks for looking
Last edited by Munty on Mon Apr 11, 2011 5:06 pm, edited 1 time in total.
Re: Scratchbuilding C&Cs Mammoth Tank
Hi Munty;
PM sent about an idea for your trracks. -Mike
PM sent about an idea for your trracks. -Mike
Re: Scratchbuilding C&Cs Mammoth Tank
Cheers Mike, recieved and responded, thanks for your support
-
blimp

- Sergeant
- Posts: 738
- Joined: Sat Dec 11, 2010 12:29 am
- Location: Watford , NW Londonistan . U.K.
Re: Scratchbuilding C&Cs Mammoth Tank
Great stuff Munty! - just one thing though , are you going to reinforce it ? - some wood / plastic / metal strip or angle at the inner corners will add a lot more strength and prevent the joints splitting without compromising space too much .
to the bouncy room ! Yay !
