Tiger Ebbey .....

Post Reply
User avatar
majordisastor
Lance Corporal
Posts: 208
Joined: Fri Apr 23, 2010 5:24 pm
Location: Llantrisant, South Wales

Tiger Ebbey .....

Post by majordisastor »

Hi folks thought it was about time to publish my Tamiya Tiger 1 build so far for you all...

It seems ages since I first posted my 'rock steady hulls? ' question to get some ideas..

But first a bit of background on the project. I originally started out to alter a Heng Long Tiger 1 – bought a hull and Turret from e-bay and a Tamiya sprue tree for added detail.

I then decided to put a Tamiya turret onto the Heng Long top, a few more sprue trees later I then decided to go the whole hog and build a full option Tiger 1 bit by bit….

Not for me the joy of watching a delivery man struggle up the drive with a big box – more of a what’s come through the letterbox today ?

Madness?? Well you have to have some fun!!

Anyway this is the starting point.

First – a repair !!

Image

Nasty – but bought with a generous discount offered from the E-Bay seller ..

That led to me think how I could reinforce the whole lower hull – because out of the box I felt the whole thing was flexing worse than a fat Nun on a bicycle.

I put a full length sheet of alloy sheet underneath the hull floor to strengthen the pan....

Image

Stuck down and bolted with the Schmo bolt kit...

Image

Next was a rear mounted plate to add a bit of beef to the rear end …

Image


A bit of extra metal and parts added to the front end to compensate for the weakened hull repair ….


Image

The front glacis plate was not a happy fit – bulged out or up every time I did a test fitting...reminded me of balloon tying that clowns do...not good !!

So scrap off cuts of alloy was glued on...and job done!!


Image


I put another plate on the front here to cover the step up from the bottom plate to the original lower hull line.

Image

And of course leaving the driver with a clear view !!!!

Image

Image

So there we are so far .. Plan is to build a mid/late Tiger with steel wheels from a Tamiya King Tiger . So far Tiger Ebbey weighs in at 2lb…

Andy
It always gets darkest before it goes completley black......
User avatar
majordisastor
Lance Corporal
Posts: 208
Joined: Fri Apr 23, 2010 5:24 pm
Location: Llantrisant, South Wales

Re: Tiger Ebbey .....

Post by majordisastor »

Last years Swindon meet was very timely for me – it enabled me to rethink a couple directions that will now appear in this update …Thanks to Rob( FV432) and Paul (SEPTON) for their help – much appreciated - thanks guys.

Image


Gearing down

I decided to go with Tamiya gearboxes Thanks to Stewart (BREL) for his advice – I was going to get the schmo geardown kits –but –got these instead …

Image

They are Tuborix RC plane metal gearbox sets from e-bay – much cheaper – under £30.00 for a pair. Takes the pain out of the gain.

Image

They do need the attention of a lathe though to reduce down the output shaft though..

Image


And here is one set in place – note the spacers to hold the motors – standard Tamiya Motors being at the moment.

Image

Sorry - as I write this I can hear a strange distant knocking……..more on that later ...

So now - Inner Strength.

Image

Image

I have fitted U shape alloy lengths along the sides of the lower hull for increased strength and to stop any flexing –cross braced at the front and rear and stuck together with JB Weld…

Here you can see Daryl Turners rear suspension upgrade fitted in place with some rear counterweights – (old door handle shafts). Standard out of the box suspension in place now.

Image


Up at the drivers end – more of the same…including another hefty plate under the glacis plate.

Image

That distant knocking noise is getting louder…


All in all the lower hull has turned Tiger Ebbey into a tough cookie – you can hold the entire tank up by holding its flimsy engine grill now..

Image
It always gets darkest before it goes completley black......
User avatar
majordisastor
Lance Corporal
Posts: 208
Joined: Fri Apr 23, 2010 5:24 pm
Location: Llantrisant, South Wales

Re: Tiger Ebbey .....

Post by majordisastor »

FAIL !!!

I had an idea to reinforce the upper hull around the turret with some more alloy plate- this worked well at the rear of the tank ..

Image

Image

Image

However once crudely cut and fitted – I might as well have employed the chuckle brothers to do this – I found it added hardly any advantage to the hull and would probably have caused some fitting problems further down the line.

So – file that under nice idea –but…….

Outside- I have started to stick bits on at last instead of shaving them off. There were a host of changes to the Tiger throughout its production run as well as many battlefield and unit alterations to further keep you on your toes ..

Image


Here is the uprated engine mod – it’s the same as the other two rear tiger engine plates – but I cut it off my old 1/24 scale Tiger 1 kit.

Image

I reworked the one remaining front mudguard to add a bit of wear and tear..

Image

The thicker turret armour gives the game away – Ebbey’s going to be a late version..

Image

Also – sound of heavy knocking again ! - I have added a Heng Long turret mech to increase Ebbeys durability on the battle field.

Image

Solved !!! I have found the source of the annoying knocking noise I mentioned earlier – It’s the sound of Tamiya Engineers banging their heads on their tables …….

Image

Without any gearboxes Tiger Ebbey is weighing in at a healthy sub 4lb – so she will soon turn into a heavy girlie – the sort that will crush your crisps as she leans over the bar
!!!

Andy
Last edited by majordisastor on Tue Apr 05, 2011 9:21 pm, edited 1 time in total.
It always gets darkest before it goes completley black......
User avatar
sparks
Warrant Officer 2nd Class
Posts: 1152
Joined: Thu Sep 23, 2010 10:57 pm

Re: Tiger Ebbey .....

Post by sparks »

Nice work Andy :clap: Keep the pics coming.
Hey man....I just ride 'em, I dunno what makes 'em work.
Woof woof woof !
User avatar
Saxondog
Captain
Posts: 4293
Joined: Mon Apr 27, 2009 11:06 pm
Location: Tennessee-U.S.A.

Re: Tiger Ebbey .....

Post by Saxondog »

Nice mods, are you trying for a target weight? I'm @ 20.4 lbs. I have been up to 24lb but that was pushing it a bit. One idea I found a great way to put weight where it works best over the tracks,stick on wheel weights,1oz. size and 1/2 oz.size.These can be placed over the tracks and adds a good 1lb,but directly over the tracks.

Your use of metal for strength is clever,and you seem to of done a fine job. The back plate is interesting addition and looks good as well. Will be interesting to follow your progress. Saxondog
User avatar
majordisastor
Lance Corporal
Posts: 208
Joined: Fri Apr 23, 2010 5:24 pm
Location: Llantrisant, South Wales

Re: Tiger Ebbey .....

Post by majordisastor »

Hi Sax,
No targert weight set really - just trying to iron out a few things that I felt were 'not right '.
I remember coming across your tiger 1 a while back with its added tyre weights - It was one of the things that sent me down the road to adding to the Tamiya design to bolster it up.

Tiger Ebbey is currently a lot more advanced than the above posts - This morning I have been reworking the whole turret rotation mech before having to break off for work.

The ultimate goal is to have a Tiger that can cut its own way across the battlefield - so I have tried to put function above looks - if anyone is expecting to see carefully crafted Aber sets on this tank .......please look away now !! :D

Andy
It always gets darkest before it goes completley black......
User avatar
majordisastor
Lance Corporal
Posts: 208
Joined: Fri Apr 23, 2010 5:24 pm
Location: Llantrisant, South Wales

Re: Tiger Ebbey .....

Post by majordisastor »

Any one remember the Sven Hassel book the ' Wheels of Terror '

Well this is my shorter version......

Image

Next fun part – buiding the wheels up out of this lot – If I cannot get it to work with all these I will have to superglue a roller skate onto the bottom instead !!

Image

Other fun to come ..

Sadly there is always a cost to all this kitbashing….

Image

Tiger leftovers anyone???


Well here we are so far - I am getting ready to deal with three cock ups I have since added to Tiger Ebbey - watch this space....

Andy
It always gets darkest before it goes completley black......
User avatar
majordisastor
Lance Corporal
Posts: 208
Joined: Fri Apr 23, 2010 5:24 pm
Location: Llantrisant, South Wales

Re: Tiger Ebbey .....

Post by majordisastor »

Right then - here is the plan for Ebbey,s wheels – and what I am aiming for ......


Image

but before I lurch into my account here is a bit of history from somebody who was responsible for the whole later wheel issue.

Robert A Pertuss. Dipl.ING.HSK 1903 – 1986.

“ I may introduce myself as, Builder of Tiger and Konigstiger.
I would like to mention the use of the steel rings instead of the rubber wheels of the Panzer .

The military and we found that the solid tyres made of rubber which rolled against the tracks of the Panzer wore out quickly when the vehicle turned on the spot, also in winter weather , and when sand ,debris,rocks or compressed snow made the tracks too tight. The result was increased wear and tear. It was therefore advisable, or although in the field not always possible, to make gradual turns instead of turns on the spot to avoid causing debris to be scooped up onto the bottom sections of the tracks.

One day Herr Kromer , the official expert at the Munitions Ministry, reported happily that the Russians were now at the end of their material supply , they don’t have any more rubber , their T- 34’s now have wheels that run steel on steel, while we still have rubber! He told us that such a T-34 was captured completely intact and could be inspected . This booty tank could also be test driven , because it was in operating condition. I accepted his offer and found this was true, steel was running on steel.

But why? I had one wheel removed and what did we find? The steel band had a T –shaped cross section , the vertical part had grooves on both sides in which rubber rings were pressed , whose outer sides were machined to match the grooves of the two wheel -cups which formed the body of the wheel itself. But why ? So we began test drive . after about one week we found the tracks now lasted twice as long as the ones with rubber on steel . Idid not understand why, but a repeat test gave us the same results . Of course we did not know how much the T-34 had already been driven on the Eastern Front.

It appeared advantageous to just copy this design. Our Purchasing Department was able to procure within 2-3 weeks the same type of T-rings. Now one of the most wicked teething problems of the Tiger was eliminated. We were really not worried that this would cause the Panzer to be more Noisy. The engine and tracks made so much noise already that it didn’t matter if a little more noise was added.”

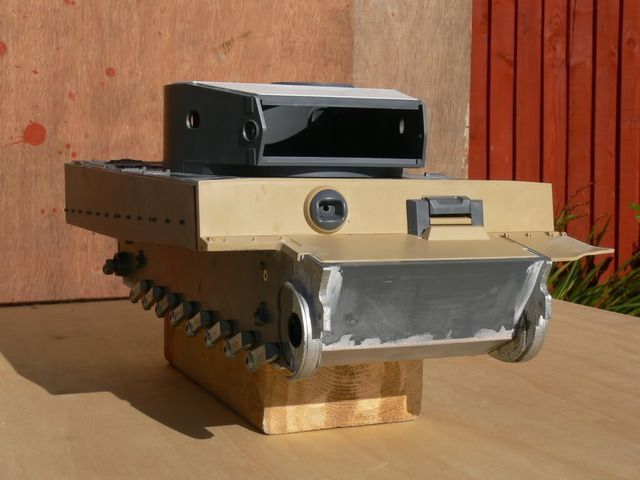
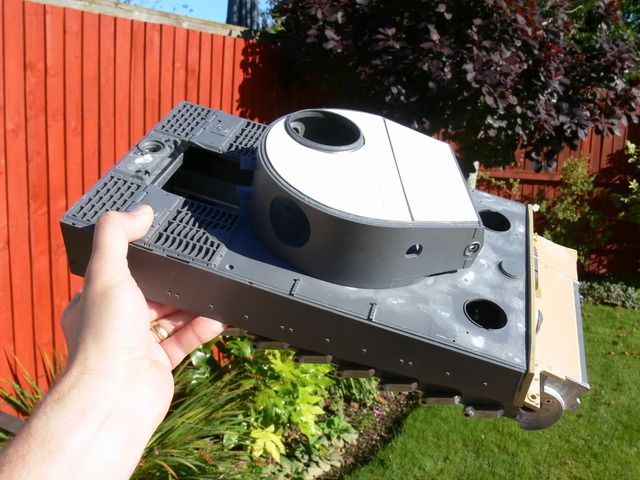
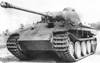
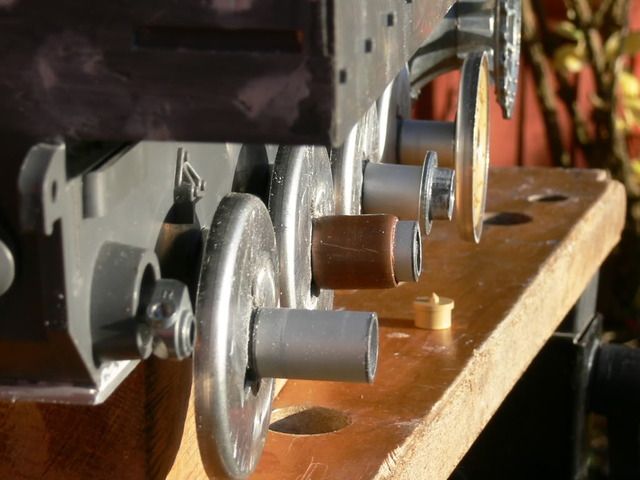
So there we are, back into todays world and back to Ebbey. I wanted to build her with later wheels – just because I thought the late series Tigers looked a lot more sinister than their earlier sisters.
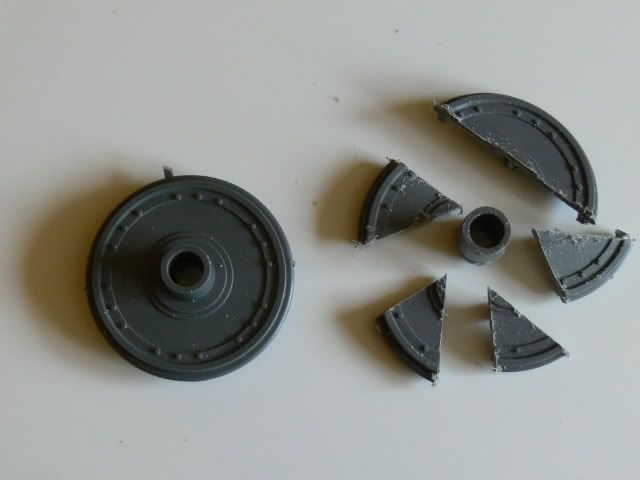
I bought a sprue of King Tiger wheels to see if there was a way of converting them. At that point I did not take into consideration the difference in wheel hubs between the two tanks .

Delving into Internet land I discovered this link on the Southeast Armour Division website
Link here http://www.sead.us/technology5.html" onclick="window.open(this.href);return false;

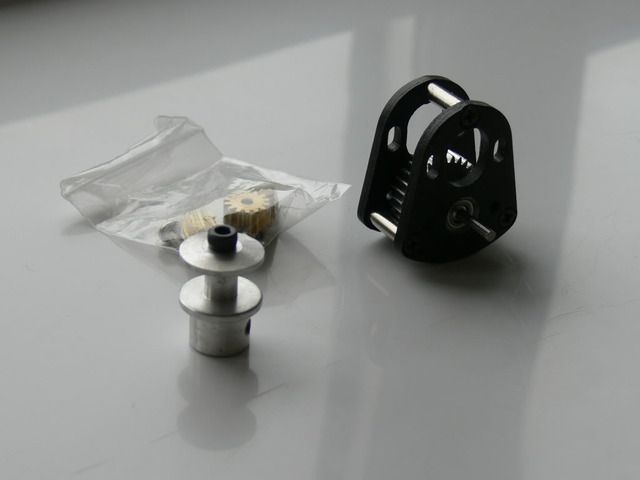
Great - I thought and bought all the bits I needed + a couple of tools.
However – after studying the planned conversion I just felt there were too many cuts and potential weaknesss to this version , after all I wanted Ebbey to be a heavy tank and while charging around flattening small boys and Shermans I did not want the battle to be spoiled by wheel / suspension failure – A view held no doubt by every real Tiger crewman as the actual tank was prone to sudden surprises – most of the having unpleasant ends for most parties. And it avoided drilling out the suspension arms to accommodate the thicker King Tiger shafts as well.

So I was stuck with either a conversion that I was not to sure about – or a adaptation of the Asiatam late wheel s set – As fitted to Robs (FV432,s) Tiger or Pauls (Septon) superb Tiger 222 with its special metal wheels for the Tamiya – a great set of rollers – but a pricy for me considering that I had other bits to buy as well – basically everything - and I had a full Tamiya King Tiger wheel set with nothing to put them onto – apart from a shelf.

So by chance I found another conversion – this time at the Front Range Armour Group

Link here http://www.fragarmor.org/Advanced%20Hints%204.htm" onclick="window.open(this.href);return false;

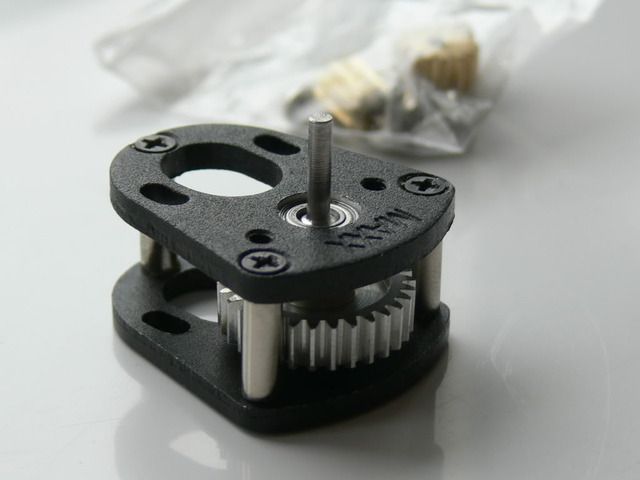
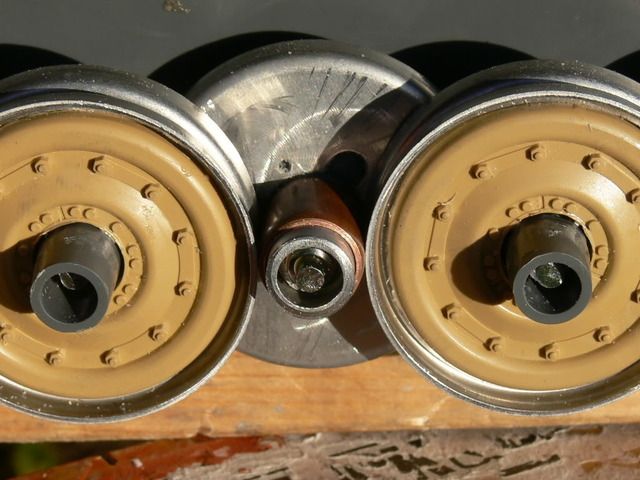
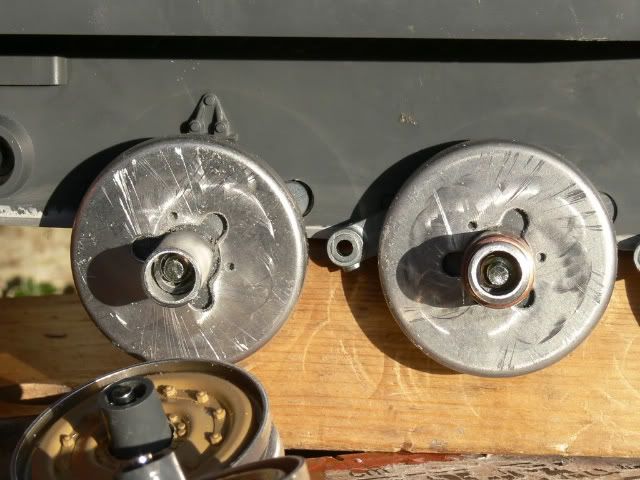
Now then this seemed to make more sense to me – it used most of the orginal model wheel assembly- great I thought . The plans were for modding an existing wheel assembly – take note!!
So some more wheels and bits later – I could begin.

Still with me? Don’t forget to take a screenbreak as you trudge through this one !!

Andy
It always gets darkest before it goes completley black......
User avatar
Nic.H
Corporal
Posts: 270
Joined: Sun May 17, 2009 7:30 am
Location: South Wales

Re: Tiger Ebbey .....

Post by Nic.H »

Hi..good build fella...I am into detail

Nic...

Once the build I am doing is finished, I will concentrate back on my tiger....its only heng long though..but would like to chop and change like yourself...on a heng long, zimmerit covers all sorts of ill's :{ ..."well, dont look to close at mine!"
User avatar
majordisastor
Lance Corporal
Posts: 208
Joined: Fri Apr 23, 2010 5:24 pm
Location: Llantrisant, South Wales

Re: Tiger Ebbey .....

Post by majordisastor »

Ok what follows now is what I carried out – mistakes were made fingers were cut and I said a few word that I would not use in polite company ……As its you though they were XXXXX XXXX, XXXXX, and even XXXXXXXX xxxx XXXX . Not proud of them but you will see why.

First of all I followed FRAG’s Robert M. Hoopes instructions to the letter, cutting down the wheels as instructed and referring to the Tamiya Instructions as well to make sure I had my inner, outer middle and anything else in between correct.

For those of you who saw Ebbey’s ‘middle wheel ‘ at Wroughton that was my first attempt ..

I later took it apart – not as easy as I thought - and increased the size of the home made plastic card washer . Much stronger . I stuck the metal King Tiger wheels to the plastic wheels with quick set Araldite and Plastic Weld for sticking both sides and the washer together.

I also cut down part A 7 to create the protruding inner wheel shaft and strengthen the whole assembly.

Image

Here is the completed inner wheel set.

Image


That's the plasticard washer in the middle.

Sorry - no step by step photographs at this stage I was too busy enjoying some rare quality tank time !

So flushed with success I then carried on with the outer Track wheel set ….Thats where the fun began …..

Now then batch building and dry test fitting are wonderfull things to do – do them together and they work even better – I didn’t and they came back to bite me .

Now in fairness FRAG’s Robert M. Hoopes was guiding you along with an already assembled wheelset . I was working with nice shiny new parts.

I made two important mistakes, 1 if you look at Tamiya instructions section 12 – I missed out the fact that you need to insert part MU2 into part A9 BEFORE you stick part A6 cut down shaft over it.
Plasticweld gives a very strong bond. ( Insert your favourite swear word here.)

2 On setting up the outer wheel, I found the shaft TOO SHORT to correctly gap the track teeth. (Insert your favourite swear word here.)

Joy !! - Well they say the answer is starring you in the face so - After 20 mins looking in the bathroom mirror , all I could get out of that exercise was the knowledge that I was developing a spot on the side of my nose – I felt so low that I almost contemplated building Shermans instead - time for a trip to a DIY store for inspiration.

I knew I had to extend the wheel shaft not only to bridge the track teeth gap but also provide a firm mount for the outside wheel disc.

Luckily I found some aluminium tubing that would do the job.. Cut down with a pipe cutter I solved my shaft length problem. I had to reduce the outer diameter of the Tamiya shaft to allow the ali tube to slide over it. Once in place provided a rock solid shaft that was strong throughout its length. DO NOT FIX INTO PLACE YET!

Next thing to tackle was a method of supporting the outside wheel disc itself – having such a thin grip on the shaft it was looking more like a ‘spin a plate on a stick’ trick than a piece of engineering capable of supporting the weight of anything - not alone the expected weight of Tiger Ebbey .
Wittman would have thrown a blue fit !!

I tried another cunning plan - a piece of copper pipe – cut to length to give the required spacing within the hub – and to provide a solid support to the outer wheel. Goody.

Image

I made a few hubs up of this type and remembered to test fit them this time. All was well until I added the completed inner wheel sets. As you can see the tolerances between the additional copper shaft and the edge of the inner wheel ranged from touching….. to bugger all.

Image

Image

However the ali shaft seemed right without its additional covering copper shaft.

Image

Time for Bed..

Andy
It always gets darkest before it goes completley black......
Post Reply

Return to “Tiger I”