Night Fighter Jagdpanther Strip and Repaint

Re: Night Fighter Jagdpanther Strip and Repaint
More pictures to follow, cheers Blake
Re: Night Fighter Jagdpanther Strip and Repaint
Cheers for a great job Blake coming together good
Grant
Grant
Re: Night Fighter Jagdpanther Strip and Repaint
Exellent build, camo looks great, and I like the rust on the exhausts...good effect there
Nic
Nic
Re: Night Fighter Jagdpanther Strip and Repaint
Thanks guys, the exhaust rust effect is done with Chalk Pastels, I scape the colors of yellow,red and brown together. Mix this together until the right color and simply rub it into the exhaust pipes, But first and most important is to ruff the surface by sanding, this allows the pigment to bond into the grooves. More pictures to follow as my RONSEAL Varnish from Darby's has arrived.
Cheers Blake
Cheers Blake
Re: Night Fighter Jagdpanther Strip and Repaint
The varnish has been applied in three coats, 48hrs drying between each coat. I have added the tools with some coloring to them as well. The wooden handles are colored with light brown pastels to give them a more wooden look but the camera does not reflect that to well.
The Jack block was pastels mixed brown/black and then coated with varnish as a sealer. These blocks were used on the dirty parts and jobs so they would seem to collect dirt,grease and scraping damage. The cables are another issue,first the rust primer,then some floor polish. After that dried I rub the pastel chalk dust into the grooves in the wire orange and brown first.
Then a very light floor polish mist.When that dries a little dry brushing or flat black and a single coat of varnish applied with a Q-tip.I hold the cable stretched out top to bottom and allow the varnish to run down the cable in drops,this does not wash out the pastel coloring but seals every thing very well. Still need to paint the fire extinguisher. Forgot the spare tracks need a little more work to show some rust,grease and dirt. cheers Saxondog
- Attachments
-
Re: Night Fighter Jagdpanther Strip and Repaint
I forgot to mention the clean look, I just can't get past the rolled out of the factory appearance on my tanks. But I seem to keep doing it on everyone.
cheers SAXONDOG
cheers SAXONDOG
- Tiger S13
- Jagdpanther 313
- Porsche King Tiger
- Tiger,King Tiger,Jagdpanther
-
Wizzard033

- Corporal
- Posts: 339
- Joined: Thu Sep 30, 2010 4:51 am
- Location: Lubbock, Texas
Re: Night Fighter Jagdpanther Strip and Repaint
Excellent work Sir!  I was curios how to use apply the pastels but I think I'll try your technique on my Tiger I.


Re: Night Fighter Jagdpanther Strip and Repaint
Thanks for the compliment. The pastels have to be the chalk type. I just work off a piece of cardboard,with a hobby knife I scrap the chalk into a fine powder,in separate piles.
Then mix into the different colors like the exhaust. I did not seal the JAGDPANTHER like I did my Tiger, I used a liquid glue plasistruct brand, Not too fast drying. Then rub the dust into the plastic,now on the exhaust I did sand them with a fine grit paper,the grooves hold the dust better and it looks more natural.
The exhaust on the Jagdpanther has not had the sealer yet,I was considering the floor polish and Matt varnish, but instead I thought I would try something different and use the decal spray bonder,I do not want them to look like the Tiger as those are exhaust shields which would not rust the same way.
In the pictures the dust has been applied, and look like the Jagdpanther's, but then I sprayed the floor polish and varnish and the look changes. Being the exhaust shields,I did not want the rusty finish but the look of heated , cooled,rusted metal. Saxondog
- th_paintingandweathering023.jpg (3.62 KiB) Viewed 3406 times
- th_paintingandweathering024.jpg (4.48 KiB) Viewed 3406 times
-
Tanker Mike

- Recruit
- Posts: 8
- Joined: Sat Dec 04, 2010 9:39 pm
Re: Night Fighter Jagdpanther Side Skirts
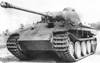
I like what you have done with the tools. Nice work. However, to my eyes the side skirts are much too tall. The bottoms are almost to the center of the road wheels and they should barely be over the top of them.
- Jagdpanther Drawing_02.jpg (26.1 KiB) Viewed 3395 times
Re: Night Fighter Jagdpanther Strip and Repaint
Your right,the side Schurzen is to wide. I have been meaning to correct this but am undecided on this issue.I considered remaking them or even replacement. I will post some pictures soon as their has been some other things added to my Jagdpanther.
Sax
Sax
