Sassgrunt: Here is apic of Plastruct HO scale diamond plate PS-155. Nearly perfect for 1/16 tank builds!!
~5 hashes per centimeter and ~11 per inch. sheet is ~0.5mm thick styrene. Can be easily glued to plastic with testors liquid model cement. it's like superglue for plastic. fumes cause cancer in California only!
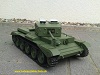
1/16 king tiger tamiya two part barrel converting into 88mm L71 one piece with some light machining. Of course, i don;t have a nice lathe so luckily, the barrel fits into my drill press chuck. I ground down the thicker stuff on a grinder, then stuck it into the drill press. with gently pressure and a bar file, aluminum comes off easily. Don;t press hard since only one end supported. Don;t get it hot or alu does not file well.
smoothing with coarse emory cloth..then fine cloth.
AHHHHH...NICE!!! In between the yellings of the wife, the doorbell rings and USPS delivers a DHL box from Germany!! Wooohooo. It has finally arrived!...some more yelling...but it does not matter at this point, I have a big smile..
Thanks C. Ludwig!! Everything arrived safely. I bought the kit with the aluminum hull and correct motor/mount holes. Also, I got the kit w/plastic superstructure. To make things easy, I bought all the Asiatam tracks and wheels and drivers at same time, and Ludwigs front axle. Really nice work on the cut outs...some minor shaving to fit. And ludwig also included a new center hatch as the first one was slightly damaged by heat (Thanks!)
The only drawback to the kit is that the 'palstic' hull parts are actually plastic foam board, rather than solid 3mm plastic. On their own, these are somewhat flexible, but when all assembled, I am sure the will be fine.
One more thought, I am building this as a 'Ferdinand' so I also ordered the panzer three/stug 3 hatch (asiatam) C. Ludwig is SUPER nice at getting all the parts together for you and not at crazy ebay prices.
I don't want to give my exact costs, but C. Ludwig is VERY fast at email replies so if interested, email him directly. However, this kit did cost less than a F/O tamiya JP even when all done! THAT'S NICE to my wallet.
nice to see it arrived savely nad relativly fast
im looking forward what you will made about these kit, and if you have any question or need any help or parts, please feel free to contact me.
pics..preliminary fitting, only minimal filing required for metal hull. Just 'round' off the tab corners and they fit. 2.5mmx10mm screws for motors, holes and mounts line right up. I had to trim a fe mm's off the inner motor bracket to get is seated, but then everything lines up perfectly with shaft hole in hull.
Also, suspension holes in hull sides are perfect. wheel spacing is accurate. It may not seem correct in side pics , but the suspension is in the uncompressed position and the little travel lock tab need to be reversed. Also, some of the wheel hubs need reversing...minor asiatam assembly flaws. suspension set comes with rubber pads as well.
The tracks, wheels, and motors are just excellent quality. The metal hull at 3mm thick is EXCELLENT with no flaws. Very robust assembly even just when tabs in place. I will probably use hidden countersunk screws and some right angle bracing to hold it all together. Have to work out the suspension mounts because for some reason, asiatam decided to put a groove down the middle of the screw threads?!?!?!
I thought the 1/16 king tiger was big...wow, this is BIG..
Hi xrad. I'm assembling one of Christian's hulls as well for my VK 45.01, and may have found a couple of solutions for you. I used 1/2" x 3/4" aluminum angle along the inside of the hull joint, (1/2" side down). I drilled through the 3/4" side where it covered the openings for the bogie units. Then, I got some "C" channel, which is marked as "33/64 x 1/2 x 1/16" which I think came from the plywood section of the hardware store - it's used for protecting the edges of 3/8" plywood. I placed that against the inside of the angle, with the open side facing out, and drilled it for the 5mm capscrew to pass through. (I also bought longer 5mm capscrews than what Asiatam supplied - they were 20mm long, I think). I used screws to hold everything together, but also used JB weld on the pieces before I screwed it together - now, it's rock-solid!
Like you, I had concerns about that groove at the screws threads, and worried that it would spread open and loosen things up over time. I couldn't find a size of brass tubing that would slide over it tightly, but did have some bearings that did. (I don't know the inside measurement of the bearings, but the OD was 26mm). That was too big to pass through the opening in the side of the hull, so I used a cut-off wheel and removed the outer ring of the bearings. Yeah, I know that's a dumb thing to do with a set of ball bearings; but I just couldn't find anything else to hold the groove closed. It worked very well, and now I'm not worried about the mounting screws loosening.
The last thing I noticed is that the bogie units seem to contact the hull when they move, so I used two paper-thin nylon washers on each one - I found these at the hardware store in those specialty fastener bins. They provide just enough standoff for the bogies to pivot without hitting.
-Mike