So I made my M-113 with bare sides as well. But this left several ugly small holes on the hull where the accessories were supposed to go.
First I filled the holes with putty. But the putty shrank upon drying, which left a small dent instead. So I had just resigned myself to the holes until I saw this image of an M-113 with crew in Vietnam, that gave me a very simple idea.

So it turns out the M-113, like almost every armored vehicle, is chock-full of rivets! Rivets here, rivets there, anywhere welding on the tank isn't an option voila RIVETS. In the case of my M-113 I had several ugly holes left behind even after adding on all the fittings. So I decided to fill the small holes with rivets.
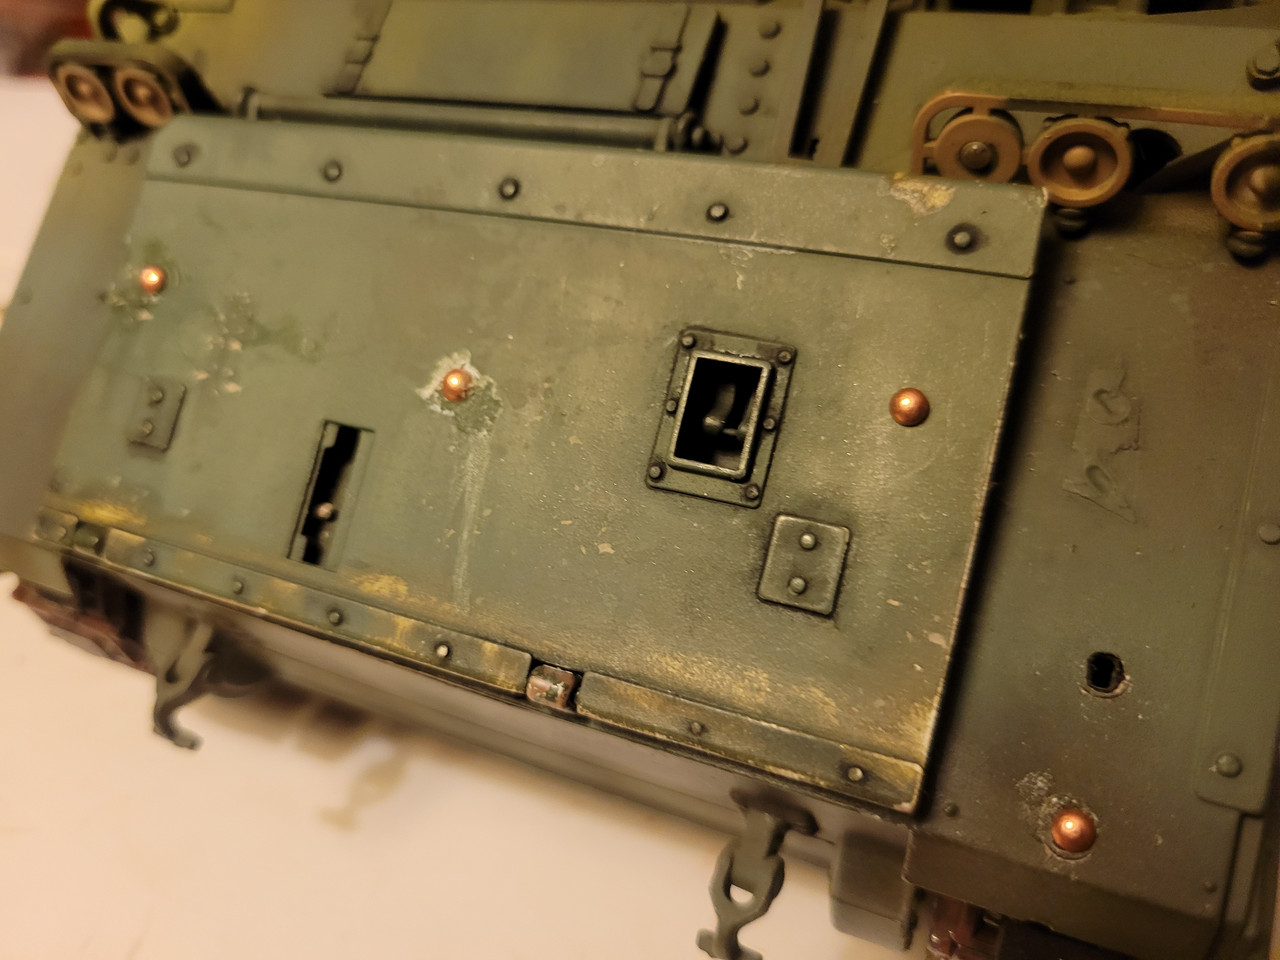
Turned out the small ones fitted most of the holes.
(One could argue that, compared to the molded-in rivets on top of the water shield plate - at least I think that's what the part is - the rivets I added on are comparatively huge, because they are. But I think I'd need to use something really tiny, like a pin-head, to make scale rivets. But the tiny rivets I used were hard enough for me to work with, even using tweezers, and I wound up just dropping the rivets on the ground more often than not! So I think these are the smallest rivet heads I want to use.)
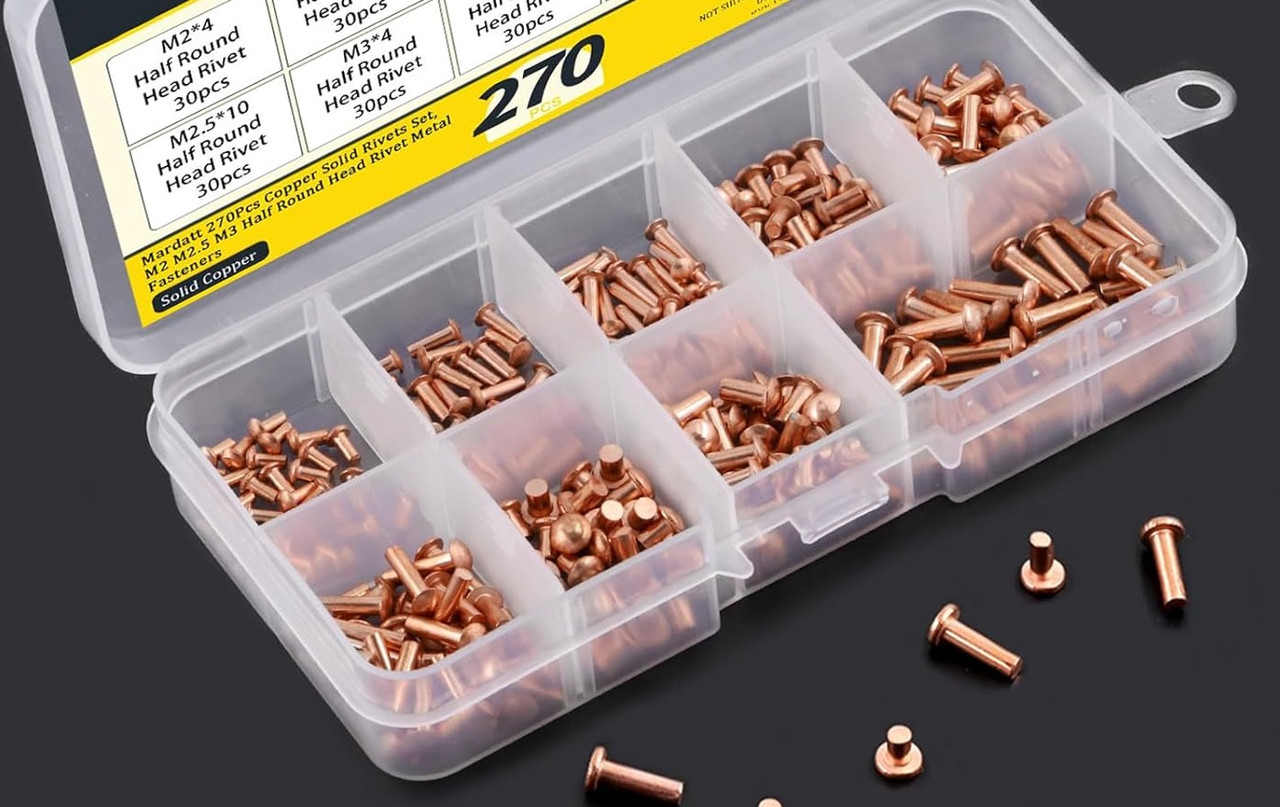
Of course they sell rivets made of almost every metal you can name, plus plastic ones too. But I chose copper rivets as they're easier to cut down if I need to.
Even the smallest rivets were slightly too large for some of the holes, so I reamed out the hole by spinning the tip of an X-acto knife. Then I super-glued them on.
I left these unpainted to take the image to be touched up later.
Anyway, I bought a life-time supply of copper tank rivets, from South American River for $12