Jumping about a bit, and moving on to the tensioners, and return rollers. Further work on the lower chassis, in an effort to convert a Das Werk Leopard, 2A7v to Radio Control.
For some reason, Das Work have made the road wheels, sprockets, and idlers to rotate, but the return rollers are fixed. So I needed to ensure these could move.
Below are the parts that have been used. The kit rollers and attachments, 3mm brass tube, and a 2mm bolt.
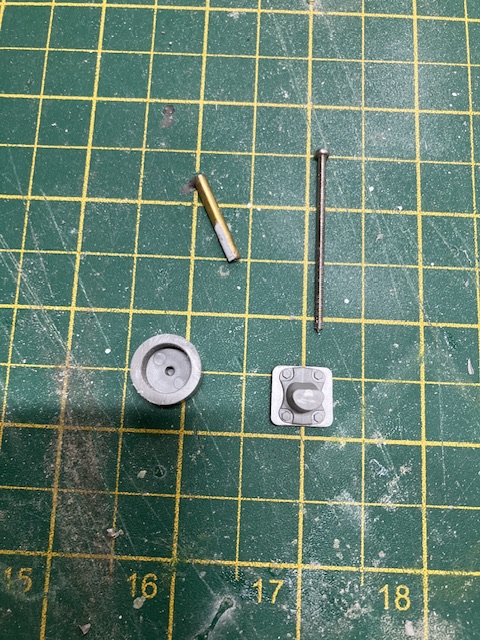
- IMG_6301.jpeg (174.31 KiB) Viewed 1261 times
First job is to drill a 3mm hole through the wheel mounting parts for the return rollers, and insert a sort length of 3mm brass tube. This was a tight interference fit into the hole.
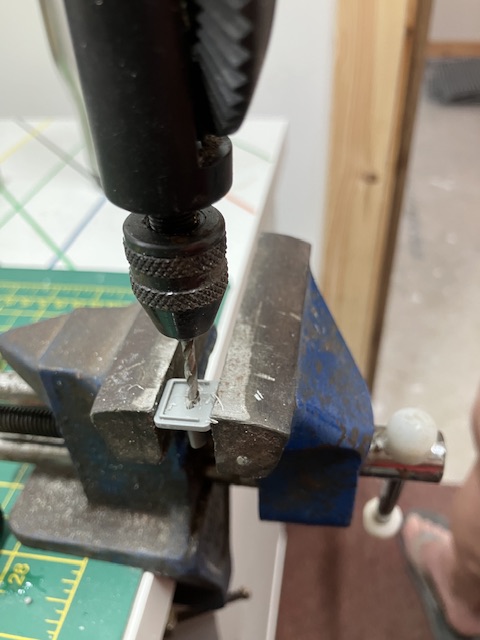
- IMG_6303.jpeg (64.78 KiB) Viewed 1261 times
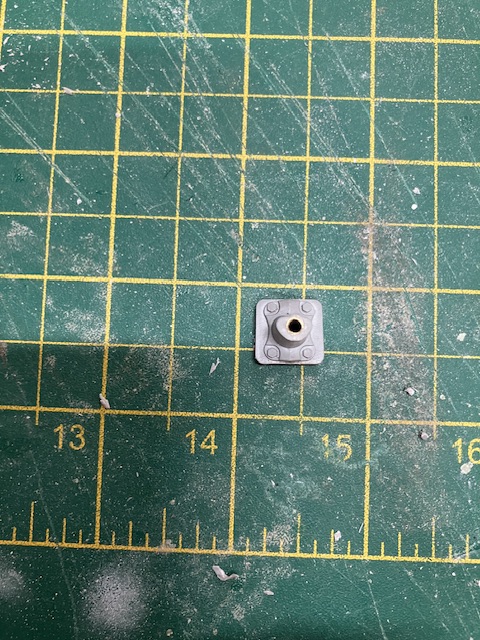
- IMG_6304.jpeg (171.93 KiB) Viewed 1261 times
This allowed a 2mm bolt to be passed through the tube and screwed in to the roller. Whether this will be sufficiently strong remains to be determined.
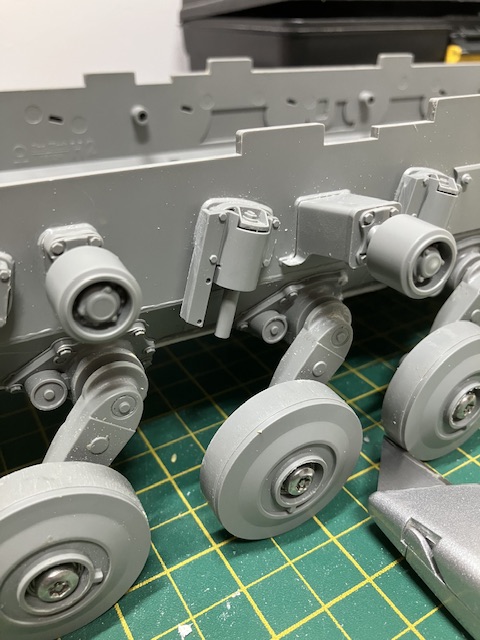
- IMG_6316.jpeg (95.42 KiB) Viewed 1261 times
The fit of some of the parts is not as expected, and some parts require trimming. I am noticing some gaps in the photographs.
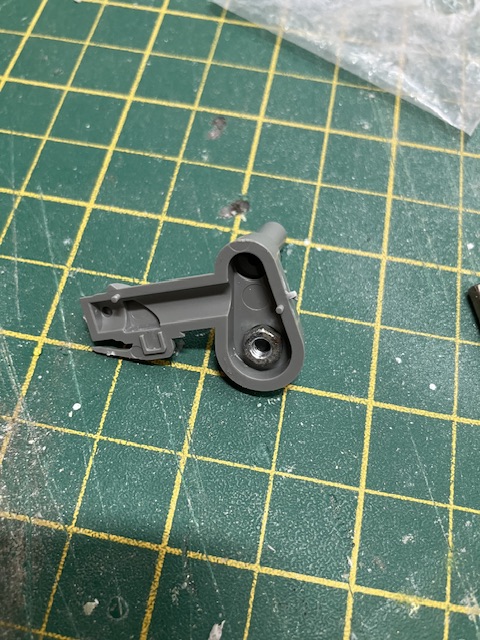
Next, the model requires working track tensioners. I had to compromise between scale fidelity, and a working solution. First job was to analyse the construction of the real tank. This has a two part hydraulic system, where a ram pushes against the pivot of the idler wheel. Analysing what was in the kit the I decided to cut the tensioner in half.

- IMG_6310.jpeg (155.4 KiB) Viewed 1261 times
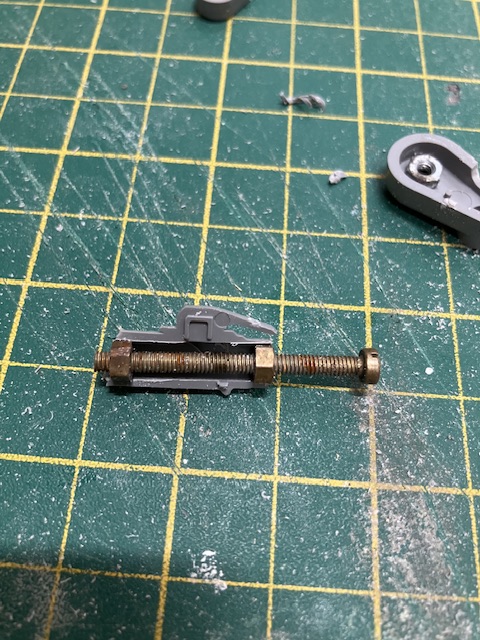
The hydraulic part was filed out so two bolts could be installed. These were set into plastic weld to give an impression to hold them securely. These were then fixed with Super glue, and the two half glued together.
Into the part that pivots and holds the idler wheel a nut was glued, and the surrounding area filled with milliput and a hole drilled for the pivot.
- IMG_6308.jpeg (144.58 KiB) Viewed 1261 times
- IMG_6310.jpeg (155.4 KiB) Viewed 1261 times
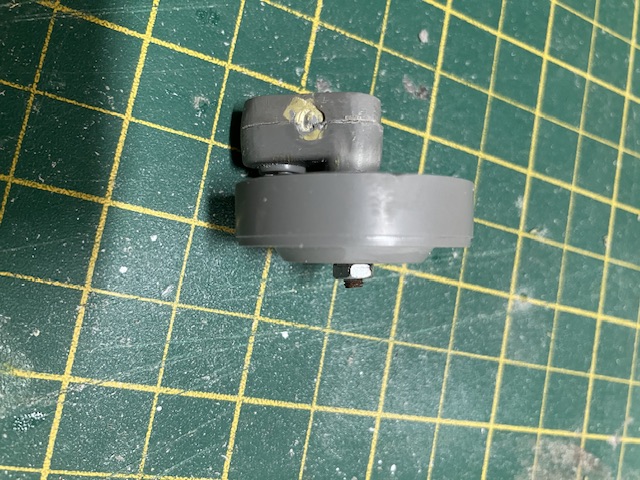
A hole needed drilling for the axel for the idlers and to gain access to the bolt. When all was dry the two halves were fixed together, and the idlers attached using bearings.
- IMG_6312.jpeg (142.07 KiB) Viewed 1261 times
Some filling and sanding is required .

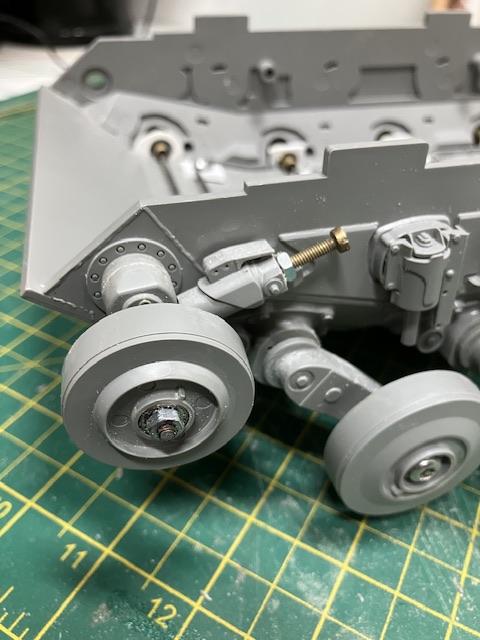
It all comes together like this. Semi realistic and similar to the system used on the 1:1 Leopard 1. It may not work, in which case a different system will need to be developed.
- IMG_6313.jpeg (87.98 KiB) Viewed 1261 times
Last for this instalment. With a bit of weight on board the suspension seems quite compliant.
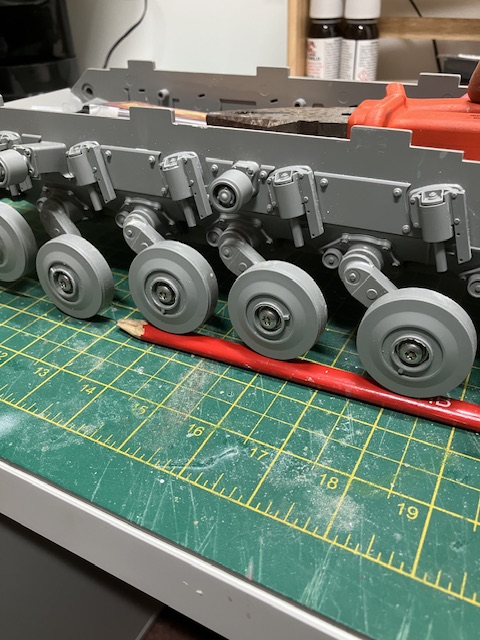
- IMG_6314.jpeg (122.62 KiB) Viewed 1261 times
You don’t get wiser as you get older. You just run out of stupid things to do.


