Used Challenger Strip and Rebuild.

Post Reply
zooma
Staff Sergeant
Posts: 766
Joined: Thu Feb 08, 2024 4:20 pm
Location: Rossendale, Lancs.

Used Challenger Strip and Rebuild.

Post by zooma »

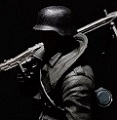
This Challenger 2 has been used .
072547F0-637B-4BBD-88AE-F82802A5D2E5.jpeg (718.56 KiB) Viewed 2039 times
I have already pulled a wad of grass of of the sprockets.
0D2D8BF1-16DE-4E64-83EA-E5304927F5EB.jpeg (781.89 KiB) Viewed 2039 times
I have just acquired a used Heng Long Challenger 2 in a exchange deal for my newish Tonge Centurion.

This used Challenger has all (or at least most) of the upgrade parts that I intend acquiring and fitting to the RTR Challenger that I bought during the Covid lock down, but against that , it has been run for the last 7 years.

Everyone looks for something different in their model tanks, and although this model has a lot mods on it that attracted me to it when I first saw it, I will feel happier after I have stripped it and rebuilt it the way I would like it.

Firstly, the tank came with a healthy supply of mud and grass from its off-road use, so I want to remove all of the debris and give it a good clean. Given the milage of the tank, I also want to check everything for wear and tear as although everything appears to be 'sound", I suspect some parts may need adjustment, lubricating or even replacement, so a lot of the tank will need to be taken apart to gain access, and so this could make an interesting Modern Build Log.

The spec of the tank includes a TK series board (of some description) that gives a very good Challenger engine sound along with good gun fire and associated sounds, but it is plugged into a standard 2.4 gig receiver that does not have an s.bus socket, so every function is plugged individually into the relevant receiver socket via its own "servo lead".

The HiTec transmitter that came with the tank has all of its driving functions on the right hand stick unit as normal, but ALL of the other functions work off of the left hadn't stick unit, and so by precisely moving this left hand stick up and down and sideways at very exact positions, it is possible ( I am reassured) to gain control of, the sound system on/off, the motor drive on/off, the turret turn left and right, the gun elevation up and down, the headlights on/off, the main gun shooting function, the machine gun sound and flash, and the second machine gun sound.

I can make all of the above work - but not necessarily in the right order (like a Morcombe and Wise sketch with a famous composer) .......and most definitely not when I want it.

Hopefully I can change the radio system that came with the tank and connect the TK board to a spare FlySky radio that I have, and connect it via an s.bus socket to give me a better control of all of the various ancillary functions mentioned above. I do hope this change can be made to work as I would like to be able to just operate any of these functions when I want them, and not have to fiddle about with the left hand stick unit in the hope that eventually I should stumble upon the function that I would like to use!

So the general servicing of the tank (including cleaning, adjustment and possible replacements) will be the backbone of this building log, making changes to suit my own preference (such as the way the radio system controls the tank) will also be covered as this may be of some interest as the project unfolds.
Attachments
The radio works fine, but is not ideally suited to the TK board.
FDF93166-71F7-4C99-BE23-CEC6CF2285B5.jpeg (1.05 MiB) Viewed 2037 times
No s.bus, but lots of servo leads.
41B2E8D4-F50A-47F6-AB14-8FC60680D37E.jpeg (762.65 KiB) Viewed 2037 times
The top view of the TK board next to the Hitec receiver.
328CFCE3-616E-4D06-A1A7-4BCA987CC669.jpeg (948.53 KiB) Viewed 2037 times
It’s a TK board - but what type?
667E7934-3148-4B2E-8944-60A9018D9331.jpeg (796.44 KiB) Viewed 2037 times
Last edited by zooma on Fri Feb 14, 2025 5:20 pm, edited 3 times in total.
Never too old to learn........
User avatar
Herr Dr. Professor
Captain
Posts: 5228
Joined: Mon Apr 22, 2019 10:48 pm
Location: Southern Wisconsin USA

Re: Used Challenger Strip and Rebuild.

Post by Herr Dr. Professor »

zooma, I have my rather stock (with metal upgrades) HengLong Challenger 2 up next. My build will be much more modest (and cheap) than yours, but I will be watching to learn.
zooma
Staff Sergeant
Posts: 766
Joined: Thu Feb 08, 2024 4:20 pm
Location: Rossendale, Lancs.

Re: Used Challenger Strip and Rebuild.

Post by zooma »

What I should have mentioned is that the reason why I acquired this Challenger 2 is that I hope to get it prepared and running (comparatively) quickly because the RTR Challenger 2 that I am working on is likely to take me at least 6 months to find (and pay for) all of the parts that I want, and to build it............so I can run this one in the meantime and find out what works or could be made better for my longer term build project Challenger 2.

Running this tank will include some tests and observations (and maybe some different ideas) about the use of chassis reinforcements (or not) to help keep the tracks on when it is being driven hard over rough terrain.

This tank already had the Heng Long Ultimate Edition gearboxes and a pair of RED motors, along with metal tracks, metal sprockets and rollers as well as a set of metal road wheels with tyres....and a TK board that has the authentic Challenger 2 engine sound so I am looking forward to seeing how they all perform.
Attachments
Metal tracks with pads.
AF538FEF-75C3-4D2E-AF49-5E74420B7F96.jpeg (309.33 KiB) Viewed 2025 times
Track tension looks a bit loose - but very realistic.
C9009A69-0A61-4E68-BA45-9D31E29078C1.jpeg (344.48 KiB) Viewed 2025 times
Turret connections.
Turret connections.
5677C0C9-9A20-41AC-846C-7626AE677E65.jpeg (287.12 KiB) Viewed 2035 times
Internal view showing foam sheet used for compartment division (with grass).
94748E7E-7553-4598-A41F-9E1A85B53CA3.jpeg (389.33 KiB) Viewed 2035 times
Ultimate Edition ball raced gearbox.
CF2744B2-8A57-492F-8EF0-1B4BA5BE5983.jpeg (317.06 KiB) Viewed 2035 times
Overall internal layout.
990F4490-B147-4565-B5C1-B1BB42624B7C.jpeg (323.57 KiB) Viewed 2035 times
Last edited by zooma on Fri Feb 14, 2025 5:21 pm, edited 6 times in total.
Never too old to learn........
zooma
Staff Sergeant
Posts: 766
Joined: Thu Feb 08, 2024 4:20 pm
Location: Rossendale, Lancs.

Re: Used Challenger Strip and Rebuild.

Post by zooma »

Herr Dr. Professor wrote: Wed Jan 15, 2025 1:29 pm zooma, I have my rather stock (with metal upgrades) HengLong Challenger 2 up next. My build will be much more modest (and cheap) than yours, but I will be watching to learn.

I think we will both be learning together then Proff. :D
Never too old to learn........
zooma
Staff Sergeant
Posts: 766
Joined: Thu Feb 08, 2024 4:20 pm
Location: Rossendale, Lancs.

Re: Used Challenger Strip and Rebuild.

Post by zooma »

I bought this FlySky radio with a TK50 board loaded with Challenger 2 sound when I saw it advertised on here a few weeks ago.

This receiver does not have s.bus either, but maybe it will be a bit easier to use than the HiTec tx.... but I do have a spare rx with an s.bus socket that I could use?
Attachments
This is the radio that I would like to use.
63687541-6387-4135-99D7-2E9DDEAF9202.jpeg (980.94 KiB) Viewed 1908 times
No s.bus socket.
No s.bus socket.
29A60A84-1CA6-411D-B68E-38D0F1C643B4.jpeg (926.09 KiB) Viewed 1908 times
Last edited by zooma on Thu Jan 16, 2025 11:29 am, edited 1 time in total.
Never too old to learn........
zooma
Staff Sergeant
Posts: 766
Joined: Thu Feb 08, 2024 4:20 pm
Location: Rossendale, Lancs.

Re: Used Challenger Strip and Rebuild.

Post by zooma »

The clean-up started with removing the sprockets and tracks. Grass had wound itself around the sprockets, return wheels and rollers. The return rollers were unable to turn at all, and the dried on mud had dried quite solid underneath..

As the grass was unwound under the sprockets I could see that the tank had been running with no axle bearings - not even the original plastic bearings, so I will need to check the gearbox bearings carefully to see how they have stood up.
Attachments
Rollers solid and unable to turn.
AA82C30E-C475-455F-8765-B482ADD89E86.jpeg (705.63 KiB) Viewed 1929 times
Drive sprockets have track guides .
04470E61-B5A8-45E6-91CC-866B835646D2.jpeg (696.28 KiB) Viewed 1929 times
Grass axle bearings?
D19D277E-5D89-4EFD-B0AA-52DC88706A9C.jpeg (827.9 KiB) Viewed 1929 times
No plastic or ball raced axle bearings fitted.
4AE8796F-A00A-4503-915D-EF08EA5D8747.jpeg (819.36 KiB) Viewed 1929 times
Never too old to learn........
zooma
Staff Sergeant
Posts: 766
Joined: Thu Feb 08, 2024 4:20 pm
Location: Rossendale, Lancs.

Re: Used Challenger Strip and Rebuild.

Post by zooma »

Everything was removed from the inside of the hull ready for cleaning and checking.
Attachments
Top deck removed.
Top deck removed.
F42E7503-427F-4467-8751-75FC2F2155F9.jpeg (924.5 KiB) Viewed 1926 times
Well specified components.
2BD5B316-C08B-4E1F-A023-A6D2DA008067.jpeg (1.04 MiB) Viewed 1926 times
Gearboxes will need stripping to clean and check for wear.
3B205F1B-76A2-4BFA-82FA-A3B11F89935D.jpeg (735.34 KiB) Viewed 1926 times
Never too old to learn........
zooma
Staff Sergeant
Posts: 766
Joined: Thu Feb 08, 2024 4:20 pm
Location: Rossendale, Lancs.

Re: Used Challenger Strip and Rebuild.

Post by zooma »

Once the inside of the hull was emptied the clean-up can begin. I also decided to grind the flange smooth around the profile of the battery box to tidy it up a little ready to have the battery door glued in and sealed.

With an hull empty but with the metal wheels still in position, I was surprised at how flexible the hull was - it was very easy to twist it without too much effort. Glueing the battery box door cover in place may help this a little and sealing it will help to keep the inside dry and clean in the future.
Attachments
The battery box had been cut out but the cover is only retained with the original self tapping screw.
B5B4DC74-E66B-4CD6-87EB-575C46529A62.jpeg (574.8 KiB) Viewed 1924 times
These magnets align with screw heads in the deck.
24FDCBE0-5E1A-4DE0-A17D-FE0E25E01904.jpeg (720.69 KiB) Viewed 1924 times
Smoothing the profile of the opening ready for glueing and sealing.
6CA0EF65-C650-4BD8-B37A-C3575C073209.jpeg (578.69 KiB) Viewed 1924 times
Never too old to learn........
User avatar
Rad_Schuhart
Warrant Officer 1st Class
Posts: 2086
Joined: Tue Jan 19, 2016 9:22 am
Location: Spanish living in Graz, Austria. Heart in UK.
Contact:

Re: Used Challenger Strip and Rebuild.

Post by Rad_Schuhart »

That receiver has I-Bus, which is the Flysky version to the Frsky's SBUS.
I dont have much experience with clark boards, but as far as I know they have to come prepared from factory to allow the use of that SBUS-IBUS
My RC tanks website, loads of free info for everybody:
https://radindustries.wordpress.com/
Pavel
Corporal
Posts: 435
Joined: Sun Jun 12, 2022 6:41 pm
Location: Москва Россия

Re: Used Challenger Strip and Rebuild.

Post by Pavel »

This is a joke, not magnets......
I have 20 mm rectangles

https://aliexpress.ru/item/100500199843 ... 4043OelwnT
Post Reply

Return to “Challenger”