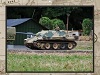
Lately, I've been using picture hanging wire. It is soft and bends/holds bends like solder. I use a drill to unwind a length and then re-wrap a variety of strands depending on the width I want. The last batch was just four strands for my turret lifting rigging. I know it is readily available in various sizes, my stuff was from a large picture that I have yet to hang (about 20-25 strands).
That's a fantastic build Guido, you're very talented. I saw the cable you made but not how you made it.
Guido Henn wrote: ↑Mon Jan 08, 2024 11:00 am
Hello,
you can make the rope to pull up the chain yourself very quickly.
Please take a look at how I did it.
So a quick update. Over the last week I've been adding, removing and correcting details to the hull.
Previously I bought metal tools and the infamous Aber PE basic set. I found the Tamiya plastic tools to be often more detailed than the metal equivalent. And the Aber mounts and shackles to be far too fiddly and fragile for what will be a working model. So the compromise is to use the Aber parts to create stand-offs to mount the tools and the Tamiya plastic tools fixed to them.
I also received my MK Modellbau order this week with C brackets, resin bolt heads and wing nuts and used them to add detail.
I'm still stuck with how to finish off the track cable mounts. I've used a combination of Aber parts and plastic square section. The Aber parts are quite weak but the plastic adds strength. I haven't decided how to mimic the Aber threaded bolts and wing nuts. I tried to join the 2 halfs of the Aber screw part but it was like microsurgery and gave up trying after half an hour despite fine point tweezers and magnifying glasses. The slit in the latching plate can only take very fine wire that has no strength so I'm tempted to CA glue the latches down and stick a wing nut on top for detail.
Hi all, thanks to all of you following and your positive comments.
I've been adding details to the top deck using some of the Aber PE set, original Tamiya tools and metal tools. To be honest the Tamiya tools are more detailed than the metal equivalent and the Aber shackles are too fiddly and fragile for a running model. So I've used PE standoffs and glued the Tamiya tools to them as a compromise.
As you can see the track cable mounts are a hybrid between Aber and plastic square section. The Aber are very fragile and I hope will stand up to use. The square section adds strength and once painted will quite likely blend in well. I tried making up the threaded swivel pins from the Aber set but after half an hour with tweezers and magnifying glasses failed to join the 2 halves. They're ridiculous and beyond all but advanced modellers.
On the turret I've added resin periscopes from MK Modellbau to the commander's hatch. I've added battle damage to the zimmerit. To be honest I dislike the zimmerit I applied 7 years ago using milliput. It's far too thick to be in scale but removing it all would risk damaging the turret. Once paint is applied it should be less obvious.
I have spare links to fit to the turret but photos I've seen of 334 in Normandy shows them missing.
I've added zimmerit to the hull and I'm much happier using Magic Sculpt because even if you put it unevenly you can level it out with water. You get 45-60 minutes before it hardens and you can work it and remove bits to simulate damage.
On the rear Hull I've kept the Tamiya jack and mounts. The mounts are sturdy and made of metal, and I plan to add the MK jack mount end plates with butterfly nuts and Aber jack support brackets.
I've added a C hook from MK with added resin butterflies and nuts.
As per the historic photo I've removed a section of zimmerit from the right side of the glacis plate for the unit insignia, and the same on the left of the rear hull.
I'm still trying to figure out where the crank handle goes. Aber provides an aluminium rod that mounts to the rear plate bit I believe there should be a cranked handle section. The Bovington Tiger is shown being started with what looks like a one piece King Tiger crank. Any ideas?
Lastly, today I've washed everything getting ready for primer. I've just got to add the armour plates to the front drives then it's ready to prime.
Most importantly I've made a commitment to myself to enjoy the process and not rush for results.