M7B1 Priest

User avatar
Ecam
Warrant Officer 1st Class
Posts: 2203
Joined: Sun Jul 13, 2014 6:30 pm
Location: Lake of the Ozarks, USA

Re: M7B1 Priest

Post by Ecam »

Again, this was an attempt to keep things low cost and using what was on hand. And keeping family traits intact, I opted not to try a video just like my brother will not attempt pictures (and most other post 50's technology).

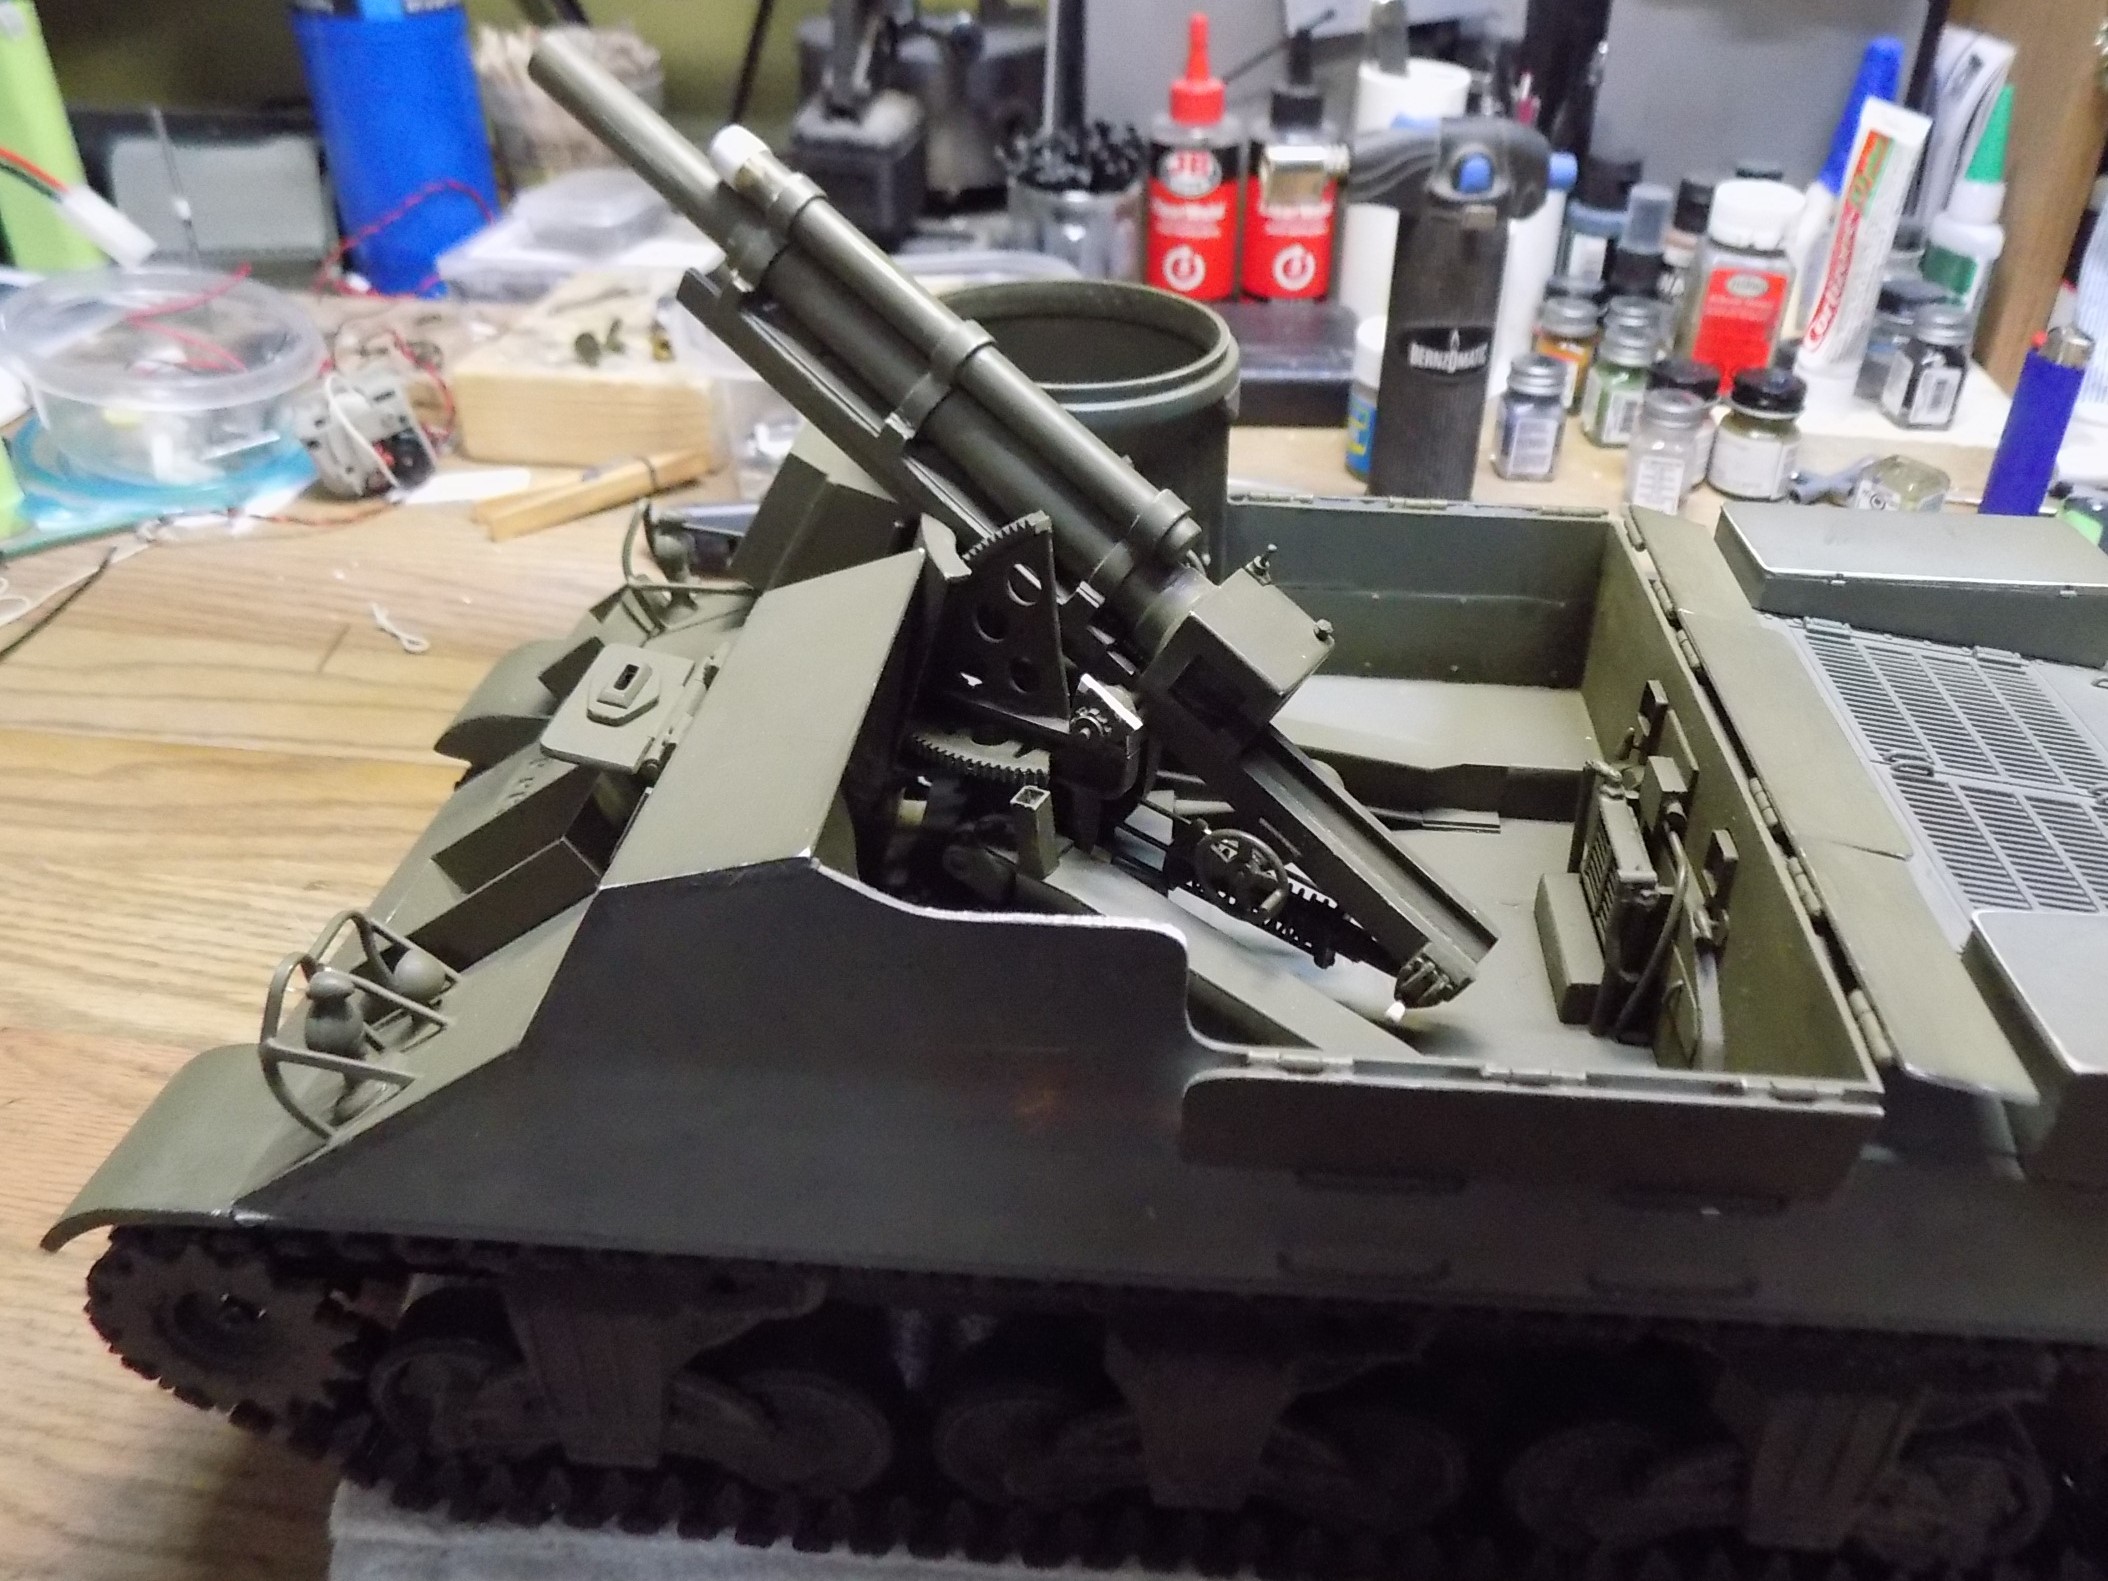
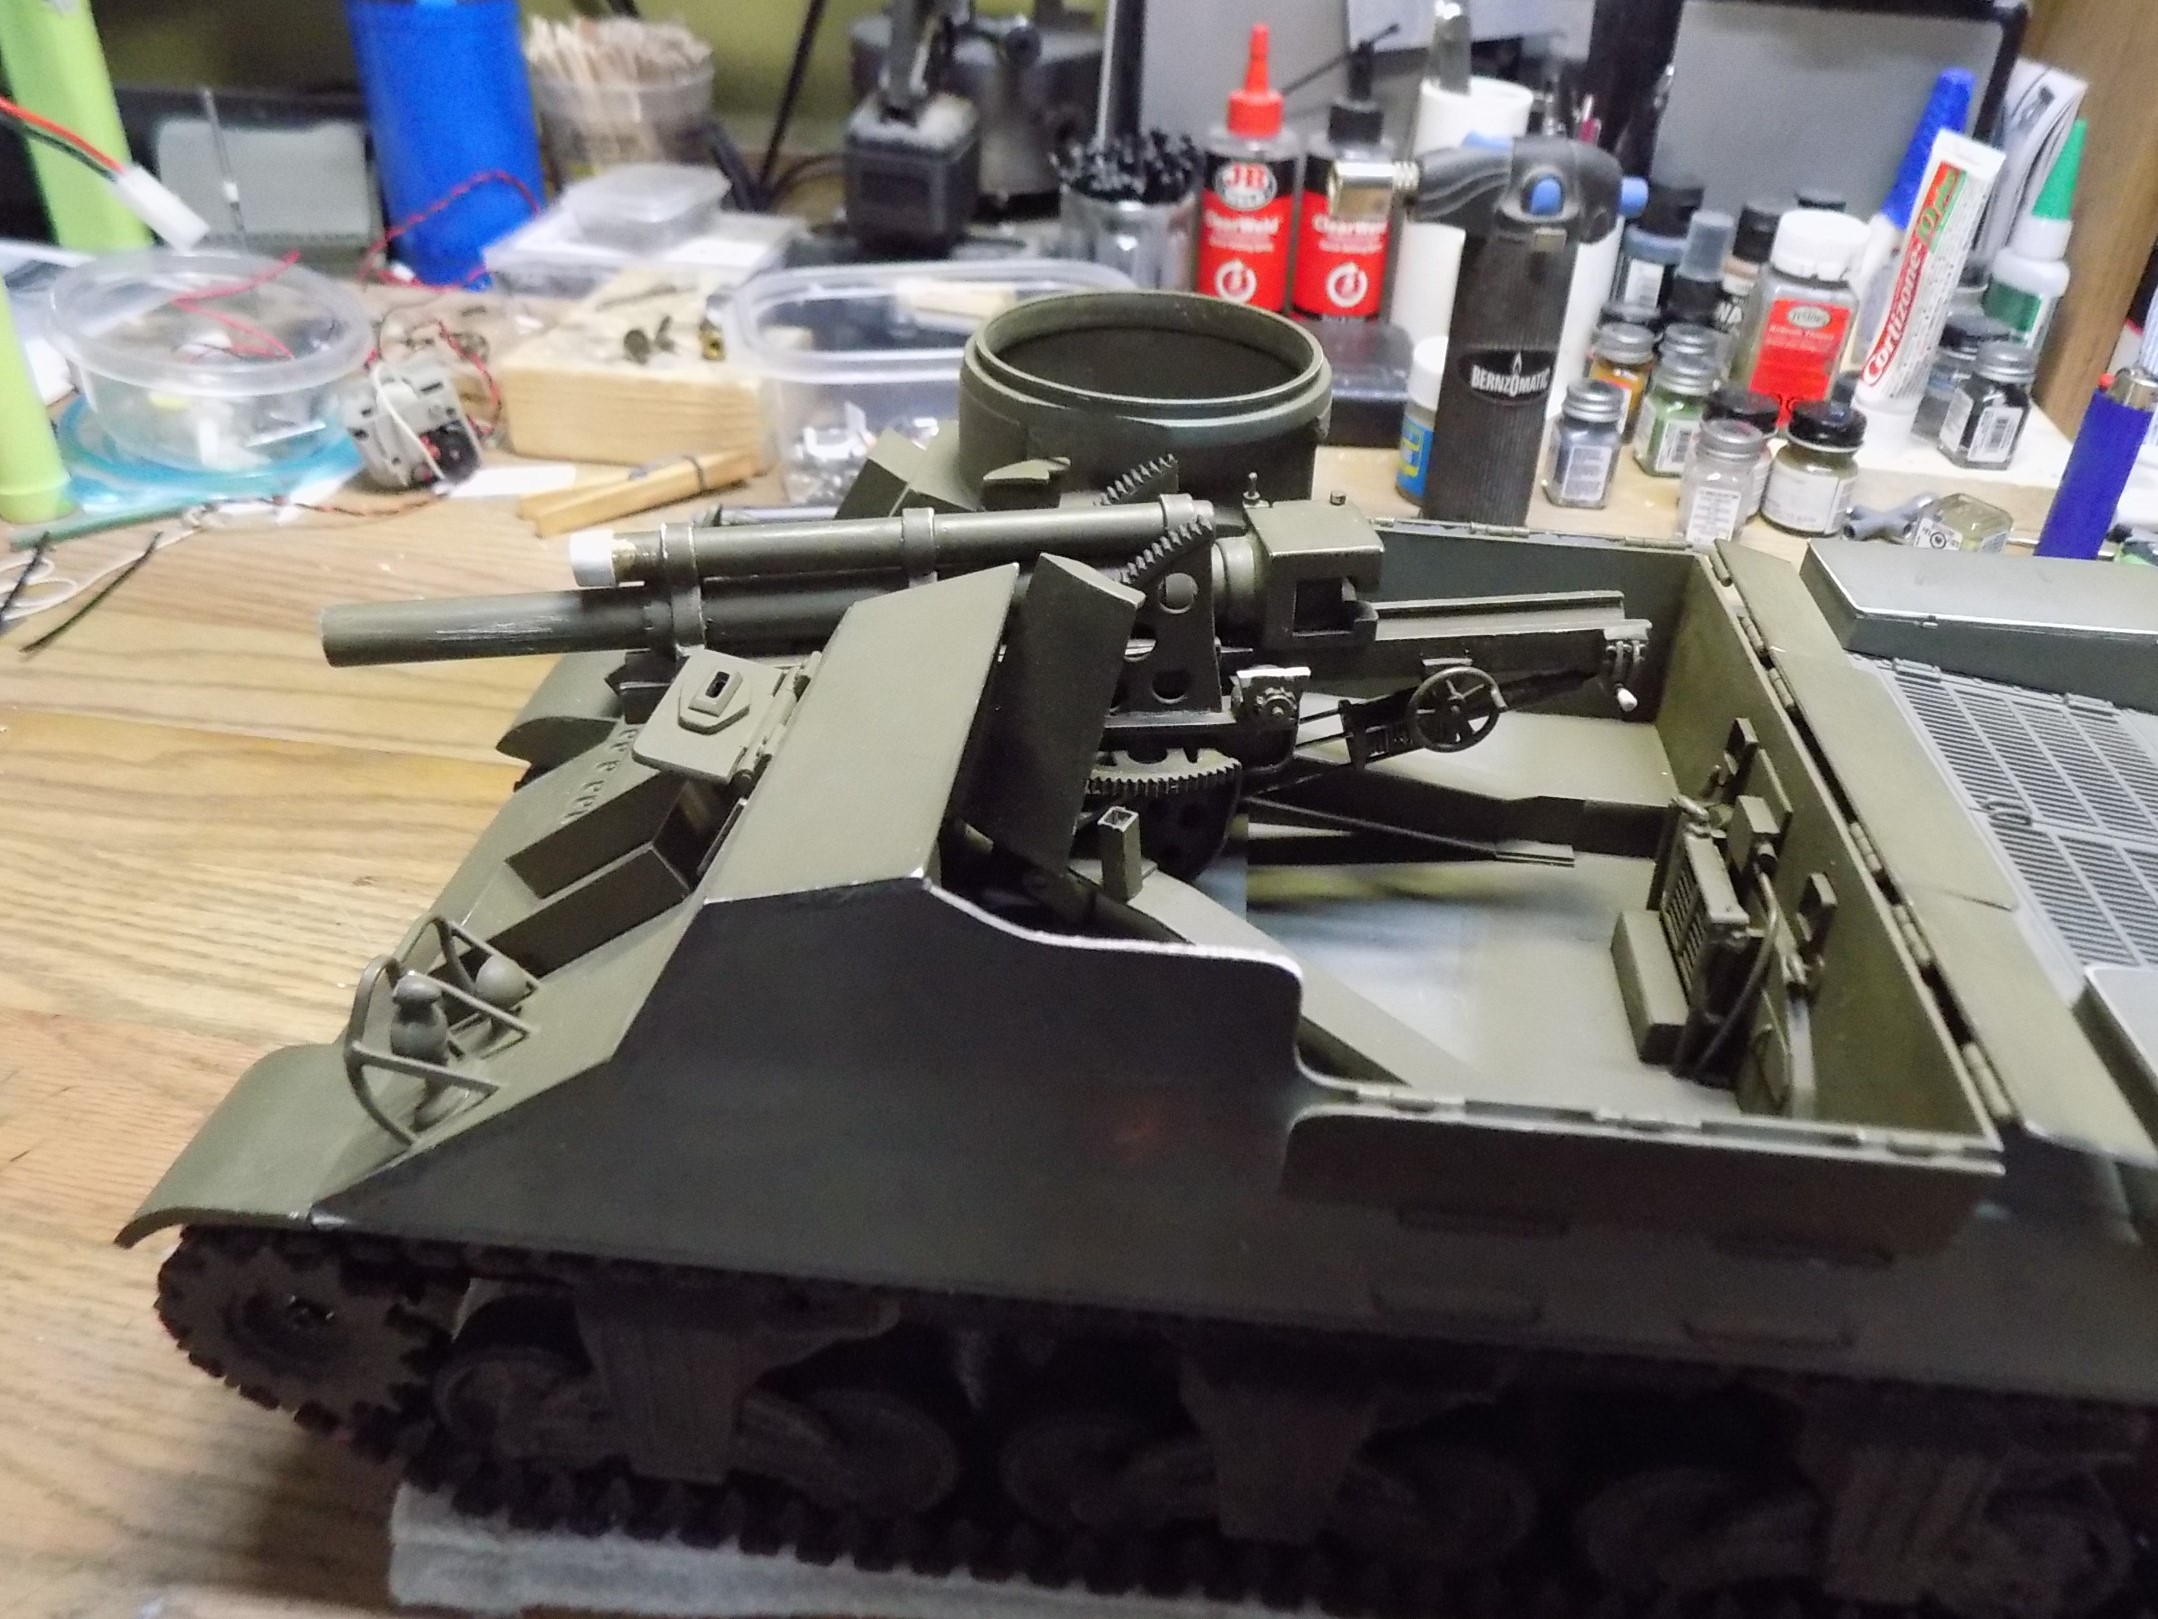
The first two pictures show full travel in traverse and elevation from the working "servos".

Image
Image

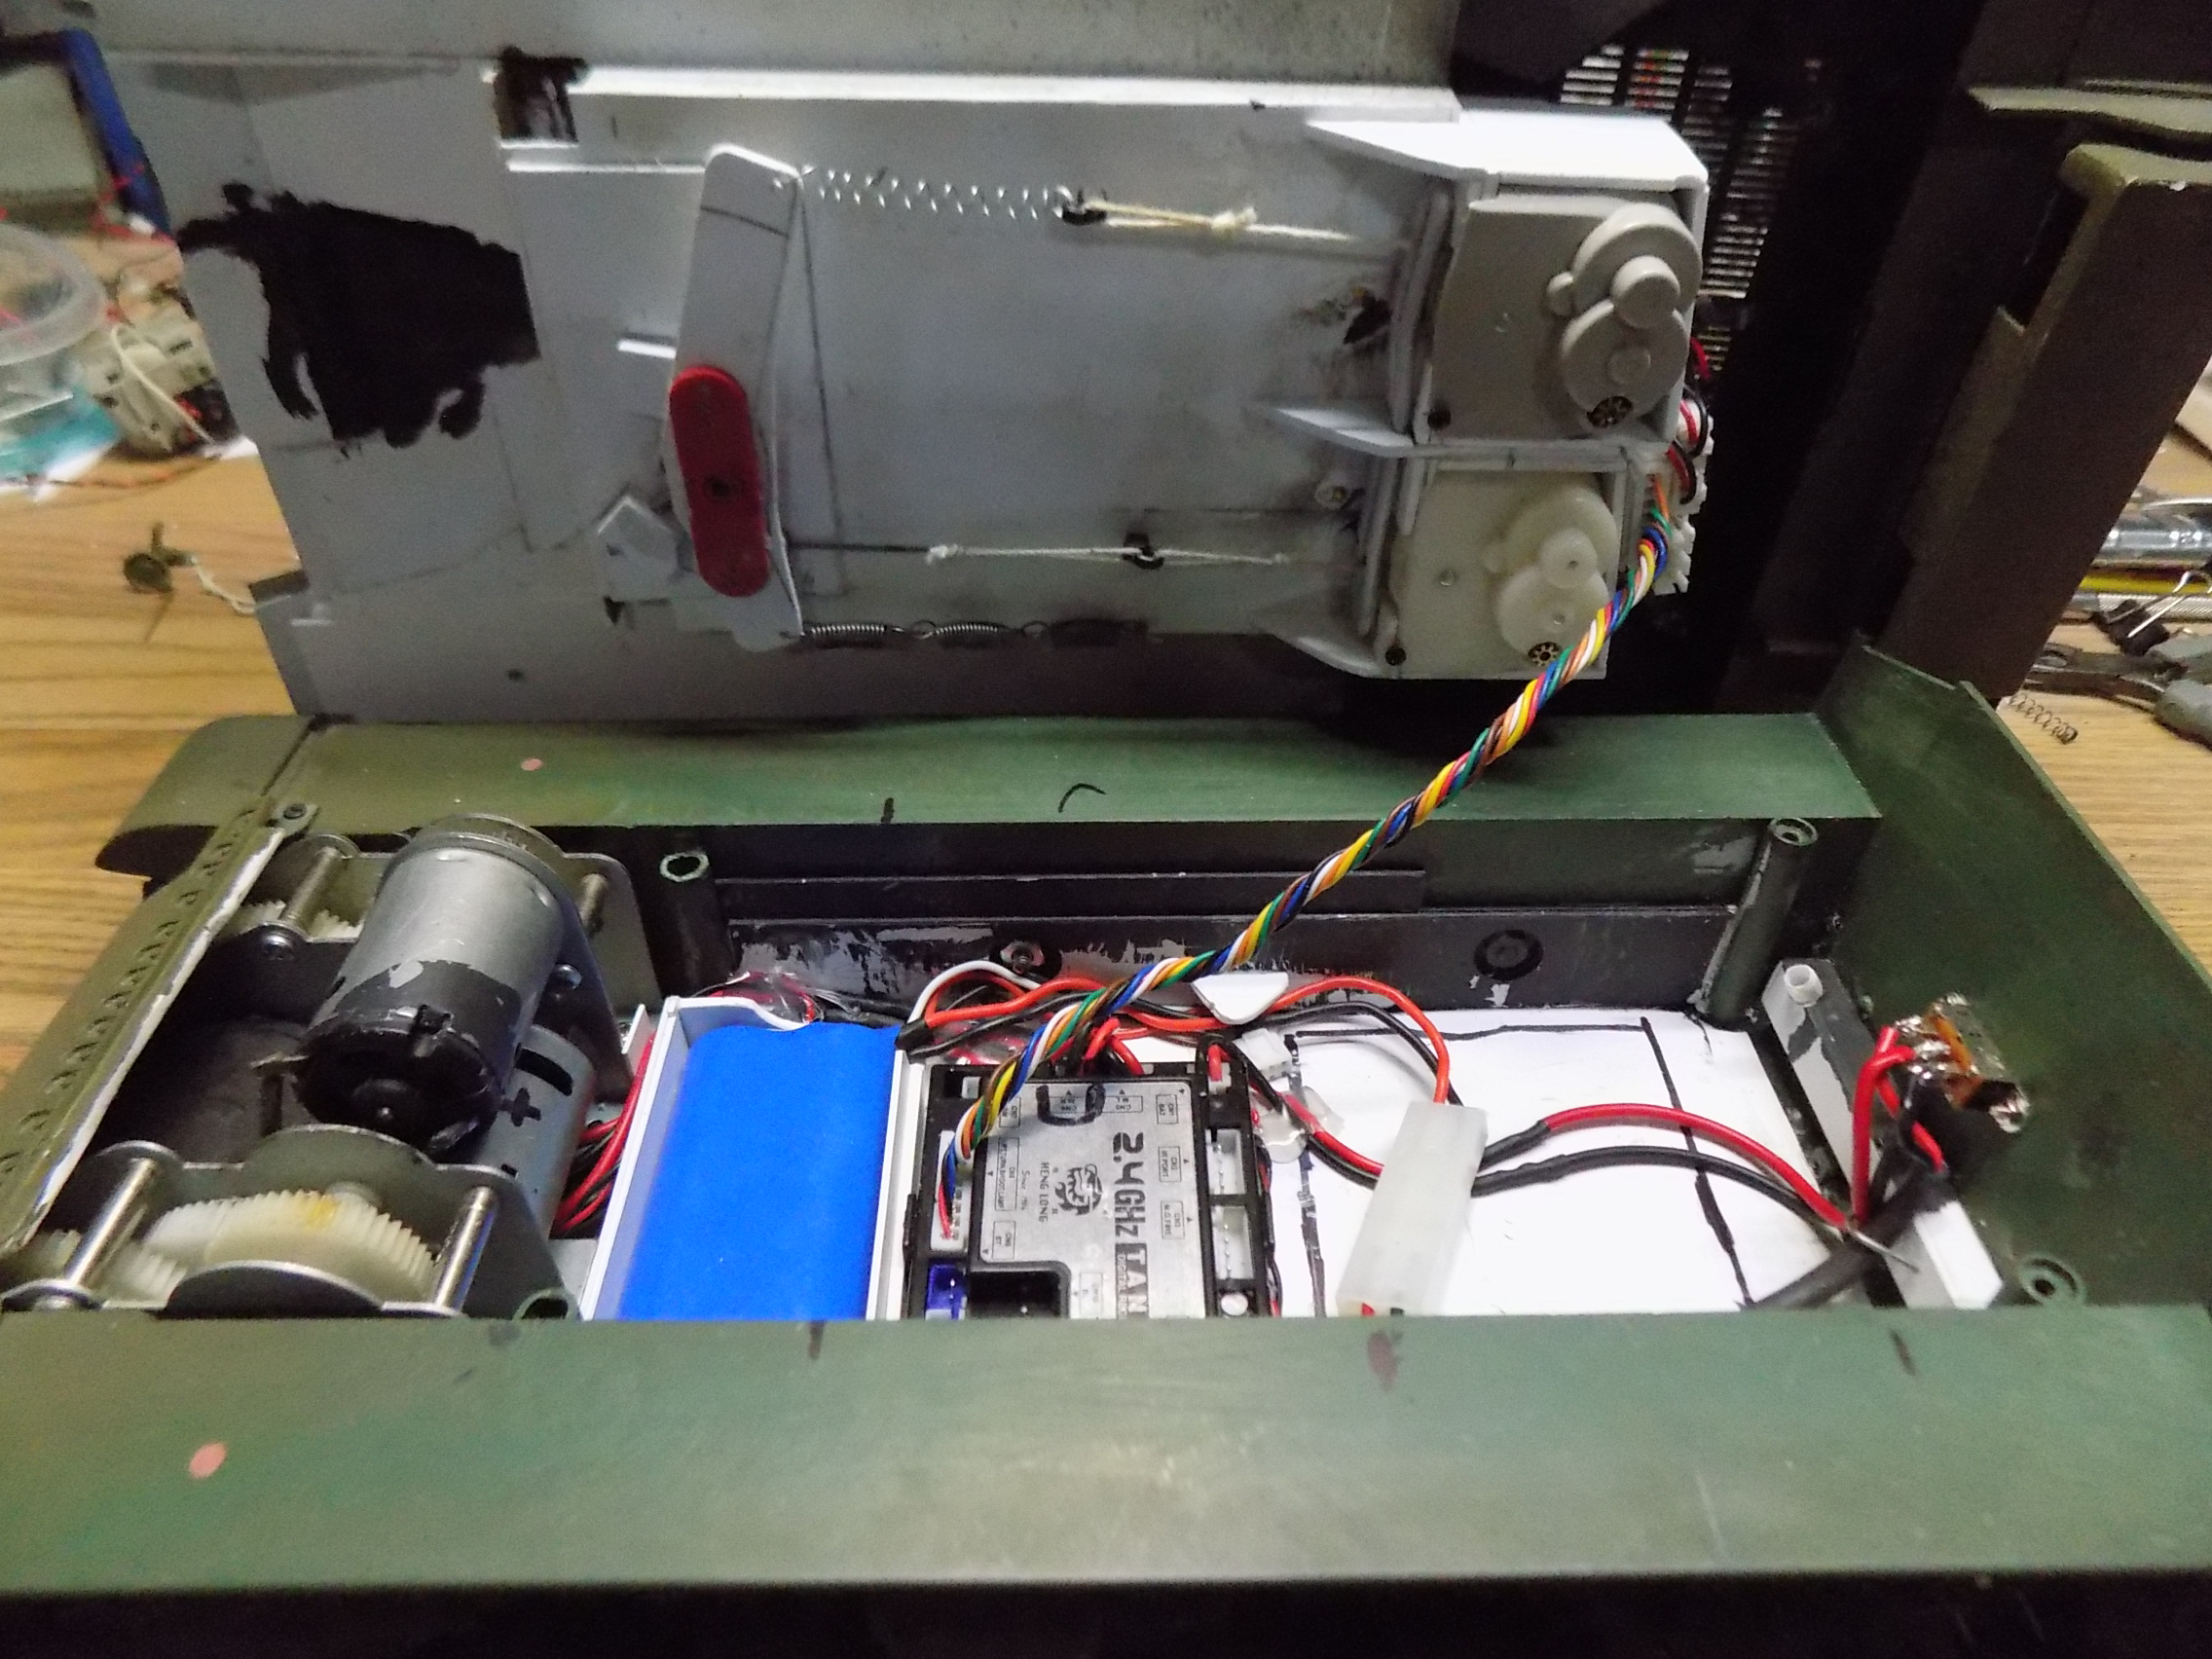
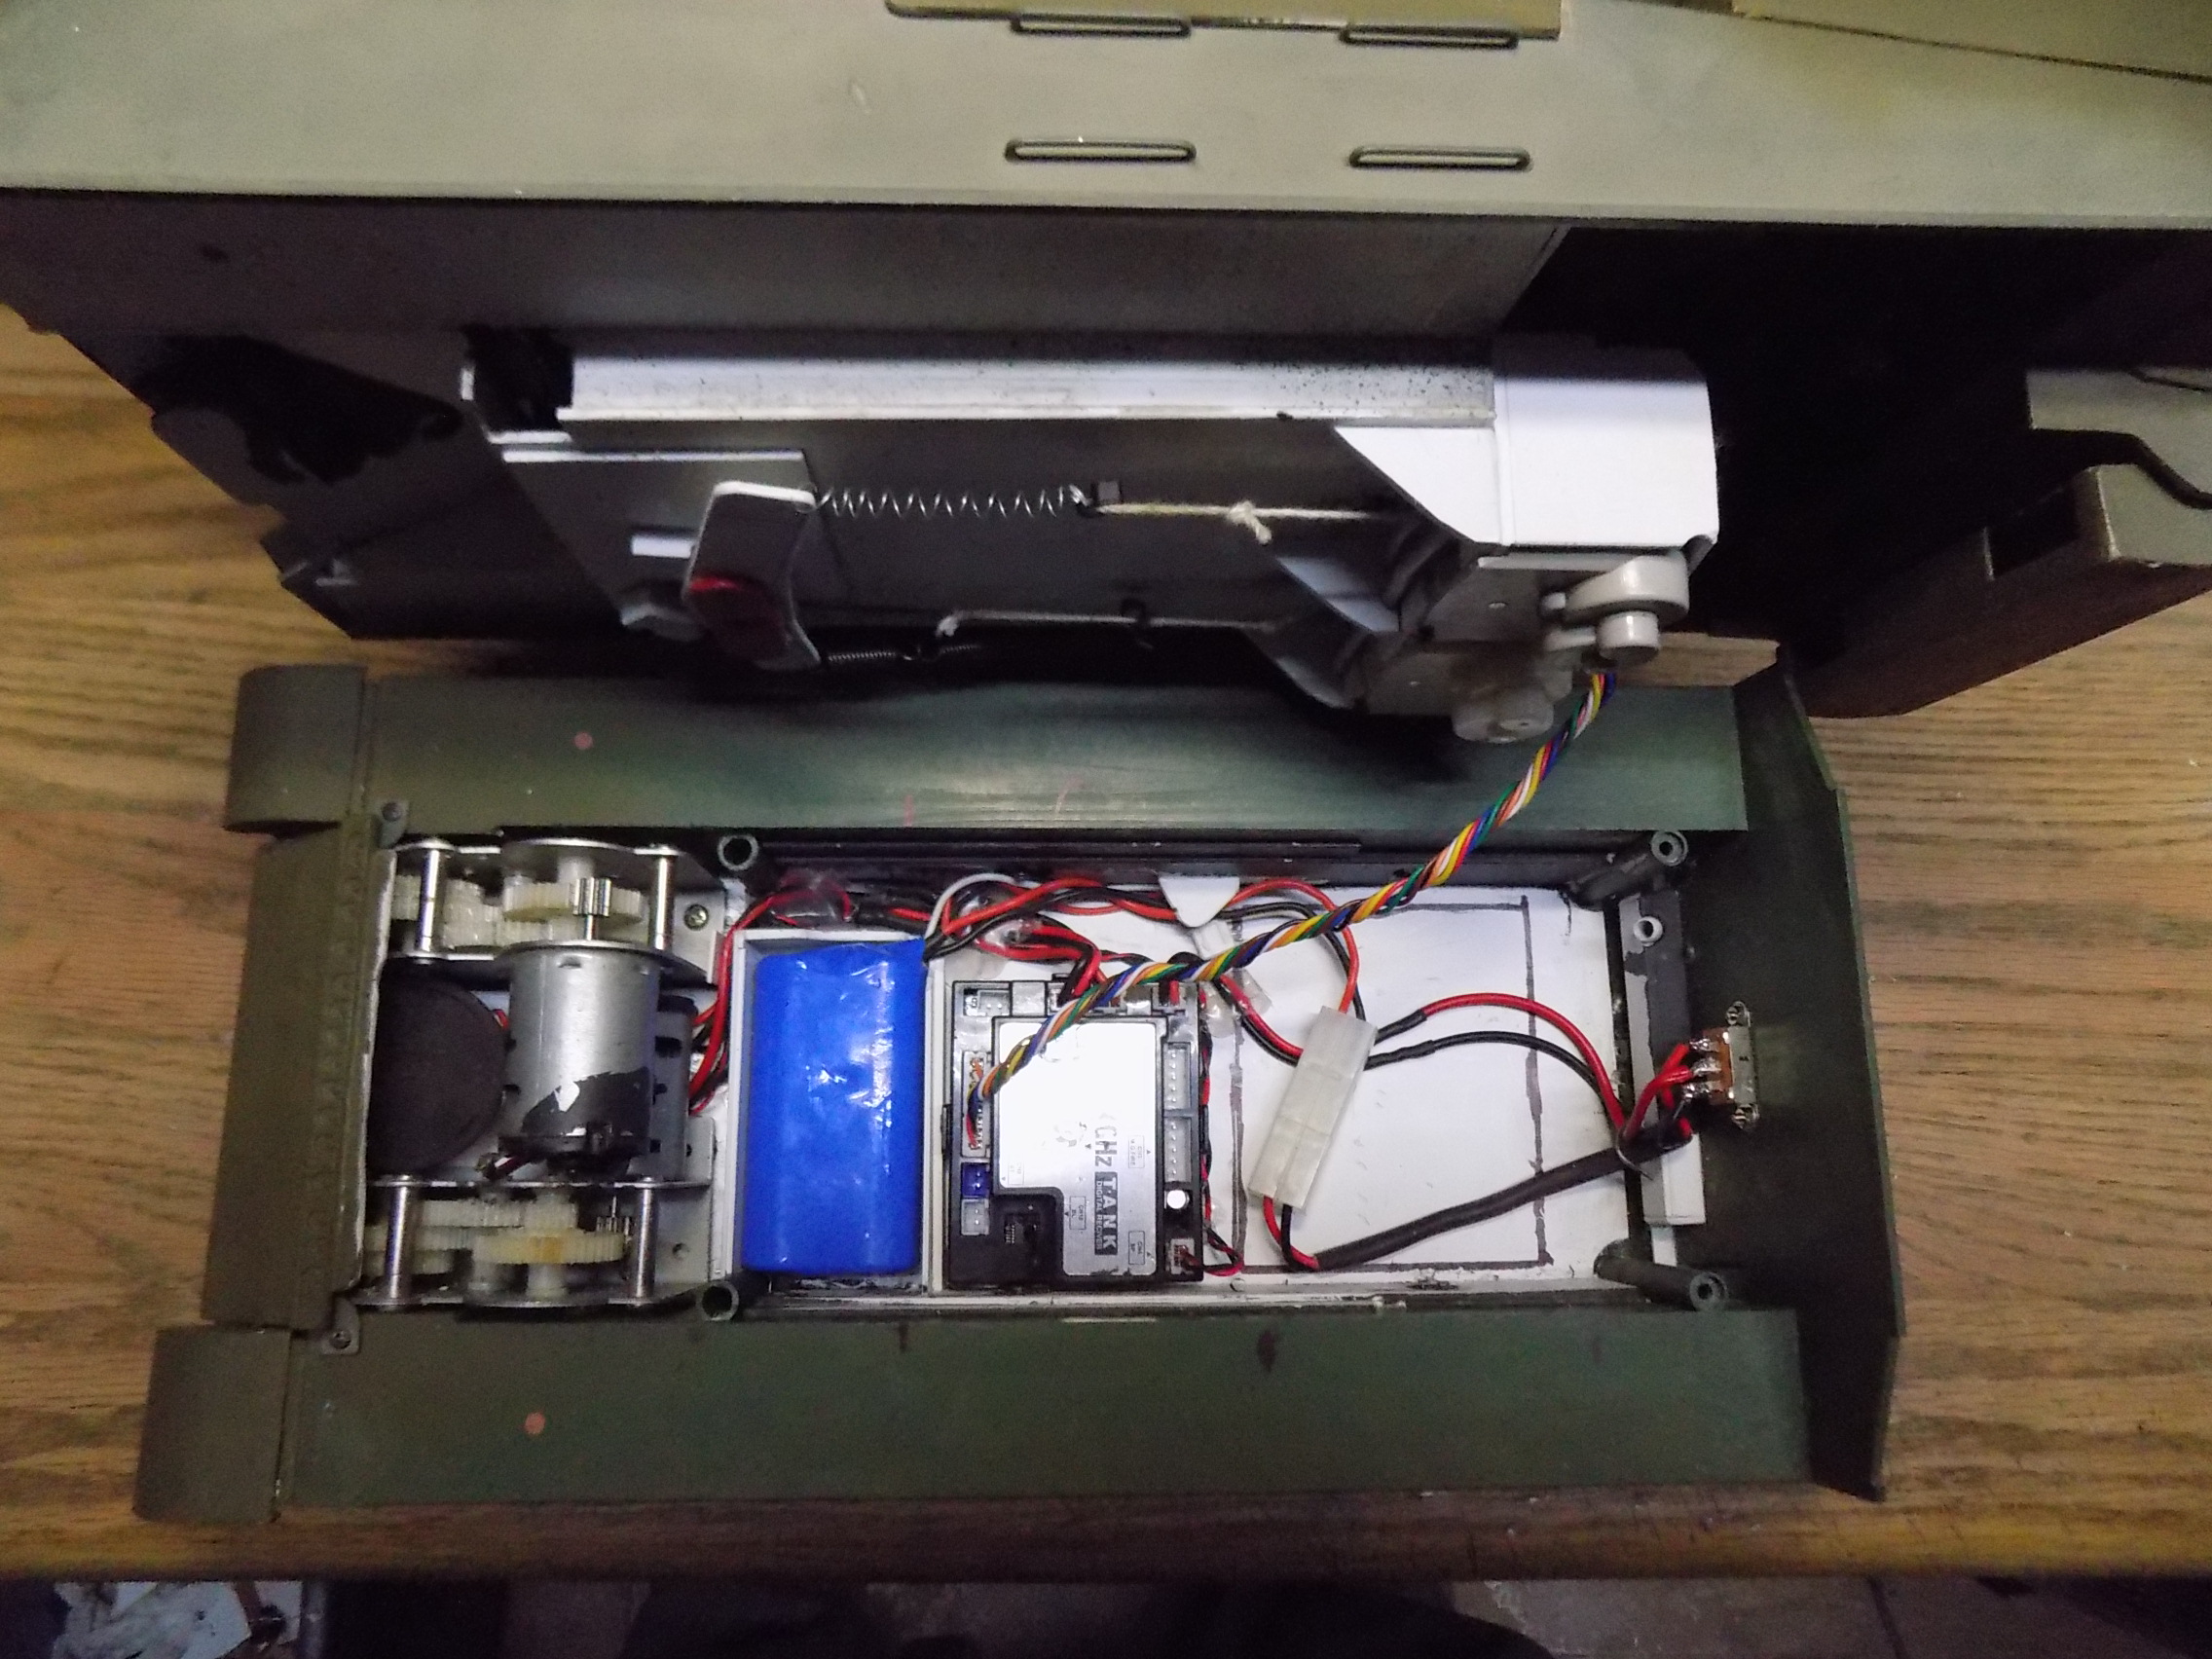
Inside the contraption. The black mark on the floor was space used by the servos. I did have a smoker and battery in the rear of the hull, but that space was needed. The housing less speaker is between the transmissions up front. The winches are really strong and have broken a couple strings already, and are quite noisy (like the air soft units are). The three linked springs are from the air soft units cut up for the build. The longer spring is from a ball point pen. I intend on changing these out, but this is testing phase.

Image

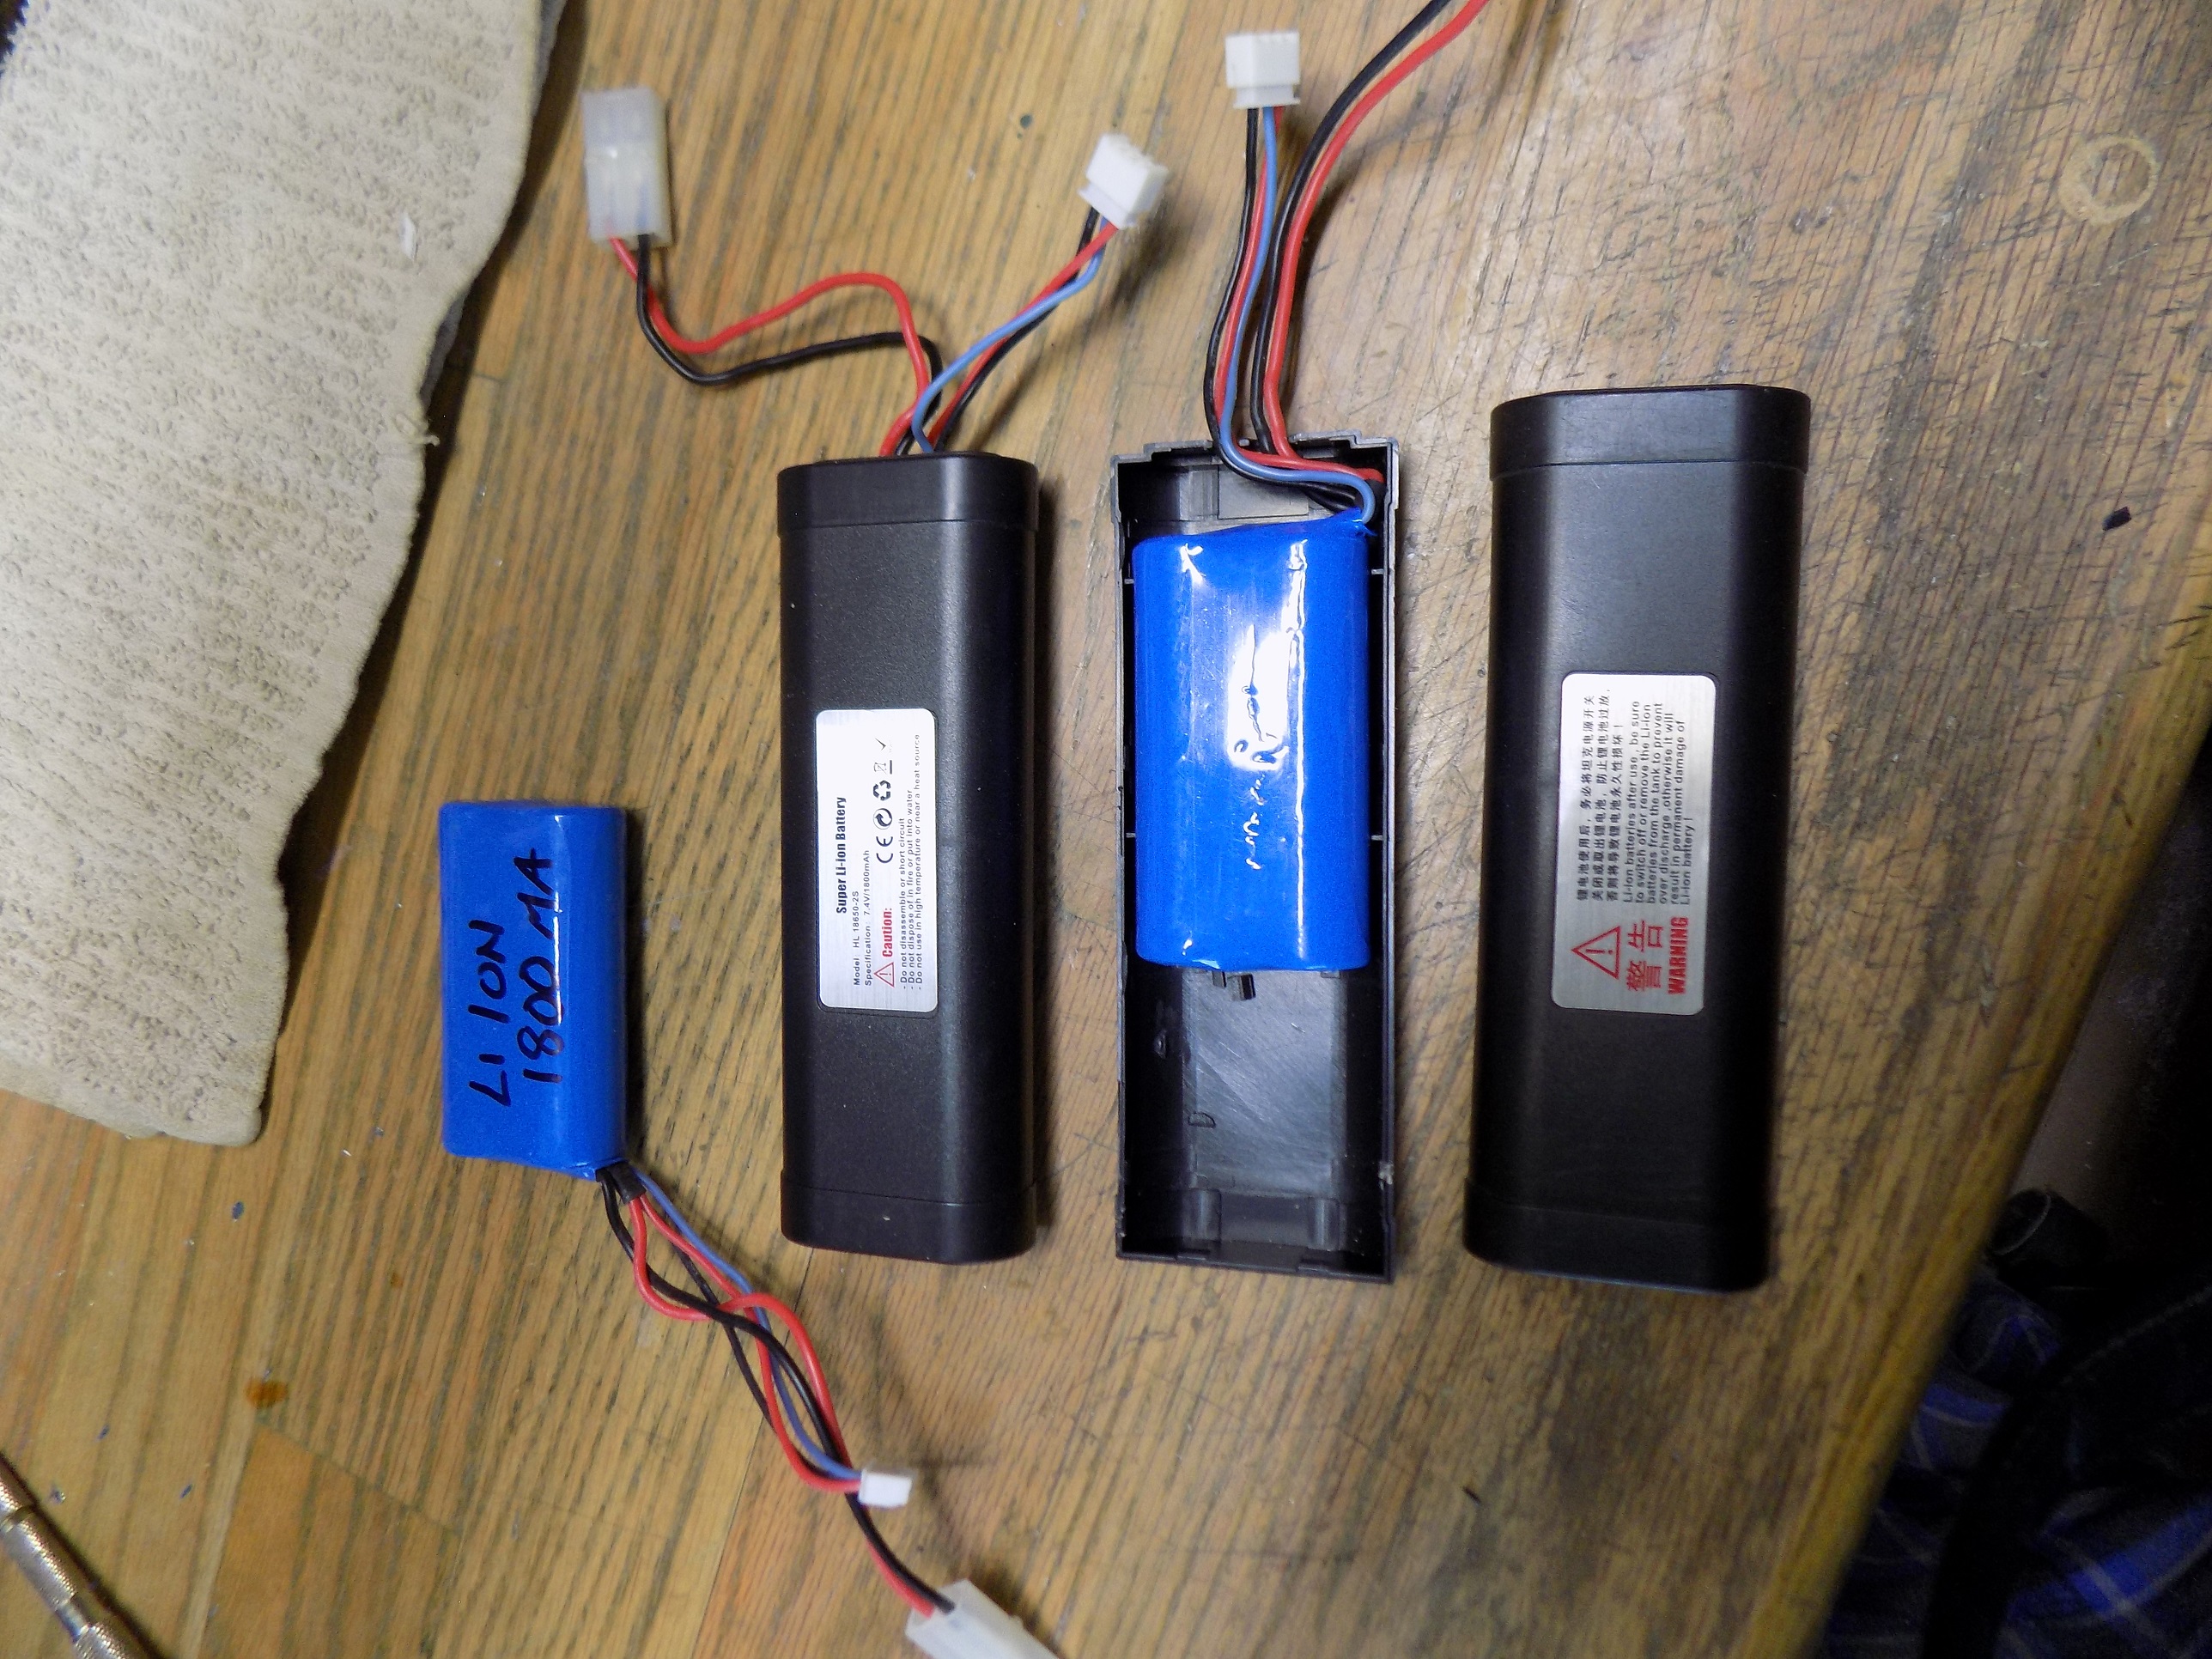
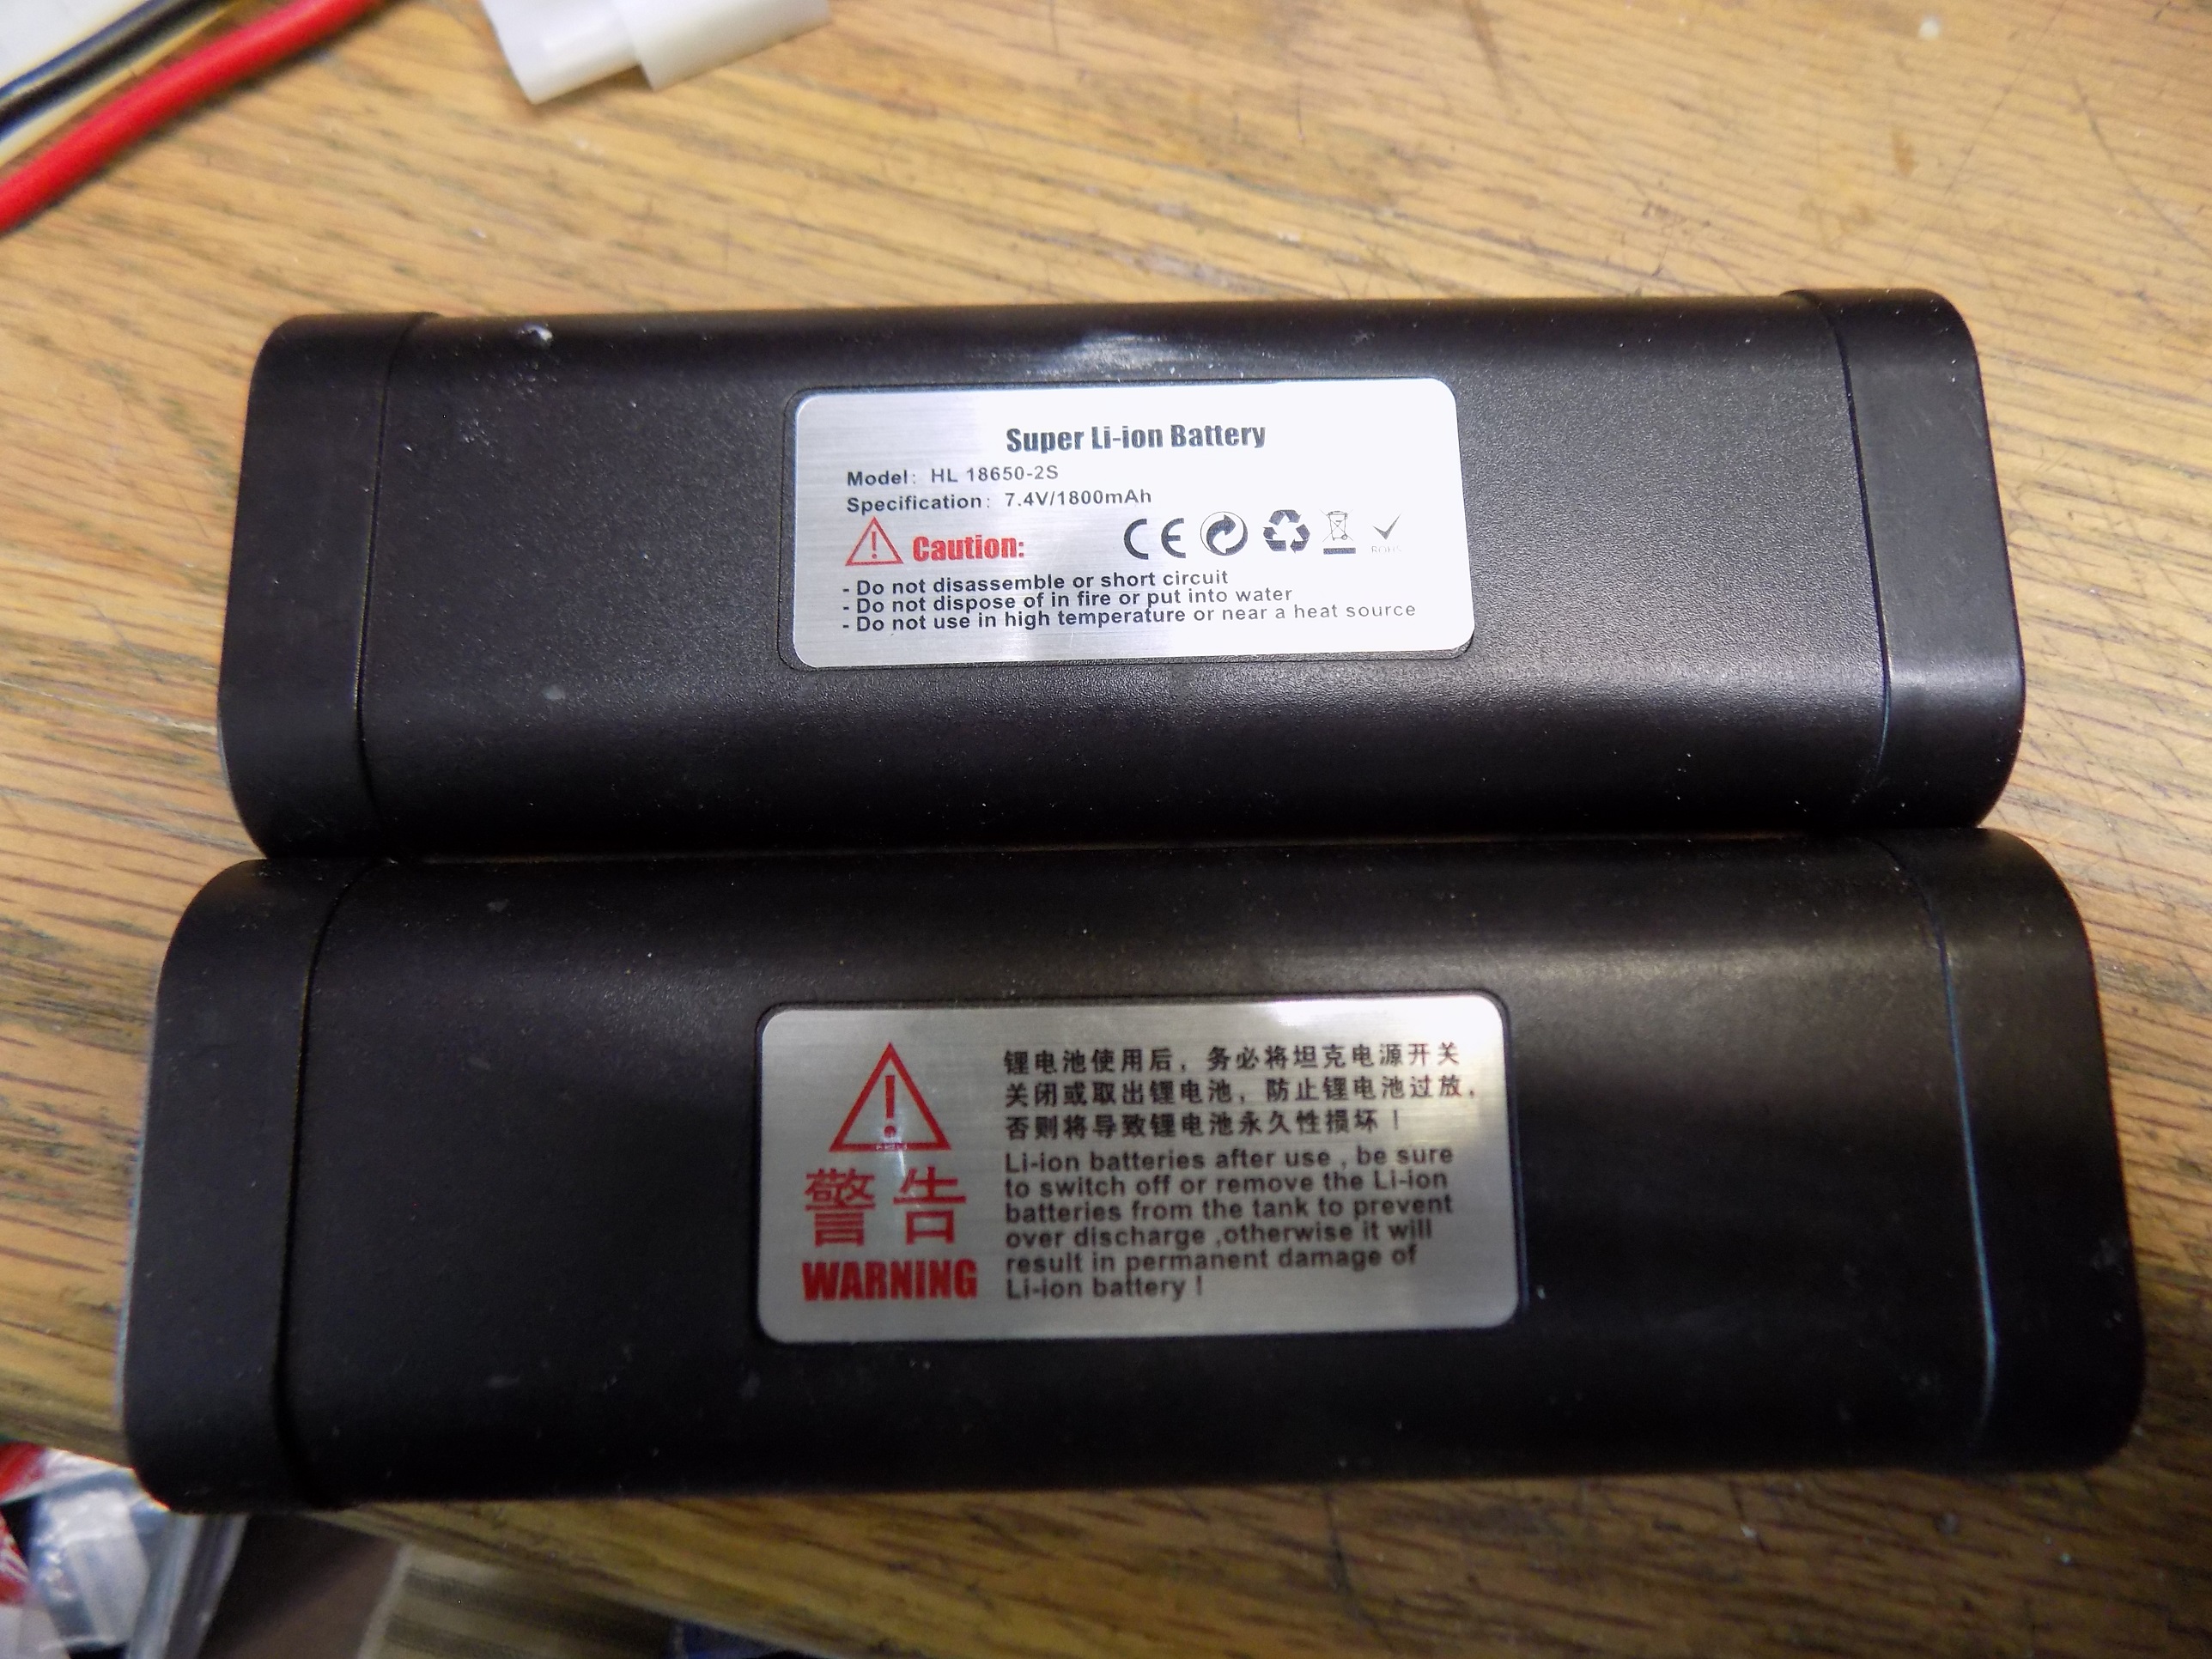
The battery is a HL that came with several of my tanks. It was inside a plastic "hull" that replicated a 7.2v stick pack. It is a Li-ion 1800 mAh 7.4v. Really handy for a compact battery solution.

Image

Image

Image

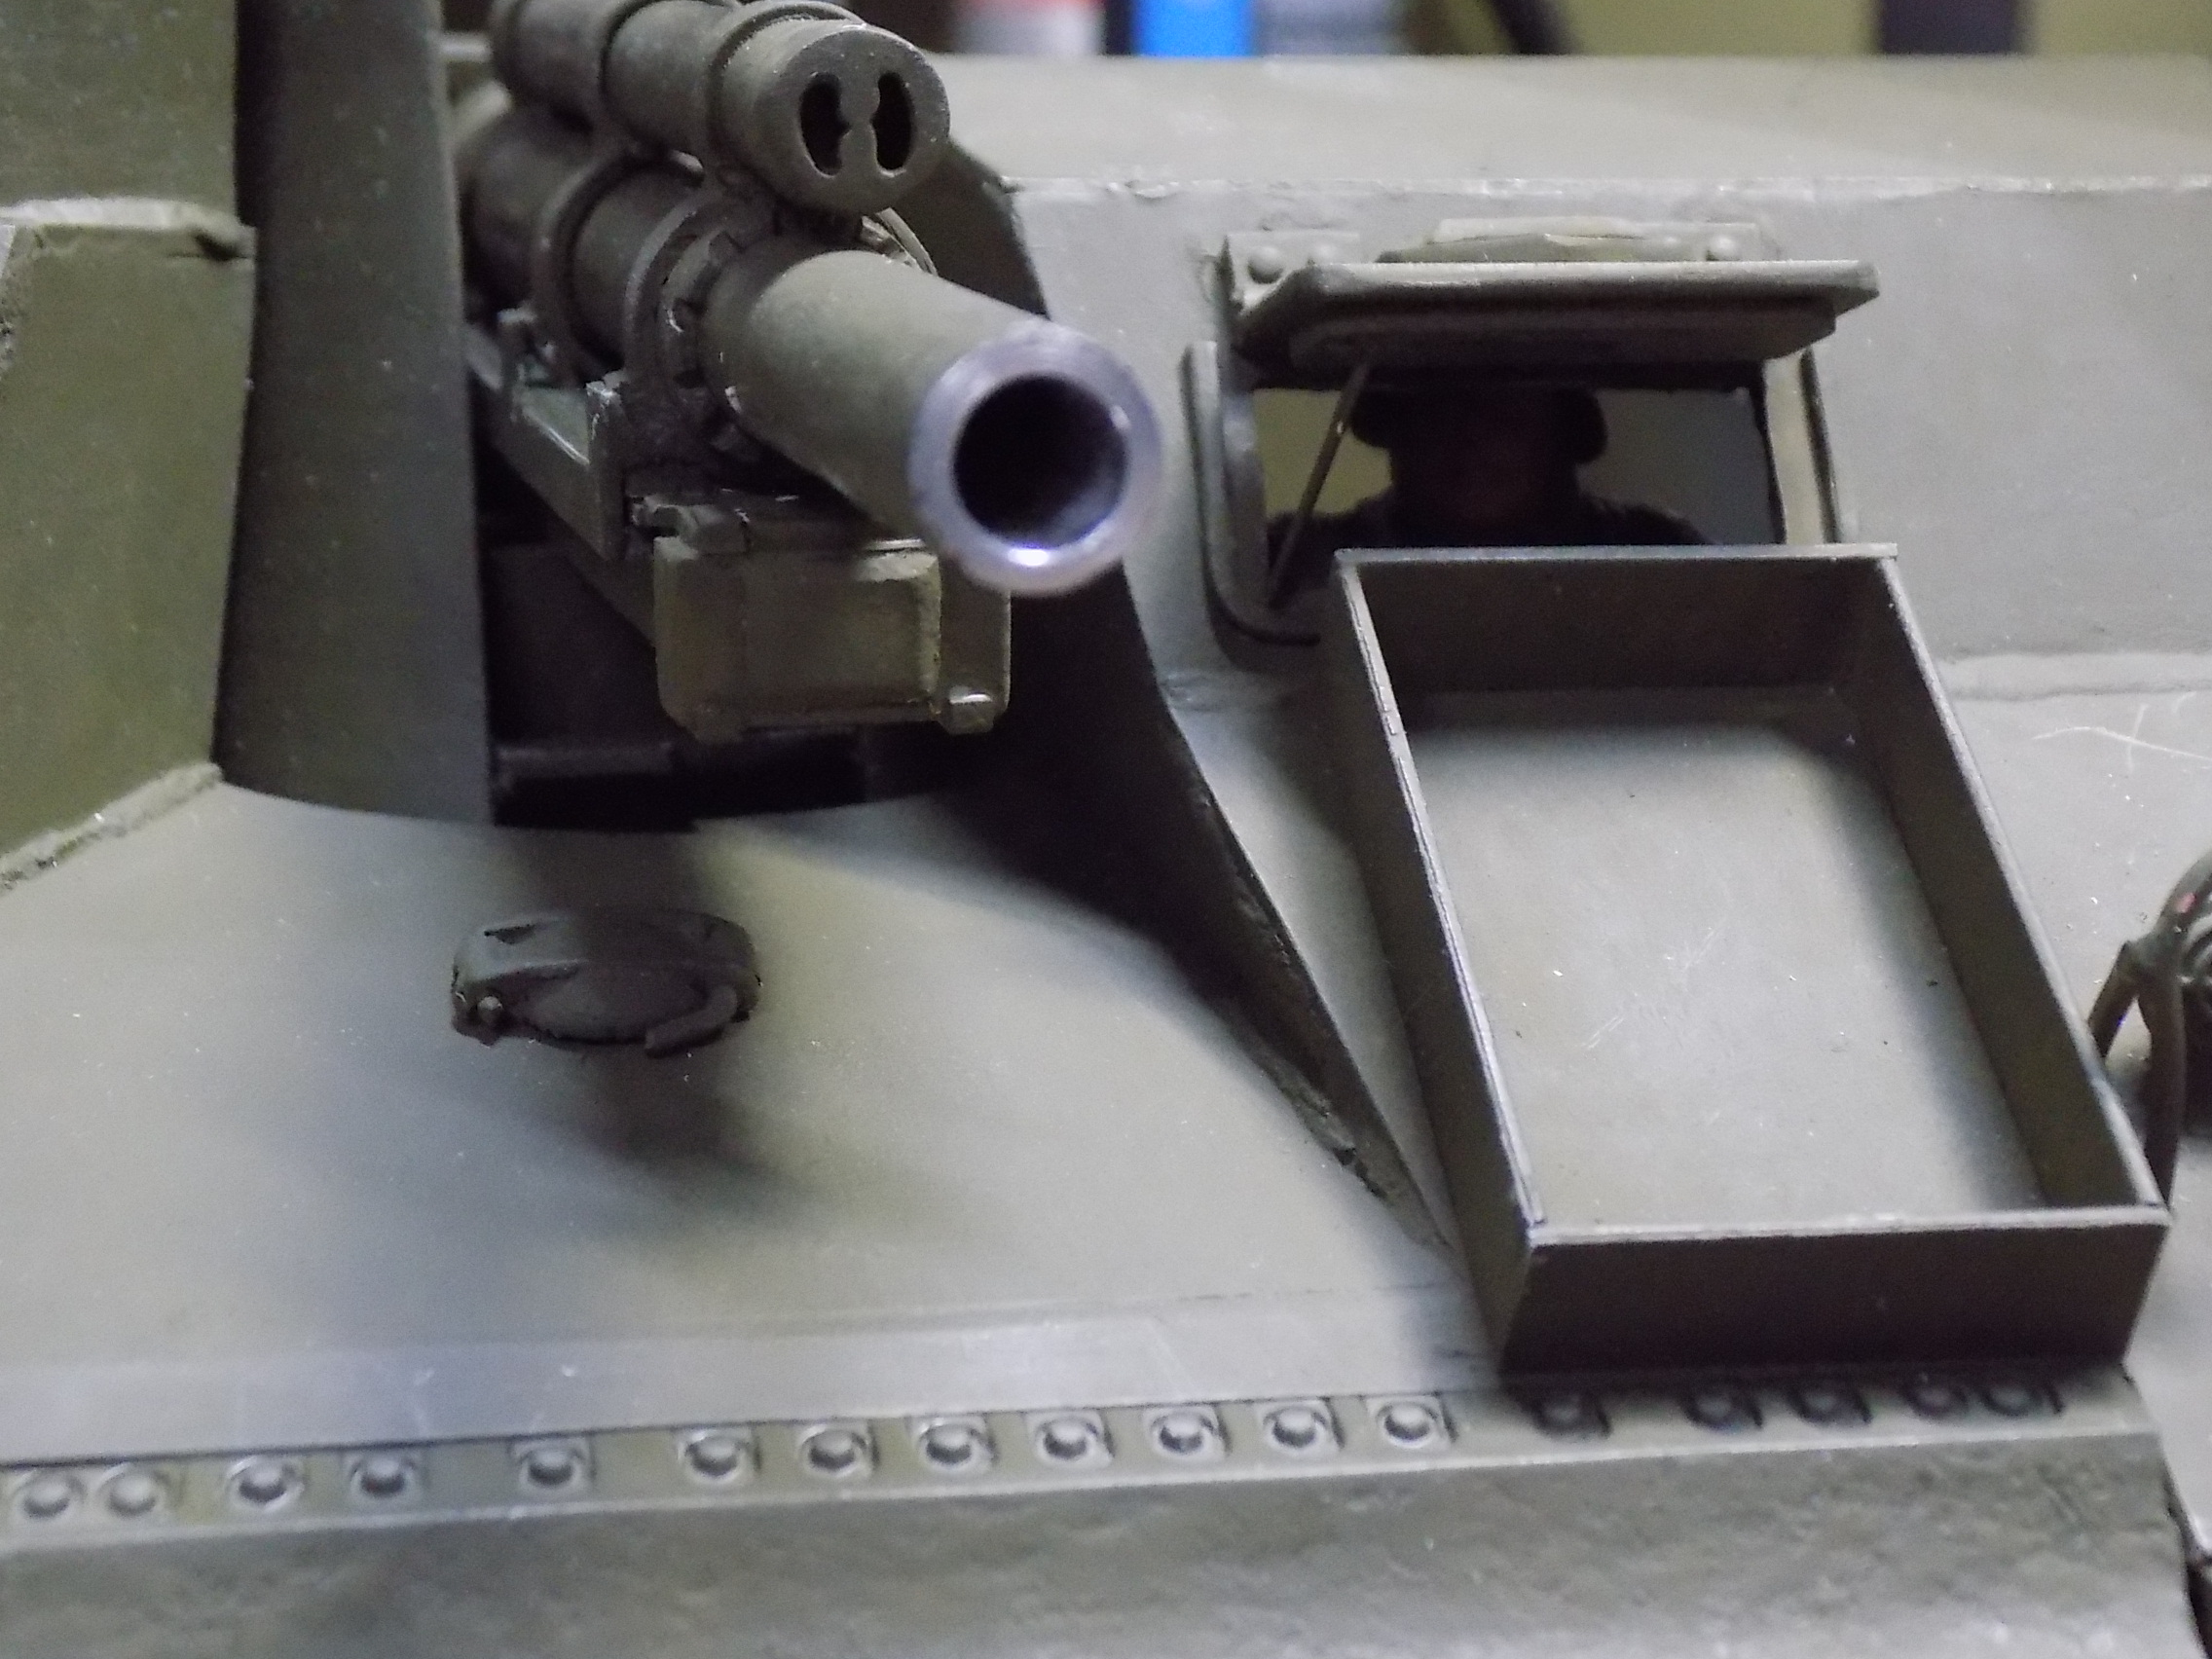
Finally a bit of gun detail.

Image
Last edited by Ecam on Mon Nov 14, 2022 11:04 pm, edited 2 times in total.
"Don't believe everything you see on the internet" - George S. Patton

Eric
User avatar
c.rainford73
Major
Posts: 6104
Joined: Thu Aug 25, 2016 7:34 pm
Location: Connecticut USA

Re: M7B1 Priest

Post by c.rainford73 »

Fantastic work :clap:
Tanks alot.... :wave:
User avatar
Ecam
Warrant Officer 1st Class
Posts: 2203
Joined: Sun Jul 13, 2014 6:30 pm
Location: Lake of the Ozarks, USA

Re: M7B1 Priest

Post by Ecam »

I did intend to run the elevation cord through the pivot point of the 105 carriage, but I did not have a .125 tube around. Closest was about .110 and caused too much slop in for the howitzer. I ended up inserting a second tube just in front of the pivot point.

The picture shows the lower string going just below the "servo" arm. It has two "posts" (polished SS welding wire) it slides on. One is just above the tube as it heads up in the hull. The two blocks just in front of the servo arm support that post.

The pivot has set screws on top and bottom so the whole thing can be taken apart.

Image
"Don't believe everything you see on the internet" - George S. Patton

Eric
User avatar
PainlessWolf
Lieutenant-Colonel
Posts: 7637
Joined: Sun Feb 26, 2012 9:09 pm
Location: Southern Colorado Rocky Mountains

Re: M7B1 Priest

Post by PainlessWolf »

Good Morning!,
Somewhere a Mr. Goldberg is smiling. It's better than anything I had in mind looking at the Build earlier. You go, Doc!
regards,
Painless
...Here for the Dawn...
User avatar
Ecam
Warrant Officer 1st Class
Posts: 2203
Joined: Sun Jul 13, 2014 6:30 pm
Location: Lake of the Ozarks, USA

Re: M7B1 Priest

Post by Ecam »

In keeping with my low cost theme, I thought I'd show where the lower hull and electronics were borrowed from. The tank on the left next to the vise/vice was my first tank. I never liked the look of the 105 M4 so I changed it to a 75. The empty upper was my 5th tank with two TD's and a Firefly in between. I decided it needed dry armor pieces added. Several tanks later I figured out that all the Fisher built M4A3's were wet ammo stored units. Also, I had a few 75's, and it was a near clone to my first tank, so it was gladly my donor.


Image
"Don't believe everything you see on the internet" - George S. Patton

Eric
User avatar
Ecam
Warrant Officer 1st Class
Posts: 2203
Joined: Sun Jul 13, 2014 6:30 pm
Location: Lake of the Ozarks, USA

Re: M7B1 Priest

Post by Ecam »

Found a couple pictures of the gun and gun mount from earlier in the build. Also a picture of what I want to add when the project is finished.

Image

Image

Image
"Don't believe everything you see on the internet" - George S. Patton

Eric
User avatar
Ecam
Warrant Officer 1st Class
Posts: 2203
Joined: Sun Jul 13, 2014 6:30 pm
Location: Lake of the Ozarks, USA

Re: M7B1 Priest

Post by Ecam »

I found a picture that may be informative.

A .020 template that I use on the HL M4A3's. I reproduce this in .080 Aluminum and bond it with two part epoxy. That has made my plasic lowers nearly as strong as metal lowers

Image
"Don't believe everything you see on the internet" - George S. Patton

Eric
User avatar
Ecam
Warrant Officer 1st Class
Posts: 2203
Joined: Sun Jul 13, 2014 6:30 pm
Location: Lake of the Ozarks, USA

Re: M7B1 Priest

Post by Ecam »

The newest HL M4A3 changed. I'll have to make a new template to match. I've reworked most of my tanks. I am not convinced that metal lowers are needed.
"Don't believe everything you see on the internet" - George S. Patton

Eric
User avatar
PainlessWolf
Lieutenant-Colonel
Posts: 7637
Joined: Sun Feb 26, 2012 9:09 pm
Location: Southern Colorado Rocky Mountains

Re: M7B1 Priest

Post by PainlessWolf »

Good Morning,
Even metal is no proof against long time wear and tear. On the 'Palace' Build, a new lower had to be sourced a few years in because the weight of the tank caused the lower to deform. (Bow bent out and down)
regards,
Painless
...Here for the Dawn...
User avatar
Ecam
Warrant Officer 1st Class
Posts: 2203
Joined: Sun Jul 13, 2014 6:30 pm
Location: Lake of the Ozarks, USA

Re: M7B1 Priest

Post by Ecam »

So far the aluminum reinforcements have seemed to work. On a few tanks I've added some reinforcements to the side walls. Most of the tanks I've tinkered with have recieved a chassis support. So far I haven't thrown tracks, but am limited to HL M4A3 (mostly).
"Don't believe everything you see on the internet" - George S. Patton

Eric
Post Reply

Return to “Sherman”